Android学习笔记之CameraX实现拍照&录像功能
本文地址:https://blog.csdn.net/qq_40785165/article/details/118274137,转载需附上此地址
大家好,我是小黑,一个还没秃头的程序员~~~
永远不要沉溺在安逸里得过且过,能给你遮风挡雨的,同样能让你不见天日,只有让自己更加强大,才能真正撑起一片天。
这次介绍的是Jetpack系列中的CameraX库,源码路径:https://gitee.com/fjjxxy/camerax-demo.git引用官方的话来介绍CameraX
CameraX 是 Jetpack 的新增库。利用该库,可以更轻松地向应用添加相机功能。该库提供了很多兼容性修复程序和解决方法,有助于在众多设备上打造一致的开发者体验。
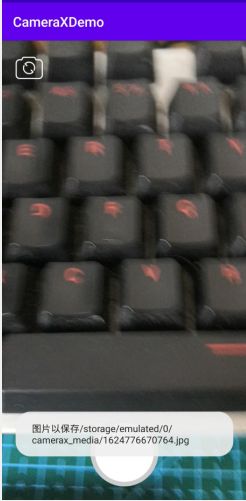
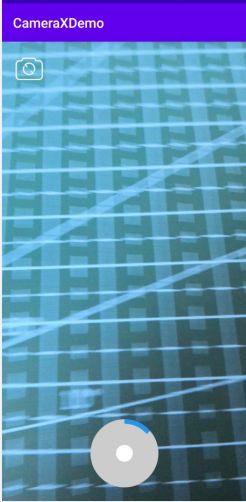
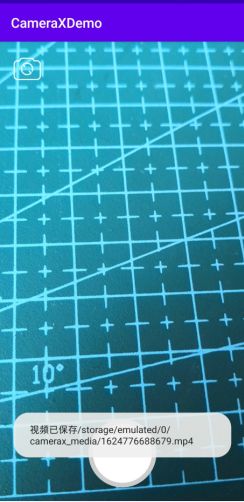
效果如下:


从效果图中可以看出,布局很简单,一个预览界面,一个图片用来翻转摄像头,底部的圆形控件支持单击拍照,长按录制视频,支持限制视频时间,实现原理可以阅读以往的博客:Android自定义带有圆形进度条的可长按控件
话不多说,正文开始
(一)添加依赖以及权限声明
CameraX的五大组件
- camera-camera2
- camera-core
- camera-extensions
- camera-lifecycle
- camera-view
  // CameraX
    def camerax_version = "1.0.0-rc01"
    // The following line is optional, as the core library is included indirectly by camera-camera2
    implementation "androidx.camera:camera-core:${camerax_version}"
    implementation "androidx.camera:camera-camera2:${camerax_version}"
    // If you want to additionally use the CameraX Lifecycle library
    implementation "androidx.camera:camera-lifecycle:${camerax_version}"
    // If you want to additionally use the CameraX View class
    implementation "androidx.camera:camera-view:1.0.0-alpha20"
    // If you want to additionally use the CameraX Extensions library
    implementation "androidx.camera:camera-extensions:1.0.0-alpha20"
    <uses-permission android:name="android.permission.WRITE_EXTERNAL_STORAGE" />
    <uses-permission android:name="android.permission.READ_EXTERNAL_STORAGE" />
    <uses-permission android:name="android.permission.CAMERA" />
    <uses-permission android:name="android.permission.RECORD_AUDIO" />
(二)创建布局文件
<?xml version="1.0" encoding="utf-8"?>
<LinearLayout xmlns:android="http://schemas.android.com/apk/res/android"
    xmlns:app="http://schemas.android.com/apk/res-auto"
    xmlns:tools="http://schemas.android.com/tools"
    android:layout_width="match_parent"
    android:layout_height="match_parent"
    tools:context=".MainActivity">

    <androidx.constraintlayout.widget.ConstraintLayout
        android:id="@+id/container"
        android:layout_width="match_parent"
        android:layout_height="match_parent">

        <androidx.camera.view.PreviewView
            android:id="@+id/preview"
            android:layout_width="match_parent"
            android:layout_height="match_parent">

        </androidx.camera.view.PreviewView>


        <ImageView
            android:id="@+id/iv_reverse"
            android:layout_width="40dp"
            android:layout_height="40dp"
            android:layout_margin="20dp"
            android:src="@mipmap/icon_reverse"
            app:layout_constraintLeft_toLeftOf="parent"
            app:layout_constraintTop_toTopOf="parent" />


        <com.example.cameraxdemo.LongClickView
            android:id="@+id/iv_camera"
            android:layout_width="100dp"
            android:layout_height="100dp"
            android:layout_marginBottom="20dp"
            app:annulusColor="@color/color_2196F3"
            app:annulusWidth="20"
            app:delayMilliseconds="40"
            app:layout_constraintBottom_toBottomOf="parent"
            app:layout_constraintLeft_toLeftOf="parent"
            app:layout_constraintRight_toRightOf="parent"
            app:maxSeconds="10" />
    </androidx.constraintlayout.widget.ConstraintLayout>

</LinearLayout>
(二)创建用例并绑定生命周期
创建预览、图片、录像的用例,创建配置好的相机,并将相机、各个用例与Activity的生命周期绑定,这样就不用单独重写生命周期函数进行相机的创建、销毁了,绑定不允许重复绑定,所以在绑定前需要解绑unbindAll
,绑定的多个用例是并发的,相机的配置中可以使用requireLensFacing来指定摄像头是前置/后置
    private void initCamera() {
        mProcessCameraProviderListenableFuture = ProcessCameraProvider.getInstance(this);
        mProcessCameraProviderListenableFuture.addListener(() -> {
            try {
                mProcessCameraProvider = mProcessCameraProviderListenableFuture.get();
                bindPreview(mProcessCameraProvider);
            } catch (ExecutionException e) {
                e.printStackTrace();
            } catch (InterruptedException e) {
                e.printStackTrace();
            }
        }, ContextCompat.getMainExecutor(this));
    }


    @SuppressLint("RestrictedApi")
    private void bindPreview(ProcessCameraProvider processCameraProvider) {
        //创建preview
        mPreview = new Preview.Builder().build();
        //指定所需的相机选项,设置摄像头镜头切换
        mCameraSelector = new CameraSelector.Builder().requireLensFacing(isFront ? CameraSelector.LENS_FACING_FRONT :
                CameraSelector.LENS_FACING_BACK).build();
        //将 Preview 连接到 PreviewView。
        mPreview.setSurfaceProvider(mPreviewView.getSurfaceProvider());
        //将所选相机和任意用例绑定到生命周期。

        mImageCapture = new ImageCapture.Builder()
                .setTargetRotation(mPreviewView.getDisplay().getRotation())
                .build();

        mVideoCapture = new VideoCapture.Builder()
                .setTargetRotation(mPreviewView.getDisplay().getRotation())
                .setVideoFrameRate(25)//每秒的帧数
                .setBitRate(3 * 1024 * 1024)//设置每秒的比特率
                .build();

        processCameraProvider.unbindAll();
        mCamera = processCameraProvider.bindToLifecycle(this, mCameraSelector,
                mImageCapture, mVideoCapture, mPreview);
    }
(三)单击对焦
代码如下:
        mPreviewView.setOnTouchListener((view, motionEvent) -> {
            float x = motionEvent.getX();
            float y = motionEvent.getY();
            FocusMeteringAction focusMeteringAction = new FocusMeteringAction.Builder(mPreviewView.getMeteringPointFactory()
                    .createPoint(x, y)).build();
            mCamera.getCameraControl().startFocusAndMetering(focusMeteringAction);
            return true;
        });
(四)图片拍摄
使用ImageCapture用例即可实现拍照并存储在本地的功能,别忘了动态权限申请,代码如下:
 private void takePhoto() {
        String path = Constants.getFilePath() + File.separator + System.currentTimeMillis() + ".jpg";
        ImageCapture.OutputFileOptions outputFileOptions = new ImageCapture.OutputFileOptions
                .Builder(new File(path)).build();
        mImageCapture.takePicture(outputFileOptions, CameraXExecutors.mainThreadExecutor(), new ImageCapture.OnImageSavedCallback() {
            @Override
            public void onImageSaved(@NonNull ImageCapture.OutputFileResults outputFileResults) {
                Toast.makeText(MainActivity.this, "图片以保存" + path, Toast.LENGTH_SHORT).show();
            }

            @Override
            public void onError(@NonNull ImageCaptureException exception) {
                Toast.makeText(MainActivity.this, exception.toString(), Toast.LENGTH_SHORT).show();
            }
        });
    }
(五)视频拍摄
使用VideoCapture用例即可实现视频拍摄并保存,别忘了申请权限,代码如下:
  private void startVideo() {
        String path = Constants.getFilePath() + File.separator + System.currentTimeMillis() + ".mp4";
        VideoCapture.OutputFileOptions build = new VideoCapture.OutputFileOptions.Builder(new File(path)).build();
        mVideoCapture.startRecording(build, CameraXExecutors.mainThreadExecutor(), new VideoCapture.OnVideoSavedCallback() {
            @Override
            public void onVideoSaved(@NonNull VideoCapture.OutputFileResults outputFileResults) {
                if (mIsLessOneMin) {
                    new File(path).delete();
                } else {
                    Toast.makeText(MainActivity.this, "视频已保存" + outputFileResults.getSavedUri().getPath(), Toast.LENGTH_SHORT).show();
                }

            }

            @Override
            public void onError(int videoCaptureError, @NonNull String message, @Nullable Throwable cause) {
                Log.e(TAG, "onError: " + message);
                new File(path).delete();//视频不足一秒会走到这里来,但是视频依然生成了,所以得删掉
            }
        });
    }
遇到的问题:
视频拍摄不足一秒也会存储成功,但是视频无法播放,而且也会调用onError回调错误信息
解决方案:
目前没有找到好的解决方案,只能采用删除不满1s的视频,并对用户进行提示
注意:VideoCapture这个用例在官网上暂无文档说明,未避免过多的适配问题出现,请各位慎用!
本次关于CameraX的介绍就先到这里,CameraX的功能并没有这么简单,更多功能日后还会继续更新介绍的,感兴趣的同学可以点个关注!最后,希望喜欢我文章的朋友们可以帮忙点赞、收藏,也可以关注一下,如果有问题可以在评论区提出,我后面会继续写关于Android开发的博客,与大家分享,谢谢大家的支持与阅读!