SpirngMVCReView(黑马)
入门案例
导入依赖时spring-webmvc需要是5.3版本以下的
<build>
  <plugins>

    <plugin>
      <groupId>org.apache.tomcat.mavengroupId>
      <artifactId>tomcat7-maven-pluginartifactId>
      <version>2.2version>
      <configuration>
        <port>8080port>
        <path>/path>
        <uriEncoding>UTF-8uriEncoding>
      configuration>
    plugin>
  plugins>
build>

<dependencies>

  <dependency>
    <groupId>javax.servletgroupId>
    <artifactId>javax.servlet-apiartifactId>
    <version>4.0.1version>
    <scope>providedscope>
  dependency>
  <dependency>
    <groupId>org.springframeworkgroupId>
    <artifactId>spring-webmvcartifactId>

    <version>5.2.14.RELEASEversion>
  dependency>

dependencies>
控制层
package com.changGe.controller;

import org.springframework.stereotype.Controller;
import org.springframework.web.bind.annotation.RequestMapping;
import org.springframework.web.bind.annotation.ResponseBody;

@Controller
public class MVCController {

  @RequestMapping("/save")
  @ResponseBody//直接将返回值响应给前端
  public String test(){
    return "{'model':'servlet'}";
  }

}
springMVC仍然属于Spring中的技术
package com.changGe.configs;

import org.springframework.context.annotation.ComponentScan;
import org.springframework.context.annotation.Configuration;

//SpringMVC仍然属于Spring中的技术
@Configuration
@ComponentScan("com.changGe.controller")
public class SpringMVCConfig {}
配置SpringMVC的容器能够被tomcat检测到
package com.changGe.configs;

import org.springframework.web.context.WebApplicationContext;
import org.springframework.web.context.support.AnnotationConfigWebApplicationContext;
import org.springframework.web.servlet.support.AbstractDispatcherServletInitializer;

//servlet容器配置类
public class ServletContainersInitConfig extends AbstractDispatcherServletInitializer {

  //web应用上下文容器
  protected WebApplicationContext createServletApplicationContext() {

    //注解配置web应用上下文
    AnnotationConfigWebApplicationContext context = new AnnotationConfigWebApplicationContext();


    //把SpirngMVC的配置注册进web应用上下文容器
    context.register(SpringMVCConfig.class);


    return context;
  }

  //哪些路径归属springMvc处理
  protected String[] getServletMappings() {
    //所有路径都归springMvc处理
    return new String[]{"/"};
  }

  //Spring容器
  protected WebApplicationContext createRootApplicationContext() {
    return null;
  }
}
工作流程
先将springMVC的配置加载到tomcat容器中,再根据路径去对应的MVC注册中找到方法执行.
web容器是先将所有的路径都注册进ServletContext,再定义所有的请求都由SpringMVC来处理.

控制bean的加载
//按注解排除过滤掉Controller注解
@ComponentScan(value = "com.changGe",
  excludeFilters = @ComponentScan.Filter(
    type = FilterType.ANNOTATION,
    classes = Controller.class
  )
)
简化Servlet容器配置
controller里的bean是由SpirngMVC加载的
mybatis是自动代理
简化Servlet上下文容器配置
package com.changGe.configs;

import org.springframework.web.servlet.support.AbstractAnnotationConfigDispatcherServletInitializer;


public class ServletConfig extends AbstractAnnotationConfigDispatcherServletInitializer {

  protected Class<?>[] getRootConfigClasses() {
    return new Class[]{SpringConfig.class};
  }

  protected Class<?>[] getServletConfigClasses() {
    return new Class[]{SpringMVCConfig.class};
  }

  protected String[] getServletMappings() {
    return new String[]{"/"};
  }
}
请求:发送参数
普通参数
post请求参数属于请求体内
请求体中参数form-data可以发送文件

//编码处理
public Filter[] getServletFilters(){
  CharacterEncodingFilter characterEncodingFilter = new CharacterEncodingFilter();

  characterEncodingFilter.setEncoding("UTF-8");

  return new Filter[]{characterEncodingFilter};
}
@RequestMapping(value = "/save",produces = "text/json;charset=utf-8")
@ResponseBody
//直接用形参来接前端传的数据
public String test(String name){
  System.out.println(name);
  return name;
}
pojo参数
SpringMVC中是先创建参数对象,然后通过对象的变量名和传参名一一对应匹配
当User对象中嵌套了Student对象时
//前台student.name=长歌
public String test(User user){
  Student student = user.getStudent();

  return student.getName();
}


//?likes=长歌&likes=长安
@ResponseBody
//规定前端的路径参数不变成对象,直接变成参数匹配
public String test(@RequestParam List likes){

  return likes.toString();
}


//字符串数组转换成字符串只能是循环
public String test(String[] likes){

  String s = "";
  for (String like : likes) {
    s += like;
  }

  return s;
}
日期参数格式转换
ctlr+alt+b查看当前类的所有子类
java默认是用Converter的子类来做数据格式转换的
/*
 * Copyright 2002-2016 the original author or authors.
 *
 * Licensed under the Apache License, Version 2.0 (the "License");
 * you may not use this file except in compliance with the License.
 * You may obtain a copy of the License at
 *
 *      https://www.apache.org/licenses/LICENSE-2.0
 *
 * Unless required by applicable law or agreed to in writing, software
 * distributed under the License is distributed on an "AS IS" BASIS,
 * WITHOUT WARRANTIES OR CONDITIONS OF ANY KIND, either express or implied.
 * See the License for the specific language governing permissions and
 * limitations under the License.
 */

package org.springframework.core.convert.converter;

import org.springframework.lang.Nullable;

/**
 * A converter converts a source object of type {@code S} to a target of type {@code T}.
 *
 * Implementations of this interface are thread-safe and can be shared.
 *
 * Implementations may additionally implement {@link ConditionalConverter}.
 *
 * @author Keith Donald
 * @since 3.0
 * @param  the source type
 * @param  the target type
 */
@FunctionalInterface
public interface Converter<S, T> {

	/**
	 * Convert the source object of type {@code S} to target type {@code T}.
	 * @param source the source object to convert, which must be an instance of {@code S} (never {@code null})
	 * @return the converted object, which must be an instance of {@code T} (potentially {@code null})
	 * @throws IllegalArgumentException if the source cannot be converted to the desired target type
	 */
	@Nullable
	T convert(S source);

}
public String test(@DateTimeFormat(pattern = "yyyy-MM-dd HH:mm:ss")Date date){
  return date.toString();
}

//有时如果加了注解还说不能转换,就把这个注解加上,开启converter转换
@EnableWebMvc
public class SpringConfig {}
响应
ResponseBody:当当前控制器返回值作为响应体
@RequestMapping(value = "/save")
public String test(){
  return "index.jsp";//跳转页面
}
当复杂类型返回
<dependency>
  <groupId>com.fasterxml.jackson.coregroupId>
  <artifactId>jackson-databindartifactId>
  <version>2.13.2.2version>
dependency>
@RequestMapping(value = "/save")
@ResponseBody
public List<Object> test(){
  List<Object> arrayList = new ArrayList();

  arrayList.add(1);
  arrayList.add(2);
  arrayList.add(3);

  return arrayList;
}
@ResponseBody由它的子类的类型转换器实现
package org.springframework.http.converter;

public interface HttpMessageConverter <T> {
RESTful:资源访问形式
json数据载体
<script>

  //js对象的key可不是字符串
  var value = {
    name:"长歌",
    addr:["长安","洛阳","海口"]
  }

  alert(value.addr[2]);

	//json对象
  var json = {
    "name":"长歌",
    "addr":["长安","洛阳","海口"]
  }

  alert(json.addr[2]);

script>
和java对象转换
<dependency>
  <groupId>com.alibabagroupId>
  <artifactId>fastjsonartifactId>
  <version>1.2.76version>
dependency>
FastJson是根据
JavaBean规范来写的,他是通过反射获得对象的get()方法来获取对象属性的值
@Data
@AllArgsConstructor
public class User {

  private String name;
  private String[] addr;

}
User user = new User("长歌",new String[]{"长安","洛阳","海口"});

//java对象转换json字符串
String s = JSON.toJSONString(user);

//json字符串转换java对象
user = JSON.parseObject(s,User.class);
web核心内容
B/S架构:Browser/Server
http协议
-
基本TCP协议(三次握手,安全)
-
一次请求对应一次响应
-
是无状态协议:对于事务没有记忆能力,每次请求-响应独立,多次请求间不能共享数据
请求与响应格式

HTTP 状态码

-
get:查询
-
post:新增
-
put:修改
-
delete:删除
//localhost:8080/users/1 restful形式前端路径
@RequestMapping(value = "/users/{id}",method = RequestMethod.GET)
@ResponseBody
//@pathvariable:接收路径中的单个变量
public int test(@PathVariable Integer id){

  return id;
}
接收多个变量(对象)
@RequestMapping(value = "/users",method = RequestMethod.POST)
@ResponseBody
//有多个变量,变成json格式接收
public User test(@RequestBody User user){
  return user;
}
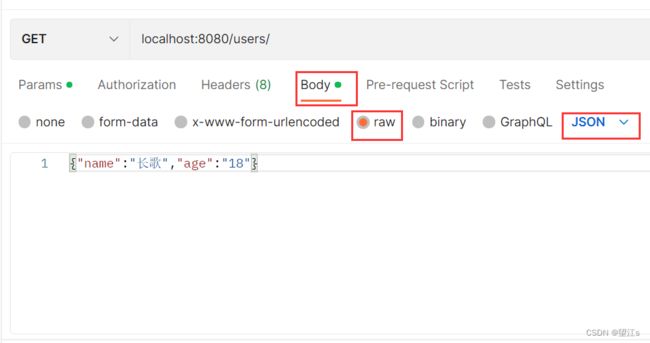
raw可以规定上传任何格式的信息
- Requestparam:接收前端路径参数
- RequestBody:接收前端请求体
- Pathvariable:接收前端变量
简化开发
//@RequestMapping + @Controller
@RestController
@RequestMapping("/users")
public class MVCController {


  @PostMapping
  public User test(@RequestBody User user){
    return user;
  }
过滤放行
不要忘记更新SpringMVC配置类的扫描路径
package com.changGe.configs;

import org.springframework.context.annotation.Configuration;
import org.springframework.web.servlet.config.annotation.ResourceHandlerRegistry;
import org.springframework.web.servlet.config.annotation.WebMvcConfigurationSupport;

@Configuration
public class MVCHandlerConfig extends WebMvcConfigurationSupport {

  @Override
  protected void addResourceHandlers(ResourceHandlerRegistry registry) {
    //告诉SpringMVC访问/pages/**时去/pages/找,不要拦截成get请求
    registry.addResourceHandler("/pages/**").addResourceLocations("/pages/");
  }

}
Axios:封装后的Ajax
在线cdn
<script src="https://unpkg.com/axios/dist/axios.min.js">script>
axios({
    method:"post",
  	//get类型url:"http://localhost:8080/users/?name=长歌&age=18",不用写data了
    url:"http://localhost:8080/users/",
    data:{'name':'长歌','age':'18'}
  }
//然后用回调函数接收响应回的数据
).then(function (response){
	alert(JSON.stringify(resp.data));
})
简化
axios.post("http://localhost:8080/users/",{'name':'长歌','age':'18'}).then(function (resp){
	alert(JSON.stringify(resp.data));
})
箭头函数
//当只有一个参数时,箭头函数(resp)=>的()也可以去掉
axios.post("http://localhost:8080/users/",{'name':'长歌','age':'18'}).then(resp=>{
  alert(JSON.stringify(resp.data));
})
整合
spirngMVC的容器里包含了Spring容器
fastjson会自动把请求过来的json数据作编码过滤
开发习惯
service的方法要见名知意,有文档说明.向增删改要有boolean返回值
表现层与前端数据传输协议
结果类
package com.changGe.utils;

import lombok.Data;

@Data
public class Result {


  private Object data;
  private String msg;
  private Integer code;

  //开发经验是状态码在数据前
  public Result(Integer code,Object data, String msg) {
    this.data = data;
    this.msg = msg;
    this.code = code;
  }
}
定义状态码
package com.changGe.domain;

public class Code {

  public static final Integer GETALL_OK = 20011;
  public static final Integer GETALL_ERR = 20010;

}
测试
@GetMapping()
public Result findAllStudent(){

  List<Student> studentAll = studentService.findStudentAll();

  //查询失败list集合会是一个null值
  Integer code = studentAll != null ? GETALL_OK : GETALL_ERR;
  String message = studentAll != null ? null : "查询失败,请检查参数";

  //将状态码,数据和消息返回给前端
  return new Result(code,studentAll,message);
}
前端接收的结果
{
  "data": [
    {
      "name": "admin",
      "id": 1,
      "age": 18,
      "money": 1000.0
    },
    {
      "name": "user",
      "id": 2,
      "age": 20,
      "money": 1000.0
    }
  ],
  "msg": null,
  "code": 20011
}
异常处理
一般是将异常不断向上抛,最后抛到表现层,由Spring的AOP思想来做总的异常处理返回前端
//这个类写在controller层
package com.changGe.controller;

import com.changGe.utils.Result;
import org.springframework.web.bind.annotation.ExceptionHandler;
import org.springframework.web.bind.annotation.RestControllerAdvice;

@RestControllerAdvice
public class MyExceptionHandler {

  @ExceptionHandler(Exception.class)
  public Result advice(Exception e){
    return new Result(10,null,e.getMessage());
  }

}
运行时异常可以不处理,直接抛
项目异常处理
将项目异常分为用户级和系统级两大类
先自定义异常
package com.changGe.exception;

import lombok.Data;

@Data
public class SystemException extends RuntimeException{

  private Integer code;

  public SystemException(Integer code) {
    this.code = code;
  }

  public SystemException(Integer code,String message, Throwable cause) {
    super(message, cause);
    this.code = code;
  }

}


package com.changGe.exception;

public class BusinessException extends RuntimeException{

  private Integer code;

  public BusinessException(Integer code) {
    this.code = code;
  }

  public BusinessException(Integer code,String message, Throwable cause) {
    super(message, cause);
    this.code = code;
  }

}
业务层捕捉异常,变成我们的自定义异常,抛给表现层
public List<Student> findStudentAll() {
  //捕捉异常,变成我们的自定义异常
  try{
    int i = 1/0;

    return studentDao.getAll();
  }catch (Exception e){
    //将异常抛给表现层,安抚用户
    //如果是走的Exception的分支,记得把controller层的异常去掉.Exception处理未定义的异常分支
    throw new SystemException(Code.SYSTEM_ERR,"系统超时,请等待",e);
  }

}
Spring异常处理类处理对应的异常
package com.changGe.controller;

import com.changGe.domain.Code;
import com.changGe.exception.SystemException;
import com.changGe.utils.Result;
import org.springframework.web.bind.annotation.ExceptionHandler;
import org.springframework.web.bind.annotation.RestControllerAdvice;

@RestControllerAdvice
public class MyExceptionHandler {

  //处理其他异常
  @ExceptionHandler(Exception.class)
  public Result advice(Exception e){
    //记录日志(错误堆栈),发消息给运维,发消息(ex对象)给开发人员让他处理
    return new Result(Code.SYSTEM_UNKOWN_ERR,null,"系统繁忙,请稍候再试");
  }


  //处理系统异常
  @ExceptionHandler(SystemException.class)
  public Result systemException(SystemException e){
    //记录日志,发消息给运维,发消息(ex对象)给开发人员让他处理
    return new Result(e.getCode(),null,e.getMessage());
  }

}
案例:数据添加和遍历
springMVC启动之后默认打开的首页是webapp/index.jsp。位置和页面名称都不能错,否则将报404错误。
<div id="app">


  <input v-model:name="name" value="name">
  <input v-model:name="id" value="id">
  <input v-model:name="age" value="age">
  <input v-model:name="money" value="money">


  <input type="submit" value="提交" @click="show()">
div>

<script>

  new Vue({
    el:"#app",
    data(){
      return{
        //接收view的双向绑定数据
        name:"",
        id:"",
        age:"",
        money:""
      }
    },
    methods:{
      show(){
        axios.post("http://localhost:8080/students",{name:this.name,id:this.id,age:this.age,money:this.money})
          .then(resp=>{
          alert(resp.data.msg);
          location.href = "html/showList.html"
        })

      }
    }
  })

script>
<div id="app">

  <table>


    <tr v-for="(stu,index) in students" :key="index">
      <th>{{index}}th>
      <td>{{stu.name}}td>
      <td>{{stu.id}}td>
      <td>{{stu.age}}td>
      <td>{{stu.money}}td>
    tr>

  table>

div>

<script>

  new Vue({
    el:"#app",
    data(){
      return{
        students:[]
      }
    },
    //mounted()
    //一般是在页面刚创建时(调用created())时加载数据
    created(){
      axios.get("http://localhost:8080/students").then(resp=>{
        this.students = resp.data.data;
        console.log('y',this.students);
      })
    }
  })

script>
视图解析器
package com.changGe.configs;

import org.springframework.context.annotation.Configuration;
import org.springframework.web.servlet.config.annotation.ViewControllerRegistry;
import org.springframework.web.servlet.config.annotation.WebMvcConfigurerAdapter;

@Configuration
public class ViewHandler extends WebMvcConfigurerAdapter {

  @Override
  public void addViewControllers(ViewControllerRegistry registry) {
    registry.addViewController("/").setViewName("index.html");
  }

}
修改
使用的是springmvc_11_page官方项目
把黑马的vue综合案例页面拿过来,然后已经查询,分页还是以前的代码,现在是只做修改和删除功能.
自定义修改的弹窗
//修改的弹窗
dialogUpdate:false,
修改的弹框用的和新增的一样,只不过需要重新绑定数据为自定义的dialogUpdata
<el-dialog
           title="编辑品牌"
           :visible.sync="dialogUpdate"
           width="30%"
           >

  <el-form ref="form" :model="brand" label-width="80px">
    <el-form-item label="品牌名称">
      <el-input v-model="brand.brandName">el-input>
    el-form-item>

    <el-form-item label="企业名称">
      <el-input v-model="brand.companyName">el-input>
    el-form-item>

    <el-form-item label="排序">
      <el-input v-model="brand.ordered">el-input>
    el-form-item>

    <el-form-item label="备注">
      <el-input type="textarea" v-model="brand.description">el-input>
    el-form-item>

    <el-form-item label="状态">
      <el-switch v-model="brand.status"
                 active-value="1"
                 inactive-value="0"
                 >el-switch>
    el-form-item>


    <el-form-item>
      <el-button type="primary" @click="handleUpdate(scope.row)">提交el-button>
      <el-button @click="dialogUpdate = false">取消el-button>
    el-form-item>
  el-form>

el-dialog>
点击修改时展示弹窗并调用方法
<el-button type="primary" @click="dialogUpdate = true,handleUpdate(scope.row)">修改el-button>
// 品牌模型数据
brand:[{
  brandName: '华为',
  companyName: '华为科技有限公司',
  ordered: '100',
  status: "1",
  id:"3",
  description: ""
}],

  // 表格数据
  tableData: [{
    brandName: '华为',
    companyName: '华为科技有限公司',
    ordered: '100',
    status: "1",
    id:"3"
  }, {
    brandName: '华为',
    companyName: '华为科技有限公司',
    ordered: '100',
    status: "1"
  }]
把原先表格中的默认数据tableData全部换成真实数据brand
<template>
  <el-table
            :data="brand"
            style="width: 100%"
            :row-class-name="tableRowClassName"
            @selection-change="handleSelectionChange">
    <el-table-column
                     type="selection"
                     width="55">
    el-table-column>
    <el-table-column
                     type="index"
                     width="50">
    el-table-column>

    <el-table-column
                     prop="brandName"
                     label="品牌名称"
                     align="center"
                     >
    el-table-column>
    <el-table-column
                     prop="companyName"
                     label="企业名称"
                     align="center"
                     >
    el-table-column>
    <el-table-column
                     prop="ordered"
                     align="center"
                     label="排序">
    el-table-column>
    <el-table-column
                     prop="statusStr"
                     align="center"
                     label="当前状态">
    el-table-column>


    <el-table-column
                     align="center"
                     label="操作">

      <template slot-scope="scope">
        <el-button type="primary" @click="dialogUpdate = true,handleUpdate(scope.row)">修改el-button>

        <el-button type="danger" @click="handleDelete(scope.row)">删除el-button>

      template>
    el-table-column>

  el-table>
template>
这样个row里面存储了当前行的所有信息,包括brand.id
//弹出编辑窗口:row.id 查询条件 = brand.id
handleUpdate(row) {
  //查询数据,根据id查询
  axios.get("/books/"+row.id).then((res)=>{
    if(res.data.code == 20041){
      //展示弹层,加载数据
      this.brand = res.data.data;
      this.dialogUpdate = true;
    }else{
      this.$message.error(res.data.msg);
    }
  });
},
他们自己的写法
//弹出编辑窗口:这个row里面存储了被点击行的信息
handleUpdate(row) {
  //console.log(row.id);//row.id 查询条件

  axios.get("/books/"+row.id).then(resp=>{
    //查询成功返回20041,失败返回20040
    if(resp.data.code == 20041){
      //将编辑表单显示出来
      this.dialogFormVisible4Edit = true;
      //将返回的数据展示在编辑表单页面上
      this.formData = resp.data.data;
    }else {
      //失败后会有一个查询失败的消息
      this.$message.error(resp.data.msg);
    }
  })
},

  //点击确定后修改数据
  handleEdit() {
    //put查询需要将编辑表单中的数据封装成json对象,传给后台
    axios.put("/books",this.formData).then(resp=>{
      //成功后提示用户,关闭弹窗
      if(resp.data.code == 20031){
        this.$message.success("修改成功");
        this.dialogFormVisible4Edit = false;
      }else {
        this.$message.success("修改失败");
      }
      //最后再查询所有 = 刷新数据
    }).finally(()=>{
      this.getAll();
    })
  },
删除
// 删除
handleDelete(row) {
  this.$confirm("确认删除吗","提示",{
    type: 'info'
    //确认执行的then()
  }).then(()=>{
    axios.delete("/books/"+row.id).then(resp=>{
      //成功后提示用户,关闭弹窗
      if(resp.data.code == 20021){
        this.$message.success("删除成功");
      }else {
        this.$message.success("删除失败");
      }
      //刷新数据
    }).finally(()=>{
      this.getAll();
    })
  }
          //取消执行的catch()
         ).catch(()=>{
    this.$message.info("取消删除")
  })
}
拦截器
浏览器发送请求后,tomcat在访问资源前,会先经过过滤器再进入spring,然后中央控制器调用controller,由controller响应给前端

拦截器可以==前后都拦截==
filter是所有请都可以过滤,而拦截器只对spirngmvc管理的资源生效
java中权限修饰符default的使用讲解和类优先于接口的规则
https://www.cnblogs.com/east7/p/15941584.html#:~:text=default%E5%85%B3%E9%94%AE%E5%AD%97%EF%BC%9A%E6%98%AF%E5%9C%A8java%208%E4%B8%AD%E5%BC%95%E5%85%A5%E7%9A%84%E6%96%B0%E6%A6%82%E5%BF%B5%EF%BC%8C%E4%B9%9F%E5%8F%AF%E7%A7%B0%E4%B8%BAVirtual,extension%20methods%E2%80%94%E2%80%94%E8%99%9A%E6%8B%9F%E6%89%A9%E5%B1%95%E6%96%B9%E6%B3%95%E4%B8%8Epublic%E3%80%81private%E7%AD%89%E9%83%BD%E5%B1%9E%E4%BA%8E%E4%BF%AE%E9%A5%B0%E7%AC%A6%E5%85%B3%E9%94%AE%E5%AD%97%EF%BC%8C%E4%B8%8E%E5%85%B6%E5%AE%83%E4%B8%A4%E4%B8%AA%E5%85%B3%E9%94%AE%E5%AD%97%E4%B8%8D%E5%90%8C%E4%B9%8B%E5%A4%84%E5%9C%A8%E4%BA%8Edefault%E5%85%B3%E9%94%AE%E5%AD%97%E5%A4%A7%E9%83%A8%E5%88%86%E9%83%BD%E7%94%A8%E4%BA%8E%E4%BF%AE%E9%A5%B0%E6%8E%A5%E5%8F%A3%E3%80%82%20default%E4%BF%AE%E9%A5%B0%E6%96%B9%E6%B3%95%E6%97%B6%E5%8F%AA%E8%83%BD%E5%9C%A8%E6%8E%A5%E5%8F%A3%E7%B1%BB%E4%B8%AD%E4%BD%BF%E7%94%A8%EF%BC%8C%E5%9C%A8%E6%8E%A5%E5%8F%A3%E4%B8%AD%E8%A2%ABdefault%E6%A0%87%E8%AE%B0%E7%9A%84%E6%96%B9%E6%B3%95%E5%8F%AF%E4%BB%A5%E7%9B%B4%E6%8E%A5%E5%86%99%E6%96%B9%E6%B3%95%E4%BD%93%EF%BC%8C%E8%80%8C%E6%97%A0%E9%9C%80%E4%BF%AE%E6%94%B9%E6%89%80%E6%9C%89%E5%AE%9E%E7%8E%B0%E4%BA%86%E6%AD%A4%E6%8E%A5%E5%8F%A3%E7%9A%84%E7%B1%BB%E3%80%82
入门案例
实现HandlerInterceptor,其中的三个方法都被default修饰了
把包建在和controller同级,springMVC就不用再扫描了
package com.changGe.controller.interceptor;

import org.springframework.stereotype.Component;
import org.springframework.web.servlet.HandlerInterceptor;
import org.springframework.web.servlet.ModelAndView;

import javax.servlet.http.HttpServletRequest;
import javax.servlet.http.HttpServletResponse;

@Component
public class MyInterceptor implements HandlerInterceptor {

  //被拦截资源执行前
  public boolean preHandle(HttpServletRequest request, HttpServletResponse response, Object handler) throws Exception {
    //handler(我们执行的方法)的反射对象是HandlerMetho,通过这个对象就可以用反射进行操作了
    System.out.println("handler就是被拦截方法的Method对象");
    //放行到资源去
    return true;
  }

  //被拦截资源执行后
  public void postHandle(HttpServletRequest request, HttpServletResponse response, Object handler, ModelAndView modelAndView) throws Exception {
    System.out.println("modelAndView可以设置springMVC响应时跳转页面");
  }

  //被拦截资源执行完成后,postHandle()执行后
  public void afterCompletion(HttpServletRequest request, HttpServletResponse response, Object handler, Exception ex) throws Exception {
    System.out.println("ex对象可以获取被拦截方法中出现的异常");
  }

}

你也可以额外写个类extends WebMvcConfigurationSupport来实现效果
@Configuration
@ComponentScan("com.changGe.controller")
//这种方式侵入性较强,和spirng强绑定
public class SpringMVCConfig implements WebMvcConfigurer {

  @Autowired
  private MyInterceptor interceptor;

  public void addInterceptors(InterceptorRegistry registry) {
    //访问特定路径时被拦截
    registry.addInterceptor(interceptor).addPathPatterns("/students","/students/*");
  }
}
注意:WebMvcConfigurer和WebMvcConfigurationSupport不能同时同时出现,会冲突,造成拦截器没反应
拦截器链
多拦截器执行顺序

MyInterceptor1的preHandle return false;
运行结果:
pre
pre1
after
@Autowired
private MyInterceptor1 interceptor1;

public void addInterceptors(InterceptorRegistry registry) {
  //返回特定路径时被拦截
  registry.addInterceptor(interceptor).addPathPatterns("/students","/students/*");
  registry.addInterceptor(interceptor1).addPathPatterns("/students","/students/*");