Kubeflow第三篇--使用技巧
0 前言
予读者言:
本系列博客本义作为笔者记录所用,所以可能稍显冗长,但同时也记录了我的学习研究思路,会在学习的过程中不断更新,可供读者借鉴,能对大家有些许帮助就是笔者最为开心之事~
1 Notebook Servers
notebook 可以说是做机器学习最喜欢用到的工具了,完美的将动态语言的交互性发挥出来,kubeflow 提供了 jupyter notebook 来快速构建云上的实验环境。
1.1 创建一个配置好tensorflow镜像的pod
这里以一个public的镜像为例:
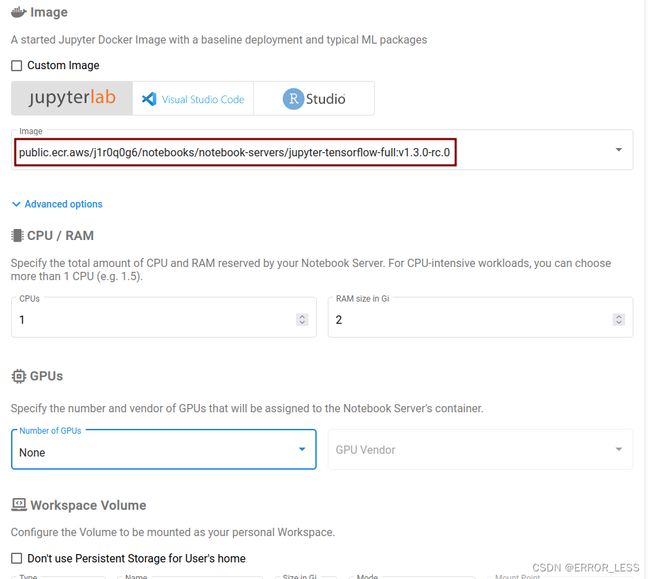
其他暂不做其他设置,LAUNCH
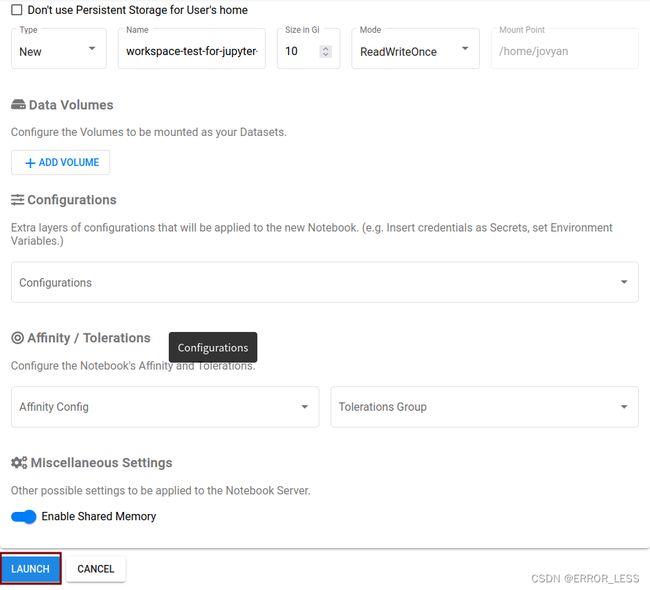 创建大约需要10min,需要大致1G流量。

1.2 进入应用界面
点击CONNECT按钮就可以进入

1.3 创建自己的jupyter文件
这里笔者选择测试的文件是 tensorflow 分布式训练教程的官方文件。
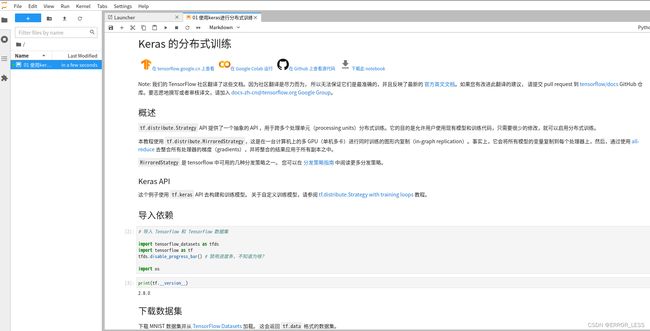
可以根据自己需求和平常一样进行开发,直接在一个容器里面,无需研发之后再dockerfile制作镜像。
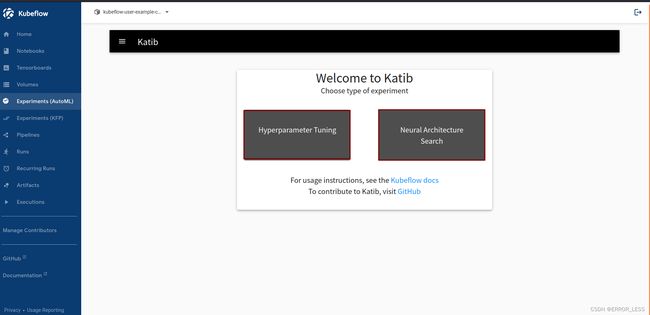
2 AutoML
AutoML 是机器学习比较热的领域,主要用来模型自动优化和超参数调整,这里其实是用的 Katib来实现的,一个基于k8s的 AutoML 项目。
Katib 主要提供了 超参数调整(Hyperparameter Tuning)和神经网络架构搜索(Neural Architecture Search)
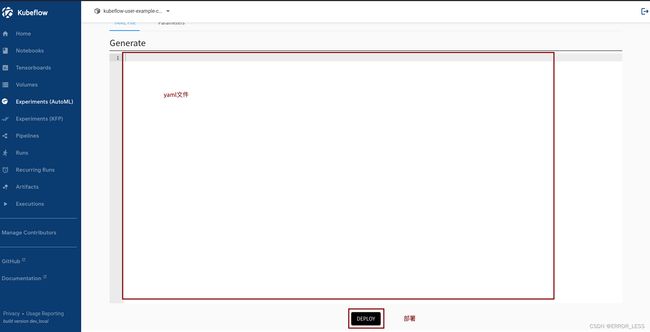
2.1 准备好yaml文件
这里以一个简单的神经网络为例,该程序具有三个参数 学习率lr, 神经网络层数num-layers, 优化器optimizer,采用的算法是随机搜索,目标是最大化准确率(accuracy)。
apiVersion: "kubeflow.org/v1beta1"
kind: Experiment
metadata:
  namespace: kubeflow-user-example-com
  name: random-example
spec:
  objective:
    type: maximize
    goal: 0.99
    objectiveMetricName: Validation-accuracy
    additionalMetricNames:
      - Train-accuracy
  algorithm:
    algorithmName: random
  parallelTrialCount: 3
  maxTrialCount: 12
  maxFailedTrialCount: 3
  parameters:
    - name: lr
      parameterType: double
      feasibleSpace:
        min: "0.01"
        max: "0.03"
    - name: num-layers
      parameterType: int
      feasibleSpace:
        min: "2"
        max: "5"
    - name: optimizer
      parameterType: categorical
      feasibleSpace:
        list:
          - sgd
          - adam
          - ftrl
  trialTemplate:
    primaryContainerName: training-container
    trialParameters:
      - name: learningRate
        description: Learning rate for the training model
        reference: lr
      - name: numberLayers
        description: Number of training model layers
        reference: num-layers
      - name: optimizer
        description: Training model optimizer (sdg, adam or ftrl)
        reference: optimizer
    trialSpec:
      apiVersion: batch/v1
      kind: Job
      spec:
        template:
          spec:
            containers:
              - name: training-container
                image: docker.io/kubeflowkatib/mxnet-mnist:v1beta1-45c5727
                command:
                  - "python3"
                  - "/opt/mxnet-mnist/mnist.py"
                  - "--batch-size=64"
                  - "--lr=${trialParameters.learningRate}"
                  - "--num-layers=${trialParameters.numberLayers}"
                  - "--optimizer=${trialParameters.optimizer}"
            restartPolicy: Never
2.2 提交部署
2.3 查看
步骤:Katib --> HP --> Monitor --> random-example
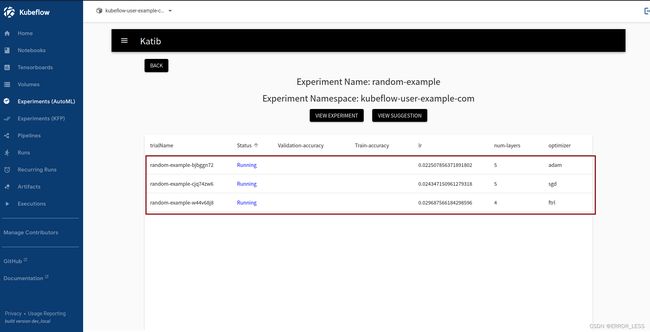
这里都running没问题,但是pod没有完全起来。
![]()
查看Dashboard,发现报错好像和外网有关,因为镜像好像得去外网拉取。
Readiness probe failed: Get http://10.244.1.243:15021/healthz/ready: dial tcp 10.244.1.243:15021: connect: connection refused
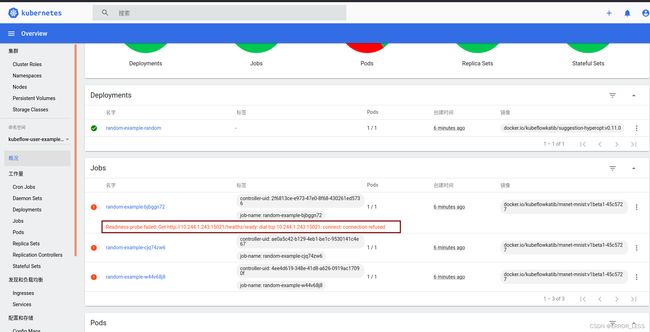
换网之后仍然没有解决,细细查看原因发现是和健康探针Readiness probe有关,集群中得有这个服务才行。
由于对这一块还不懂,因此不管这部分了,日后再看~
3 Pipeline
3.1 创建pvc
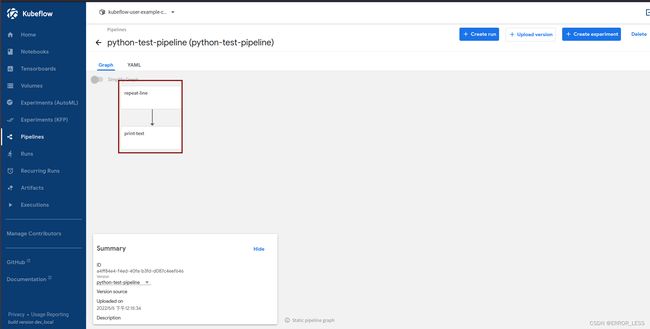
这里我们定义了两个任务 repeat-line 和 print-text, repeat-line 任务会将生产结果写入 kubeflow-test-pv 的 PVC 中, print-text 会从 PVC 中读取数据输出到 stdout。
apiVersion: v1
kind: PersistentVolumeClaim
metadata:
  name: kubeflow-test-pv
  namespace: kubeflow-user-example-com
spec:
  accessModes:
    - ReadWriteOnce
  resources:
    requests:
      storage: 128Mi
部署:
root@master:/home/hqc/Kubeflow/pipeline/test# kubectl apply -f pv.yaml
	persistentvolumeclaim/kubeflow-test-pv created
root@master:/home/hqc/Kubeflow/pipeline/test# kubectl get pvc --all-namespaces
	NAMESPACE                   NAME                         STATUS    VOLUME                                     CAPACITY   ACCESS MODES   STORAGECLASS   AGE
	istio-system                authservice-pvc              Bound     pvc-eee66d9e-238b-4ced-aeaf-8576dd8c4232   10Gi       RWO            local-path     12d
	kubeflow-user-example-com   kubeflow-test-pv             Pending                                                                        local-path     14s
	kubeflow-user-example-com   workspace-test-for-jupyter   Bound     pvc-19c86ad1-c582-4da0-bef2-a142a5830156   10Gi       RWO            local-path     6d19h
	kubeflow                    katib-mysql                  Bound     pvc-1e3c34f1-e65b-400d-be49-8d989423a28f   10Gi       RWO            local-path     12d
	kubeflow                    minio-pvc                    Bound     pvc-2b0b9c13-4381-4a11-be18-f1a166a0bcdd   20Gi       RWO            local-path     10d
	kubeflow                    mysql-pv-claim               Bound     pvc-ae3f961d-9d62-413c-8128-997822e0a70a   20Gi       RWO            local-path     10d
# 注意:此处处于Pending状态,不知是不是要等一段时间。
3.2 创建workflow
apiVersion: argoproj.io/v1alpha1
kind: Workflow
metadata:
  generateName: kubeflow-test-
spec:
  entrypoint: kubeflow-test
  templates:
  - name: kubeflow-test
    dag:
      tasks:
      - name: print-text
        template: print-text
        dependencies: [repeat-line]
      - {name: repeat-line, template: repeat-line}
  - name: repeat-line
    container:
      args: [--line, Hello, --count, '15', --output-text, /gotest/outputs/output_text/data]
      command:
      - sh
      - -ec
      - |
        program_path=$(mktemp)
        printf "%s" "$0" > "$program_path"
        python3 -u "$program_path" "$@"
      - |
        def _make_parent_dirs_and_return_path(file_path: str):
            import os
            os.makedirs(os.path.dirname(file_path), exist_ok=True)
            return file_path

        def repeat_line(line, output_text_path, count = 10):
            '''Repeat the line specified number of times'''
            with open(output_text_path, 'w') as writer:
                for i in range(count):
                    writer.write(line + '\n')

        import argparse
        _parser = argparse.ArgumentParser(prog='Repeat line', description='Repeat the line specified number of times')
        _parser.add_argument("--line", dest="line", type=str, required=True, default=argparse.SUPPRESS)
        _parser.add_argument("--count", dest="count", type=int, required=False, default=argparse.SUPPRESS)
        _parser.add_argument("--output-text", dest="output_text_path", type=_make_parent_dirs_and_return_path, required=True, default=argparse.SUPPRESS)
        _parsed_args = vars(_parser.parse_args())

        _outputs = repeat_line(**_parsed_args)
      image: python:3.7
      volumeMounts:
      - name: workdir
        mountPath: /gotest/outputs/output_text/
    volumes:
      - name: workdir
        persistentVolumeClaim:
          claimName: kubeflow-test-pv
    metadata:
      annotations:
  - name: print-text
    container:
      args: [--text, /gotest/outputs/output_text/data]
      command:
      - sh
      - -ec
      - |
        program_path=$(mktemp)
        printf "%s" "$0" > "$program_path"
        python3 -u "$program_path" "$@"
      - |
        def print_text(text_path): # The "text" input is untyped so that any data can be printed
            '''Print text'''
            with open(text_path, 'r') as reader:
                for line in reader:
                    print(line, end = '')

        import argparse
        _parser = argparse.ArgumentParser(prog='Print text', description='Print text')
        _parser.add_argument("--text", dest="text_path", type=str, required=True, default=argparse.SUPPRESS)
        _parsed_args = vars(_parser.parse_args())

        _outputs = print_text(**_parsed_args)
      image: python:3.7
      volumeMounts:
      - name: workdir
        mountPath: /gotest/outputs/output_text/
    volumes:
      - name: workdir
        persistentVolumeClaim:
          claimName: kubeflow-test-pv
    metadata:
      annotations:
3.3 创建pipeline
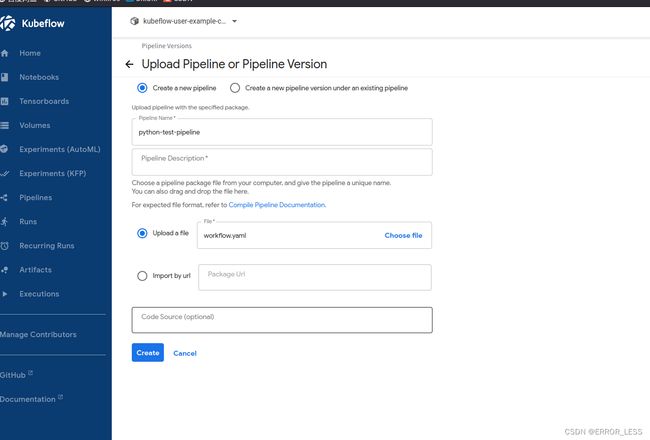
创建之后:
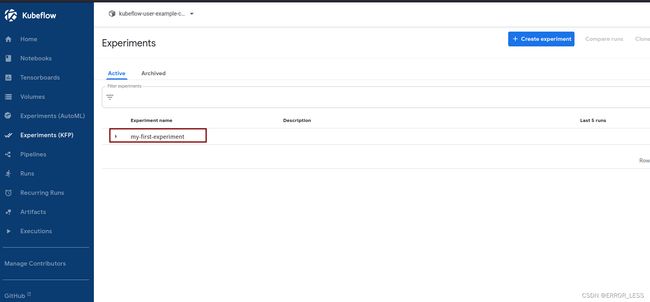
3.4 创建experiment
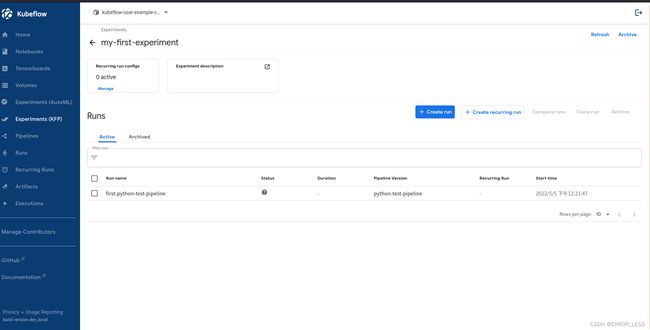
3.5 Run pipeline
 start之后:
3.6 查看
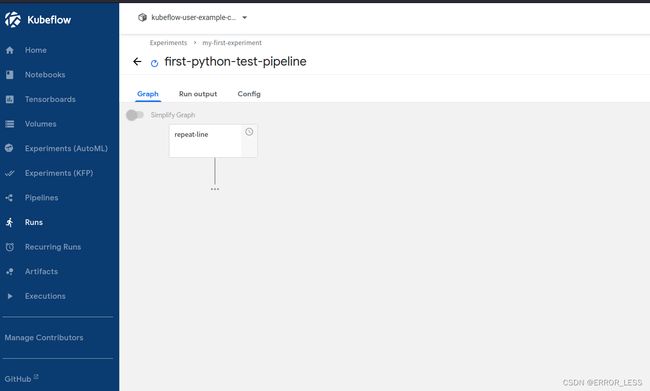
正在进行中…

等待6分钟之后发现POD一直在creating,分析怀疑可能是前面pvc一直在pending并且workflow中卷的目录不对的缘故,应该替换为自己的。下午再来解决这个问题吧~
再次查看了一下pvc的状态,发现已经创建成功了
root@master:/home/hqc/Kubeflow/pipeline/test# kubectl get pvc --all-namespaces
	NAMESPACE                   NAME                         STATUS   VOLUME                                     CAPACITY   ACCESS MODES   STORAGECLASS   AGE
	kubeflow-user-example-com   kubeflow-test-pv             Bound    pvc-b8526686-2e6b-43ec-9cd4-669f2d8347fd   128Mi      RWO            local-path     23m
	kubeflow-user-example-com   workspace-test-for-jupyter   Bound    pvc-19c86ad1-c582-4da0-bef2-a142a5830156   10Gi       RWO            local-path     6d19h
因此不是pvc的错误。
修改pvc目录尝试后也不行,一样的报错。
尝试官方教程,仍然一直在creating,出现以下报错:
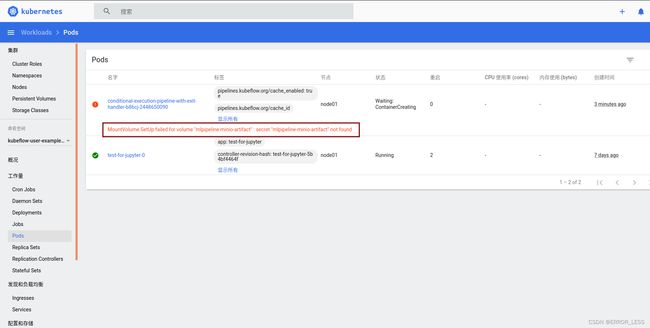
参考issue,但我尝试之后还是不能解决。