为GirdView添加鼠标移动样式及删除确认
注意,我使用了ScriptManager.RegisterClientScriptBlock,若你没有使用Asp.net Ajax,请改为ClientScript.RegisterClientScriptBlock() ,因为ClientScript.RegisterClientScriptBlock()在使用了ScriptManager时会失效的。
///
<summary>
/// GirdView行绑定时加一些样式和用户体验
/// </summary>
/// <param name="sender"></param>
/// <param name="e"></param>
protected void gvMediaOrders_RowDataBound( object sender, GridViewRowEventArgs e)
{
// 添加脚本到页页面
ScriptManager.RegisterClientScriptBlock( this , this .GetType(), " gvMediaOrdersBehavor " ,
@" function DeleteConfirm(oEvent){try{
if(!confirm('确定删除吗?')) {
if(window.event) {
oEvent = window.event;
oEvent.cancelBubble = true;
oEvent.returnValue = false;
} else {
oEvent.stopPropagation();
oEvent.preventDefault();
}
return false;
}}catch(e){alert(oEvent.message);}
}; " , true );
// 判断是否是DataRow,以防止鼠标经过Header也有效果
if (e.Row.RowType == DataControlRowType.DataRow)
{
e.Row.Attributes.Add( " onmouseover " , " c=this.style.backgroundColor; this.style.backgroundColor='#c8dafa';this.style.cursor='pointer'; " );
e.Row.Attributes.Add( " onmouseout " , " this.style.backgroundColor=c; " );
// 整行可选
e.Row.Attributes.Add( " onclick " , " __doPostBack(' " + gvMediaOrders.UniqueID + " ','Select$ " + e.Row.RowIndex + " '); " );
// 删除键在最后一列
e.Row.Cells[e.Row.Cells.Count - 1 ].Attributes.Add( " onclick " , " DeleteConfirm(event) " );
}
}
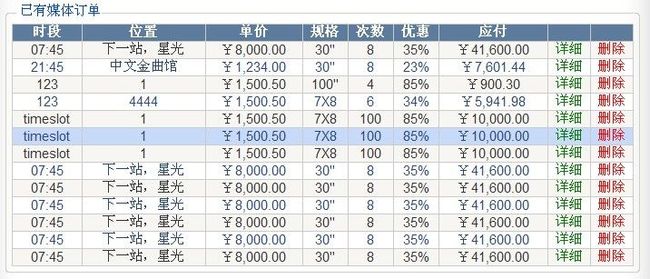
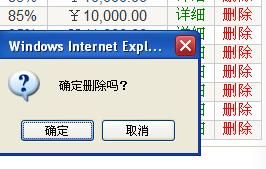
效果示例:
可整行选择

删除确认。

其实在服务器端实现这个效果,总觉得很别扭,但人总是想着方便,就全部都在服务器端实现了。
只要熟悉JavaScript脚本,类似这样的实现,是非常容易想到的。