Python爬虫之Scrapy框架系列(19)——实战下载某度猫咪图片【媒体管道类】
目录:
- 1.引入:
-
- 1.1 不使用管道,直接存储本地:
-
- ①创建scrapy项目及爬虫文件
- ②编写爬虫文件:
- ③效果:
- 1.2 使用管道,进行本地存储:
-
- ①编写爬虫文件:
- ②在items.py文件中创建相应的字段:
- ③编写管道文件pipelines.py:
- ④效果:
- 分析:两种储方法下所编写的爬虫文件:
- 2.这就引入了媒体管道类。使用如下:
-
- 2.1 爬虫文件改为:
- 2.2 编写items.py文件:
- 2.3 使用媒体管道类的话,pipelines.py文件就不用管,直接在settings.py操作即可:
- 2.4 效果:
1.引入:
先来看个小案例:使用scrapy爬取某度图片。
- 目标百度图片URL:https://image.baidu.com/search/index?tn=baiduimage&ipn=r&ct=201326592&cl=2&lm=-1&st=-1&sf=1&fmq=&pv=&ic=0&nc=1&z=&se=1&showtab=0&fb=0&width=&height=&face=0&istype=2&ie=utf-8&fm=index&pos=history&word=%E7%8C%AB%E5%92%AA
1.1 不使用管道,直接存储本地:
①创建scrapy项目及爬虫文件
'''
创建项目及爬虫文件:
1.scrapy startproject baiduimgs
2.cd baiduimgs
3.scrapy genspider bdimg www
'''
②编写爬虫文件:
# -*- coding: utf-8 -*-
import scrapy

import re
import os
class BdimgSpider(scrapy.Spider):
    name = 'bdimgs'
    allowed_domains = ['image.baidu.com']
    start_urls = ['https://image.baidu.com/search/index?tn=baiduimage&ipn=r&ct=201326592&cl=2&lm=-1&st=-1&sf=1&fmq=&pv=&ic=0&nc=1&z=&se=1&showtab=0&fb=0&width=&height=&face=0&istype=2&ie=utf-8&fm=index&pos=history&word=%E7%8C%AB%E5%92%AA']
    num=0

    def parse(self, response):
        text=response.text
        img_urls=re.findall('"thumbURL":"(.*?)"',text)
        for img_url in img_urls:
            yield scrapy.Request(img_url,dont_filter=True,callback=self.get_img)

    def get_img(self,response):
        img_data=response.body
        if not os.path.exists("dir"):
            os.mkdir("dir")
        filename="dir/%s.jpg"%self.num
        self.num+=1
        with open(filename,"wb") as f:
            f.write(img_data)
注意:
- 在settings.py文件中关闭robots协议;
- 加UA!!!
③效果:
1.2 使用管道,进行本地存储:
①编写爬虫文件:
# -*- coding: utf-8 -*-
import scrapy

import re
import os
from ..items import BaiduimgsItem	#引入创建字段的类
class BdimgSpider(scrapy.Spider):
    name = 'bdimgs'
    allowed_domains = ['image.baidu.com']
    start_urls = ['https://image.baidu.com/search/index?tn=baiduimage&ipn=r&ct=201326592&cl=2&lm=-1&st=-1&sf=1&fmq=&pv=&ic=0&nc=1&z=&se=1&showtab=0&fb=0&width=&height=&face=0&istype=2&ie=utf-8&fm=index&pos=history&word=%E7%8C%AB%E5%92%AA']
    num=0

    def parse(self, response):
        text=response.text
        img_urls=re.findall('"thumbURL":"(.*?)"',text)
        for img_url in img_urls:
            yield scrapy.Request(img_url,dont_filter=True,callback=self.get_img)

    def get_img(self,response):
        img_data=response.body

        item=BaiduimgsItem()
        item["img_data"]=img_data
        yield item
②在items.py文件中创建相应的字段:
# -*- coding: utf-8 -*-

# Define here the models for your scraped items
#
# See documentation in:
# https://docs.scrapy.org/en/latest/topics/items.html

import scrapy


class BaiduimgsItem(scrapy.Item):
    # define the fields for your item here like:
    # name = scrapy.Field()
    img_data=scrapy.Field()
③编写管道文件pipelines.py:
# -*- coding: utf-8 -*-

# Define your item pipelines here
#
# Don't forget to add your pipeline to the ITEM_PIPELINES setting
# See: https://docs.scrapy.org/en/latest/topics/item-pipeline.html

import os
class BaiduimgsPipeline(object):
    num=0
    def process_item(self, item, spider):
        if not os.path.exists("dir_pipe"):
            os.mkdir("dir_pipe")
        filename="dir_pipe/%s.jpg"%self.num
        self.num+=1
        img_data=item["img_data"]
        with open(filename,"wb") as f:
            f.write(img_data)
        return item
注意:要在settings.py文件中开启管道!!!
④效果:
分析:两种储方法下所编写的爬虫文件:
- 其中:都有个get_img()回调函数,前面文章可知回调函数必须有,但是仔细观察这两个爬虫文件,会发现这个回调函数作用不大,我们的目标就直接是图片数据,而不需要再进行额外的一系列的提取,所以:这个回调函数明显累赘了,那么:有么有方法可以简化嘞!!!
2.这就引入了媒体管道类。使用如下:
2.1 爬虫文件改为:
# -*- coding: utf-8 -*-
import scrapy

import re
import os
from ..items import BaiduimgsPipeItem
class BdimgSpider(scrapy.Spider):
    name = 'bdimgs'
    allowed_domains = ['image.baidu.com']
    start_urls = ['https://image.baidu.com/search/index?tn=baiduimage&ipn=r&ct=201326592&cl=2&lm=-1&st=-1&sf=1&fmq=&pv=&ic=0&nc=1&z=&se=1&showtab=0&fb=0&width=&height=&face=0&istype=2&ie=utf-8&fm=index&pos=history&word=%E7%8C%AB%E5%92%AA']

    def parse(self, response):
        text=response.text
        image_urls=re.findall('"thumbURL":"(.*?)"',text)
        # 注意:此处给字段的值是图片的URL!!!
        item=BaiduimgsPipeItem()
        item["image_urls"]=image_urls
        yield item
2.2 编写items.py文件:
- (注意:使用媒体管道类的话,这个字段名必须是image_urls,因为源码中默认的字段名就是这个!!!)
# -*- coding: utf-8 -*-

# Define here the models for your scraped items
#
# See documentation in:
# https://docs.scrapy.org/en/latest/topics/items.html

import scrapy

class BaiduimgsPipeItem(scrapy.Item):
    # define the fields for your item here like:
    # name = scrapy.Field()
    image_urls=scrapy.Field()
2.3 使用媒体管道类的话,pipelines.py文件就不用管,直接在settings.py操作即可:
- (重点:表面上没有使用管道,因为咱pipelines.py文件没有进行任何操作,但是实际上由于咱使用了特定的字段名,在暗地里使用了媒体管道类!!!)
# Configure item pipelines
# See https://docs.scrapy.org/en/latest/topics/item-pipeline.html
ITEM_PIPELINES = {
   # 'baiduimgs.pipelines.BaiduimgsPipeline': 300,
   'scrapy.pipelines.images.ImagesPipeline': 300,          # 注意:一定要开启此pipeline管道!
}
# 注意:一定要指定媒体管道存储的路径!
IMAGES_STORE = r'E:\Py_Spider_High\spiderpro\scrapy_1\baiduimgs\dir0'
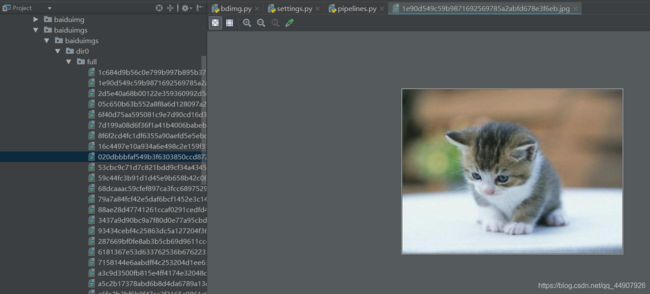
2.4 效果:
- 需要注意的是:
本文使用的是scrapy2.7版本,直接上述操作是不行的,我们会发现有个WARNING,需要我们下载pillow包。


