Nightingale | 夜莺监控部署安装和使用
1.0 背景介绍
最近在对开源的新型监控做调研,发现Nightingale功能强大,使用效果还不错,并对,并对目前监控做了一个对比
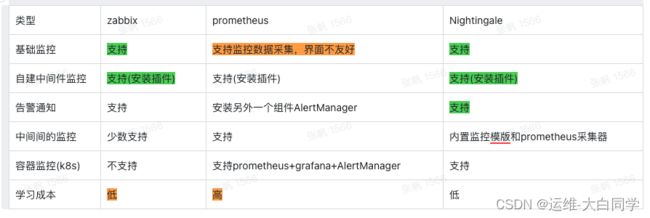
夜莺监控( Nightingale )是一款国产、开源云原生监控分析系统,采用 All-In-One 的设计,集数据采集、可视化、监控告警、数据分析于一体。于 2020 年 3 月 20 日,在 github 上发布 v1 版本,已累计迭代 60 多个版本。从 v5 版本开始与 Prometheus、VictoriaMetrics、Grafana、Telegraf、Datadog 等生态紧密协同集成,提供开箱即用的企业级监控分析和告警能力,已有众多企业选择将 Prometheus + AlertManager + Grafana 的组合方案升级为使用夜莺监控。。
官网地址
https://n9e.github.io/
2.0 安装部署
2.1 安装依赖组件
# install mysql
yum -y install mariadb*
systemctl enable mariadb
systemctl restart mariadb
mysql -e "SET PASSWORD FOR 'root'@'localhost' = PASSWORD('1234');"

# install redis
yum install -y redis
systemctl enable redis
systemctl restart redis
#安装prometheus,并配置服务启动参数
mkdir -p /opt/prometheus
wget https://s3-gz01.didistatic.com/n9e-pub/prome/prometheus-2.28.0.linux-amd64.tar.gz -O prometheus-2.28.0.linux-amd64.tar.gz
tar xf prometheus-2.28.0.linux-amd64.tar.gz
cp -far prometheus-2.28.0.linux-amd64/*  /opt/prometheus/
cat /etc/systemd/system/prometheus.service
[Unit]
Description="prometheus"
Documentation=https://prometheus.io/
After=network.target

[Service]
Type=simple

ExecStart=/opt/prometheus/prometheus  --config.file=/opt/prometheus/prometheus.yml --storage.tsdb.path=/opt/prometheus/data --web.enable-lifecycle --enable-feature=remote-write-receiver --query.lookback-delta=2m

Restart=on-failure
SuccessExitStatus=0
LimitNOFILE=65536
StandardOutput=syslog
StandardError=syslog
SyslogIdentifier=prometheus


[Install]
WantedBy=multi-user.target
systemctl daemon-reload
systemctl enable prometheus
systemctl restart prometheus
systemctl status prometheus
2.2二进制方式安装夜莺并配置启动
mkdir -p /opt/n9e && cd /opt/n9e
# 去 https://github.com/didi/nightingale/releases 找最新版本的包,文档里的包地址可能已经不是最新的了
tarball=n9e-5.8.0.tar.gz
urlpath=https://github.com/didi/nightingale/releases/download/v5.8.0/${tarball}
wget $urlpath || exit 1

tar zxvf ${tarball}

mysql -uroot -p1234 < docker/initsql/a-n9e.sql

nohup ./n9e server &> server.log &
nohup ./n9e webapi &> webapi.log &
配置启动
vim /opt/n9e/etc/config.toml


其他配置保持默认即可,如果启动成功,server 默认会监听在 19000 端口,webapi 会监听在 18000 端口
默认用户是root,密码是root.2020
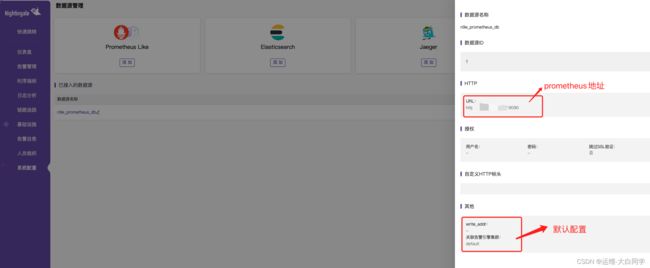
3.0配置使用
3.1 server端 配置数据源,务必确认网络端口是否通
3.2配置采集器categraf
github地址
https://github.com/flashcatcloud/categraf/releases/tag/v0.2.35
下载二进制包
wge https://github.com/flashcatcloud/categraf/releases/download/v0.2.35/categraf-v0.2.35-linux-amd64.tar.gz
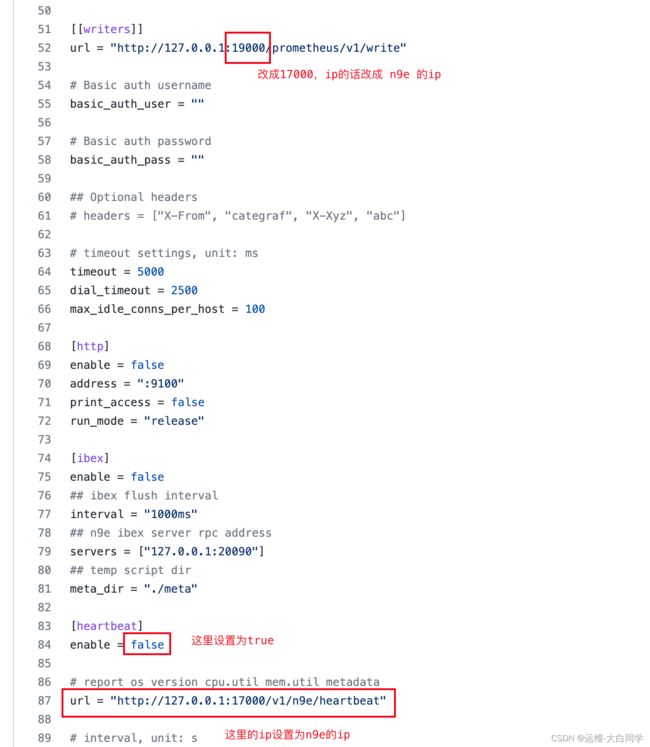
vim /opt/n9e/categraf/conf/config.toml
我这里配置的是本机所以是127.0.0.1/其他机器请配置真实ip
配置systemd 启动管理
cat categraf.service
[Unit]
Description="Categraf"
After=network.target

[Service]
Type=simple

ExecStart=/opt/n9e/categraf/categraf
WorkingDirectory=/opt/n9e/categraf/

Restart=on-failure
SuccessExitStatus=0
LimitNOFILE=65536
StandardOutput=syslog
StandardError=syslog
SyslogIdentifier=categraf


[Install]
WantedBy=multi-user.target
systemctl start categraf.service
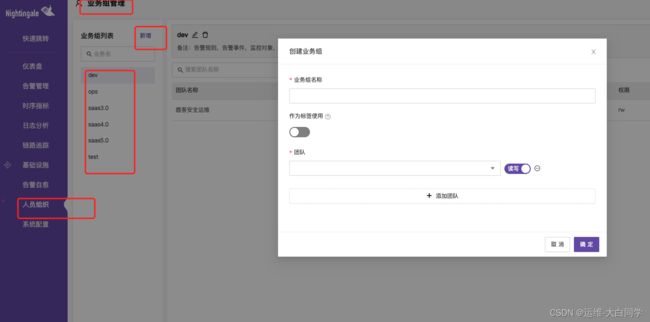
3.3 创建分组,创建团队
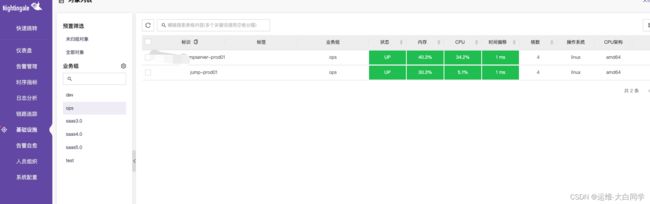
3.4 将刚才配置的机器绑定分组

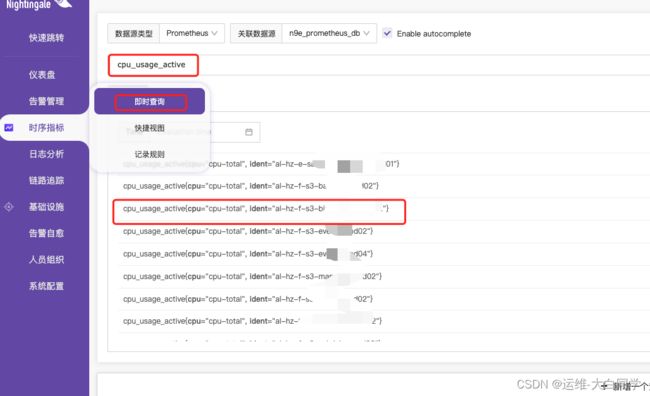
3.5 查询指标,配置成功后能看到指标和采集到的数据
3.6 配置监控大盘,内置了很多中间件和主机的大盘,选择自己需要的大盘并导入

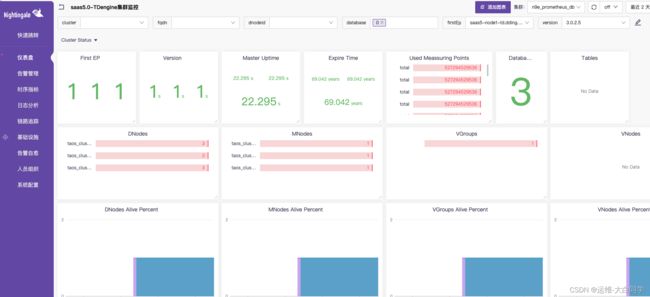
3.7 展示大盘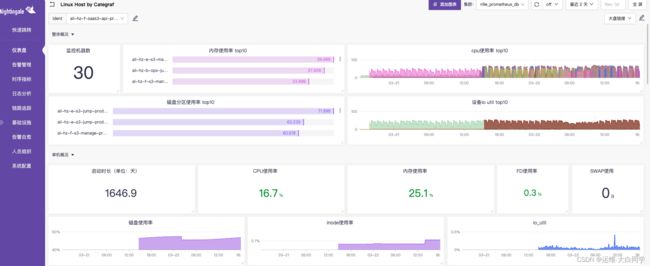
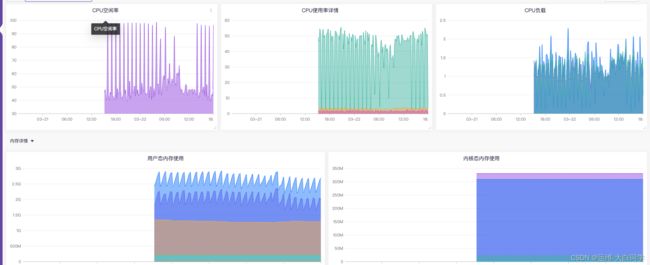
3.7 采集监控 rabbitmq
vim input.rabbitmq/rabbitmq.toml
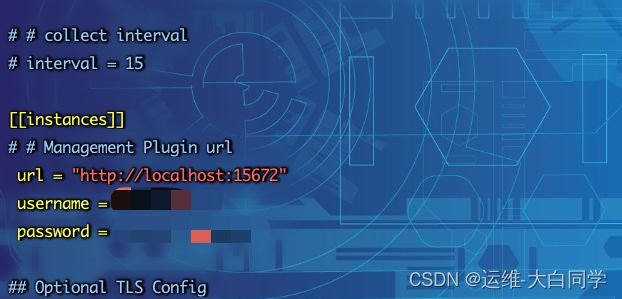
导入rabbitmq模版
https://github.com/flashcatcloud/categraf/tree/main/inputs/rabbitmq

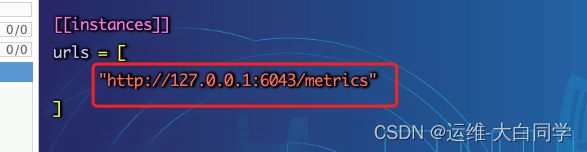
3.8 采集监控 prometheus,监控TDengine
需要先安装启动prometheus-export采集器并成功采集到数据才能使用该配置
vim input.prometheus/prometheus.toml
3.8.1 导入prometheus grafana模版