SpringBoot简易入门指南
SpringBoot
1.yaml配置
- SpringBoot可以使用application.properties、application.yml(.yaml)等文件来作为配置文件
- 它们可以放在多个位置
1.1 配置查找
- 在application配置文件中,每一项配置都可以在xxxProperties.java中一一对应.如下图:

Properties:

1.2 自动配置
- 如上图,在
WebMvcProperties类中,有一个@ConfigurationProperties的注解,其中,prefix其对应的值就为配置文件中的前缀spring.mvc,我们就可以找到我们配置的东西在何处映射到程序中了. - 当然,只有这个属性类,不能加载有什么用呢?这里我们就需要一个
xxxAutoConfiguration类,它与之前的xxxproperties类相对应,其目的就是为了加载xxxproperties.

2.静态资源请求
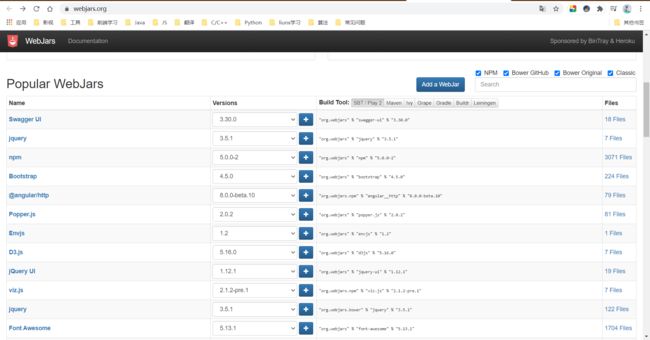
2.1 webjars
-
常用的web中所需的静态资源,被webjars包所收录,可引入相应的依赖以此来导入web静态资源
-
可去官网查询相应的资源(如,JQuery、Bootstrap等等)
- 这里我选择的是Maven导入Bootstrap

- 其项目文件结构为:
META_INF.resources.webjars.boostrap.4.5.0,而其中由于META-INF/resources下的包会被SpringBoot默认扫描到,因此在访问资源时,可直接访问:/webjars/bootstrap/4.5.0/*即可访问并使用Bootstrap资源。

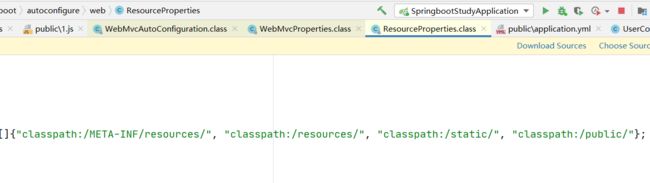
2.2 默认静态资源存放点
- /META-INF/resources/ :webjars
- classpath:/resources/
- classpath:/static/
- classpath:/public/
这个顺序代表了优先级,再访问静态资源时,依次访问,如访问到,便返回结果
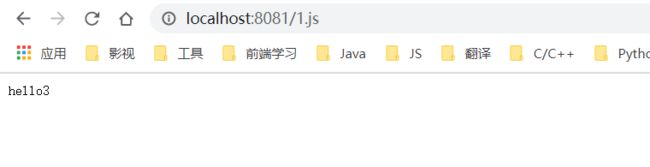
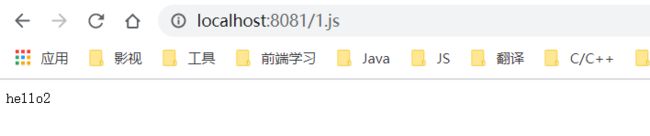
这里来做一个测试 如下图所示,每个1.js文件写着不同的内容,我们直接访问,看它们谁先展示出来
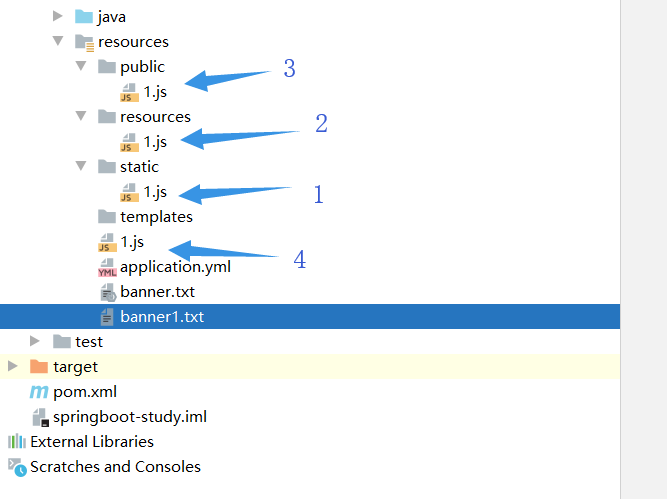
- 可以看到先展示出来的是resources下的1.js
- 删掉resources下的1.js继续实验
- 删掉static下的1.js

- 删掉public下的1.js
最后得出=> 1、2、3号位置的静态资源可访问且优先级为:resource > static > public
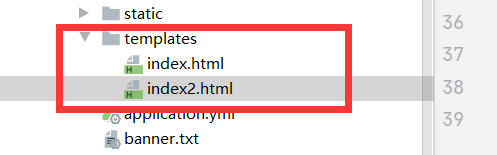
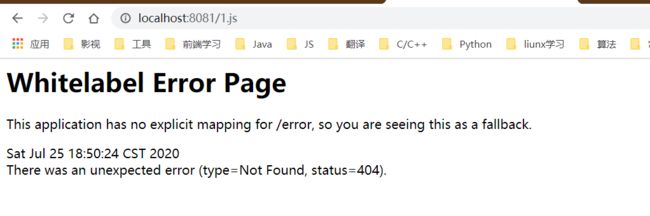
2.3页面放置
- 在页面放在templates下时,必须通过视图解析器去访问,不然会报404错误.
- 可以自定义Mvc配置,制定视图映射.
@Configuration
public class MyMvcConfig implements WebMvcConfigurer {

    @Override
    public void addViewControllers(ViewControllerRegistry registry) {
        //这里必须定制首页,因此访问templates下的页面必须走视图控制器
        registry.addViewController("/").setViewName("index2");
        registry.addViewController("index2.html").setViewName("index2");
    }
}
3.Banner
- 在启动SpringBoot时,常常会看到一串特殊的Spring图案,这个有趣的图案有时候能够给我们带来一些DIY的乐趣。
只需要在resources目录下添加一下Banner.txt文件便可以了,里面的图案就是在SpringBoot启动时会打印的图案.
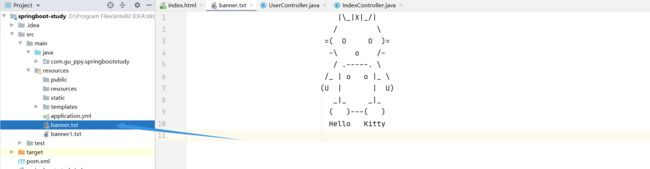
启动结果:
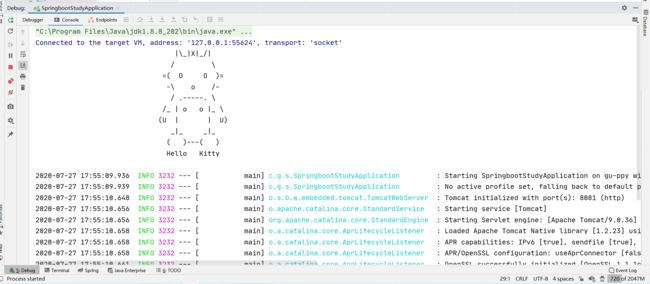
很有趣,有莫有.
当然了想要的DIY可不止于此.
除了一个文本文件,你还可以添加一个banner.gif,banner.jpg或banner.png图像文件到类路径或设置spring.banner.image.location属性。图像将转换为ASCII艺术作品并打印在任何文本横幅上方。
3.1 关掉横幅
-
如果你对横幅没有什么要求,可以在自己创建的Application中关掉横幅.
-
自行实例化Application
public static void main(String[] args) {
    SpringApplication app = new SpringApplication(MySpringConfiguration.class);
    app.setBannerMode(Banner.Mode.OFF);
    app.run(args);
}
4. Thymeleaf
4.1 表达式类型

4.2 导入依赖
<dependency>
    <groupId>org.springframework.bootgroupId>
    <artifactId>spring-boot-starter-thymeleafartifactId>
dependency>
5.国际化
5.1制定properties文件
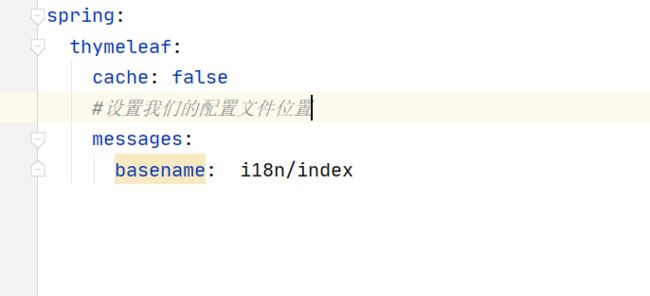

- 需要在配置文件中制定该properties文件
5.2自定义国际化解析器
public class MyLocaleResolver implements LocaleResolver {
    @Override
    public Locale resolveLocale(HttpServletRequest httpServletRequest) {
        String language = httpServletRequest.getParameter("language");

        Locale locale = Locale.getDefault();
        if (!StringUtils.isEmpty(language)){
            String[] split = language.split("_");
            locale = new Locale(split[0], split[1]);
        }
        return locale;
    }

    @Override
    public void setLocale(HttpServletRequest httpServletRequest, HttpServletResponse httpServletResponse, Locale locale) {

    }
}
5.3LocaleResolver装入Spring容器
@Configuration
public class MyMvcConfig implements WebMvcConfigurer {

    @Override
    public void addViewControllers(ViewControllerRegistry registry) {
        //这里必须定制首页,因此访问templates下的页面必须走视图控制器
        registry.addViewController("/").setViewName("index2");
        registry.addViewController("index2.html").setViewName("index2");
    }

    //添加自定义区域解析器到Spring容器
    //返回类型为LocaleResolver,而不为MyLocaleResolver
    @Bean
    public LocaleResolver localeResolver(){
        return new MyLocaleResolver();
    }
}
5.4编写Thymeleaf
<html lang="en" xmlns:th="http://www.thymeleaf.org">
<head>
    <meta charset="UTF-8">
    <title>首页title>
    <link th:href="@{css/bootstrap.min.css}" rel="stylesheet">
    <link th:href="@{css/signin.css}" rel="stylesheet">
head>
<body>
<div class="container">

    <form class="form-signin">
        <h2 class="form-signin-heading" th:text="#{index.title}">请登录h2>
        <label for="inputEmail" class="sr-only">Email addresslabel>
        <input type="username" id="inputEmail" class="form-control" placeholder="用户名" th:placeholder="#{index.username}" required="" autofocus="">
        <label for="inputPassword" class="sr-only" >Passwordlabel>
        <input type="password" id="inputPassword" class="form-control" placeholder="密码" th:placeholder="#{index.password}"  required="">
        <div class="checkbox">
            <label >
                <input type="checkbox" value="remember-me" th:text="#{index.rememberMe}">
            label>
        div>
        <button class="btn btn-lg btn-primary btn-block" type="submit" th:text="#{index.loginBtn}">Sign inbutton>

        <p class="mt-5 mb-3 text-muted">@ 2017-2020p>
        <a th:href="@{/index2.html(language='zh_CN')}" class="btn btn-sm">中文a>
        <a th:href="@{/index2.html(language='en_US')}" class="btn btn-sm">Englisha>
    form>
div>

body>
<script th:src="@{/js/jquery-3.2.1.slim.min.js}">script>
<script th:src="@{js/bootstrap.min.js}">script>
<script>
	//Ajax请求
script>
html>
6.Durid配置
- 这里使用的是自行导Druid包,而不是官方的starter包。
6.1 导入依赖
<dependency>
    <groupId>mysqlgroupId>
    <artifactId>mysql-connector-javaartifactId>
    <version>8.0.19version>
dependency>

<dependency>
    <groupId>org.springframework.bootgroupId>
    <artifactId>spring-boot-starter-jdbcartifactId>
dependency>

<dependency>
    <groupId>com.alibabagroupId>
    <artifactId>druidartifactId>
    <version>1.1.23version>
dependency>
6.2 配置yaml文件
- 在使用其它数据源时可不在此添加其他配置,只需更换datasource.type便可
spring:
	datasource:
    #    配置JDBC
        url: jdbc:mysql://localhost:3306/my_train?useUnicode=true&characterEncoding=utf-8&serverTimezone=UTC
        driver-class-name: com.mysql.cj.jdbc.Driver
        username: root
        password: PQS2017214206
        type: com.alibaba.druid.pool.DruidDataSource

    #   数据源其他配置
    initialSize: 5
    minIdle: 5
    maxActive: 20
    maxWait: 60000
    timeBetweenEvictionRunsMillis: 60000
    minEvictableIdleTimeMillis: 300000   #最小可撤离时间
    validationQuery: SELECT 1 FROM DUAL
    testWhileIdle: true
    testOnBorrow: false
    testOnReturn: false
    poolPreparedStatements: true
    #   配置监控统计拦截的filters,stat去掉后监控界面sql无法统计,'wall'用于防火墙
    filters: stat,wall
    maxPoolPreparedStatementPerConnectionSize: 20
    useGlobalDataSourceStat: true
    connectionProperties: druid.stat.mergeSql=true;druid.stat.slowSqlMillis=500
6.3 配置实例及监视
ServletRegistrationBean类与FilterRegistrationBean类相当于web.xml里面配置Servlet与Filter
@Configuration
public class DruidConfig {

    @ConfigurationProperties(prefix = "spring.datasource")
    @Bean
    public DataSource druidDatasource(){
//        System.out.println( "druid实例化");
        return new DruidDataSource();
    }

//    后台监控
    @Bean
    public ServletRegistrationBean servletRegistrationBean(){
        ServletRegistrationBean<StatViewServlet> bean = new ServletRegistrationBean<>(new StatViewServlet(),"/druid/*");
        Map<String, String> initParameters = new HashMap<String, String>();
        initParameters.put("loginUserName","admin"); //登录名
        initParameters.put("loginPassword","123");  //登录密码
        initParameters.put("allow","127.0.0.1");    // "":所有人可访问   "localhost":本地可访问
        bean.setInitParameters(initParameters);

        return bean;
    }
    /**
     * 配置服务过滤器
     *
     * @return 返回过滤器配置对象
     */
    @Bean
    public FilterRegistrationBean statFilter() {
        FilterRegistrationBean filterRegistrationBean = new FilterRegistrationBean(new WebStatFilter());
        // 添加过滤规则
        filterRegistrationBean.addUrlPatterns("/*");
        // 忽略过滤格式
        filterRegistrationBean.addInitParameter("exclusions", "*.js,*.gif,*.jpg,*.png,*.css,*.ico,/druid/*,");
        return filterRegistrationBean;
    }
}
6.4 完成
- 访问/druid/即可

7.整合Mybatis
Note: 运行Mapper,需要配置好数据源之后的操作
7.1 导入依赖
<dependency>
    <groupId>org.mybatis.spring.bootgroupId>
    <artifactId>mybatis-spring-boot-starterartifactId>
    <version>2.1.3version>
dependency>
7.2 编写Mapper
- UserMapper.java
@Mapper //也可以在启动类上加@MapperScan注解
@Repository
public interface UserMapper {

    List<User> selectAllUser();

    User selectUserById(int id);

    Integer updateUser(User user);

    Integer insertUser(User user);

    int deleteUser(int id);
}
- UserMapper.xml
<mapper namespace="com.gu_ppy.springbootstudy.mapper.UserMapper">
    <select id="selectAllUser" resultType="user">
        select * from user
    select>
    <select id="selectUserById" resultType="user">
        select * from user where id=#{id}
    select>
    <update id="updateUser" parameterType="user">
        update user set name = #{name},
                        age = #{age},
                        password = #{password}
                        where id=#{id}
    update>

    <insert id="insertUser" parameterType="user">
        insert into user(name,age,password) values (#{name},#{age},#{password})
    insert>

    <delete id="deleteUser" >
        delete from user where id=#{id}
    delete>


mapper>
7.3 导入mapper.xml
注意:xml文件很有可能忘记在yml文件中配置,不配置,在调用时mapper时,会显示
BindingException异常,所以请务必加上配置.
#  配置Mybatis
mybatis:
  type-aliases-package: com\skylan\tuantuan\pojo\entity
  mapper-locations: classpath:mybatis/mapper/*.xml
  configuration:
    map-underscore-to-camel-case: true #开启驼峰式命名
7.4 使用
@SpringBootTest
class SpringbootStudyApplicationTests {

    @Autowired
    UserMapper userMapper;

    @Test
    public void test(){
        List<User> users = userMapper.selectAllUser();
        for (User user : users) {
            System.out.println(user);
        }
    }

    @Test
    public void test1(){
        System.out.println(userMapper.selectUserById(1));
    }
    @Test
    public void test2(){
        userMapper.insertUser(new User(4,"尼马","33","222"));
        test();
    }
}
8.Spring-Security
- Spring Boot使用Spring-Security
8.1 导入依赖
<dependency>
    <groupId>org.springframework.bootgroupId>
    <artifactId>spring-boot-starter-securityartifactId>
dependency>
8.2 注意
- 新版本默认开启跨站请求伪造,导致登出等操作错误,需要手动关闭
8.3 与Thymeleaf整合
- Thymeleaf与Security整合时,要注意SpringBoot版本问题,最高支持
2.0.9.
8.4 配置类
- 具体如何写可以查看
WebSecurityConfigurerAdapter类中的注释。
@EnableWebSecurity   //必须注明为 启用web安全配置
@Configuration
public class SecurityConfig extends WebSecurityConfigurerAdapter {

    @Override
    protected void configure(HttpSecurity http) throws Exception {
        http.authorizeRequests()
                .antMatchers("/").permitAll()
                .antMatchers("/level1/**").hasRole("vip1")
                .antMatchers("/level2/**").hasRole("vip2")
                .antMatchers("/level3/**").hasRole("vip3");

        http.formLogin();
        //登出时处理路径和成功后跳转界面//登出时删除Cookie及Session
        http.logout().logoutUrl("/logout").logoutSuccessUrl("/index").deleteCookies("").invalidateHttpSession(true);
        http.csrf().disable();//关闭跨站请求防伪

    }

    @Override
    protected void configure(AuthenticationManagerBuilder auth) throws Exception {
        //在Security5中必须硬编码密码
        auth.inMemoryAuthentication().passwordEncoder(new BCryptPasswordEncoder())
                .withUser("root").password(new BCryptPasswordEncoder().encode("123")).roles("vip2","vip3")
                .and()
                .withUser("vip1").password(new BCryptPasswordEncoder().encode("123")).roles("vip2");

    }
}
    }

    @Override
    protected void configure(AuthenticationManagerBuilder auth) throws Exception {
        //在Security5中必须硬编码密码,否则抛出异常
        auth.inMemoryAuthentication().passwordEncoder(new BCryptPasswordEncoder())
                .withUser("root").password(new BCryptPasswordEncoder().encode("123")).roles("vip2","vip3")
                .and()
                .withUser("vip1").password(new BCryptPasswordEncoder().encode("123")).roles("vip2");

    }
}
9.Swagger
- 官网网址:swagger.io
9.1 导入依赖
- 前提:SpringBoot项目
- 导入版本为3.0以下,3.0及3.0以上swagger已更改为OpenApi 3.0其与swagger2.x使用不同。
<dependency>
    <groupId>io.springfoxgroupId>
    <artifactId>springfox-swagger2artifactId>
    <version>2.9.2version>
dependency>
<dependency>
    <groupId>io.springfoxgroupId>
    <artifactId>springfox-swagger-uiartifactId>
    <version>2.9.2version>
dependency>
9.2 配置Docket
@Configuration
@EnableSwagger2  //开启swagger,3.0版本配置不为这个
public class SwaggerConfig  {
    @Bean//生成Swagger的Docket实例
    public Docket docket(Environment environment){
        return new Docket(DocumentationType.SWAGGER_2)
                .apiInfo(apiInfo())

    }
}
9.3 设置开发环境
- 根据开发环境选择是否启用swagger
package com.gu_ppy.springboot02security.config;

import org.springframework.context.annotation.Bean;
import org.springframework.context.annotation.Configuration;
import org.springframework.core.env.Environment;
import org.springframework.core.env.Profiles;
import org.springframework.web.servlet.config.annotation.WebMvcConfigurer;
import springfox.documentation.builders.RequestHandlerSelectors;
import springfox.documentation.service.ApiInfo;
import springfox.documentation.service.Contact;
import springfox.documentation.spi.DocumentationType;
import springfox.documentation.spring.web.plugins.Docket;
import springfox.documentation.swagger2.annotations.EnableSwagger2;

import java.util.ArrayList;
@Configuration
@EnableSwagger2  //开启swagger,3.0版本配置不为这个
public class SwaggerConfig  {

    @Bean//生成Swagger的Docket实例
    public Docket docket(Environment environment){
        //设置启用swagger的环境
        Profiles profiles = Profiles.of("dev","test");
        //从环境中查找是否处于上诉环境
        boolean isdev = environment.acceptsProfiles(profiles);

        return new Docket(DocumentationType.SWAGGER_2)
                .apiInfo(apiInfo())
                .enable(isdev)//是否启用
            //select...build是一套操作,不能分割
                .select()
         .apis(RequestHandlerSelectors.basePackage("com.gu_ppy.springboot02security.controller"))
            	.paths(PathSelectors.ant(""))//过滤一些接口
                .build();
    }
    //配置API信息
    @Bean
    ApiInfo apiInfo(){
        //作者信息
        Contact contact = new Contact("Pixcer","http://www.smileboy.club","[email protected]");
        return new ApiInfo("团团网API文档",
        "SkyLan 天空之岚",
        "0.1",
        "http://www.smileboy.club",//组织名字
        contact,
        "Apache 2.0",//开源版本
        "http://www.apache.org/licenses/LICENSE-2.0",
        new ArrayList());
    }
}
- 在yml文件中配置开发环境
spring:
	  profiles:
    		active: dev  #配置环境dev,在项目部署时,修改其环境
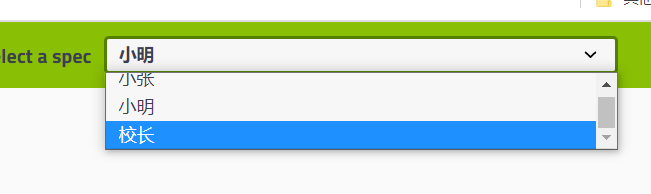
9.5 文档分组
- 配置多个Docket实例
@Configuration
@EnableSwagger2  //开启swagger
public class SwaggerConfig  {

    @Bean
    public Docket docket1(){
        return new Docket(DocumentationType.SWAGGER_2).groupName("小明");
    }

    @Bean
    public Docket docket2(){
        return new Docket(DocumentationType.SWAGGER_2).groupName("小张");
    }
    // More Docket Instance...
}
- 分组展示
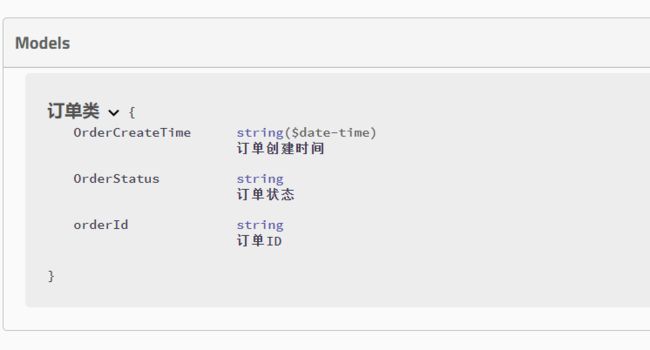
9.6 实体类注释
//或@Api("注释")
@ApiModel("订单类")
public class Order {
    //修饰符为private会被忽略
    @ApiModelProperty("订单ID")
    public String orderId;
    @ApiModelProperty("订单创建时间")
    public Date OrderCreateTime;
    @ApiModelProperty("订单状态")
    public String OrderStatus;
}
- 要在swagger显示,可在controller中返回其实体类
@GetMapping("/getUser")
public Order getUser() {
    return new Order();//返回一个实体类,则在swaggermodel上会显示该Api
}
- 注释显示
9.7 Controller添加注释
@ApiOperation:注释方法名/注释请求@ApiParam:注释参数
 @ApiOperation("获取订单信息")
@GetMapping("/getUser")
public Order getUser(@ApiParam("订单名") String name) {
    return new Order();//返回一个实体类,则在swaggermodel上会显示该Api
}
ApiImplicitParams:多个参数详解
@ApiOperation(value = "审核商品",notes = "审核商品信息")
@PutMapping("/review")
@ApiImplicitParams({
    @ApiImplicitParam(name = "id",value="商品ID",paramType = "form",required = true),
    @ApiImplicitParam(name = "review",value="商品审核字段 传入0为未通过 1为通过",paramType = "form",required = true)
})
public R<Object> review(@RequestParam("id") Integer id,@RequestParam("review") Integer review){
    goodsService.review(id,review);
    return new R<>("商品已通过审核");
}
9.9 Swagger调试功能
- Note:Get方法在调试中不允许有body
10.邮件
10.1 导入邮件依赖
<dependency>
    <groupId>org.springframework.bootgroupId>
    <artifactId>spring-boot-starter-mailartifactId>
dependency>
10.2 配置yaml文件
spring:
    #配置邮件
  mail:
    username: [email protected]
    password: wxbbtpniitebe
    protocol: smtp
    properties:   # QQ邮箱的加密
      mail:
        smtp:
          ssl:
            enable: true
    host: smtp.qq.com
    default-encoding: utf-8
10.3 发送简单邮件
- 执行异步需要在Spring Boot启动类上加上
@EableAsync注解
@Autowired
JavaMailSenderImpl mailSender;
@Async
public void SendEmail(){
    SimpleMailMessage message = new SimpleMailMessage();
    message.setFrom("[email protected]");//setFrom不能乱设置,必须为邮箱格式
    message.setSubject("警告⚠");
    //1302
    message.setTo("[email protected]");
    message.setText("你已被通缉!请联系我给你解除封锁.");

    mailSender.send(message);
}
10.4 发送Mime邮件
@Autowired
JavaMailSenderImpl mailSender;
@Async
public void SendMimeEmail() throws MessagingException {
MimeMessage message = mailSender.createMimeMessage();
//通过Helper的重载构造器来配置相应参数
MimeMessageHelper helper = new MimeMessageHelper(message,true);
helper.setSubject("666666");
helper.setText("皮亚二,原来是你!
",true);
//添加附件
helper.addAttachment("1.png",new File("C:\\Users\\gu-ppy\\Pictures\\portrait.png"));
helper.setTo("[email protected]");
helper.setFrom("[email protected]");
mailSender.send(message);
}
11.异步任务
@Async : 此注解用于标注方法异步执行
@EnableAsync : 用于开启异步注解
12.定时任务
- TaskScheduler:任务计划者
@Scheduled : 标注定时任务,可用cron表达式描述时间
@EnableScheduling : 开启定时任务注解
- cron: [秒 分 时 日 月 星期]
@Scheduled(cron="30 10 10 * * ?"):表示每天十点十分三十秒执行该定时任务@Scheduled(cron="30 10 10 ? * 1-6"):表示每个星期一到星期六的十点十分三十秒执行@Scheduled(cron="0/30 * * * * ?"):每隔三十秒执行一次
13.IDEA热部署配置
13.1 添加devTool
- 添加依赖
<dependency>
    <groupId>org.springframework.bootgroupId>
    <artifactId>spring-boot-devtoolsartifactId>
    <scope>runtimescope>
    <optional>trueoptional>
dependency>
- 添加插件
<plugin>
    <groupId>org.springframework.bootgroupId>
    <artifactId>spring-boot-maven-pluginartifactId>
    <configuration>
        <fork>truefork>
        <addResources>trueaddResources>
    configuration>
plugin>
13.2 配置热部署
下面两种配置方式选一种即可
- properties文件配置
# 热部署开关,false即不启用热部署
spring.devtools.restart.enabled: true

# 指定热部署的目录
#spring.devtools.restart.additional-paths: src/main/java

# 指定目录不更新
spring.devtools.restart.exclude: test/**
- yaml文件配置
#配置热部署
  devtools:
    restart:
      enabled: true
      exclude: test/**
13.3 设置IDEA
如果是idea,需要改以下两个地方:
1、勾上自动编译或者手动重新编译
File > Settings > Build, Execution, Deployment > Compiler-Build Project automatically
2、注册
factId>spring-boot-devtools
runtime
true
- 添加插件

```xml

    org.springframework.boot
    spring-boot-maven-plugin

        true
        true
13.2 配置热部署
下面两种配置方式选一种即可
- properties文件配置
# 热部署开关,false即不启用热部署
spring.devtools.restart.enabled: true

# 指定热部署的目录
#spring.devtools.restart.additional-paths: src/main/java

# 指定目录不更新
spring.devtools.restart.exclude: test/**
- yaml文件配置
#配置热部署
  devtools:
    restart:
      enabled: true
      exclude: test/**
13.3 设置IDEA
如果是idea,需要改以下两个地方:
1、勾上自动编译或者手动重新编译
File > Settings > Build, Execution, Deployment > Compiler-Build Project automatically
2、注册
ctrl + shift + alt + / > Registry > 勾选Compiler autoMake allow when app running