Java配置方式使用Spring MVC
文章目录
- 基于Java配置方式使用Spring MVC
-
- 一、创建Maven项目
- 二、添加相关依赖
- 三、创建日志属性文件
- 四、创建首页文件
- 五、创建Spring MVC配置类
- 六、创建Web应用初始化配置类
- 七、创建演示控制器
- 八、配置Tomcat服务器
- 九、启动服务器,查看效果
基于Java配置方式使用Spring MVC
上一节,我们学习了如何基于XML配置与注解的方式使用Spring MVC,涉及到三个XML配置文件:Spring配置文件(spring-config.xml)、Spring MVC配置文件(spring-mvc-config.xml)、Web部署描述文件(web.xml),这一节,我们通过案例学习如何基于Java配置类与注解的方式使用Spring MVC,只有Java配置类,没有XML配置文件。
一、创建Maven项目
Maven项目 - SpringMvcDemo02

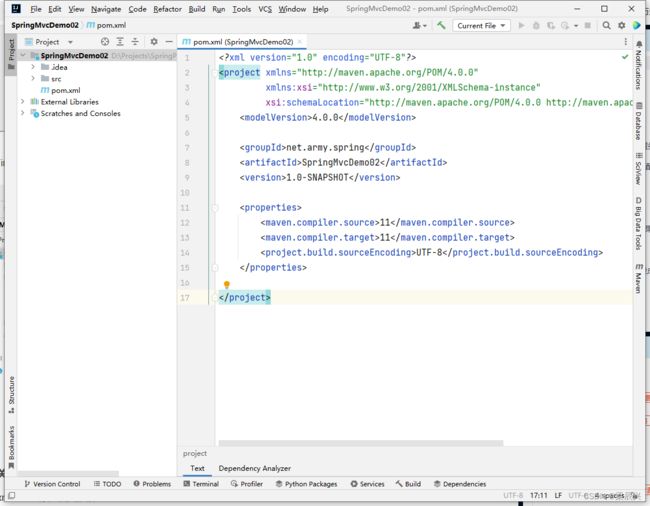
二、添加相关依赖
在pom.xml文件里添加相关依赖

<project xmlns="http://maven.apache.org/POM/4.0.0"
         xmlns:xsi="http://www.w3.org/2001/XMLSchema-instance"
         xsi:schemaLocation="http://maven.apache.org/POM/4.0.0
         http://maven.apache.org/xsd/maven-4.0.0.xsd">
    <modelVersion>4.0.0modelVersion>

    <groupId>net.army.springgroupId>
    <artifactId>SpringMvcDemo02artifactId>
    <version>1.0-SNAPSHOTversion>

    <properties>

        <spring.version>5.3.25spring.version>
    properties>

    <dependencies>

        <dependency>
            <groupId>org.springframeworkgroupId>
            <artifactId>spring-coreartifactId>
            <version>${spring.version}version>
        dependency>

        <dependency>
            <groupId>org.springframeworkgroupId>
            <artifactId>spring-beansartifactId>
            <version>${spring.version}version>
        dependency>

        <dependency>
            <groupId>org.springframeworkgroupId>
            <artifactId>spring-contextartifactId>
            <version>${spring.version}version>
        dependency>

        <dependency>
            <groupId>org.springframeworkgroupId>
            <artifactId>spring-testartifactId>
            <version>${spring.version}version>
        dependency>

        <dependency>
            <groupId>org.springframeworkgroupId>
            <artifactId>spring-jdbcartifactId>
            <version>${spring.version}version>
        dependency>

        <dependency>
            <groupId>mysqlgroupId>
            <artifactId>mysql-connector-javaartifactId>
            <version>5.1.49version>
        dependency>

        <dependency>
            <groupId>com.alibabagroupId>
            <artifactId>druidartifactId>
            <version>1.1.24version>
        dependency>

        <dependency>
            <groupId>log4jgroupId>
            <artifactId>log4jartifactId>
            <version>1.2.17version>
        dependency>

        <dependency>
            <groupId>org.springframeworkgroupId>
            <artifactId>spring-aopartifactId>
            <version>${spring.version}version>
        dependency>

        <dependency>
            <groupId>aspectjgroupId>
            <artifactId>aspectjrtartifactId>
            <version>1.5.4version>
        dependency>
        <dependency>
            <groupId>org.aspectjgroupId>
            <artifactId>aspectjweaverartifactId>
            <version>1.9.6version>
            <scope>runtimescope>
        dependency>

        <dependency>
            <groupId>junitgroupId>
            <artifactId>junitartifactId>
            <version>4.13version>
            <scope>testscope>
        dependency>

        <dependency>
            <groupId>org.springframeworkgroupId>
            <artifactId>spring-webartifactId>
            <version>${spring.version}version>
        dependency>

        <dependency>
            <groupId>org.springframeworkgroupId>
            <artifactId>spring-webmvcartifactId>
            <version>${spring.version}version>
        dependency>

        <dependency>
            <groupId>javax.servletgroupId>
            <artifactId>jstlartifactId>
            <version>1.2version>
        dependency>

        <dependency>
            <groupId>javax.servletgroupId>
            <artifactId>javax.servlet-apiartifactId>
            <version>3.1.0version>
            <scope>providedscope>
        dependency>

        <dependency>
            <groupId>com.fasterxml.jackson.coregroupId>
            <artifactId>jackson-coreartifactId>
            <version>2.9.7version>
        dependency>
        <dependency>
            <groupId>com.fasterxml.jackson.coregroupId>
            <artifactId>jackson-databindartifactId>
            <version>2.9.7version>
        dependency>
        <dependency>
            <groupId>com.fasterxml.jackson.coregroupId>
            <artifactId>jackson-annotationsartifactId>
            <version>2.9.7version>
        dependency>

        <dependency>
            <groupId>com.fasterxml.jackson.dataformatgroupId>
            <artifactId>jackson-dataformat-xmlartifactId>
            <version>2.5.3version>
        dependency>
    dependencies>
project>
单击刷新按钮,下载(更新)依赖

查看依赖

三、创建日志属性文件
在resources目录里创建log4j.properties

四、创建首页文件
在resources里创建templates子目录,然后在里面创建index.jsp
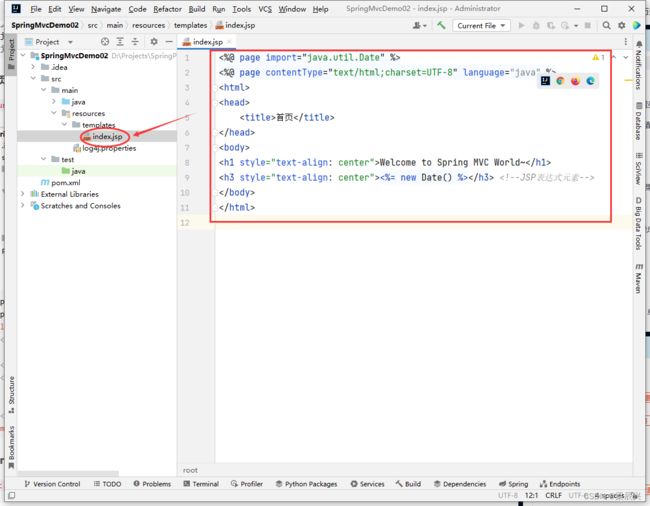
<%@ page import="java.util.Date" %>
<%@ page contentType="text/html;charset=UTF-8" language="java" %>
<html>
    <head>
        <title>首页title>
    head>
    <body>
        <h1 style="text-align: center">Welcome to Spring MVC World~h1>
        <h3 style="text-align: center"><%= new Date() %>h3>
    body>
html>
五、创建Spring MVC配置类
创建net.army.spring.config包,然后在里面创建SpringMvcConfig类

package net.army.spring.config;

import org.springframework.context.annotation.Bean;
import org.springframework.context.annotation.ComponentScan;
import org.springframework.context.annotation.Configuration;
import org.springframework.web.servlet.config.annotation.EnableWebMvc;
import org.springframework.web.servlet.view.InternalResourceViewResolver;
import org.springframework.web.servlet.view.JstlView;

/**
 * 作者:梁辰兴
 * 日期:2023/5/11
 * 功能:Spring MVC配置类
 */
@Configuration // 表明当前类是配置类
@EnableWebMvc  // 启用Web MVC功能
@ComponentScan("net.army.spring") // 组件扫描
public class SpringMvcConfig {
    // 定义内部资源视图解析器
    @Bean
    public InternalResourceViewResolver viewResolver() {
        // 创建内部资源视图解析器对象
        InternalResourceViewResolver viewResolver = new InternalResourceViewResolver();
        // 设置内部资源视图解析器对象属性
        viewResolver.setViewClass(JstlView.class); // 设置视图类
        viewResolver.setPrefix("/WEB-INF/classes/templates/"); // 设置前缀
        viewResolver.setSuffix(".jsp"); // 设置后缀
        // 返回内部资源视图解析器对象
        return viewResolver;
    }
}
六、创建Web应用初始化配置类
现在Java配置方式在逐步取代XML配置方式,WebApplicationInitializer接口可以看做是web.xml的替代,通过实现WebApplicationInitializer接口,在其中可以添加servlet,listener等,在加载Web项目时会加载这个接口实现类,从而起到web.xml相同的作用。
在net.army.spring.config包里里创建MyWebAppInitializer类

package net.army.spring.config;

import org.springframework.web.WebApplicationInitializer;
import org.springframework.web.context.support.AnnotationConfigWebApplicationContext;
import org.springframework.web.servlet.DispatcherServlet;

import javax.servlet.ServletContext;
import javax.servlet.ServletException;
import javax.servlet.ServletRegistration;

/**
 * 作者:梁辰兴
 * 日期:2023/5/11
 * 功能:Web应用初始化配置类
 */
public class MyWebAppInitializer implements WebApplicationInitializer {
    @Override
    public void onStartup(ServletContext servletContext) throws ServletException {
        // 创建Web应用容器(基于注解配置类的Web应用容器)
        AnnotationConfigWebApplicationContext context = new AnnotationConfigWebApplicationContext();
        // 注册配置类
        context.register(SpringMvcConfig.class); // 对应先前的spring-mvc-config.xml文件
        // 绑定当前的ServletContext对象 - 方法的参数(servletContext)
        context.setServletContext(servletContext);
        // 注册Spring MVC的前端控制器(DispatcherServlet)
        ServletRegistration.Dynamic servlet = servletContext.addServlet("dispatcher", new DispatcherServlet(context));
        // 过滤一切资源请求
        servlet.addMapping("/");
        // 设置启动加载顺序
        servlet.setLoadOnStartup(1);
    }
}
七、创建演示控制器
创建net.army.spring.controller子包,然后在里面创建DemoController类

package net.army.spring.controller;

import org.springframework.stereotype.Controller;
import org.springframework.web.bind.annotation.GetMapping;

/**
 * 作者:梁辰兴
 * 日期:2023/5/11
 * 功能:演示控制器
 */
@Controller
public class DemoController {
    @GetMapping("/index")
    public String index() {
        // 返回逻辑视图名
        return "index";
    }
}
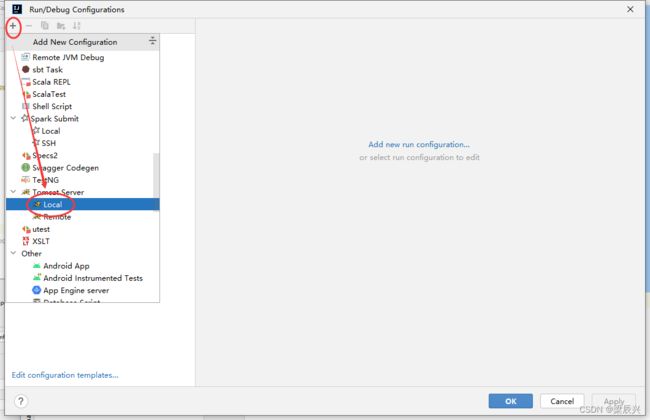
八、配置Tomcat服务器
单击【Current File】下的【Edit Configuration…】
 单击加号,【Local】
配置如下图所示,最后单击【Fix】
 单击【Artifacts】-【+】-【Web Application:Exploded】
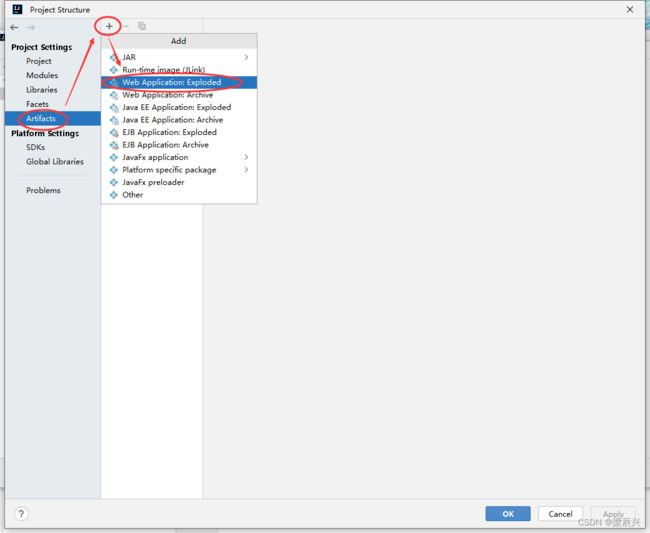
输入项目名称:SpringMvcDemo02,添加依赖到输出目录和项目编译的输出,单击【Put into /WEB-INF/lib】
 单击【OK】按钮

此时可以看到SpringMvcDemo02就已经部署到服务器上了

切换到【Server】选项卡

九、启动服务器,查看效果
访问:http://localhost:8080/SpringMvcDemo02/index

修改演示控制器,修改映射路径

重启服务器,访问:http://localhost:8080/SpringMvcDemo02
