本地化SilverLight应用程序(多语言支持)
利用资源文件(Resources File)使SilverLight支持多语言。
1. 创建一个SilverLight应用程序。
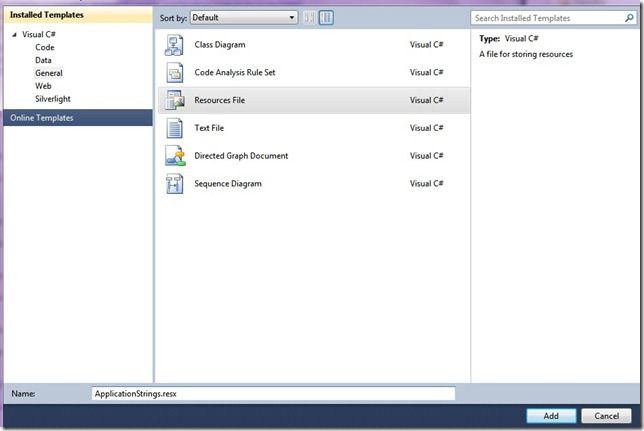
2. 添加一个资源文件,命名为ApplicationStrings.resx。
3. 添加String类型的资源,这里添加 UsernameString:User Name。设置Access Modeifer为Public。
4. 为了让程序可以支持中文,再添加一个资源文件:ApplicationString.zh-CN.resx。这里的zh-CN就是语言区域性名称。关于这个名称可以查阅MSDN。
5. 为这个资源文件添加同样的资源,只是这次是用中文写的。UsernameString:姓 名。确保Access Modeifer为No code generation。
6. 使用资源来显示文本内容。这里可以通过代码实现,也可以做一个ResourcesWrapper的类,用于直接Binding。这里是用Binding的方式。
// ResourcesWrapper Class


public sealed class ResourcesWrapper

    {

        private static Resources.ApplicationStrings applicationStrings = new Resources.ApplicationStrings();


        public Resources.ApplicationStrings ApplicationStrings

        {

            get { return applicationStrings; }

        }

    }


// Add into ResourceDictionary


<local:ResourcesWrapper x:Key="ResourcesWrapper" />


// set Binding in UI element


<TextBlock Text="{Binding Source={StaticResource ResourcesWrapper}, Path=ApplicationStrings.UserNameString}"

                   Grid.Row="0" Grid.Column="0" />
7. 为了让Silverlight在XAP文件中加入支持的语言资源,我们还需要编辑一下.csproj文件。Unload SilverLight 工程,右键编辑这个文件,在<SupportedCultures>节点中,添加支持的语言,之间用分号隔开。例如:
<SupportedCultures>en-US;zh-CN;</SupportedCultures>
8. 好了,让我们重新加载这个工程,并且编译一下。现在可以看到,在Debug目录下,多出来一个zh-CN的目录,这便是中文支持的语言包了。为了确保XAP中也包含这个文件,可以将XAP用Zip解开,会看到同样包含这个目录。
9. 让我们试一下这个可不可行,直接运行。结果发现,显示出来的还是英文。哦,因为默认UI是显示英文的,修改App.xaml.cs,将UI语言和区域语言一致,当然,这里也可以直接指定使用其他语言。
        private void Application_Startup(object sender, StartupEventArgs e)

        {

            Thread.CurrentThread.CurrentUICulture = CultureInfo.CurrentCulture;


            this.RootVisual = new MainPage();

        }
好了,这样我们就可以让我们的SilverLight程序支持多国语言了。

