Redis
Redis
一、简介
Redis(Remote Dictionary Server),即远程字典服务,是一个开源的使用C语言编写的支持网络、可基于内存亦可持久化的日志型Key-Value非关系型数据库(NoSql)。
NoSQL最常见的解释是non-relational,Not Only SQL。超大规模和高并发的SNS类型的web2.0纯动态网站已经显得力不从心,出现了很多难以克服的问题,NoSQL数据库的产生就是为了解决大规模数据集合多重数据种类带来的挑战,特别是大数据应用难题。
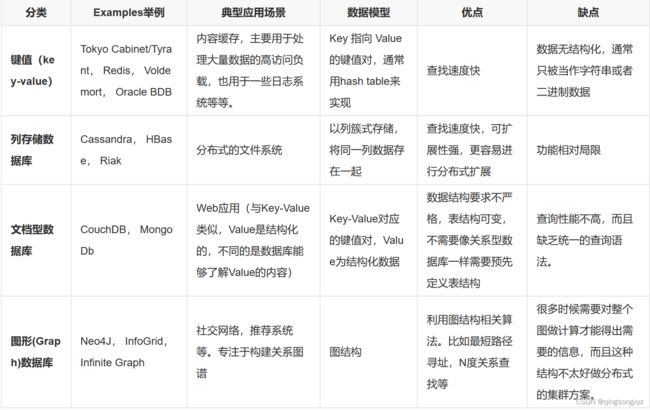
NoSql数据库分类:
二、Linux环境下安装Redis
下载链接:https://github.com/redis/redis/archive/7.0.0.tar.gz
上传到Linux环境下进行解压:
![]()
![]()
安装gcc:
安装需要的环境:
进入/usr/local/bin目录查看:
![]()
将redis.conf文件拷贝到/usr/local/bin目录下:
修改配置文件redis.conf,将其更改为后台启动:
通过指定的配置文件启动redis服务:
关机命令:shutdown
三、性能测试
本机测试100连接数10000请求数:
![]()
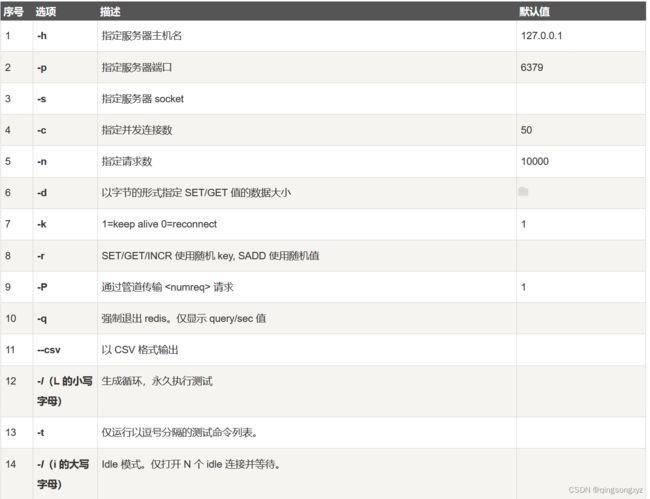
参数列表:
四、基本命令
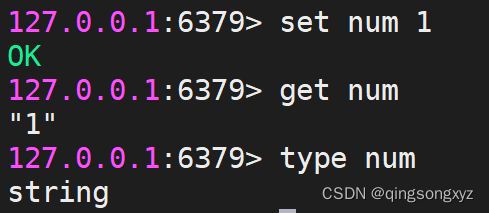
1.type
type 命令用于返回 key 所储存的值的类型。
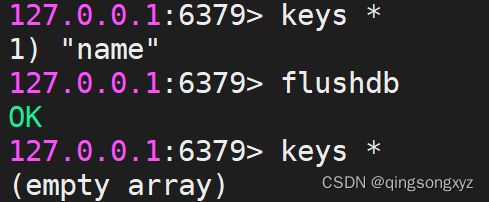
2.keys
keys 命令用于查找所有符合给定模式 pattern 的 key 。
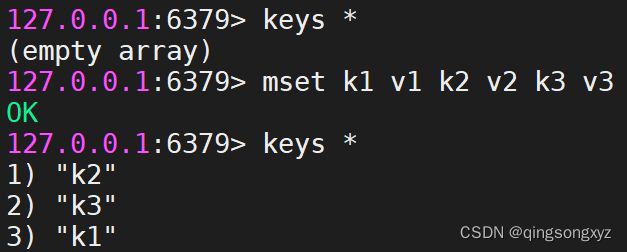
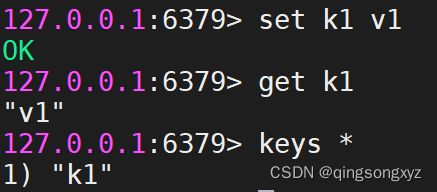
keys *查找数据库下所有的key值:
![]()
3.flushdb/flushall
flushdb 命令用于清空当前数据库的数据。
flushall 命令用于清空整个 Redis 服务器的数据(删除所有数据库的所有 key )。
4.rename
rename 命令用于修改 key 的名称 。
![]()
5.renamenx
renamenx 命令用于在新的 key 不存在时修改 key 的名称 。
修改成功时,返回 1 。 如果新的名称已经存在,返回 0 。
6.exists
exists 命令用于检查给定 key 是否存在。
7.del
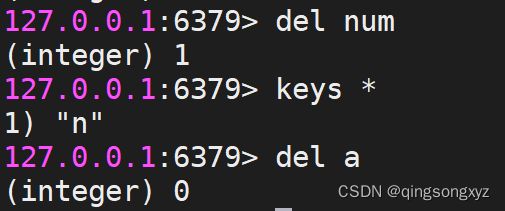
del 命令用于删除已存在的键。删除成功返回1,删除不存在的 key返回0 。
8.select
select 命令用于切换到指定的数据库,数据库索引号 index 用数字值指定,查看redis.conf文件,redis默认数据库数目为16,下标为0~15。
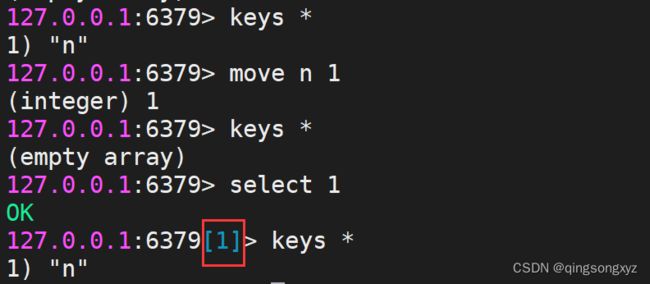
9.move
move 命令用于将当前数据库的 key 移动到给定的数据库 db 当中。
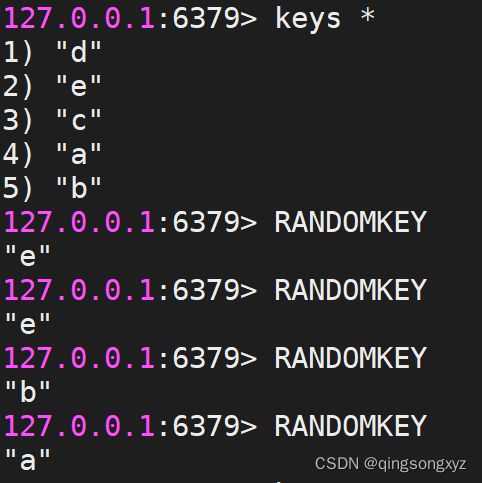
10.randomkey
randomkey 命令从当前数据库中随机返回一个 key 。
当数据库不为空时,返回一个 key 。 当数据库为空时,返回 nil 。
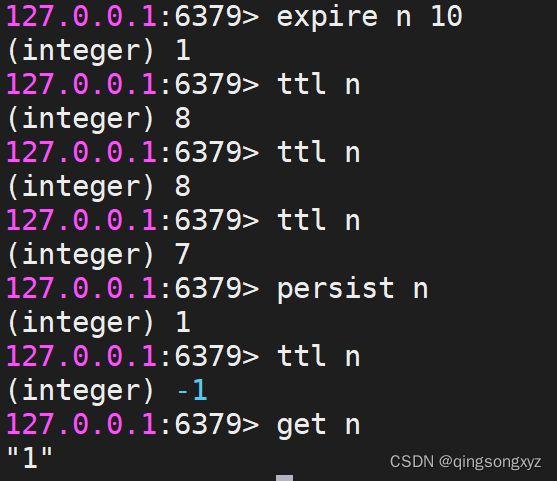
11.expire/ttl
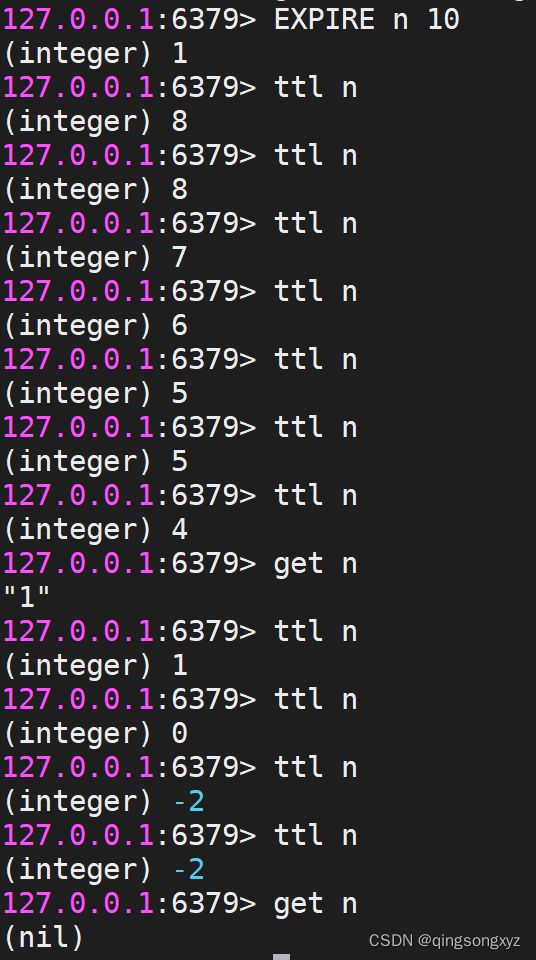
expire 命令用于设置 key 的过期时间。key 过期后将不再可用。
设置成功返回 1 ,当 key 不存在返回 0 。
ttl 命令以秒为单位返回 key 的剩余过期时间。
当 key 不存在时,返回 -2 。 当 key 存在但没有设置剩余生存时间时,返回 -1 。 否则,以毫秒为单位,返回 key 的剩余生存时间。
12.persist
persist 命令用于移除给定 key 的过期时间,使得 key 永不过期。
当过期时间移除成功时,返回 1 。 如果 key 不存在或 key 没有设置过期时间,返回 0 。
五、Redis 数据类型
1.String(Key-Value)
- set/get:
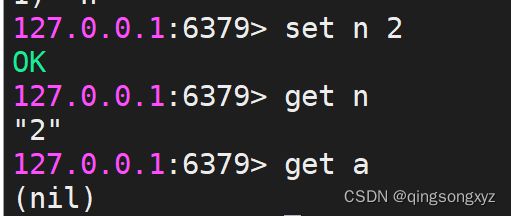
set 命令用于设置给定 key 的值。如果 key 已经存储其他值, set 就覆写旧值,且无视类型。
get 命令用于获取指定 key 的值。如果 key 不存在,返回 nil 。如果key 储存的值不是字符串类型,返回一个错误。
- setnx:
setnx(SET if Not eXists) 命令在指定的 key 不存在时,为 key 设置指定的值。
设置成功,返回 1 。 设置失败,返回 0 。
![]()
- setex:
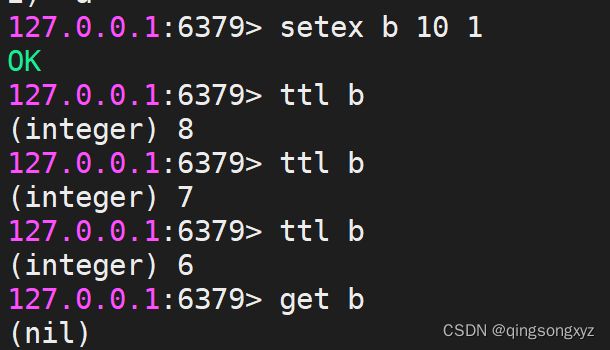
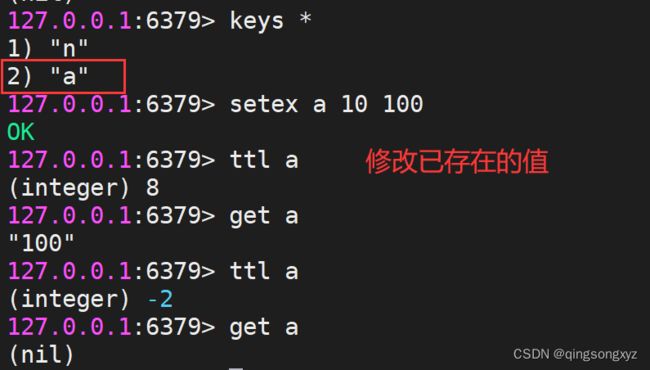
setex 命令为指定的 key 设置值及其过期时间。如果 key 存在, setex 命令将会替换旧的值。
- mset/mget:
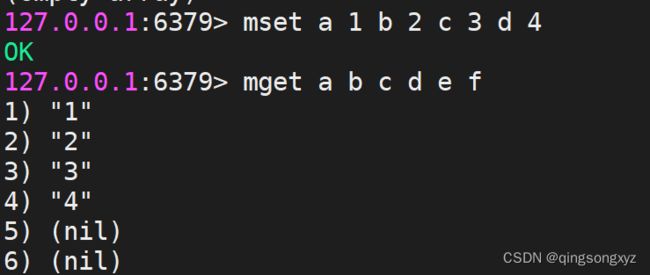
mset 命令用于同时设置一个或多个 key-value 对。
mget 命令返回所有(一个或多个)给定 key 的值。 如果给定的 key 里面,有某个 key 不存在,那么这个 key 返回特殊值 nil 。
- incr/decr:
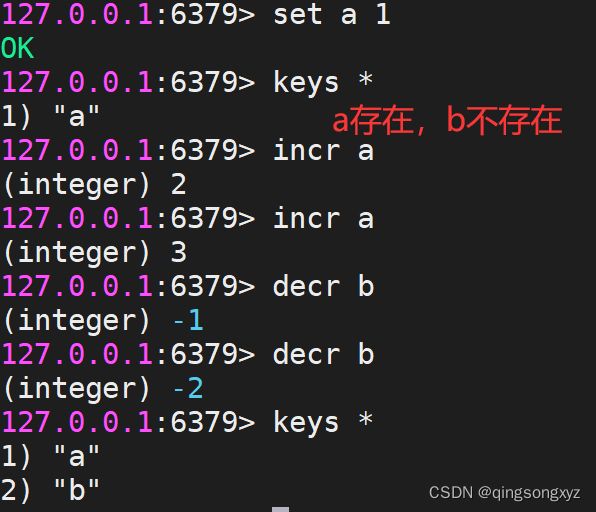
incr 命令将 key 中储存的数字值增一,decr 命令将 key 中储存的数字值减一。
如果 key 不存在,那么 key 的值会先被初始化为 0 ,然后再执行 INCR 操作。
如果值包含错误的类型,或字符串类型的值不能表示为数字,那么返回一个错误。
操作的值限制在 64 位(bit)有符号数字表示之内。
- incrBy/decrBy:
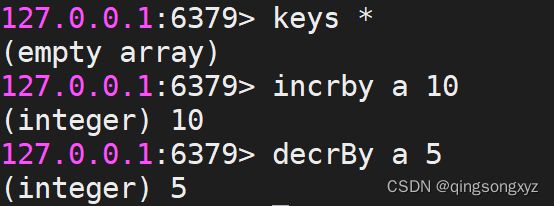
incrby 命令将 key 中储存的数字加上指定的增量值, decrby 命令将 key 所储存的值减去指定的减量值。
- strlen:
strlen 命令用于获取指定 key 所储存的字符串值的长度。
当 key 储存的不是字符串值时,返回一个错误。 当 key 不存在时,返回 0。
![]()
- setRange/getRange:
setrange 命令用指定的字符串覆盖给 key 所储存的字符串值,覆盖的位置从偏移量 offset 开始。
getrange 命令用于获取存储在指定 key 中字符串的子字符串。字符串的截取范围由 start 和 end 两个偏移量决定(包括 start 和 end 在内)。
- append:
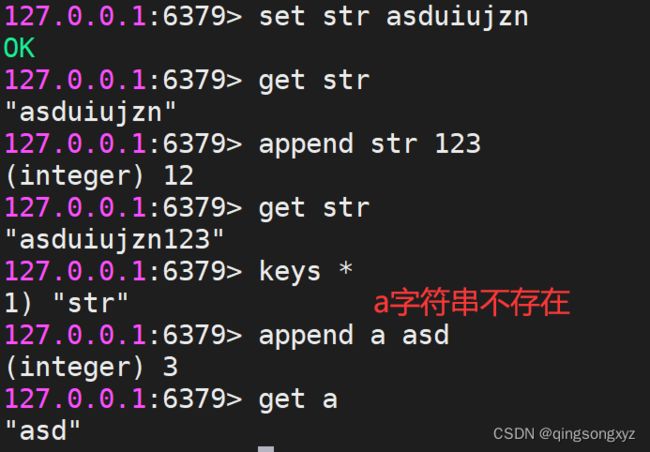
append 命令用于为指定的 key 追加值。
如果 key 已经存在并且是一个字符串, append 命令将 value 追加到 key 原来的值的末尾。
如果 key 不存在, append 就简单地将给定 key 设为 value ,就像执行 SET key value 一样。
- msetnx:
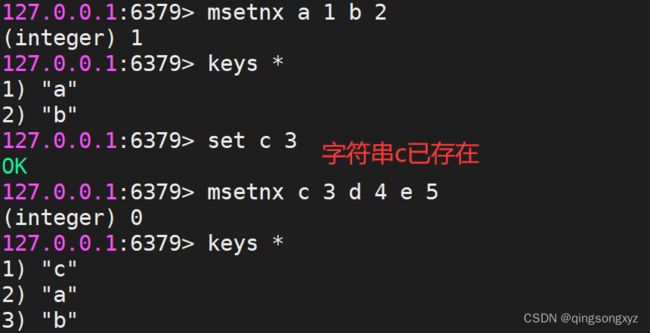
msetnx 命令用于所有给定 key 都不存在时,同时设置一个或多个 key-value 对。
当所有 key 都成功设置,返回 1 。 如果所有给定 key 至少有一个 key 已经存在,那么返回 0 。
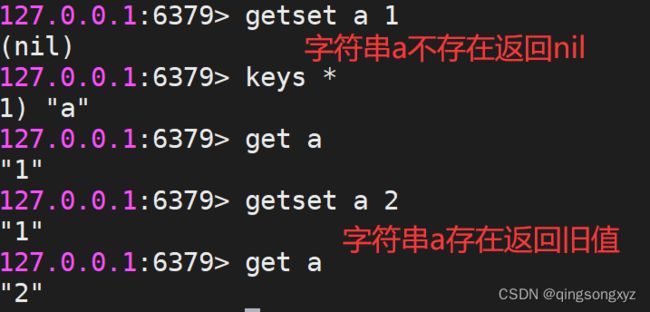
- getset:
getset 命令用于设置指定 key 的值,并返回 key 旧的值。
当 key 没有旧值时,即 key 不存在时,返回 nil 。
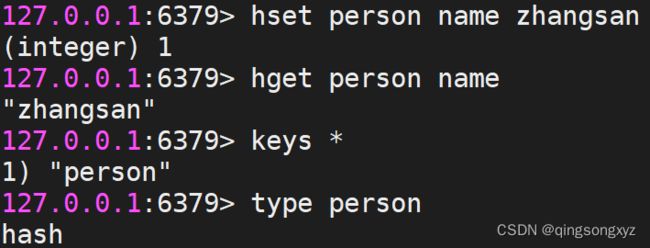
2.Hash(Key-Map)
- hset/hget:
hset 命令用于为哈希表中的字段赋值 。
如果哈希表不存在,一个新的哈希表被创建并进行 hset 操作。
如果字段已经存在于哈希表中,旧值将被覆盖。
hget 命令用于返回哈希表中指定字段的值。
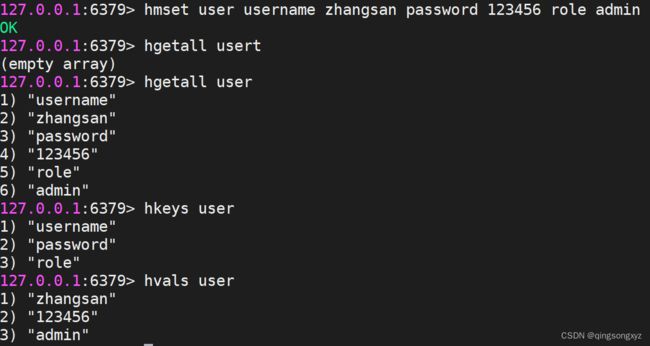
- hmset/hmget:
hmset 命令用于同时将多个 field-value (字段-值)对设置到哈希表中。
hmget 命令用于返回哈希表中,一个或多个给定字段的值。
- hsetnx:
hsetnx 命令用于为哈希表中不存在的的字段赋值 。
如果哈希表不存在,一个新的哈希表被创建并进行 hset 操作。
如果字段已经存在于哈希表中,操作无效。
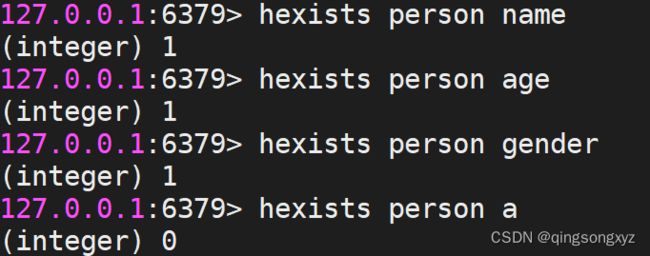
- hexists:
hexists 命令用于查看哈希表的指定字段是否存在。
如果哈希表含有给定字段,返回 1 。 如果哈希表不含有给定字段,或 key 不存在,返回 0 。
- hincrby:
hincrby 命令用于为哈希表中的字段值加上指定增量值。
增量也可以为负数,相当于对指定字段进行减法操作。
如果哈希表的 key 不存在,一个新的哈希表被创建并执行 hincrby 命令。
如果指定的字段不存在,那么在执行命令前,字段的值被初始化为 0 。
对一个储存字符串值的字段执行 hincrby 命令将造成一个错误。
本操作的值被限制在 64 位(bit)有符号数字表示之内。
- hlen:
hlen 命令用于获取哈希表中字段的数量。
- hdel:
hdel 命令用于删除哈希表 key 中的一个或多个指定字段,不存在的字段将被忽略。
- hgetall/hkeys/hvals:
hgetall 命令用于返回哈希表中,所有的字段和值。
hkeys 命令用于获取哈希表中的所有字段名,当 key 不存在时,返回一个空列表。
hvals 命令返回哈希表所有字段的值,当 key 不存在时,返回一个空表。
3.List
- Lpush/Rpush:
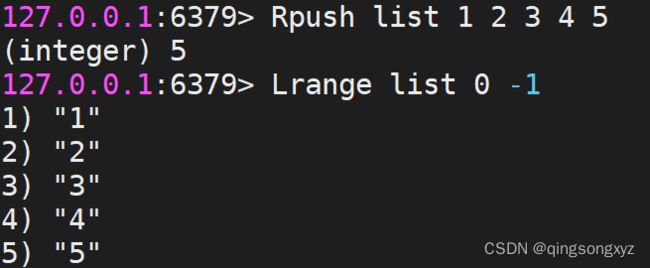
Lpush 命令将一个或多个值插入到列表头部。 Rpush 命令将一个或多个值插入到列表的尾部。
如果 key 不存在,一个空列表会被创建并执行 Lpush 操作。
当 key 存在但不是列表类型时,返回一个错误。
- Lpop/Rpop:
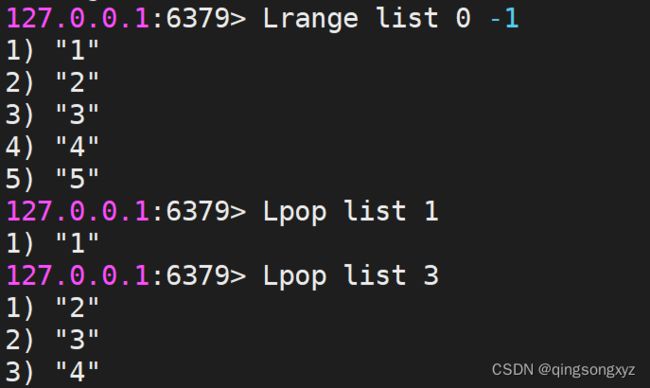
Lpop 命令用于从列表头部移除一个或多个元素并返回移除的元素。
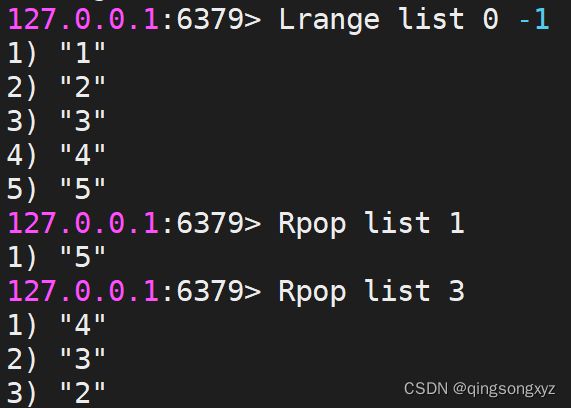
Rpop 命令用于从列表尾部移除一个或多个元素并返回移除的元素。
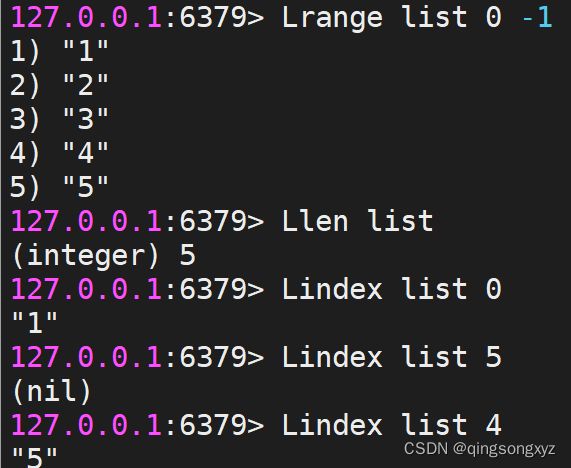
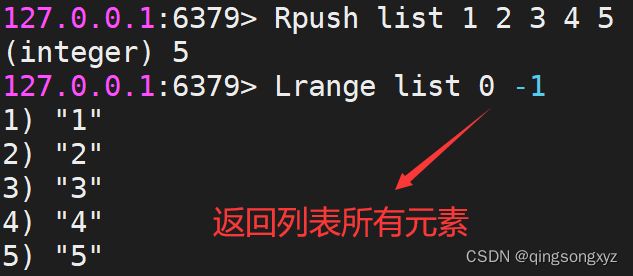
- Lrange:
Lrange 返回列表中指定区间内的元素,区间以偏移量 start 和 end 指定。
其中 0 表示列表的第一个元素,也可以使用负数下标,以 -1 表示列表的最后一个元素。
- Llen:
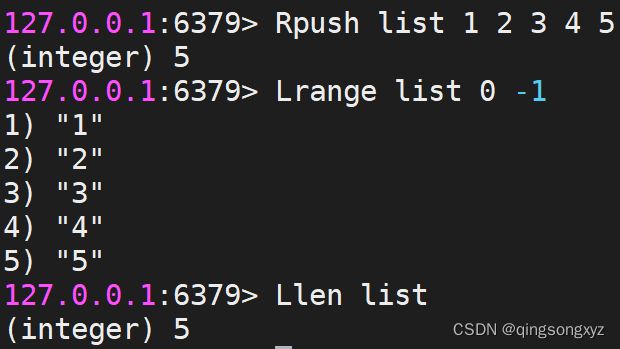
Llen 命令用于返回列表的长度。
如果列表 key 不存在,则返回 0 。 如果 key 不是列表类型,返回一个错误。
- Lindex:
Lindex 命令用于通过索引获取列表中的元素。
也可以使用负数下标,以 -1 表示列表的最后一个元素。
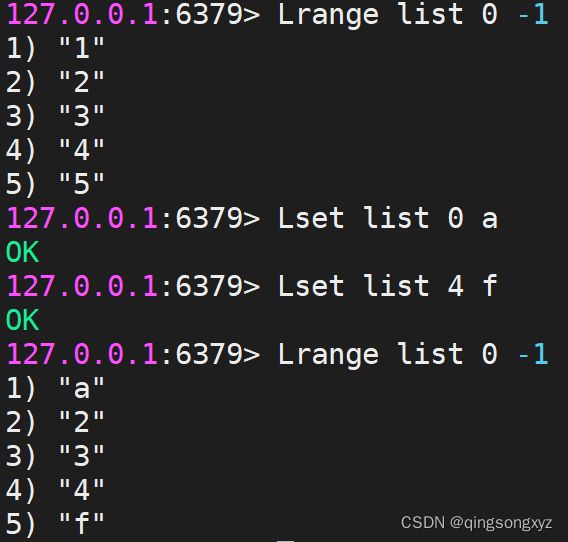
- Lset:
Lset 通过索引来设置元素的值。
当索引参数超出范围,或对一个空列表进行 LSET 时,返回一个错误。
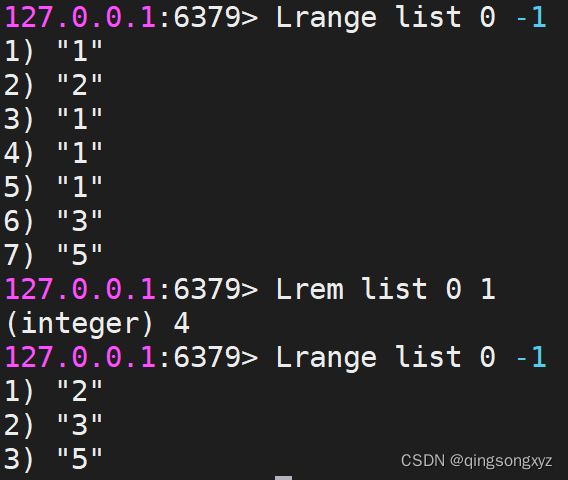
- Lrem:
Lrem 根据参数 count 的值,移除列表中与参数 value 相等的元素。
count > 0 : 从表头开始向表尾搜索,移除与 value 相等的元素,数量为 count 。
count < 0 : 从表尾开始向表头搜索,移除与 value 相等的元素,数量为 count 的绝对值。
count = 0 : 移除表中所有与 value 相等的值。
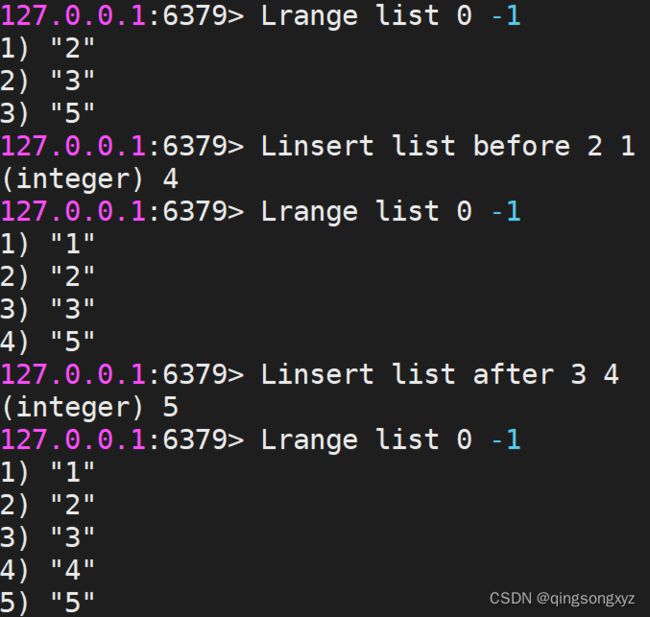
- Linsert:
Linsert 命令用于在列表的元素前或者后插入元素。
当指定元素不存在于列表中时,不执行任何操作。
当列表不存在时,被视为空列表,不执行任何操作。
如果 key 不是列表类型,返回一个错误。
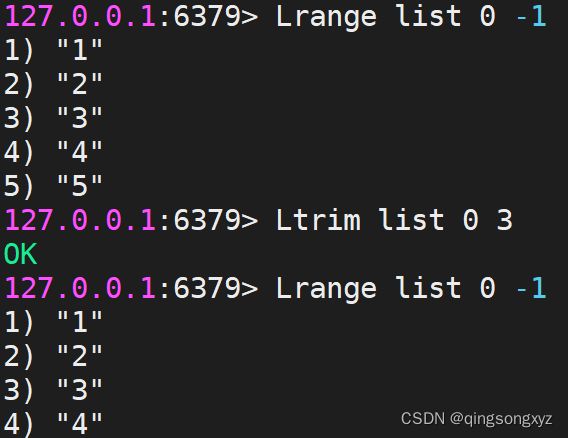
- Ltrim:
Ltrim 对一个列表进行修剪(trim),就是说,让列表只保留指定区间内的元素,不在指定区间之内的元素都将被删除。
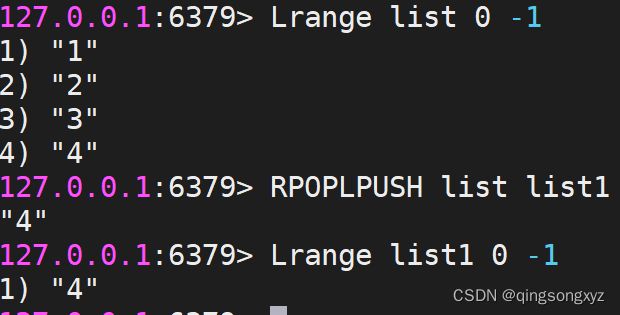
- Rpoplpush:
Rpoplpush 命令用于移除列表的最后一个元素,并将该元素添加到另一个列表并返回。
4.Set
- Sadd:
Sadd 命令将一个或多个成员元素加入到集合中,已经存在于集合的成员元素将被忽略。
假如集合 key 不存在,则创建一个只包含添加的元素作成员的集合。
当集合 key 不是集合类型时,返回一个错误。
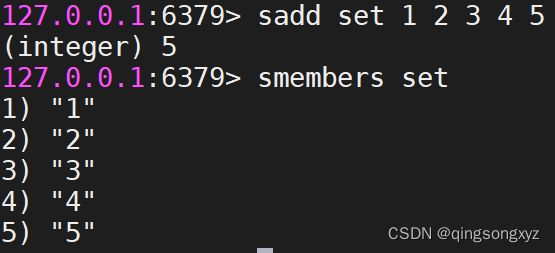
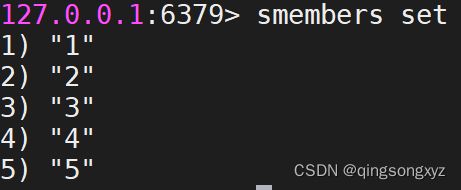
- Smembers:
Smembers 命令返回集合中的所有的成员。 不存在的集合 key 被视为空集合。
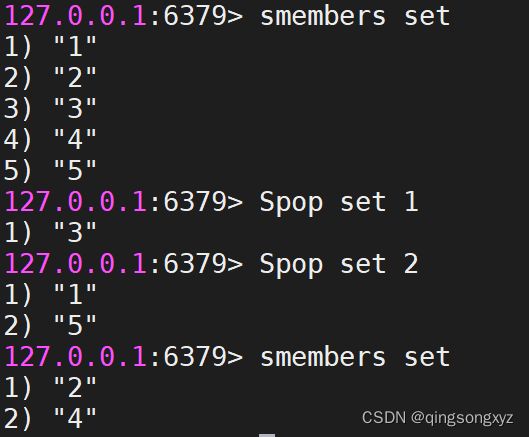
- Spop:
Spop 命令用于移除并返回集合中的一个或多个随机元素。当集合不存在或是空集时,返回 nil 。
- Srem:
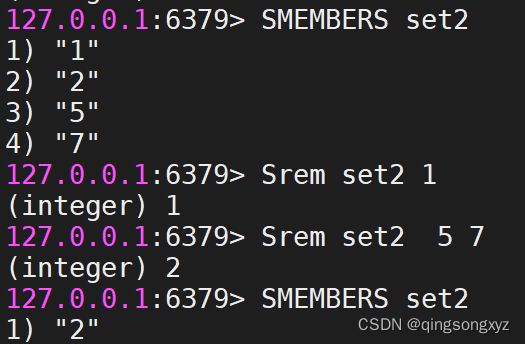
Srem 命令用于移除集合中的一个或多个指定元素,不存在的成员元素会被忽略。
- Scard:
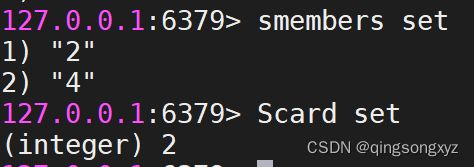
Scard 命令返回集合中元素的数量。当集合 key 不存在时,返回 0 。
- Sismember:
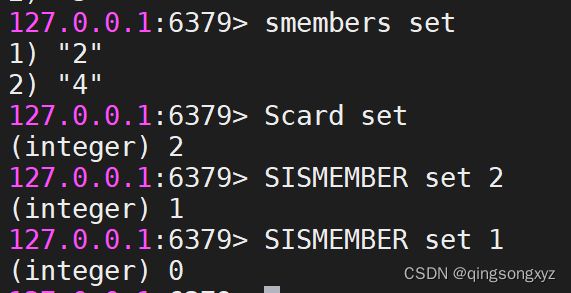
Sismember 命令判断成员元素是否是集合的成员。
如果成员元素是集合的成员,返回 1 。 如果成员元素不是集合的成员,或 key 不存在,返回 0
- Sunion:
Sunion 命令返回给定集合的并集。不存在的集合 key 被视为空集。
![]()
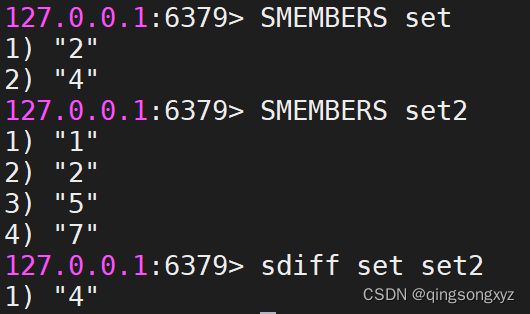
- Sdiff:
Sdiff 命令返回给定集合之间的差集。不存在的集合 key 将视为空集。
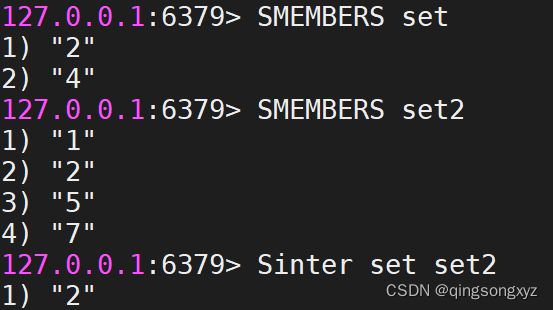
- Sinter:
Sinter 命令返回给定所有给定集合的交集。 不存在的集合 key 被视为空集。 当给定集合当中有一个空集时,
结果也为空集。
- Smove:
Smove 命令将指定成员 member 元素从 source 集合移动到 destination 集合,是原子性操作。
如果 source 集合不存在或不包含指定的 member 元素,则 Smove 命令不执行任何操作,仅返回 0 。否
则, member 元素从 source 集合中被移除,并添加到 destination 集合中去。当 destination 集合已经包含
member 元素时, Smove 命令只是简单地将 source 集合中的 member 元素删除。当 source 或 destination
不是集合类型时,返回一个错误。
![]()
5.Zset(sorted set)
- Zadd:
Zadd 命令用于将一个或多个成员元素及其值加入到有序集当中。
如果某个成员已经是有序集的成员,那么更新这个成员的值,并通过重新插入这个成员元素,来保证该成员
在正确的位置上。分数值可以是整数值或双精度浮点数。如果有序集合 key 不存在,则创建一个空的有序集
并执行 ZADD 操作。当 key 存在但不是有序集类型时,返回一个错误。
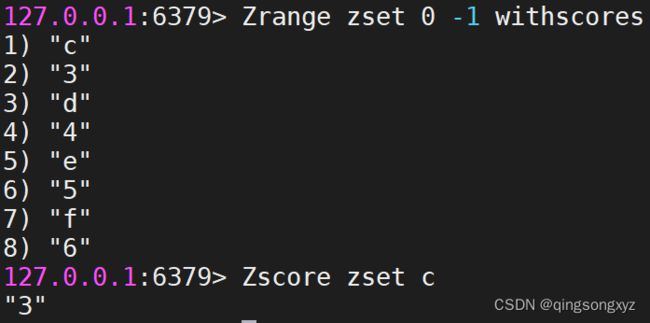
- Zrange:
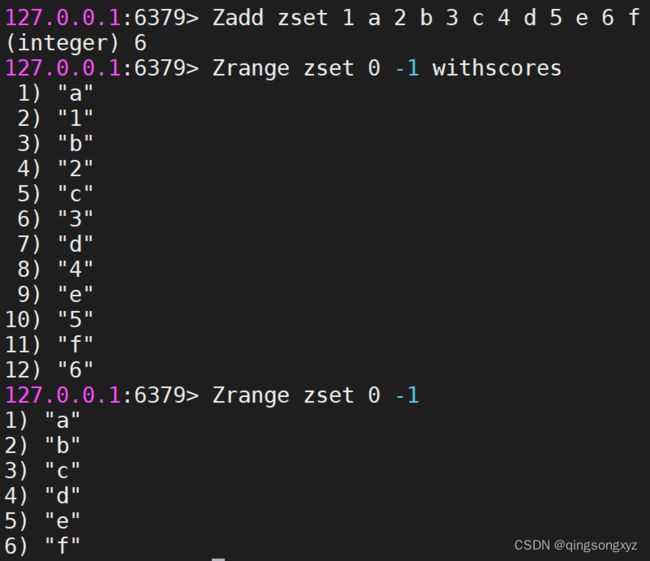
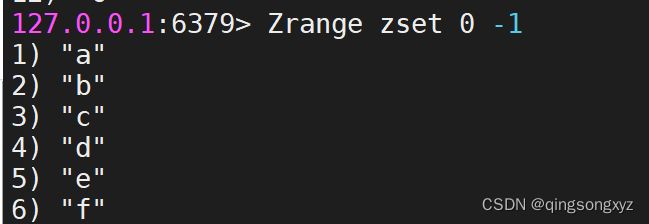
Zrange 返回有序集中,指定区间内的成员。
其中成员的位置按分数值递增(从小到大)来排序。
具有相同分数值的成员按字典顺序来排列。
以 0 表示有序集第一个成员,以 -1 表示最后一个成员
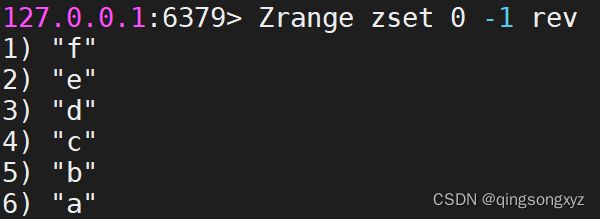
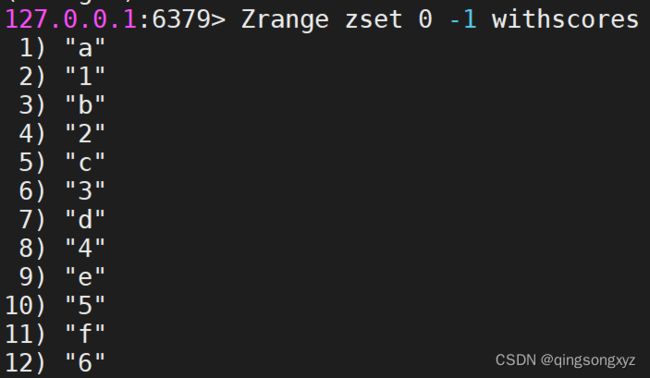
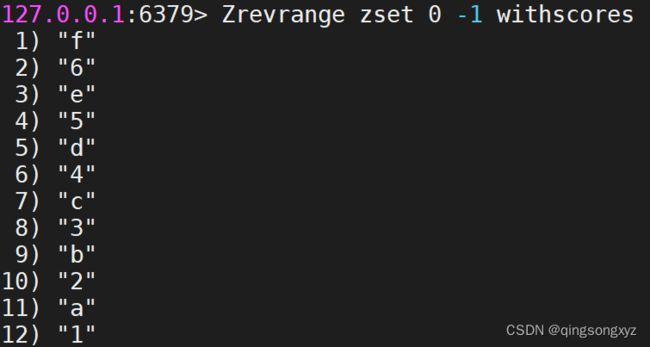
加上rev 参数颠倒顺序,加上withscores带值显示
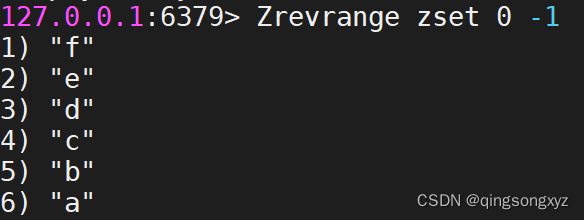
- Zrevrange:
Zrevrange 命令返回有序集中,指定区间内的成员。
其中成员的位置按分数值递减(从大到小)来排列。
- ZrangeByscore:
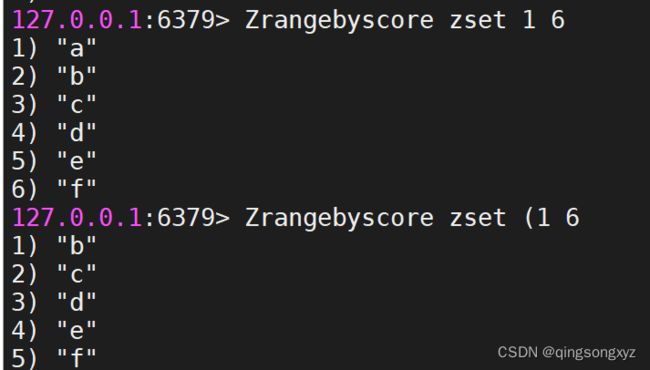
Zrangebyscore 返回有序集合中指定分数区间的成员列表。
有序集成员按分数值递增(从小到大)次序排列。
默认情况下,区间的取值使用闭区间,通过给参数前增加 (变成开区间
- ZrevrangeByscore:
Zrevrangebyscore 返回有序集中指定分数区间内的所有的成员。
有序集成员按分数值递减(从大到小)的次序排列。
- Zcount:
Zcount 命令用于计算有序集合中指定分数区间的成员数量。

- Zcard:
Zcard 命令用于计算集合中元素的数量。
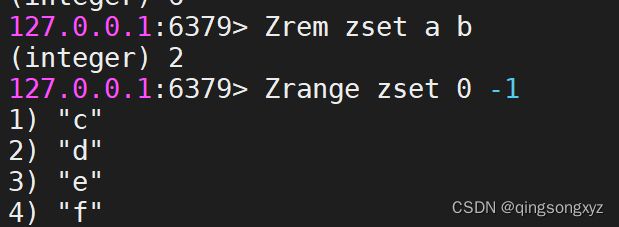
- Zrem:
Zrem 命令用于移除有序集中的一个或多个成员,不存在的成员将被忽略。
当 key 存在但不是有序集类型时,返回一个错误。
- Zscore:
Zscore 命令返回有序集中,成员的分数值。
如果成员元素不是有序集 key 的成员,或 key 不存在,返回 nil 。
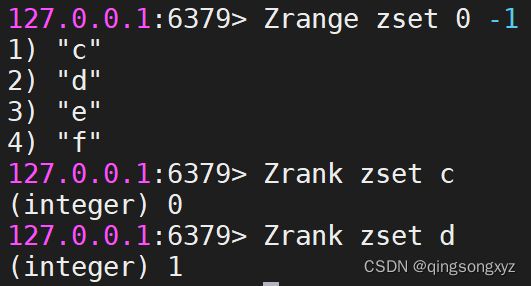
- Zrank:
Zrank 返回有序集中指定成员的下标。
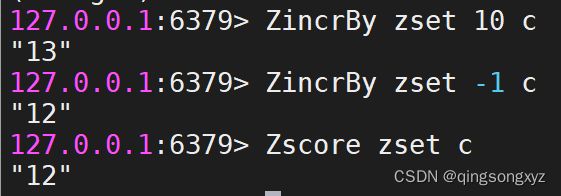
- ZincrBy:
Zincrby 命令对有序集合中指定成员的分数加上增量 increment
可以通过传递一个负数值 increment ,让分数减去相应的值
当 key 不存在,或分数不是 key 的成员时等同于添加一个元素
6.Geospatial(地理位置)
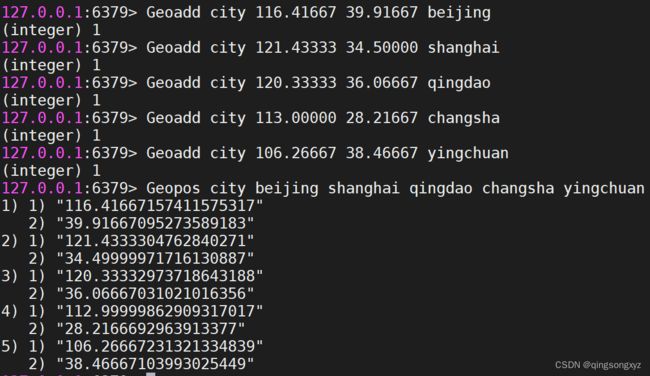
- Geoadd:
将指定的地理空间位置(纬度、经度、名称)添加到指定的key中,这些数据将会存储到sorted set,实质上
为Zset类型,有效的经度从-180度到180度。有效的纬度从-85.05112878度到85.05112878度。当坐标位置超
出上述指定范围时,该命令将会返回一个错误。
- Geopos:
从key里返回所有给定位置元素的位置(经度和纬度)。
![]()
- Geodist:
返回两个给定位置之间的距离
如果两个位置之间的其中一个不存在, 那么命令返回空值。
如果用户没有显式地指定单位参数,默认使用米作为单位。
- m 表示单位为米。
- km 表示单位为千米。
- mi 表示单位为英里。
- ft 表示单位为英尺。
Geodist 命令在计算距离时会假设地球为完美的球形, 在极限情况下, 这一假设最大会造成 0.5% 的误差。
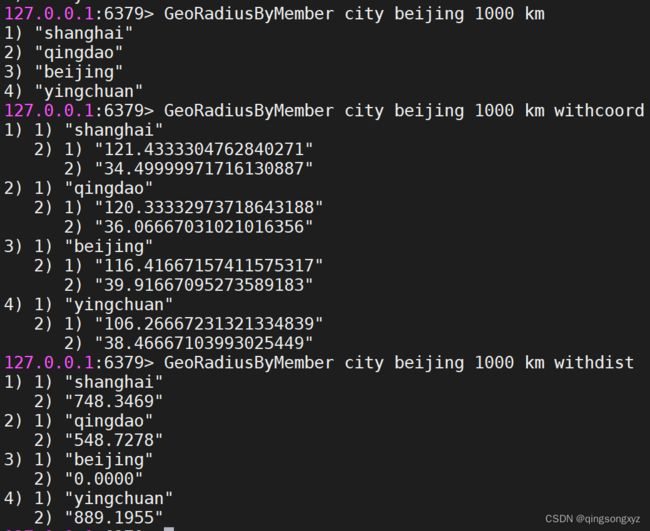
- GeoRadiusByMember:
以给定的元素为中心, 返回键包含的位置元素当中, 与中心的距离不超过给定最大距离的所有位置元素。
withdist: 在返回位置元素的同时, 将位置元素与中心之间的距离也一并返回。 距离的单位和用户给定的范围单位保持一致。withcoord: 将位置元素的经度和维度也一并返回。
命令默认返回未排序的位置元素。
通过以下两个参数, 用户可以指定被返回位置元素的排序方式:
asc: 根据中心的位置, 按照从近到远的方式返回位置元素。desc: 根据中心的位置, 按照从远到近的方式返回位置元素。
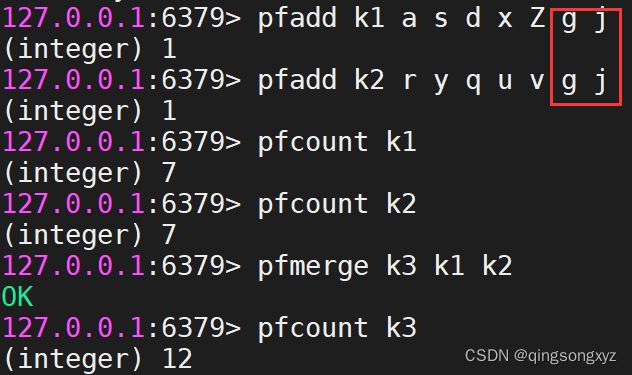
7.hyperloglogs(基数统计)
Redis HyperLogLog 是用来做基数(不重复元素)统计的算法。
HyperLogLog 的优点是,在输入元素的数量或者体积非常非常大时,计算基数所需的空间总是固定 的,并且
是很小的。每个 HyperLogLog 键只需要花费 12 KB 内存,就可以计算接近 2^64 个不同元素的基 数。存在
误差!!!
- pfadd:
pfadd 命令将所有元素参数添加到 HyperLogLog 数据结构中。
如果至少有一个元素被添加返回 1, 否则返回 0。
- pfmerge:
pfmerge 命令将多个 HyperLogLog 合并为一个 HyperLogLog ,合并后的 HyperLogLog 的基数估算值是通过对所有 给定 HyperLogLog 进行并集计算得出的。
- pfcount:
pfcount 命令返回给定 HyperLogLog 的基数估算值。
如果多个 HyperLogLog 则返回基数估值之和。
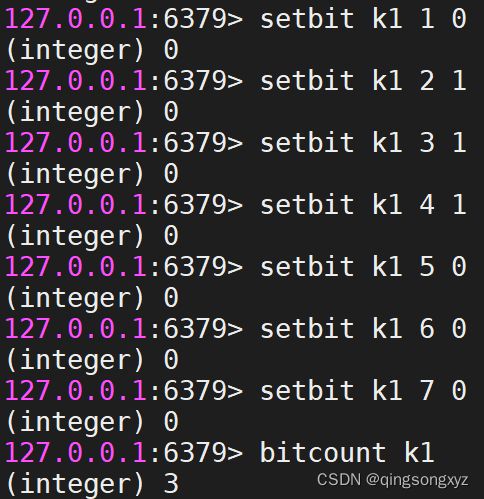
8.Bitmap(位图)
操作二进制0、1进行计数
- setbit:
设置字符串某一位的值
- bitcount:
统计字符中每一位上值为1的个数
六、Redis事务和乐观锁
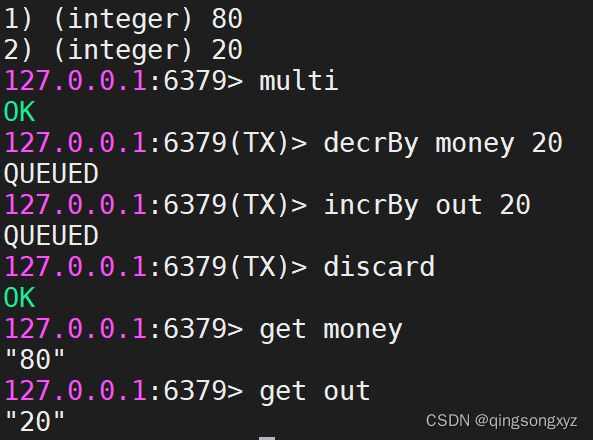
- Multi:
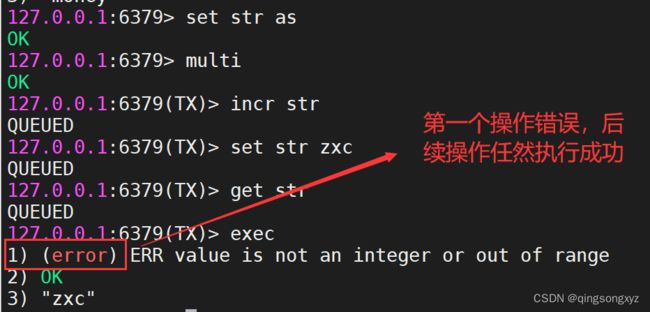
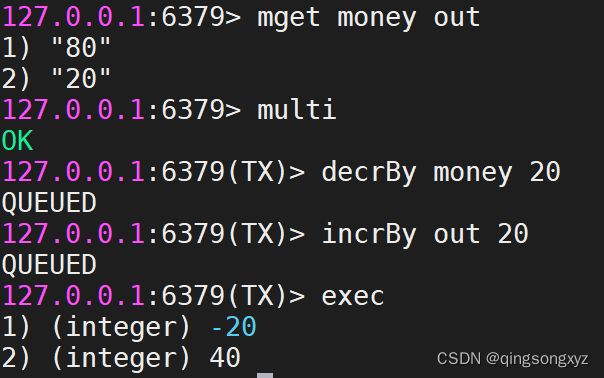
Multi 命令用于标记一个事务块的开始。
事务块内的多条命令会按照先后顺序被放进一个队列当中,最后由 exec命令执行。
- Exec:
Exec 命令用于执行所有事务块内的命令。当操作被打断时,返回空值 nil 。
- Discard:
Discard 命令用于取消事务,放弃执行事务块内的所有命令。
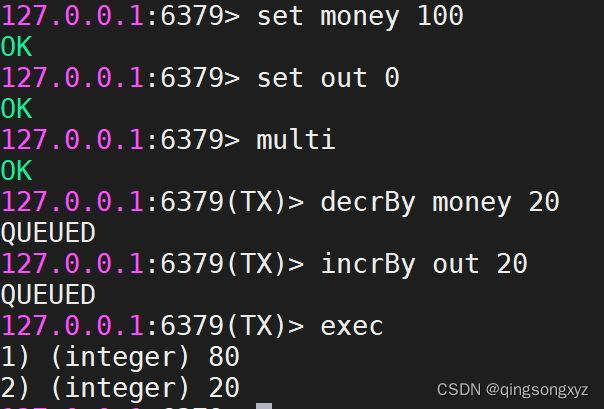
Redis没有隔离级别
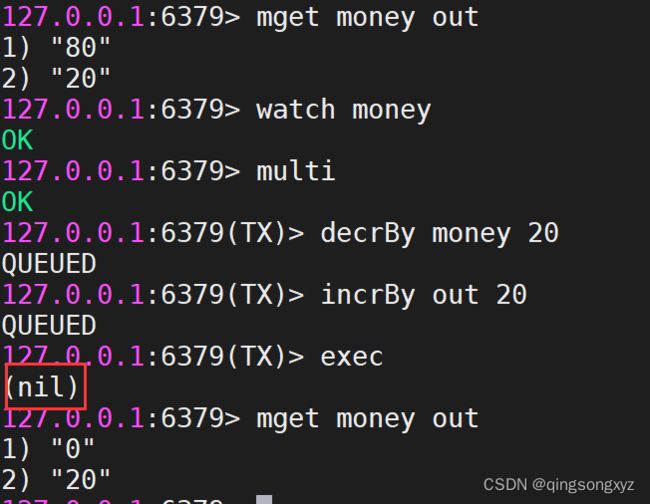
Redis乐观锁使用Watch实现:
- Watch:
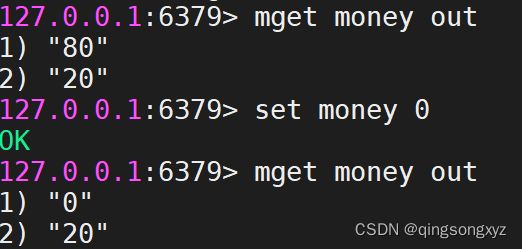
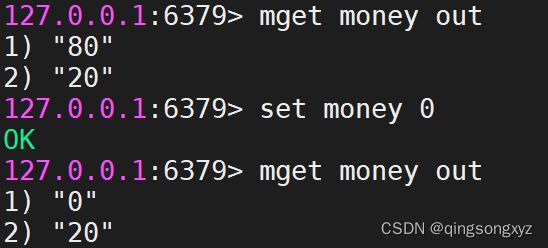
Watch 命令用于监视一个(或多个) key ,如果在事务执行之前这个(或这些) key 被其他命令所改动,那么事务
将被打断
- Unwatch:
Unwatch 命令用于取消 WATCH 命令对所有 key 的监视。
使用两个客户端连接redis
使用乐观锁Watch:
检测money被其他命令所改动,事务将被打断
七、SpringBoot整合
导入starter:
<dependency>
   <groupId>org.springframework.bootgroupId>
   <artifactId>spring-boot-starter-data-redisartifactId>
dependency>
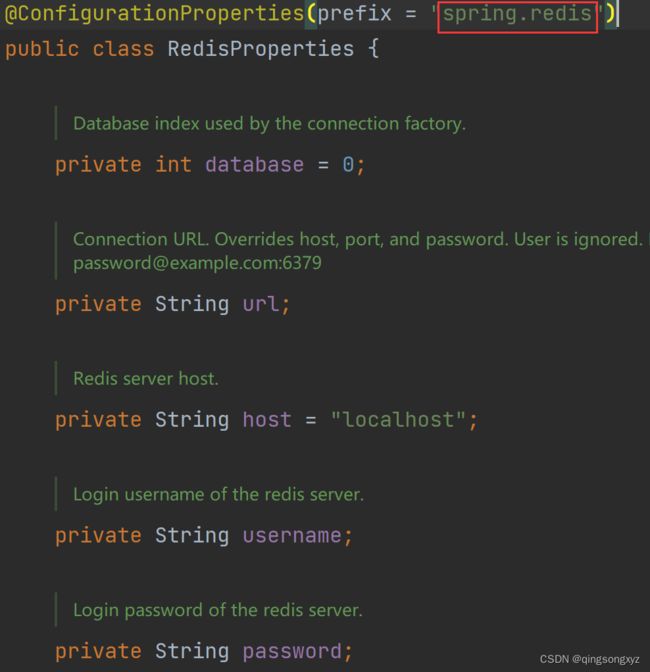
配置:
spring:
  redis:
    host: localhost # 主机默认为本机
    port: 6379 # 默认端口为6379
    #password: 默认为空
    #client-type: jedis 设置客户端类型 默认为letture
1.Jedis
Jedis:直连,同步阻塞 IO,不支持异步,多线程不安全,需要使用Jedis pool使得在多线程下安
全,但函数与Redis命令一一对应方便理解
导入依赖:
<dependency>
   <groupId>redis.clientsgroupId>
   <artifactId>jedisartifactId>
   <version>4.2.2version>
dependency>
@SpringBootTest
public class JedisTest {

    @Test
    void test(){
        //连接Redis
        Jedis jedis = new Jedis("127.0.0.1", 6379);
        //jedis.auth("Your Password"); //检验Redis密码

        jedis.set("a", "1");
        System.out.println(jedis.get("a"));

        //关闭连接
        jedis.close();

    }
}
2.Letture
Letture:非阻塞的,采用Netty,在多线程中可以共享同一个连接
@SpringBootTest
public class RedisTest {

    @Autowired
    private RedisTemplate redisTemplate;

    @Test
    void test(){
        Group group = new Group("1", 10, "2020-1-1");
        redisTemplate.opsForValue().set("姓名", "张三");
        redisTemplate.opsForValue().set("性别", "男");
        redisTemplate.opsForValue().set("年龄", 18);
        redisTemplate.opsForValue().set("group", group);
        System.out.println(redisTemplate.opsForValue().get("姓名"));
        System.out.println(redisTemplate.opsForValue().get("性别"));
        System.out.println(redisTemplate.opsForValue().get("年龄"));
        System.out.println(redisTemplate.opsForValue().get("group"));
    }
}

/*
张三
男
18
Group(name=1, userNum=10, time=2020-1-1)
*/
redis数据进制问题:
使用redis-cli --raw命令连接查看:
产生中文乱码,由于redisTemplate将序列化后的值存入redis中造成
解决方法:
@Configuration
public class RedisConfig {

    @Bean
    public RedisTemplate<String, Object> redisTemplate(RedisConnectionFactory redisConnectionFactory) {
        RedisTemplate<String, Object> template = new RedisTemplate<>();
        template.setConnectionFactory(redisConnectionFactory);

        Jackson2JsonRedisSerializer objectJackson2JsonRedisSerializer = new Jackson2JsonRedisSerializer(Object.class);

        ObjectMapper objectMapper = new ObjectMapper();
        objectMapper.setVisibility(PropertyAccessor.ALL, JsonAutoDetect.Visibility.ANY);

     //方法已过时
  	//objectMapper.enableDefaultTyping(ObjectMapper.DefaultTyping.NON_FINAL);
        			    objectMapper.activateDefaultTyping(LaissezFaireSubTypeValidator.instance, ObjectMapper.DefaultTyping.NON_FINAL, JsonTypeInfo.As.PROPERTY);

        objectJackson2JsonRedisSerializer.setObjectMapper(objectMapper);

        StringRedisSerializer stringRedisSerializer = new StringRedisSerializer();

        // key采用String的序列化方式
        template.setKeySerializer(stringRedisSerializer);

        // hash的key也采用String的序列化方式
        template.setHashKeySerializer(stringRedisSerializer);

        // value序列化方式采用jackson
        template.setValueSerializer(objectJackson2JsonRedisSerializer);

        // hash的value序列化方式采用jackson
        template.setHashValueSerializer(objectJackson2JsonRedisSerializer);

        template.afterPropertiesSet();

        return template;
    }
}
八、持久化
1.RDB(Redis DataBase)
在指定时间间隔内将内存中的数据写入磁盘中,即Snapshot快照
Redis会(fork)创建一个子进程来进行持久化,将数据写入一个临时文件(dump.rdb),待所有数据都写入后,将
这个文件替换上一次的文件。在此过程中,主进程不进行任何IO操作,保证了极高的性能。但是,如果持久
化之前出现宕机现象,此前没有来得及写入磁盘的数据都将丢失。Redis默认使用RDB持久化。
默认存储文件名
触发RDB持久化条件:
- save规则满足
- 执行flushall命令
- 退出redis(shutdown)
2.AOF(Append Only File)
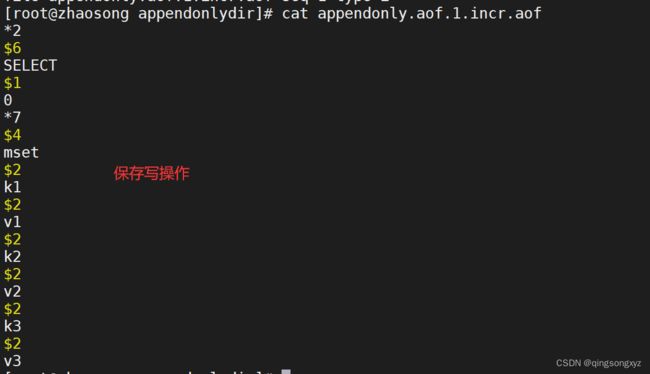
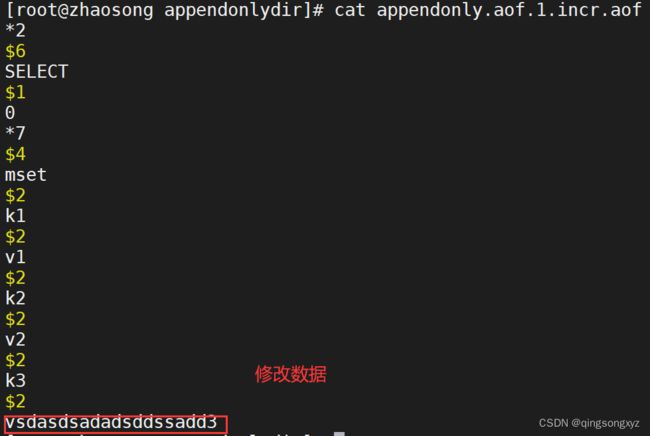
将Redis执行过程中每一个写操作记录下来,每次进行追加,Redis启动会读取该文件(appendonly.aof)重新构
建数据,即将每一个写操作执行一遍。
测试aof:
aof文件破坏后无法连接redis:
可以通过redis-check-aof进行修复,可能会丢失少量数据:
AOF存储的文件远大于RDB,但修复速度比RDB慢,运行效率也相对低一些
九、发布与订阅
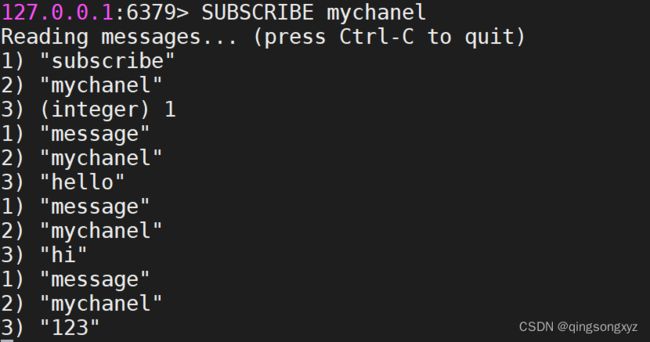
- Subscribe:
Subscribe 命令用于订阅给定的一个或多个频道的信息。
- Publish:
Publish 命令用于将信息发送到指定的频道。
十、主从复制,读写分离
指一台Redis服务器上的数据复制到其他的Redis服务器上,前者称为主节点(master),后者称为
从节点(slave),只能从主节点到从节点,主节点负责写入数据,从节点负责读取数据。
主要作用:
- 数据冗余
- 故障恢复
- 负载均衡
- 高可用
一般Redis运用中,只使用一台Redis是不行的:
1.单个Redis服务器会发生单点故障,并且一台服务器需要处理所有请求,压力太大
2.单个Redis服务器内存容量有限,一般最大使用内存不应该超过20G
默认每一台Redis服务器都是主节点,一个主节点可以有多个从节点,但每个从节点只能有一个
主节点。
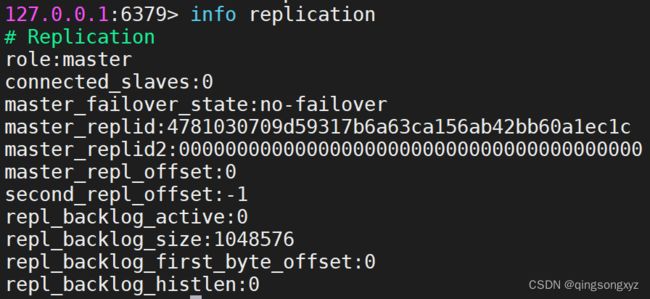
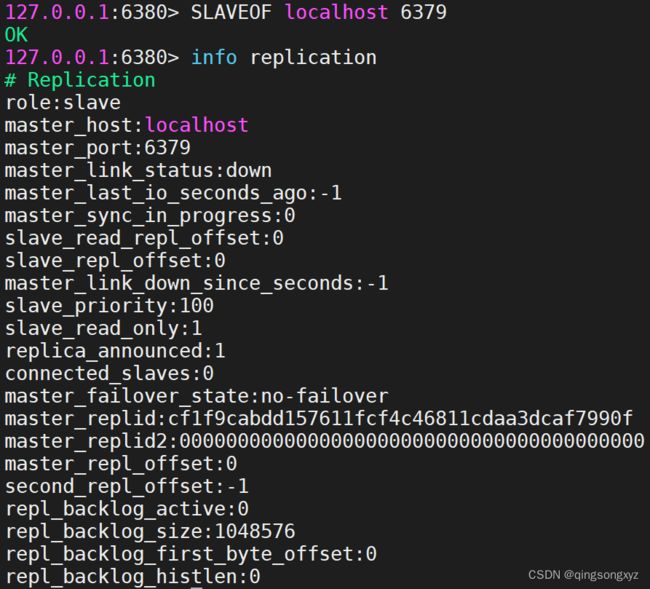
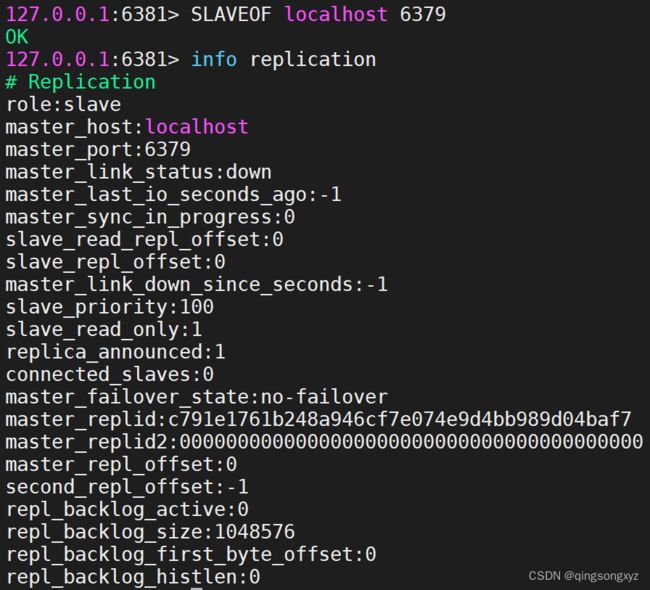
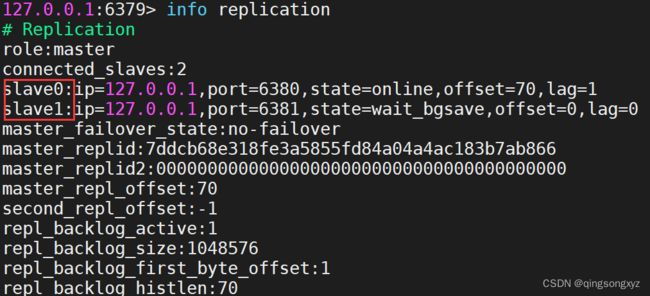
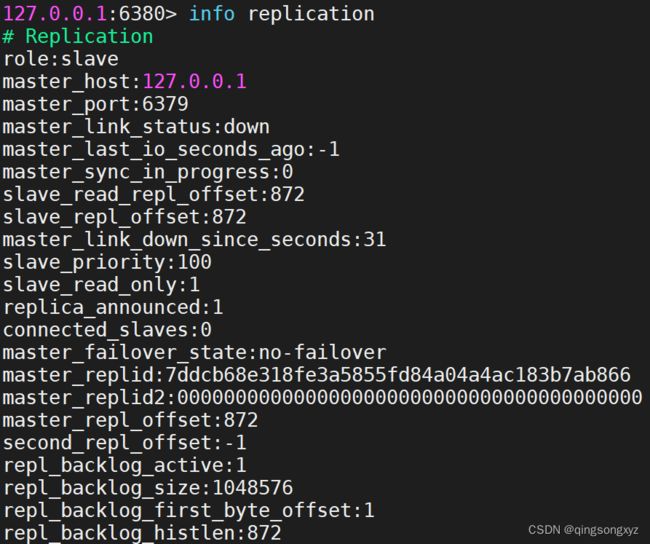
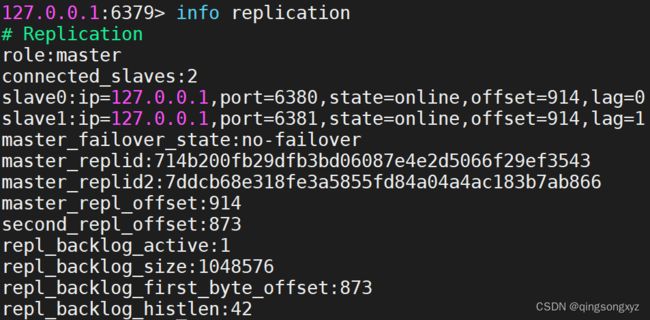
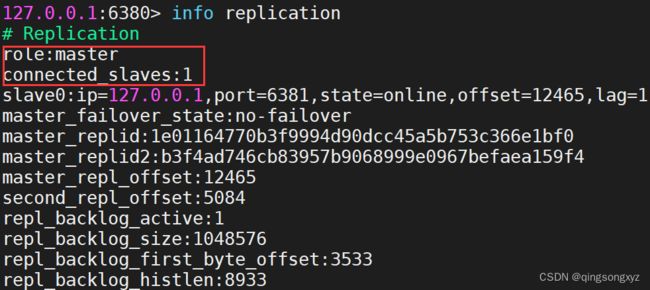
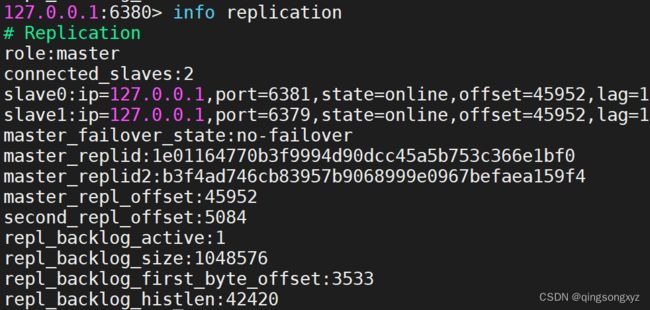
使用info replication查看节点信息:
搭建Redis伪集群,一个主节点加两个从节点:
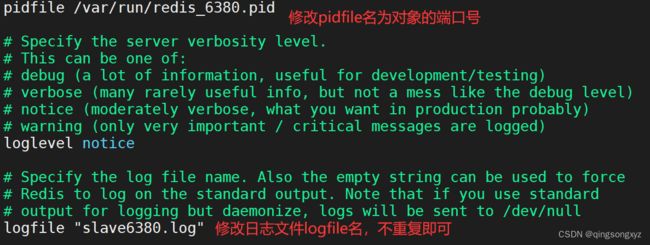
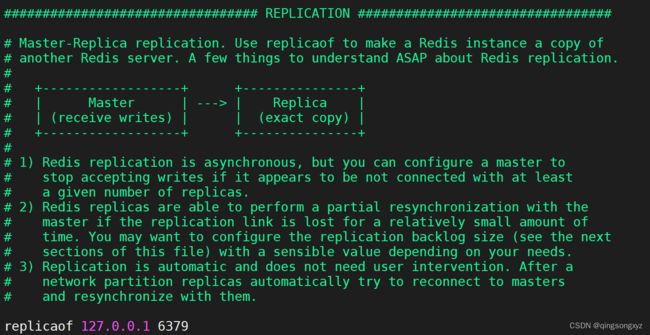
修改配置文件:
注意:
如果主机配置了密码,需要修改masterauth password
运行Redis服务:
主节点负责写入数据,从节点负责读取数据
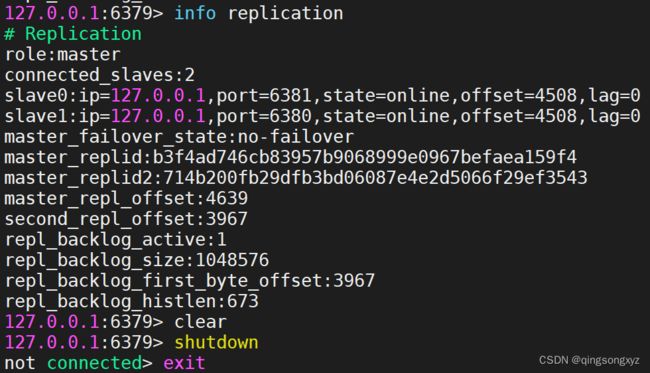
主节点断开后,从节点依旧连接主节点但是无法进行写操作:
主机恢复后,依旧为主节点,写入的数据从节点也能获取到
主从复制原理:
从节点连接到主节点时会发送一个同步命令(sync),主节点将所有写操作命令持久化到文件,然
后将这个文件发送到从节点完成一次同步。
全量复制:从节点接受数据库文件后,将数据加载进内存中
增量复制:主节点将新的写入操作依次发送给从节点
当从节点重新连接到主机节点时,发生一次全量复制。
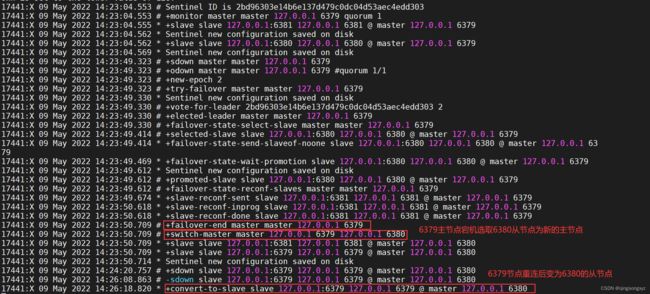
十一、哨兵模式
通过发送心跳命令监控节点是否正常运行,当主节点宕机后,选取其从节点变成新的主节点,保
证Redis的高可用
新建一个哨兵配置文件sentinel.conf:
# 哨兵监控本机6379端口
# 1代表只有一个以上的哨兵认为主服务器不可用的时候,才会进行failover操作(一般设置为哨兵数量的一半加一)
sentinel monitor master 127.0.0.1 6379 1
sentinel auth-pass master YourPassword # 如果节点设置了密码需要配置
当进行failover操作后,配置文件会自动修改并记录信息
# 哨兵监听的端口变为6380,即当前的主节点
sentinel monitor master 127.0.0.1 6380 1
sentinel auth-pass master YourPassword
# Generated by CONFIG REWRITE
latency-tracking-info-percentiles 50 99 99.9
dir "/usr/local/bin"
protected-mode no
port 26379
user default on nopass sanitize-payload ~* &* +@all
sentinel myid 2bd96303e14b6e137d479c0dc04d53aec4edd303
sentinel config-epoch master 2
sentinel leader-epoch master 2
sentinel current-epoch 2

# 原来的主节点变成从节点
sentinel known-replica master 127.0.0.1 6379
sentinel known-replica master 127.0.0.1 6381
十二、Cluster集群
主从集群可以解决该并发读的问题,但是没有解决大量数据存储,由于只有主节点能进行写操作,并发写的
问题没有解决,这时需要使用cluster集群。
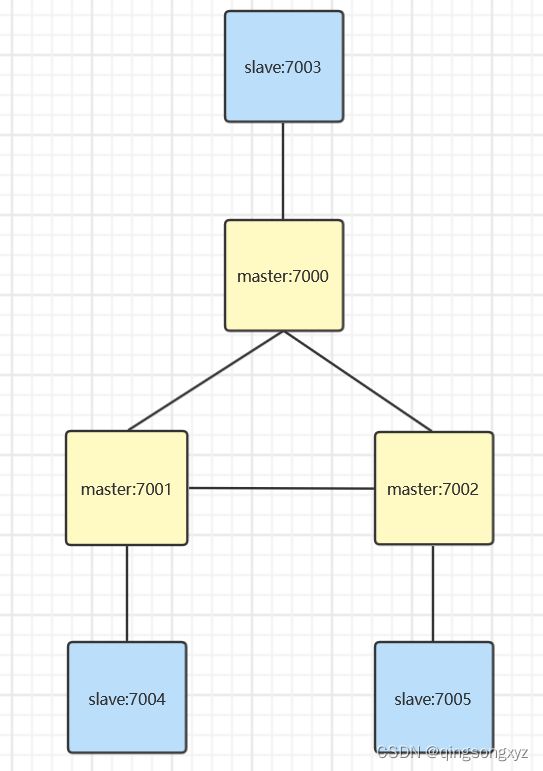
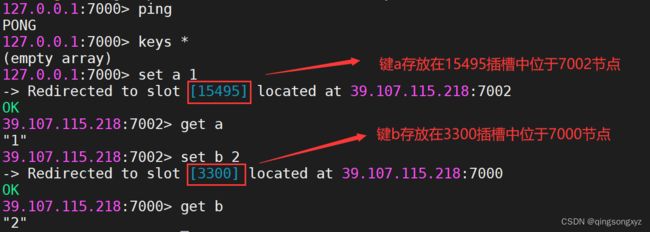
cluster集群中有多个master保存不同的数据,每个master有多个slave,master之间使用ping检测健康状态,
客户端可以访问任意节点,最后都会被转发到正确的节点上。所有主节点一起划分16384个插槽,数据存放
在插槽中,随着插槽移动。
redis配置文件,每台redis只需将文件中所有的7000修改为对应的端口号:
bind 0.0.0.0
# 端口
port 7000
# 后台启动
daemonize yes
# 设置数据库个数为1
databases 1
# 关闭保护模式,让外部redis客户端访问
protected-mode no
pidfile /var/run/redis_7000.pid
# 日志存储目录及日志文件名
logfile "7000.log"
# rdb数据文件名
dbfilename "dump7000.rdb"
# rdb数据文件和aof数据文件的存储目录
dir "/usr/local/bin/cluster"
# 是否开启aof
appendonly no
# 设置密码
requirepass 密码
# 从节点访问主节点密码(必须与 requirepass 一致)
masterauth 密码
# 是否开启集群模式,默认 no
cluster-enabled yes
# 集群节点信息文件,会保存在 dir 配置对应目录下
cluster-config-file nodes-7000.conf
# 集群节点连接超时时间
cluster-node-timeout 15000
#绑定ip 和 端口号
cluster-announce-ip 外网ip #!!!注意 声明节点ip为云服务器外网ip
cluster-announce-port 7000
依次启动redis:
printf '%s\n' 7000 7001 7002 7003 7004 7005 | xargs -I{} -t redis-server conf/cluster/{}/redis.conf
依次关闭redis:
printf '%s\n' 7000 7001 7002 7003 7004 7005 | xargs -I{} -t redis-cli -a 密码 -p {} shutdown
创建cluster集群:
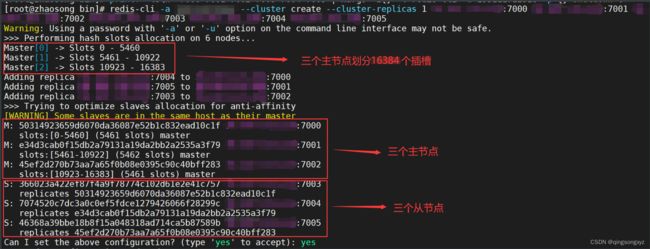
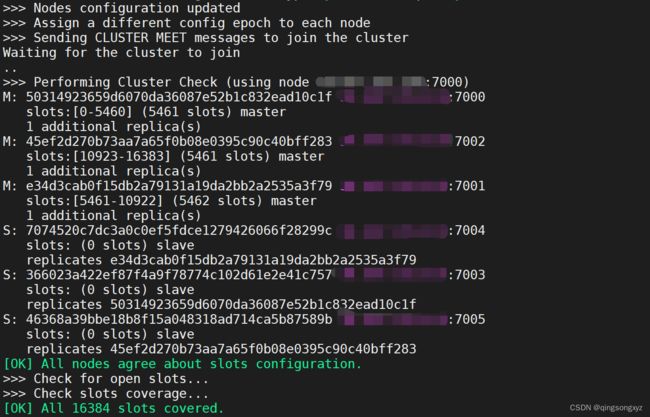
redis-cli -a 密码 --cluster create --cluster-replicas 1 外网IP:7000 外网IP:7001 外网IP:7002 外网IP:7003 外网IP:7004 外网IP:7005
在设置值和获取值的时候会自动转发到指定的节点上
springboot操作cluster集群:
spring:
  redis:
    password: 密码
    client-type: lettuce
    # cluster集群配置
    cluster:
      nodes: #指定分片集群地址
        - 服务器Ip:7000
        - 服务器Ip:7001
        - 服务器Ip:7002
        - 服务器Ip:7003
        - 服务器Ip:7004
        - 服务器Ip:7005
@RequestMapping("/redis")
@RestController
public class RedisController {

    @Autowired
    private StringRedisTemplate stringRedisTemplate;

    @GetMapping("/set")
    public String set(String key, String value){
        if(!StringUtils.hasLength(key) || !StringUtils.hasLength(value))
        {
            return "请输入key和value!!!";
        }

        stringRedisTemplate.opsForValue().set(key, value);
        return "success";
    }

    @GetMapping("/get")
    public String get(String key){
        if(!StringUtils.hasLength(key))
        {
            return "请输入key!!!";
        }

        String s = stringRedisTemplate.opsForValue().get(key);
        return "key: " + key + ", value: " + s;
    }
}
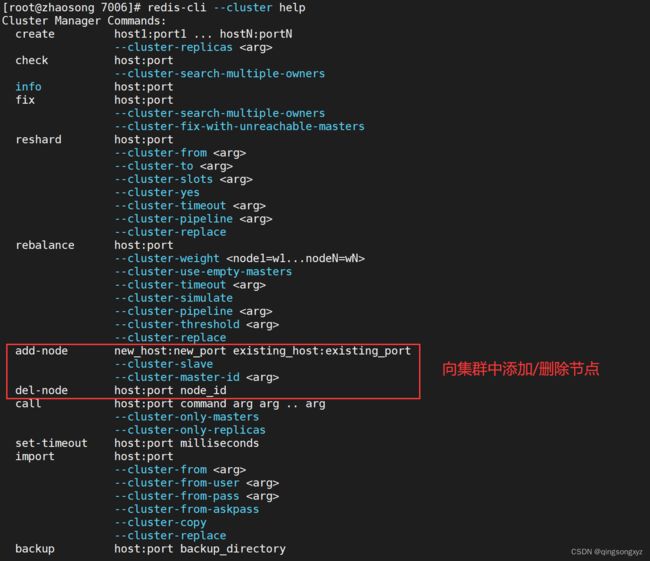
集群伸缩:
十三、数据一致性
保证redis缓存内容和mysql数据库信息一致
1.更新缓存与删除缓存哪种方式更合适?
-
更新缓存:
优点:每次数据变化都及时更新缓存,所以查询时不容易出现未命中的情况。
缺点:更新缓存的消耗比较大,影响服务器的性能。如果是写入数据频繁的业务场景,那么可能频繁的更新缓存时,却没有业务读取该数据。
-
删除缓存
优点:操作简单,无论更新操作是否复杂,都是将缓存中的数据直接删除。
缺点:删除缓存后,下一次查询缓存会出现未命中,这时需要重新读取一次数据库。
从上面的比较来看,删除缓存是更优的方案。
2.先操作数据库还是缓存?
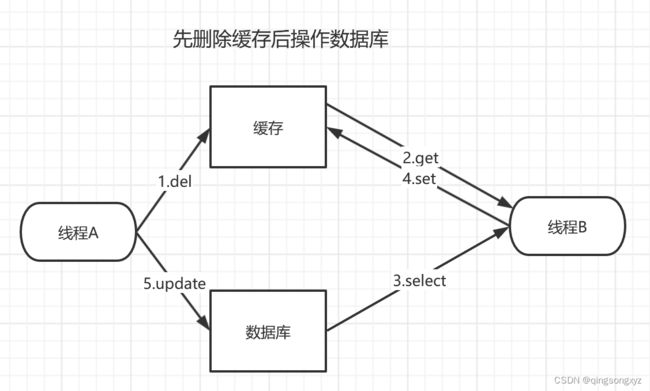
先删除缓存再更新数据库:
线程A在删除缓存之后去更新数据库信息,在更新过程中(时间较长),线程B访问缓存为命中,从数据库中查
询到旧数据再设置到缓存中,导致数据不一致问题。
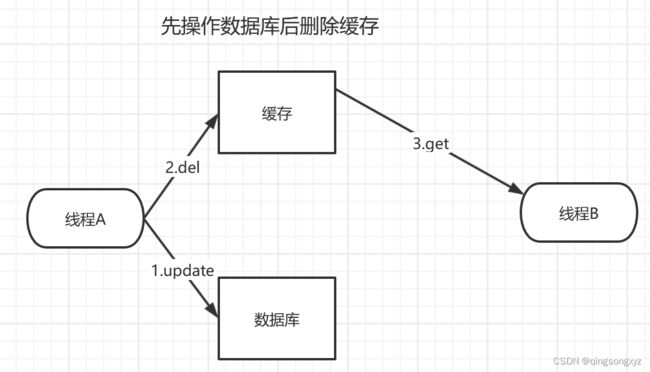
先操作数据库后删除缓存:
线程A在更新数据库删除缓存之前,线程B访问缓存获取到旧数据,导致数据不一致问题,但是删除缓存用时
远比更新数据库少,这一小段时间的数据不一致是可以接受的。
经过对比发现,先更新数据库、再删除缓存是影响更小的方案。
十四、分布式锁
即分布式系统或集群模式下多进程可见并互斥的锁
java提供的锁机制只能解决同一个jvm虚拟机中的互斥,而在分布式系统下每一个进程使用不同的jvm,普通
的锁机制不起作用,这时需要分布式锁。
加锁:
//当key不存在时设置key的值value
setnx key value
释放锁:
//删除key
del key
当一个客户端获得锁后,如果出现故障会导致锁没有得到释放,会出现死锁,需要设置过期时间
加锁:
setnx key value
//设置key的过期时间为time
expire key time
但是设置值和过期时间需要一步完成保证原子性,不然或有多个客户端来重置过期时间会有并发问题
set key value ex time nx
还可能出现问题:
当一个客户端A获得锁后,执行自己的业务,但是由于业务耗时很长,导致锁超过了过期时间自动释放,正好
有客户端B获取到锁,执行它的业务,此时客户端A业务完成去释放锁,就会释放其他客户端的锁,引起并发
问题。设置锁的值有特殊标识,在释放锁的时候先检查是否是自己的锁。
//判断是否是自己的锁
get key
del key
这里依然存在原子性问题,判断是否是自己持有的锁以及释放锁需要一步完成,不然可能由于full gc导致释
放锁阻塞,如果阻塞时间超过过期时间锁自动释放,后续还会出现上次的并发问题。Redis没有这两条语句的
组合语句,但是提供eval命令执行Lua脚本,Lua脚本在Redis中是原子执行的,执行过程中不会插入其他命
令。
Lua基本语法:https://www.runoob.com/lua/lua-data-types.html
---获取分布式锁的值
---local id = redis.call('get', KEYS[1])
---比较id值,如果相同则释放锁
if(redis.call('get', KEYS[1]) == ARGV[1]) then
    redis.call('del', KEYS[1])
end
/**
 * Redis生成全局唯一ID,由三部分组成(第一位为 0 表示正数, 中间31位为时间戳, 最后32位为自增量)
 */
public class RedisIDHelper {

    //起始时间戳 --> 2000年1月1日00:00:00
    private static final long START_TIMESTAMP = 946684800L;

    //自增量的位数上限为32位
    private static final int BIT_COUNT = 32;

    private StringRedisTemplate stringRedisTemplate;

    public RedisIDHelper(StringRedisTemplate stringRedisTemplate) {
        this.stringRedisTemplate = stringRedisTemplate;
    }

    public long getID(String key) {

        //时间戳
        LocalDateTime now = LocalDateTime.now();
        long current = now.toEpochSecond(ZoneOffset.UTC);
        long timestamp = current - START_TIMESTAMP;

        String date = now.format(DateTimeFormatter.ofPattern("yyyy:MM:dd"));

        //redis中自增的key
        long increment = stringRedisTemplate.opsForValue().increment("icr:" + key + ":" + date);

        //合并 时间戳左移32位 或 自增值
        return timestamp << BIT_COUNT | increment;
    }
}
/**
 * Redis实现分布式锁
 */
public class RedisDistributedLock {

    //锁名称前缀
    private static final String LOCK_PREFIX = "lock:";

    //锁名称
    private String name;

    private StringRedisTemplate stringRedisTemplate;

    //redis脚本
    private static final DefaultRedisScript SCRIPT;

    //全局ID生成器
    private RedisIDHelper helper;

    //保存锁的标识(值)
    private String id;

    static {
        SCRIPT = new DefaultRedisScript<>();
        //加载lua文件
        SCRIPT.setLocation(new ClassPathResource("lua/lock.lua"));

    }

    public RedisDistributedLock(String name, StringRedisTemplate stringRedisTemplate) {
        this.name = name;
        this.stringRedisTemplate = stringRedisTemplate;
        this.helper = new RedisIDHelper(stringRedisTemplate);
    }

    public boolean tryLock(){
        long threadID = Thread.currentThread().getId();
        long helperID = helper.getID(name);
        this.id = helperID + "-" + threadID;
        //set nx ex命令
        Boolean flag = stringRedisTemplate.opsForValue().setIfAbsent(LOCK_PREFIX + name, id, 2, TimeUnit.MINUTES);
        //返回获取锁是否成功
        return Boolean.TRUE.equals(flag);
    }

    public void unlock(){
        //执行lua脚本 判断是否是自己持有的锁 进行释放
        stringRedisTemplate.execute(SCRIPT
                , Collections.singletonList(LOCK_PREFIX + name)
                , id);
    }
}
@Slf4j
@RestController
public class RedisController {

    @Autowired
    private StringRedisTemplate stringRedisTemplate;

    private RedisIDHelper helper;

    private RedisDistributedLock lock;

    @PostConstruct
    public void init(){
        //初始化工作
        helper = new RedisIDHelper(stringRedisTemplate);
        lock = new RedisDistributedLock("test", stringRedisTemplate);
    }

    //获取全局唯一ID
    @GetMapping("/id")
    public String getID(String key)
    {
        long id = helper.getID(key);
        return String.valueOf(id);
    }

    @GetMapping("/lock")
    public String lock(){
        //获取分布式锁
        if (lock.tryLock()) {
            try {
                //返回全局唯一ID
                return getID("test");
            } catch (Exception e) {
                log.error(e.getMessage());
            } finally {
                //释放锁
                lock.unlock();
            }
        }

        return "failure!!!";
    }
}
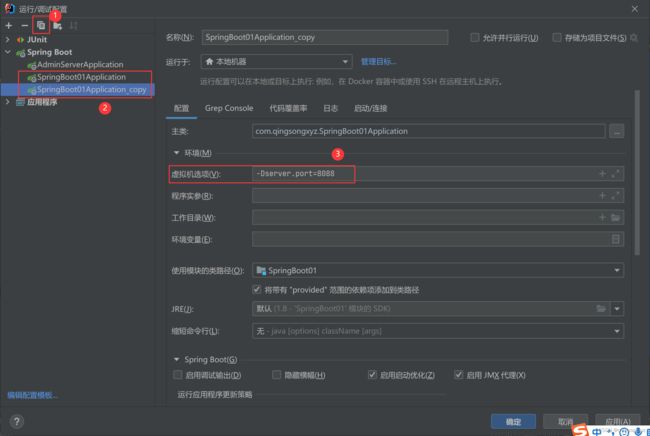
复制一份springboot项目,修改端口号,模拟分布式场景:
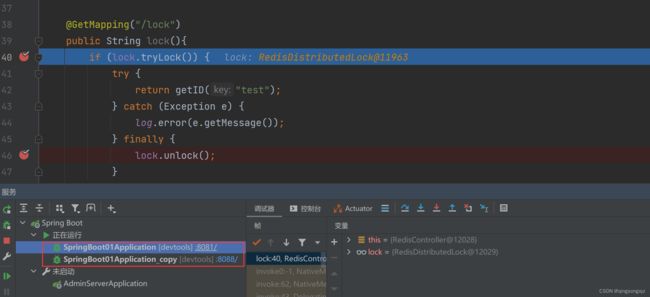
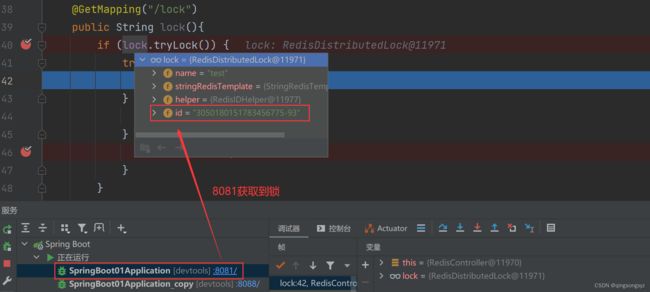
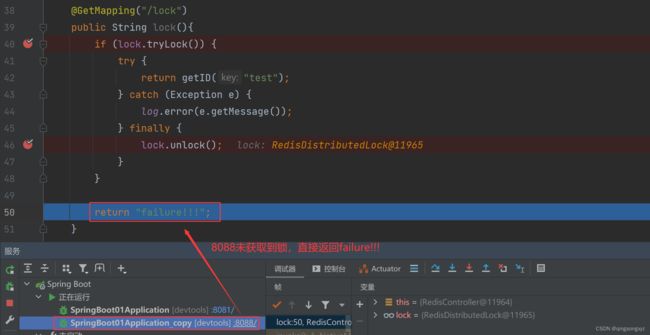
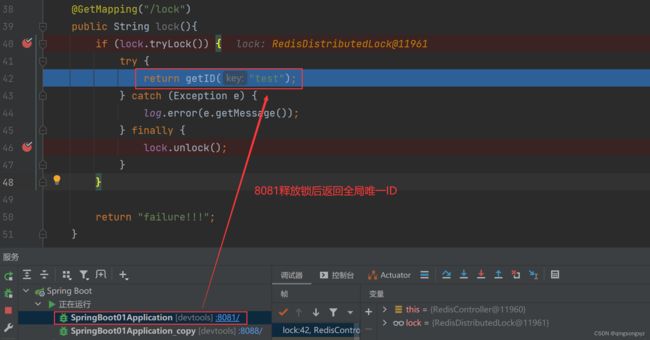
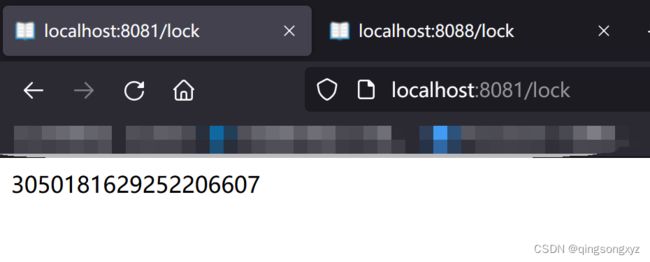
调试测试分布式锁:
自定义分布式锁满足基本需求,但不是可重入锁,也不能重新尝试获取锁
@Slf4j
@SpringBootTest
public class ReentrantLockTest {

    @Autowired
    private StringRedisTemplate stringRedisTemplate;

    //自定义锁 不是可重入锁
    private RedisDistributedLock diyLock;

    //初始化
    @PostConstruct
    public void init(){
        diyLock = new RedisDistributedLock("test", stringRedisTemplate);
    }

    @Test
    void method1(){
        boolean flag = diyLock.tryLock();

        if(!flag){
            log.error("获取锁失败...");
            return;
        }

        try {
            log.info("获取锁成功...");
            method2();
        } catch (Exception e) {
            log.error(e.getMessage());
        } finally {
            diyLock.unlock();
            log.info("解锁成功...");
        }
    }

    private void method2() {
        boolean flag = diyLock.tryLock();

        if(!flag){
            log.error("获取锁失败...");
            return;
        }

        try {
            log.info("获取锁成功...");
        } catch (Exception e) {
            log.error(e.getMessage());
        } finally {
            diyLock.unlock();
            log.info("解锁成功...");
        }
    }
}

/*
获取锁成功...
获取锁失败...
解锁成功...
*/
引入官方提供的Redisson(实现分布式锁的扩展功能):
导入依赖:
<dependency>
    <groupId>org.redissongroupId>
    <artifactId>redissonartifactId>
    <version>3.17.4version>
dependency>
@Configuration
public class RedisConfig {

   	//向容器中注入RedissonClient
    @Bean
    public RedissonClient redissonClient(){

        Config config = new Config();

        //添加redis单节点配置
        config.useSingleServer().setAddress("redis://ip地址:端口号").setPassword("xxx");

        //创建客户端
        return Redisson.create(config);
    }
}
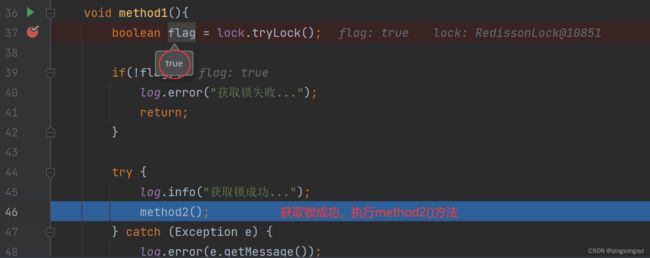
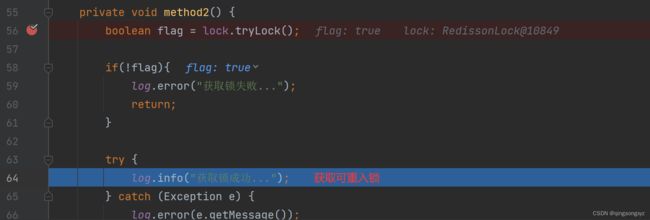
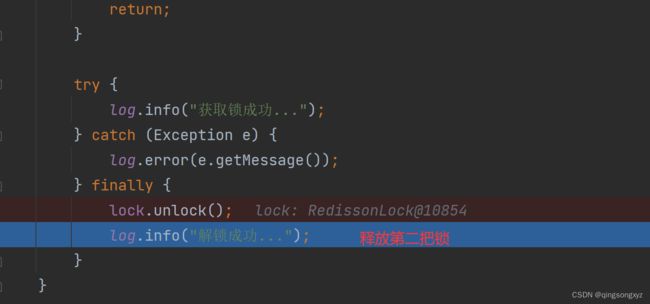
测试是否为可重入锁:
@Slf4j
@SpringBootTest
public class ReentrantLockTest {

    @Autowired
    private RedissonClient client;

    private RLock lock;

    @PostConstruct
    public void init(){
        lock = client.getLock("test");
    }

    @Test
    void method1(){
        boolean flag = lock.tryLock();

        if(!flag){
            log.error("获取锁失败...");
            return;
        }

        try {
            log.info("获取锁成功...");
            method2();
        } catch (Exception e) {
            log.error(e.getMessage());
        } finally {
            lock.unlock();
            log.info("解锁成功...");
        }
    }

    private void method2() {
        boolean flag = lock.tryLock();

        if(!flag){
            log.error("获取锁失败...");
            return;
        }

        try {
            log.info("获取锁成功...");
        } catch (Exception e) {
            log.error(e.getMessage());
        } finally {
            lock.unlock();
            log.info("解锁成功...");
        }
    }
}

/*
获取锁成功...
获取锁成功...
解锁成功...
解锁成功...
*/
加锁源码分析:
RedissonLock:
public boolean tryLock() {
    return (Boolean)this.get(this.tryLockAsync());
}

public RFuture<Boolean> tryLockAsync() {
    //传入当前线程id值
    return this.tryLockAsync(Thread.currentThread().getId());
}

public RFuture<Boolean> tryLockAsync(long threadId) {
    //未设置等待时间, 锁过期时间
    return this.tryAcquireOnceAsync(-1L, -1L, (TimeUnit)null, threadId);
}

private RFuture<Boolean> tryAcquireOnceAsync(long waitTime, long leaseTime, TimeUnit unit, long threadId) {
    RFuture acquiredFuture;
    if (leaseTime > 0L) {
        acquiredFuture = this.tryLockInnerAsync(waitTime, leaseTime, unit, threadId, RedisCommands.EVAL_NULL_BOOLEAN);
    } else {
        //使用默认参数 锁过期时间为30s
        acquiredFuture = this.tryLockInnerAsync(waitTime, this.internalLockLeaseTime, TimeUnit.MILLISECONDS, threadId, RedisCommands.EVAL_NULL_BOOLEAN);
    }

    CompletionStage<Boolean> f = acquiredFuture.thenApply((acquired) -> {
        if (acquired) {
            if (leaseTime > 0L) {
                this.internalLockLeaseTime = unit.toMillis(leaseTime);
            } else {
                this.scheduleExpirationRenewal(threadId);
            }
        }

        return acquired;
    });
    return new CompletableFutureWrapper(f);
}

public RedissonLock(CommandAsyncExecutor commandExecutor, String name) {
	......
    this.internalLockLeaseTime = commandExecutor.getConnectionManager().getCfg().getLockWatchdogTimeout();
	......
}

public Config() {
    ......
    this.lockWatchdogTimeout = 30000L;
	......
}

<T> RFuture<T> tryLockInnerAsync(long waitTime, long leaseTime, TimeUnit unit, long threadId, RedisStrictCommand<T> command) {
        return this.evalWriteAsync(
            this.getRawName(),
            LongCodec.INSTANCE,
            command,

            //如果锁不存在 创建锁自增一 并设置过期时间
            "if (redis.call('exists', KEYS[1]) == 0) then
                redis.call('hincrby', KEYS[1], ARGV[2], 1);
                redis.call('pexpire', KEYS[1], ARGV[1]);
            return nil;
            end;
            //如果锁是自己持有的 锁的值自增一 并重置过期时间
            if (redis.call('hexists', KEYS[1], ARGV[2]) == 1) then
                redis.call('hincrby', KEYS[1], ARGV[2], 1);
                redis.call('pexpire', KEYS[1], ARGV[1]);
            return nil;
            end;
            //如果锁不是自己持有的 不予处理 直接返回过期时间(以毫秒为单位)
            return redis.call('pttl', KEYS[1]);",

            Collections.singletonList(this.getRawName()),
            new Object[]
            {
                unit.toMillis(leaseTime),
                this.getLockName(threadId)
            });
}
设置等待时间(可重试锁)
public boolean tryLock(long waitTime, TimeUnit unit) throws InterruptedException {
    return this.tryLock(waitTime, -1L, unit);
}

public boolean tryLock(long waitTime, long leaseTime, TimeUnit unit) throws InterruptedException {
    //时间一毫秒为单位
    long time = unit.toMillis(waitTime);
    long current = System.currentTimeMillis();
    long threadId = Thread.currentThread().getId();
    //获取锁的剩余时间
    Long ttl = this.tryAcquire(waitTime, leaseTime, unit, threadId);
    //获取锁成功
    if (ttl == null) {
        return true;
    } else {
        //最大等待时间 - 获取锁消耗的时间 = 剩余等待时间
        time -= System.currentTimeMillis() - current;
        //剩余等待时间小于0 获取锁失败
        if (time <= 0L) {
            this.acquireFailed(waitTime, unit, threadId);
            return false;
        } else {

            current = System.currentTimeMillis();
            //订阅释放锁消息
            //不会立即重试 而是等待其他人释放锁后才去重试
            CompletableFuture subscribeFuture = this.subscribe(threadId);

            try {
                subscribeFuture.get(time, TimeUnit.MILLISECONDS);
            } catch (TimeoutException | ExecutionException var20) {
                //超过剩余等待时间后 取消订阅 获取锁失败
                if (!subscribeFuture.cancel(false)) {
                    subscribeFuture.whenComplete((res, ex) -> {
                        if (ex == null) {
                            this.unsubscribe(res, threadId);
                        }

                    });
                }

                this.acquireFailed(waitTime, unit, threadId);
                return false;
            }

            try {
                //计算新的等待时间
                time -= System.currentTimeMillis() - current;
                //新的等待时间小于0 获取锁失败
                if (time <= 0L) {
                    this.acquireFailed(waitTime, unit, threadId);
                    boolean var22 = false;
                    return var22;
                } else {
                    boolean var16;
                    //循环尝试获取锁
                    do {
                        long currentTime = System.currentTimeMillis();
					  //第一次尝试获取锁 返回锁过期时间
                        ttl = this.tryAcquire(waitTime, leaseTime, unit, threadId);
                        //过期时间为null 获取锁成功
                        if (ttl == null) {
                            var16 = true;
                            return var16;
                        }

                        time -= System.currentTimeMillis() - currentTime;
                        if (time <= 0L) {
                            this.acquireFailed(waitTime, unit, threadId);
                            var16 = false;
                            return var16;
                        }

                        currentTime = System.currentTimeMillis();

                        //如果锁过期时间小于剩余等待时间 尝试获取锁的超时时间为锁过期时间
                        if (ttl >= 0L && ttl < time) {
                        ((RedissonLockEntry)this.commandExecutor.getNow(subscribeFuture)).getLatch().tryAcquire(ttl, TimeUnit.MILLISECONDS);
                        } else {
                        //如果锁过期时间大于剩余等待时间 尝试获取锁的超时时间为剩余等待时间
                            ((RedissonLockEntry)this.commandExecutor.getNow(subscribeFuture)).getLatch().tryAcquire(time, TimeUnit.MILLISECONDS);
                        }

                        time -= System.currentTimeMillis() - currentTime;
                    } while(time > 0L);

                    this.acquireFailed(waitTime, unit, threadId);
                    var16 = false;
                    return var16;
                }
            } finally {
                this.unsubscribe((RedissonLockEntry)this.commandExecutor.getNow(subscribeFuture), threadId);
            }
        }
    }
}

private Long tryAcquire(long waitTime, long leaseTime, TimeUnit unit, long threadId) {
    return (Long)this.get(this.tryAcquireAsync(waitTime, leaseTime, unit, threadId));
}

private <T> RFuture<Long> tryAcquireAsync(long waitTime, long leaseTime, TimeUnit unit, long threadId) {
    RFuture ttlRemainingFuture;
    if (leaseTime > 0L) {
        ttlRemainingFuture = this.tryLockInnerAsync(waitTime, leaseTime, unit, threadId, RedisCommands.EVAL_LONG);
    } else {
        ttlRemainingFuture = this.tryLockInnerAsync(waitTime, this.internalLockLeaseTime, TimeUnit.MILLISECONDS, threadId, RedisCommands.EVAL_LONG);
    }

    CompletionStage<Long> f = ttlRemainingFuture.thenApply((ttlRemaining) -> {
        if (ttlRemaining == null) {
            if (leaseTime > 0L) {
                this.internalLockLeaseTime = unit.toMillis(leaseTime);
            } else {
                //重置过期时间
                this.scheduleExpirationRenewal(threadId);
            }
        }

        return ttlRemaining;
    });
    return new CompletableFutureWrapper(f);
}

protected void scheduleExpirationRenewal(long threadId) {
    RedissonBaseLock.ExpirationEntry entry = new RedissonBaseLock.ExpirationEntry();
    RedissonBaseLock.ExpirationEntry oldEntry = (RedissonBaseLock.ExpirationEntry)EXPIRATION_RENEWAL_MAP.putIfAbsent(this.getEntryName(), entry);
    //如果是重入
    if (oldEntry != null) {
        oldEntry.addThreadId(threadId);
    } else {
    //如果是第一次获取锁 需要设置超时任务
        entry.addThreadId(threadId);

        try {
            this.renewExpiration();
        } finally {
            if (Thread.currentThread().isInterrupted()) {
                this.cancelExpirationRenewal(threadId);
            }
        }
    }
}

private void renewExpiration() {
    RedissonBaseLock.ExpirationEntry ee = (RedissonBaseLock.ExpirationEntry)EXPIRATION_RENEWAL_MAP.get(this.getEntryName());
    if (ee != null) {
        //定时任务 10s后执行
        Timeout task = this.commandExecutor.getConnectionManager().newTimeout(new TimerTask() {
            public void run(Timeout timeout) throws Exception {
                RedissonBaseLock.ExpirationEntry ent = (RedissonBaseLock.ExpirationEntry)RedissonBaseLock.EXPIRATION_RENEWAL_MAP.get(RedissonBaseLock.this.getEntryName());
                if (ent != null) {
                    Long threadId = ent.getFirstThreadId();
                    if (threadId != null) {
                        CompletionStage<Boolean> future = RedissonBaseLock.this.renewExpirationAsync(threadId);
                        future.whenComplete((res, e) -> {
                            if (e != null) {
                                RedissonBaseLock.log.error("Can't update lock " + RedissonBaseLock.this.getRawName() + " expiration", e);
                                RedissonBaseLock.EXPIRATION_RENEWAL_MAP.remove(RedissonBaseLock.this.getEntryName());
                            } else {
                                //执行完后进行递归 无限重置锁的过期时间
                                if (res) {
                                    RedissonBaseLock.this.renewExpiration();
                                } else {
                                    RedissonBaseLock.this.cancelExpirationRenewal((Long)null);
                                }

                            }
                        });
                    }
                }
            }
        //this.internalLockLeaseTime 30s
        }, this.internalLockLeaseTime / 3L, TimeUnit.MILLISECONDS);
        //向entry里面设置定时任务
        ee.setTimeout(task);
    }
}

protected CompletionStage<Boolean> renewExpirationAsync(long threadId) {
    return this.evalWriteAsync(
        this.getRawName(),
        LongCodec.INSTANCE,
        RedisCommands.EVAL_BOOLEAN,

        //重置锁的过期时间
        "if (redis.call('hexists', KEYS[1], ARGV[2]) == 1) then
        	redis.call('pexpire', KEYS[1], ARGV[1]);
        	return 1;
        end;
        return 0;",

        Collections.singletonList(this.getRawName()),
        this.internalLockLeaseTime,
        this.getLockName(threadId)
    );
}
释放锁源码分析:
RedissonLock:
public void unlock() {
    try {
        this.get(this.unlockAsync(Thread.currentThread().getId()));
    } catch (RedisException var2) {
        if (var2.getCause() instanceof IllegalMonitorStateException) {
            throw (IllegalMonitorStateException)var2.getCause();
        } else {
            throw var2;
        }
    }
}

public RFuture<Void> unlockAsync(long threadId) {
    RFuture<Boolean> future = this.unlockInnerAsync(threadId);
    CompletionStage<Void> f = future.handle((opStatus, e) -> {
        this.cancelExpirationRenewal(threadId);
        if (e != null) {
            throw new CompletionException(e);
        } else if (opStatus == null) {
            IllegalMonitorStateException cause = new IllegalMonitorStateException("attempt to unlock lock, not locked by current thread by node id: " + this.id + " thread-id: " + threadId);
            throw new CompletionException(cause);
        } else {
            return null;
        }
    });
    return new CompletableFutureWrapper(f);
}

protected void cancelExpirationRenewal(Long threadId) {
    //获取到当前锁定时的任务
    RedissonBaseLock.ExpirationEntry task = (RedissonBaseLock.ExpirationEntry)EXPIRATION_RENEWAL_MAP.get(this.getEntryName());
    if (task != null) {
        if (threadId != null) {
            //删除线程id
            task.removeThreadId(threadId);
        }

        if (threadId == null || task.hasNoThreads()) {
            Timeout timeout = task.getTimeout();
            if (timeout != null) {
                //取消定时任务
                timeout.cancel();
            }

            //删除entry
            EXPIRATION_RENEWAL_MAP.remove(this.getEntryName());
        }
-
    }
}

protected RFuture<Boolean> unlockInnerAsync(long threadId) {
    return this.evalWriteAsync(
        this.getRawName(),
        LongCodec.INSTANCE,
        RedisCommands.EVAL_BOOLEAN,

        //如果不存在自己持有的锁 不予处理
        "if (redis.call('hexists', KEYS[1], ARGV[3]) == 0) then
       		return nil;
        end;
        //counter 记录自己持有的锁的值(重入的次数) 减一
        local counter = redis.call('hincrby', KEYS[1], ARGV[3], -1);
        //如果重入次数减1后大于 0
        if (counter > 0) then
        	//重置过期时间
        	redis.call('pexpire', KEYS[1], ARGV[2]);
        	return 0;
        //否则释放锁, 并且发布消息通知锁被释放
        else
		    redis.call('del', KEYS[1]);
        	redis.call('publish', KEYS[2], ARGV[1]);
        	return 1;
        end;
        return nil;",

        Arrays.asList(this.getRawName(), this.getChannelName()),
        new Object[]{
            LockPubSub.UNLOCK_MESSAGE,
            this.internalLockLeaseTime,
            this.getLockName(threadId)
        });
}
十五、多级缓存
构造多级缓存保证redis的高可用
添加jvm进程缓存Caffeine:https://github.com/ben-manes/caffeine/wiki/home-zh-CN
//配置Caffeine
@Configuration
public class CaffeineConfig {

    @Bean
    public Cache<String, Book> cache() {
        return Caffeine.newBuilder()
                .expireAfterWrite(5, TimeUnit.MINUTES) //写入缓存数据5分钟过期
                .initialCapacity(10) //初始化容量10
                .maximumSize(100) //最大容量100
                .build();
    }
}
@RestController
@RequestMapping("/book")
public class BookController {

    @Autowired
    private StringRedisTemplate redisTemplate;

    @Autowired
    private BookService bookService;

    @Autowired
    private Cache<String, Book> cache;

    @RequestMapping("/{id}")
    public Book getBookById(@PathVariable("id") String id){

        String prefix = "book:id:";
        //caffeine.get()方法先从jvm缓存中获取,如果没有则会调用第二个参数Function函数式接口
        //第一次访问以后就会存储在jvm缓存,之后直接从缓存中获取
        return cache.get(prefix + id, key -> getBook(id));
    }

    //getBook先从redis缓存中取,如果没有则查询数据库,将数据加入redis缓存返回
   	private Book getBook(String id) {

        Book book = null;
        Map<Object, Object> entries = redisTemplate.opsForHash().entries("book:id:" + id);
        if(ObjectUtils.isEmpty(entries))
        {
            book = bookService.getById(id);
            Map<String, Object> map = BeanUtil.beanToMap(book, new HashMap<>(),
                    CopyOptions.create()
                            .ignoreNullValue()
                            .setFieldValueEditor((fieldName, fieldValue) -> fieldValue.toString())
            );
            redisTemplate.opsForHash().putAll("book:id:" + id, map);
            return book;
        }

        Book b = BeanUtil.fillBeanWithMap(entries, new Book(),
                CopyOptions.create()
                        .ignoreNullValue()
                        .setFieldValueEditor((name, value) -> value.toString())
        );

        return b;
    }
}
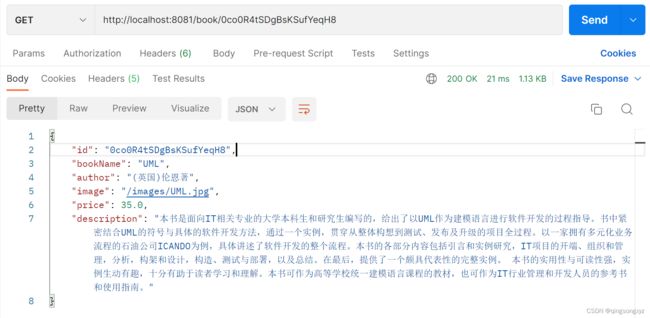
多次访问接口只查询了一次数据库:
十六、缓存淘汰策略
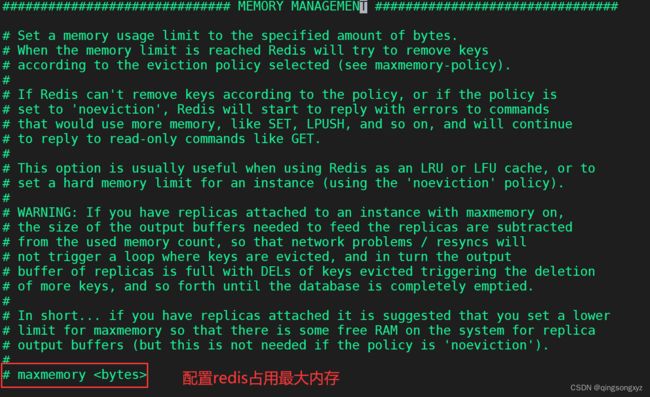
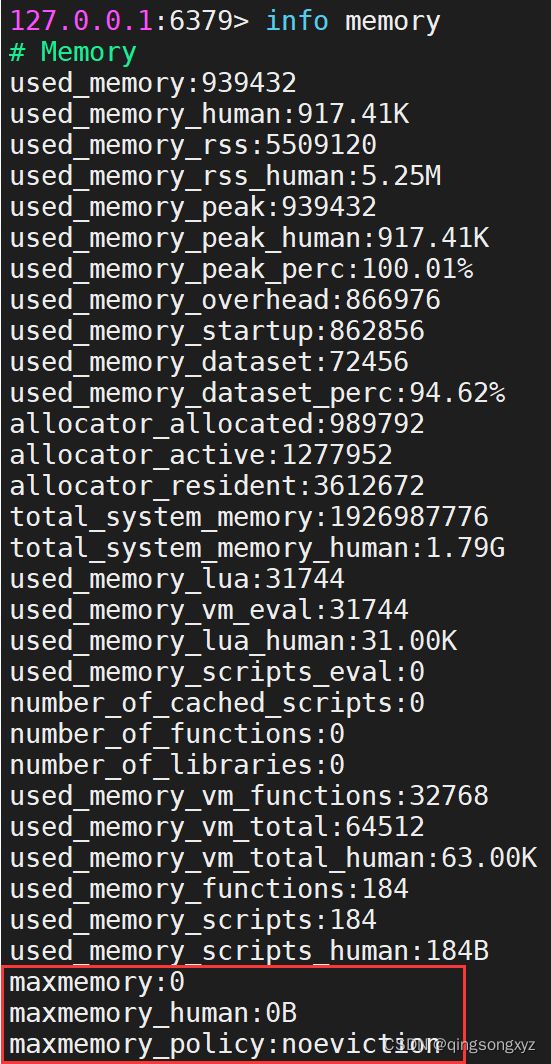
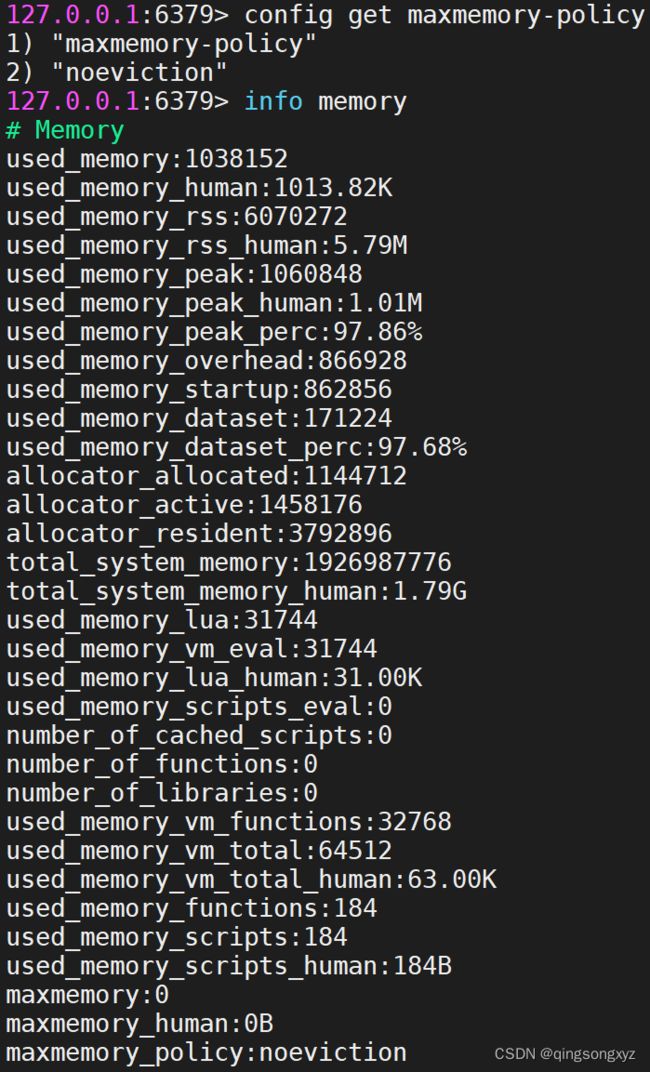
maxmemory
如果没有配置或设置最大内存为0时,对于64位操作系统不限制其内存大小,对于32位操作系统最多用3G内存
一般设置为最大物理内存的3/4
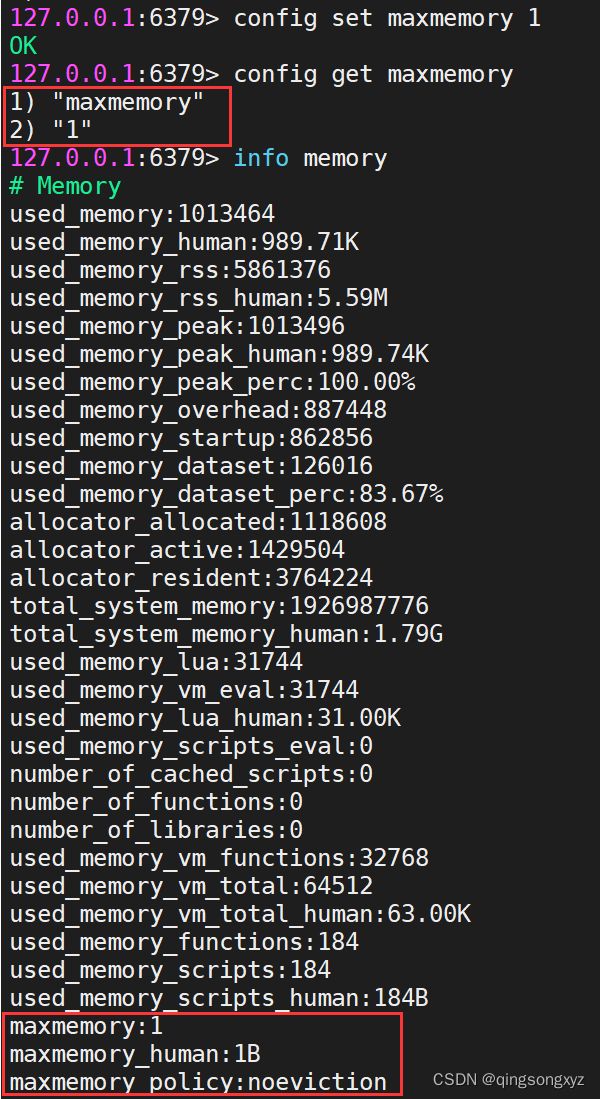
也可以通过命令修改
config get maxmemory //查看redis最大内存
config set maxmemory  //设置redis最大内存
info maxmemory //查看redis使用内存大小
此时对于缓存淘汰策略noevition存入数据产生OOM
过期数据的删除策略
-
定时删除:需要时刻删除,对CPU不友好
-
惰性删除:数据达到过期时间不处理,等到下次访问该数据时进行删除,对内存不友好,如果大量数据长期未访问,则不会被删除存在于内存之中,导致内存泄漏
-
定期删除:每隔一段时间执行一次删除操作,限制操作执行时长和频率减少对CPU的影响,但是删除操作的时长的频率不好确定
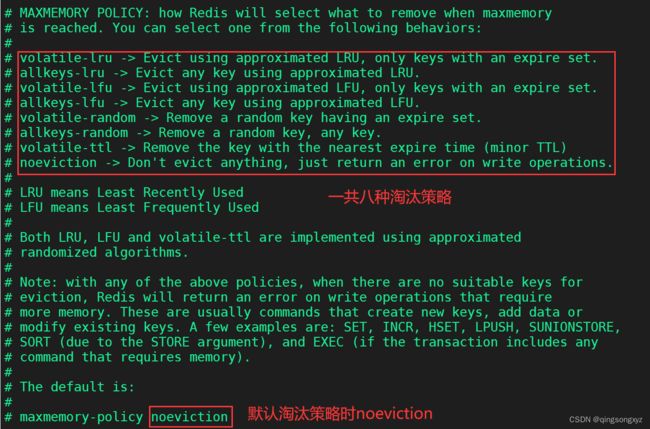
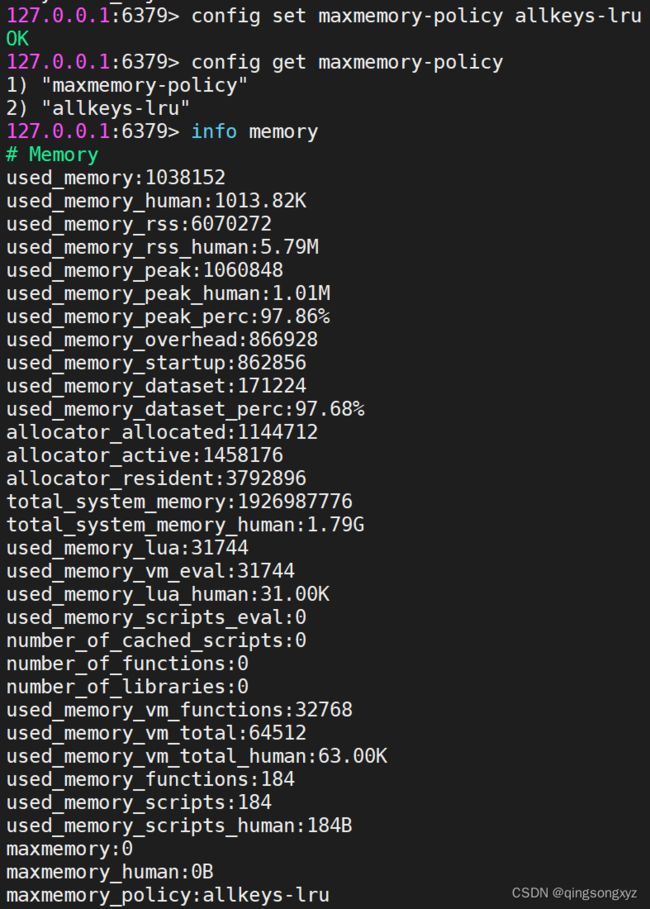
当写入数据将导致超出maxmemory限制时,Redis会采用maxmemory-policy所指定的策略进行数据淘汰
| 策略 | 解释 |
|---|---|
| volatile-lru | 从设置了过期时间的键中,使用LRU算法选择键,进行淘汰 |
| allkeys-lru(推荐) | 从所有的键中,使用LRU算法选择键,进行淘汰 |
| volatile-lfu | 从设置了过期时间的键中,使用LFU算法选择键,进行淘汰 |
| allkeys-lfu | 从所有的键中,使用LFU算法选择键,进行淘汰 |
| volatile-random | 从设置了过期时间的键中,随机选择键,进行淘汰 |
| allkeys-random | 从所有的键中,随机选择键,进行淘汰 |
| volatile-ttl | 从设置了过期时间的键中,选择过期时间最小的键,进行淘汰 |
| noeviction(默认) | 直接抛出OOM |
LRU(Least Recently Used):按照最近最少使用原则来筛选数据,即最不常用的数据会被筛选出来
若一个key很少被访问,只是刚刚被访问了一次,则它就被认为是热点数据,短时间内不会被淘汰
LFU(Least Frequently Used):根据key的最近访问频率进行淘汰。为每个数据增加了一个计数器,来统计其访
问次数。首先会根据数据的访问次数进行筛选,把访问次数最低的数据淘汰出内存。如果两个数据的访问次数
相同,再比较这两个数据的访问时间,把访问时间更早的数据淘汰出内存
config set maxmemory-policy allkeys-lru
LRU算法实现
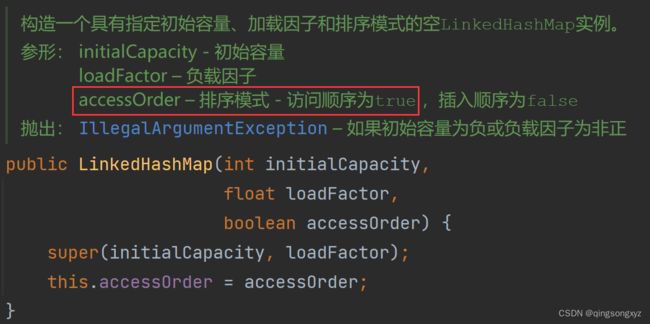
1.使用LinkedHashMap
public class LRU01<K, V> extends LinkedHashMap<K, V> {

    private int capacity;

    public LRU01(int capacity) {
        //初始容量为最大容量 默认加载因子为0.75 按元素访问顺序排序
        super(capacity, 0.75f, true);
        this.capacity = capacity;
    }

    /**
     * 如果map大小大于最大容量删除最久未使用的元素
    */
    @Override
    protected boolean removeEldestEntry(Map.Entry<K, V> eldest) {
        return super.size() > capacity;
    }

    public static void main(String[] args) {

        //最大容量为3
        LRU01<Integer, Object> lru01 = new LRU01<>(3);

        lru01.put(1, "a");
        lru01.put(2, "b");
        lru01.put(3, "c");

        System.out.println(lru01.keySet());
        lru01.put(4, "d"); //将最久未使用的元素1删除
        System.out.println(lru01.keySet());
        lru01.put(3, "c");
        System.out.println(lru01.keySet());
        lru01.put(3, "c");
        System.out.println(lru01.keySet());
        lru01.put(5, "c"); //将最久未使用的元素2删除
        System.out.println(lru01.keySet());
    }
}

/*
[1, 2, 3]
[2, 3, 4]
[2, 4, 3]
[2, 4, 3]
[4, 3, 5]
*/
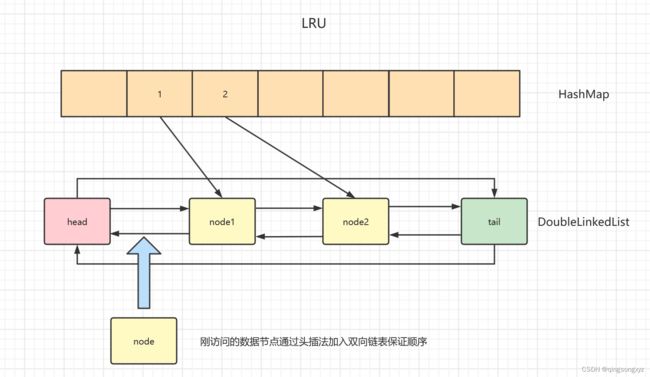
2.使用双向链表和哈希表
public class LRU02 {

    //最大容量
    private int cacheSize;

    //map用来查找数据
    private Map<Integer, Node<Integer, Object>> map;

    //按访问顺序存储数据
    private DLinkedList<Integer, Object> dLinkedList;

    public LRU02(int cacheSize) {
        this.cacheSize = cacheSize;
        map = new HashMap<>();
        dLinkedList = new DLinkedList<>();
    }

    //通过key获取值
    public Object get(int key) {
        if (!map.containsKey(key)) {
            return -1;
        }
        Node<Integer, Object> node = map.get(key);
        dLinkedList.removeNode(node);
        dLinkedList.addToHead(node);
        return node.getValue();
    }

    //存入数据
    public void put(int key, int value) {
        //1.如果map中存在则修改值
        if (map.containsKey(key)) {
            Node<Integer, Object> node = map.get(key);
            node.setValue(value);
            map.put(key, node);

            dLinkedList.removeNode(node);
            dLinkedList.addToHead(node);
        } else {
            //2.如果map中不存在,判断是否存满
            if(map.size() == cacheSize){
                //2.1.已经存满将最后一个(最久未访问)数据删除
                Node<Integer, Object> lastNode = dLinkedList.getLastNode();
                map.remove(lastNode.key);
                dLinkedList.removeNode(lastNode);
            }
            //3.将数据加入队列
            Node<Integer, Object> node = new Node<>(key, value);
            map.put(key, node);
            dLinkedList.addToHead(node);
        }
    }

    public int getCacheSize() {
        return cacheSize;
    }

    public void setCacheSize(int cacheSize) {
        this.cacheSize = cacheSize;
    }

    public Map<Integer, Node<Integer, Object>> getMap() {
        return map;
    }

    public void setMap(Map<Integer, Node<Integer, Object>> map) {
        this.map = map;
    }

    //节点类
    static class Node<K, V> {
        private K key;

        private V value;

        private Node<K, V> pre;

        private Node<K, V> next;

        public Node() {
            this.next = this.pre = null;
        }

        public Node(K key, V value) {
            this.key = key;
            this.value = value;
            this.next = this.pre = null;
        }

        public K getKey() {
            return key;
        }

        public void setKey(K key) {
            this.key = key;
        }

        public V getValue() {
            return value;
        }

        public void setValue(V value) {
            this.value = value;
        }

        public Node<K, V> getPre() {
            return pre;
        }

        public void setPre(Node<K, V> pre) {
            this.pre = pre;
        }

        public Node<K, V> getNext() {
            return next;
        }

        public void setNext(Node<K, V> next) {
            this.next = next;
        }

        @Override
        public String toString() {
            return "Node{" +
                    "key=" + key +
                    ", value=" + value +
                    '}';
        }
    }

    //双向链表
    static class DLinkedList<K, V> {
        private Node<K, V> head;

        private Node<K, V> tail;

        public DLinkedList() {
            this.head = new Node<>();
            this.tail = new Node<>();
            this.head.setNext(tail);
            tail.setPre(this.head);
        }

        /**
         * 头插法插入节点
         *
         * @param node 节点
         */
        public void addToHead(Node<K, V> node) {
            node.setNext(this.head.getNext());
            this.head.getNext().setPre(node);
            node.setPre(this.head);
            this.head.setNext(node);
        }

        /**
         * 删除节点
         *
         * @param node 节点
         */
        public void removeNode(Node<K, V> node) {
            node.getNext().setPre(node.getPre());
            node.getPre().setNext(node.getNext());
            node.setNext(null);
            node.setPre(null);
        }

        public Node<K, V> getLastNode() {
            return this.tail.getPre();
        }

        public Node<K, V> getHead() {
            return head;
        }

        public void setHead(Node<K, V> head) {
            this.head = head;
        }

        public Node<K, V> getTail() {
            return tail;
        }

        public void setTail(Node<K, V> tail) {
            this.tail = tail;
        }
    }

    public static void main(String[] args) {
        LRU02 lru02 = new LRU02(3);
        lru02.put(1, 1);
        lru02.put(2, 2);
        lru02.put(3, 3);

        System.out.println(lru02.getMap().keySet());
        lru02.put(4, 4);
        System.out.println(lru02.getMap().keySet());
        lru02.put(3, 3);
        System.out.println(lru02.getMap().keySet());
        lru02.put(3, 3);
        System.out.println(lru02.getMap().keySet());
        lru02.put(5, 5);
        System.out.println(lru02.getMap().keySet());

    }
}

/*
[1, 2, 3]
[2, 3, 4]
[2, 3, 4]
[2, 3, 4]
[3, 4, 5]
*/
十七、常见问题
1.缓存穿透
服务器请求增加,出现很多非正常Url请求或redis宕机,在redis中获取不到数据,命中率降低,请求一直访问数据库
解决方案:
- 对空值(获取不到的key,设置值为空)做缓存
- 设置可访问的白名单
- 使用布隆过滤器
布隆过滤器(Bloom Filter):实际上是一个很长的二进制数组和一系列Hash函数,用于检索一个元素是否在一个集合中。查询时间很快,但存在有一定的误识别率和删除困难
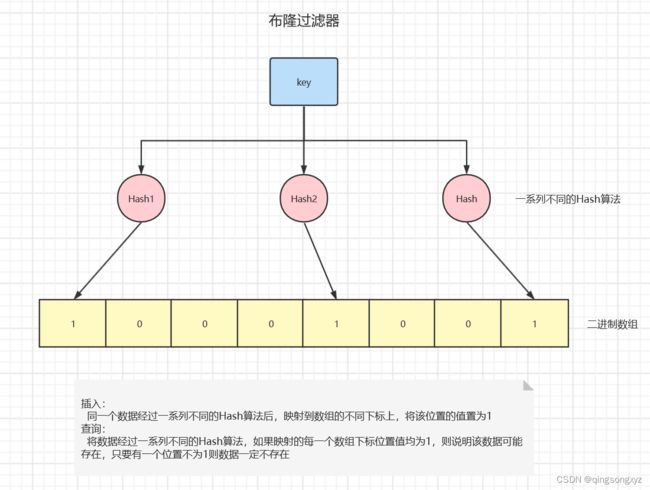
当布隆过滤器中存放多个值时,可能会发生Hash碰撞,导致不同的值经过Hash算法后位于相同的下标位置,导致误判
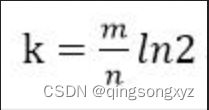
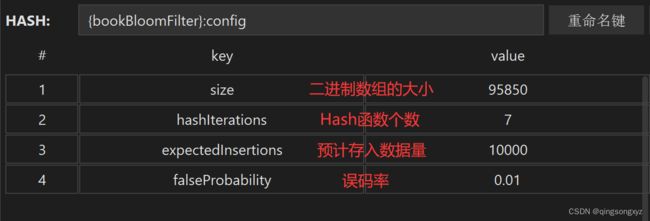
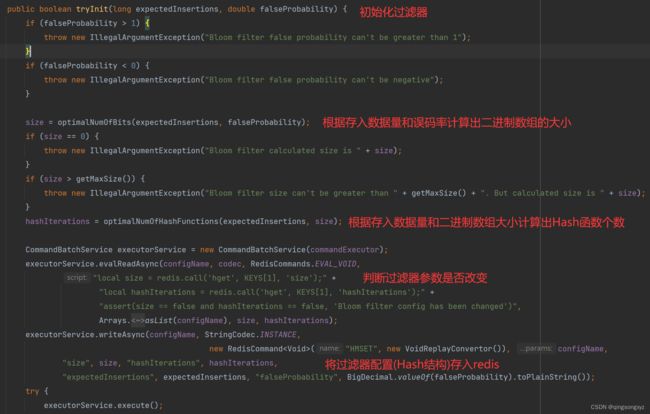
该数据存在根据存入数据量n,误判率fpp,计算出二进制数组大小m和Hash函数的个数k
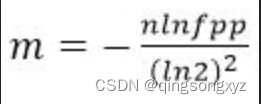
使用RedissonBloomFilter
导入依赖:
<dependency>
    <groupId>org.springframework.bootgroupId>
    <artifactId>spring-boot-starter-data-redisartifactId>
dependency>
<dependency>
    <groupId>org.redissongroupId>
    <artifactId>redissonartifactId>
    <version>3.17.4version>
dependency>
<dependency>
    <groupId>cn.hutoolgroupId>
    <artifactId>hutool-allartifactId>
    <version>5.8.4version>
dependency>
配置类:
@Configuration
public class RedisConfig {

    @Bean
    public RedissonClient redissonClient(){

        Config config = new Config();

        //添加redis单节点配置
        config.useSingleServer().setAddress("redis://IP:6379").setPassword("密码");

        //创建客户端
        return Redisson.create(config);
    }

    //配置集群的主从读写分离
    @Bean
    public LettuceClientConfigurationBuilderCustomizer configurationBuilderCustomizer(){
        return configurationBuilder -> configurationBuilder.readFrom(ReadFrom.REPLICA_PREFERRED);
    }

    @Bean
    public RedisTemplate<String, Object> redisTemplate(RedisConnectionFactory redisConnectionFactory) {
        RedisTemplate<String, Object> template = new RedisTemplate<>();
        template.setConnectionFactory(redisConnectionFactory);

        Jackson2JsonRedisSerializer jackson2JsonRedisSerializer = new Jackson2JsonRedisSerializer(Object.class);

        ObjectMapper objectMapper = new ObjectMapper();
        objectMapper.setVisibility(PropertyAccessor.ALL, JsonAutoDetect.Visibility.ANY);

        //方法已过时
        //objectMapper.enableDefaultTyping(ObjectMapper.DefaultTyping.NON_FINAL);
        objectMapper.activateDefaultTyping(LaissezFaireSubTypeValidator.instance, ObjectMapper.DefaultTyping.NON_FINAL, JsonTypeInfo.As.PROPERTY);

        jackson2JsonRedisSerializer.setObjectMapper(objectMapper);

        StringRedisSerializer stringRedisSerializer = new StringRedisSerializer();

        // key采用String的序列化方式
        template.setKeySerializer(stringRedisSerializer);

        // hash的key也采用String的序列化方式
        template.setHashKeySerializer(stringRedisSerializer);

        // value序列化方式采用jackson
        template.setValueSerializer(jackson2JsonRedisSerializer);

        // hash的value序列化方式采用jackson
        template.setHashValueSerializer(jackson2JsonRedisSerializer);

        template.afterPropertiesSet();

        return template;
    }
}
在查询redis前添加布隆过滤器判断数据是否存在
bloomFilter:
  book:
    expectedInsertions: 10000
    falseProbability: 0.01
    #expiration: 30 #过期时间
@Slf4j
@Service
public class BookServiceImpl extends ServiceImpl<BookMapper, Book> implements BookService {

    @Value("${bloomFilter.book.expectedInsertions}")
    private long expectedInsertions;

    @Value("${bloomFilter.book.falseProbability}")
    private double falseProbability;

    //@Value("${bloomFilter.book.expiration}")
    //private long expiration;

    @Autowired
    private RedissonClient redissonClient;

    private RBloomFilter<Object> bookBloomFilter;

    public RBloomFilter<Object> getBookBloomFilter() {
        return bookBloomFilter;
    }

    @PostConstruct
    public RBloomFilter<Object> initBloomFilter() {
        bookBloomFilter = redissonClient.getBloomFilter("bookBloomFilter");
        bookBloomFilter.tryInit(expectedInsertions, falseProbability);
        //设置过期时间在数据库删除数据后定期重建过滤器
        //bookBloomFilter.expire(Duration.ofSeconds(expiration));
        return bookBloomFilter;
    }

    //定时任务,定期将数据库数据加入过滤器
    @Scheduled(cron = "0/30 * * * * ?") //30s执行一次
    public void loadBloomFilter() {
        log.info("定时任务开启...");
        log.warn("expectedInsertions:{}, falseProbability:{}, expiration:{}", expectedInsertions, falseProbability, expiration);
        List<Book> bookList = list();
        bookList.forEach(b -> bookBloomFilter.add(b.getId()));
        log.info("定时任务完成...");
    }
}
@RestController
@RequestMapping("/book")
public class BookController {

    @Autowired
    private StringRedisTemplate redisTemplate;

    @Autowired
    private BookService bookService;

    @GetMapping("/list")
    public List<Book> list(){
        return bookService.list();
    }

    @RequestMapping("/{id}")
    public Book getBookById(@PathVariable("id") String id){

        String prefix = "book:id:";
        Book book = null;
        //如果布隆过滤器中不存在该数据则直接返回null
        if(!((BookServiceImpl)bookService).getBookBloomFilter().contains(id))
        {
            return book;
        }
        //访问redis缓存获取数据
        Map<Object, Object> entries = redisTemplate.opsForHash().entries("book:id:" + id);
        if(ObjectUtils.isEmpty(entries))
        {
            //访问数据库获取数据
            book = bookService.getById(id);
            //存入redis缓存
            if(!ObjectUtils.isEmpty(book)) {
                Map<String, Object> map = BeanUtil.beanToMap(book, new HashMap<>(),
                        CopyOptions.create()
                                .ignoreNullValue()
                                .setFieldValueEditor((fieldName, fieldValue) -> fieldValue.toString())
                );
                redisTemplate.opsForHash().putAll("book:id:" + id, map);
                redisTemplate.expire("book:id:" + id, Duration.ofMinutes(10));
            }
            return book;
        }

        Book b = BeanUtil.fillBeanWithMap(entries, new Book(),
                CopyOptions.create()
                        .ignoreNullValue()
                        .setFieldValueEditor((name, value) -> value.toString())
        );
        return b;
    }
}
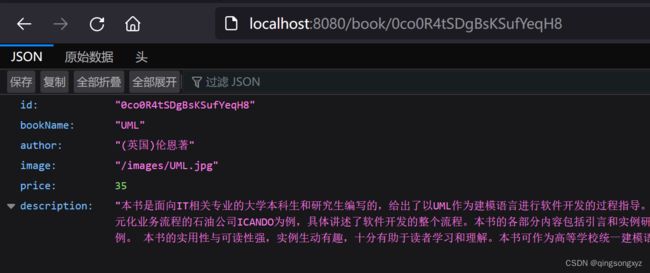
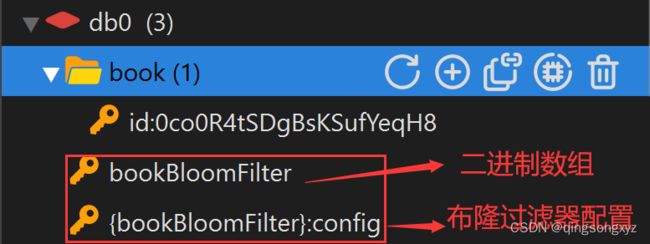
测试:
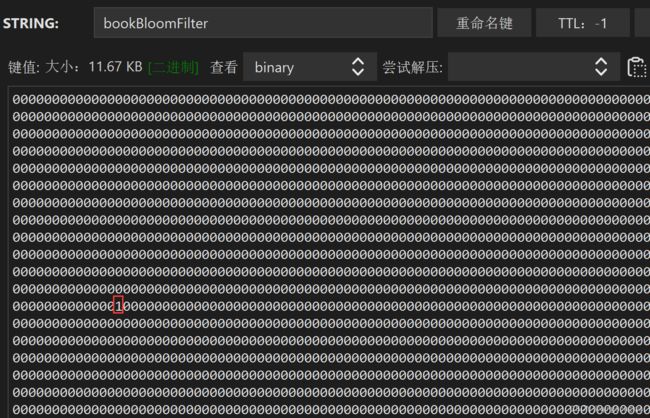
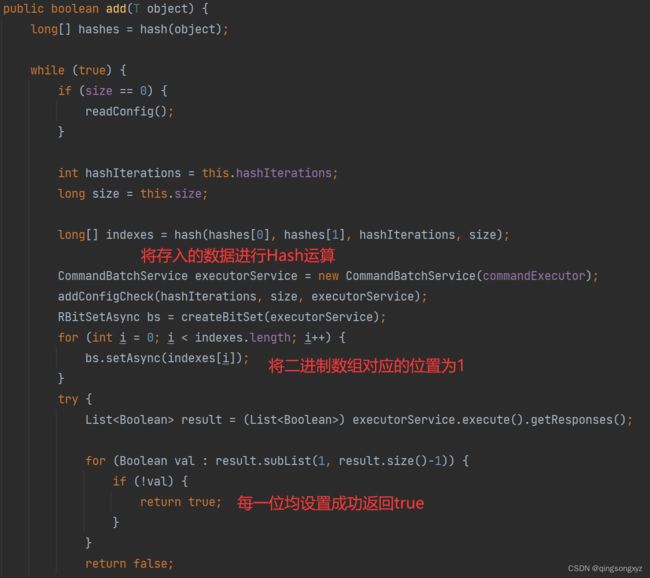
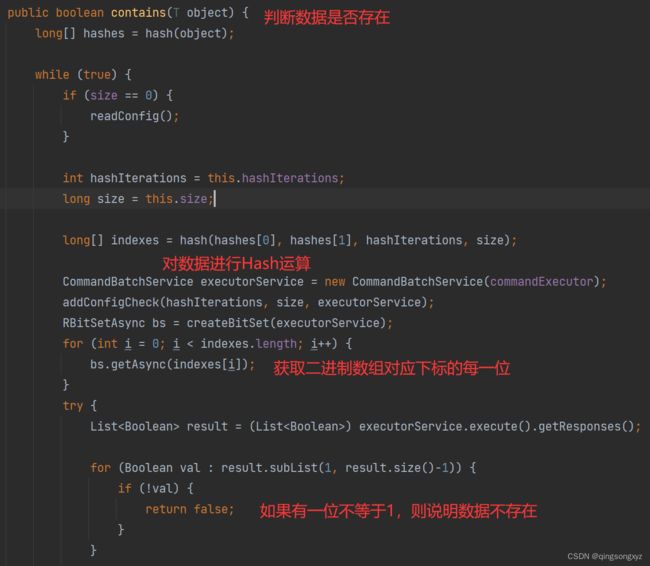
源码分析:
2.缓存击穿
redis中某个key过期,大量请求访问这个key,造成数据库压力瞬间增加
解决方案:
- 预先设置热门数据
- 实时调整key的过期时长
- 使用锁(效率低)
3.缓存雪崩
在极少的时间段内出现大量key集中过期情况,造成数据库压力变大服务器崩溃
解决方案:
- 构建多层缓存架构
- 使用锁(效率低)
- 设置过期标志更新缓存(提前从数据库更新值)
- 让key的过期时间分散开
