SpringBoot + Vue前后端分离项目实战 || 一:Vue前端设计
文章目录
-
- 环境配置
- 开发工具
- 下载Vue前端模板
- 前端项目启动
- 前端说明及修改
-
- 修改导航栏
- 自定义菜单与子菜单
- 增加导航标签功能
- 前端数据格式
B站视频讲解:2023全网最简单但实用的SpringBoot+Vue前后端分离项目实战
不想看视频可浏览此文章笔记,比较详细
环境配置
Nodejs: 8.17.0
Vue: 3.11.0
Maven: 3.6.0
Java版本: 1.8.0_371
MySQL: 5.5_56
Redis: 5.0.14
一般推荐使用低版本,因为高版本兼容低版本,反之不行
开发工具
IDEA 2021(后端)
VScode(前端)
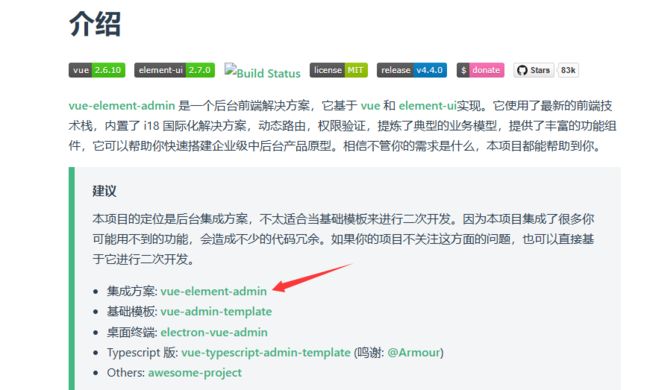
下载Vue前端模板
https://panjiachen.gitee.io/vue-element-admin-site/zh/guide/
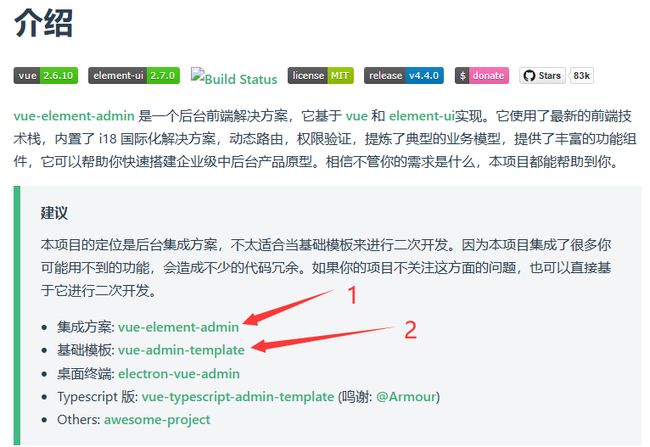
此处建议下载1和2,项目主要基于2开发,但是会拓展一个前端功能需要用到1里面的代码
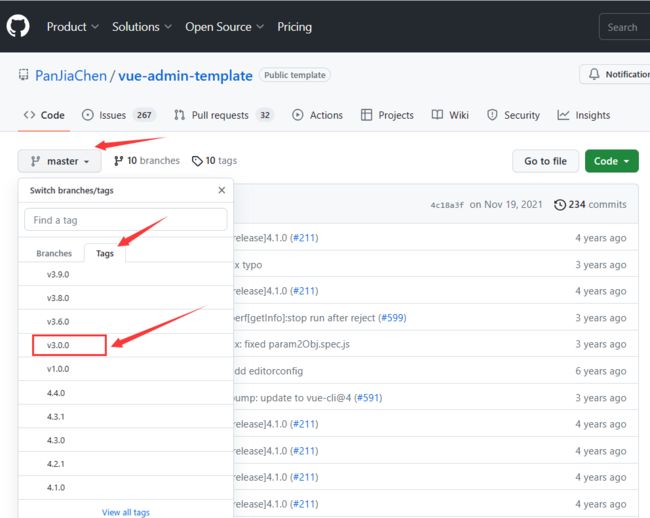
选择2后,可下载其他版本,此处我下载的是v3.0.0
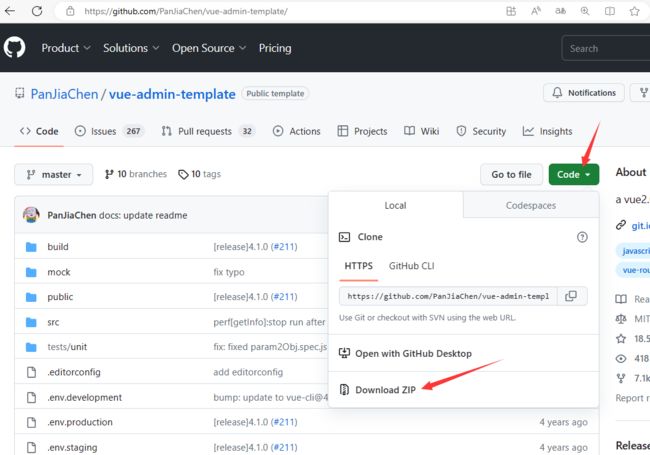
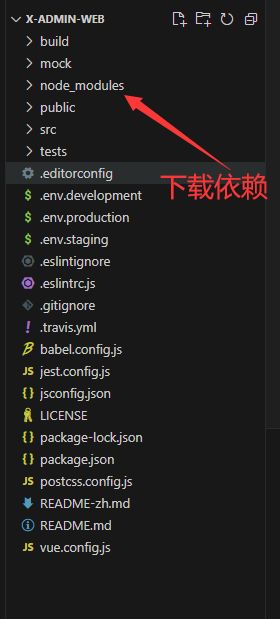
下载完成后将第2个基础模版解压到任意能找到的目录(不推荐目录中包含中文字符)
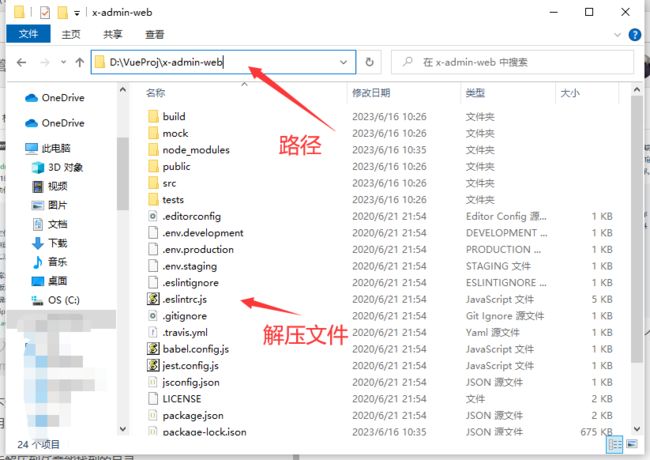
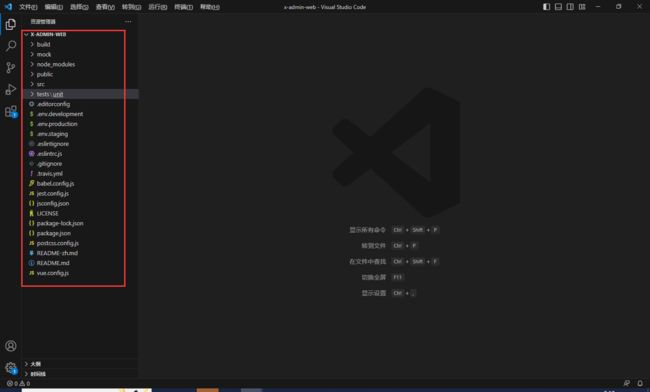
打开VScode,选择 文件 -> 打开文件夹

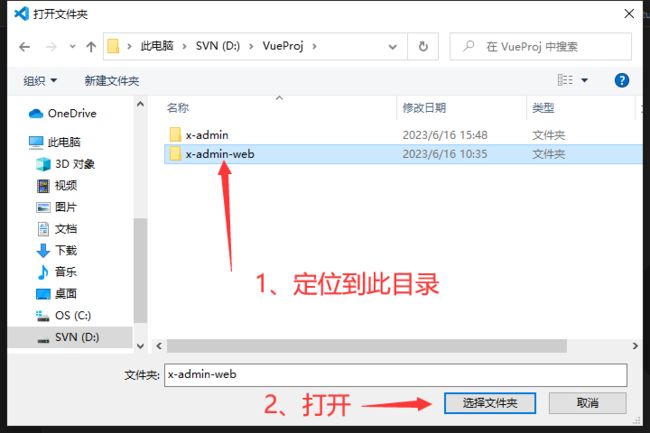
如下图 打开成功
前端项目启动
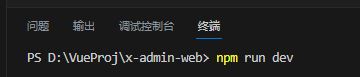
打开集成终端,一定要定位到package.json级别的目录
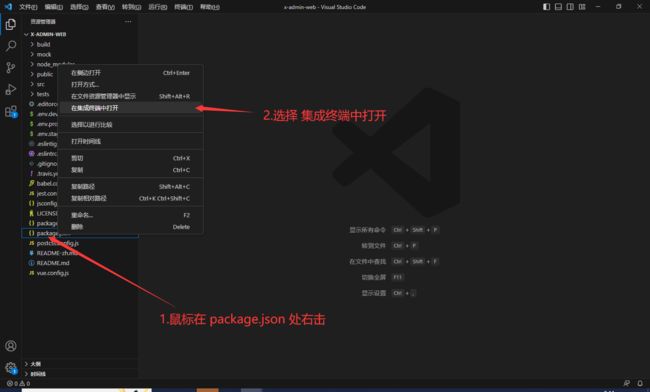
然后终端输入命令 npm install
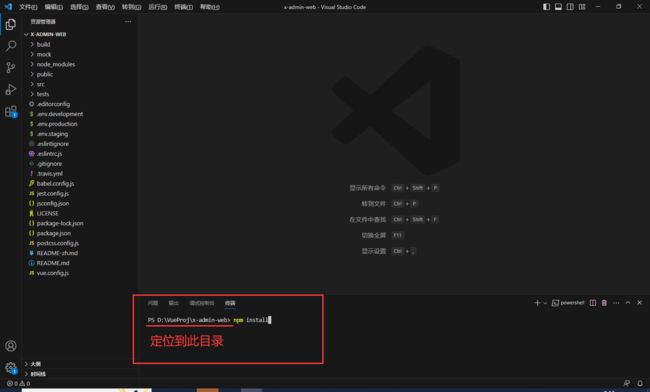
会自动下载项目的依赖
依赖下载完毕后 启动项目,运行命令npm run dev
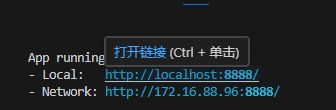
出现以下信息表示成功
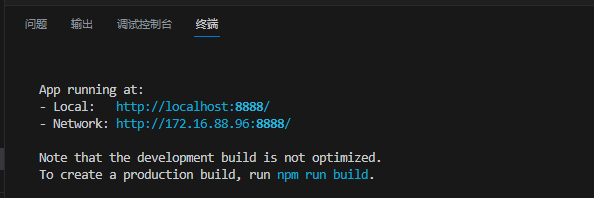
打开链接即可
前端说明及修改
前端的总体配置在文件vue.config.js中
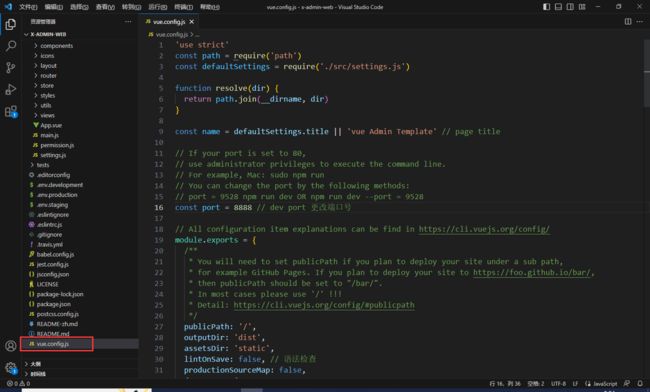
第16行 是端口号,可修改,此处我修改为8888

第34行 为是否启动项目就默认打开浏览器,因为vue支持热修改,并不用每次改完前端就需要重新启动,改完保存后前端页面就自动修改,所以此处设为false

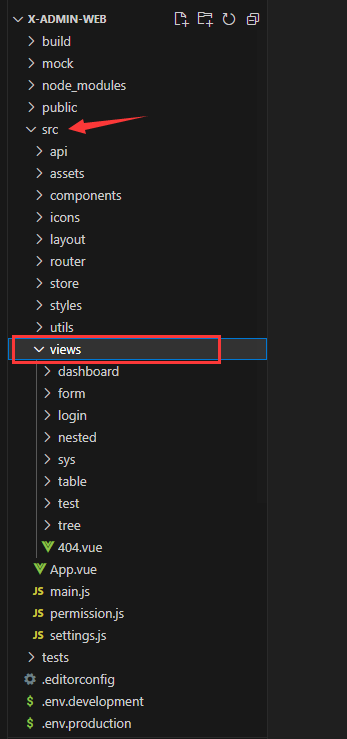
所有的页面保存在src/views文件夹中,此处的view文件夹被我修改过,稍后说明修改流程
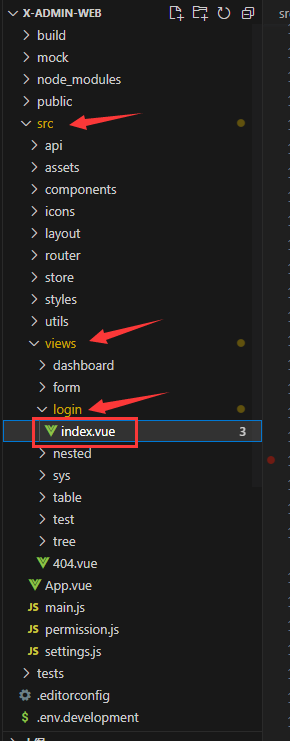
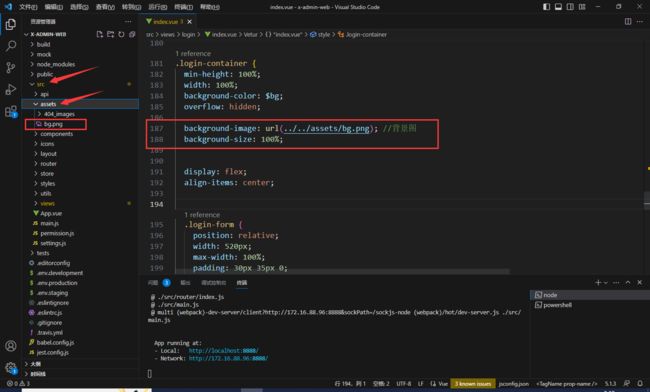
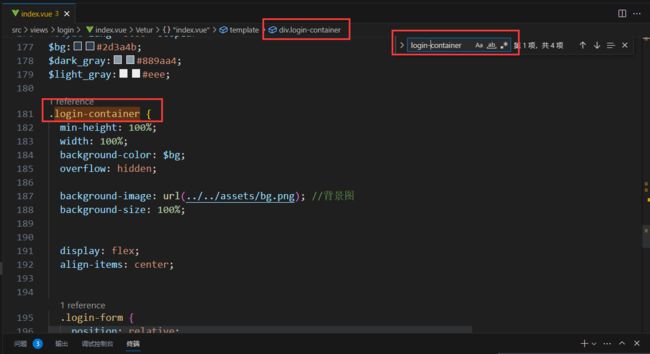
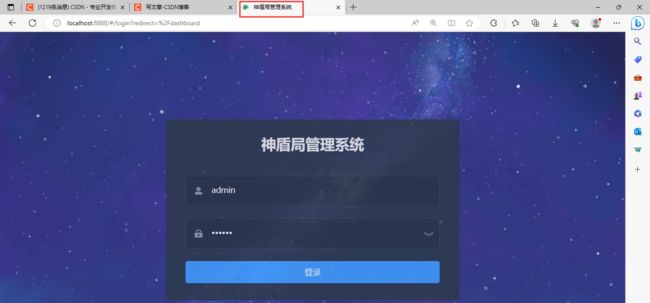
先修改登录页面src/views/login/index.vue
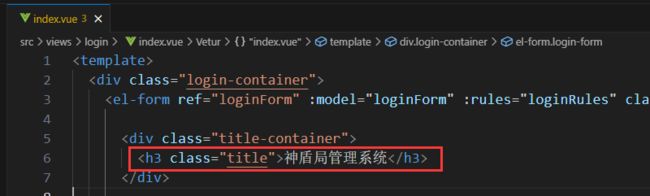
定位到第6行,修改title
定位到 187行,修改背景图,此时你需要找到一张背景图片,放在src/assets文件夹中
background-image: url(../../assets/bg.png); //背景图
background-size: 100%;
保存后页面会同步修改
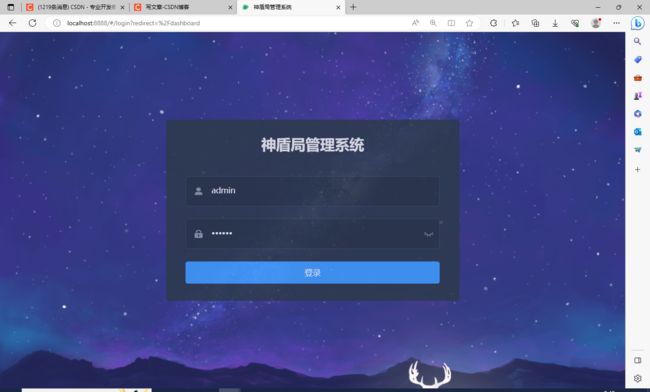
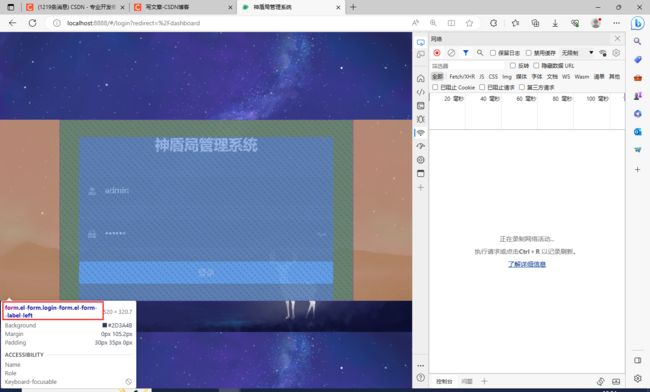
为什么要在此处才能修改背景图?
我们在浏览器中按F12打开开发者模式,选择1,然后鼠标移动到整个页面都被选择,此时左下角出现了一个类名.login.container,记住该名称
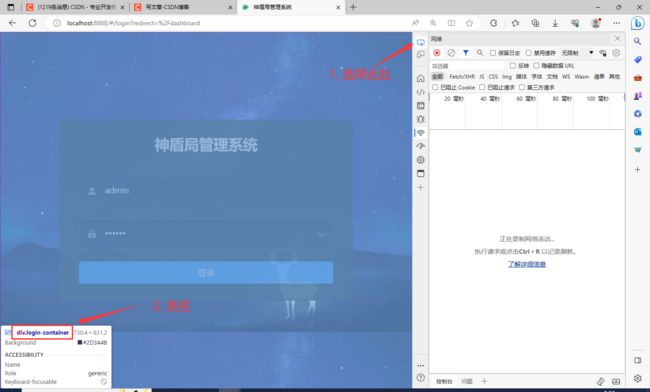
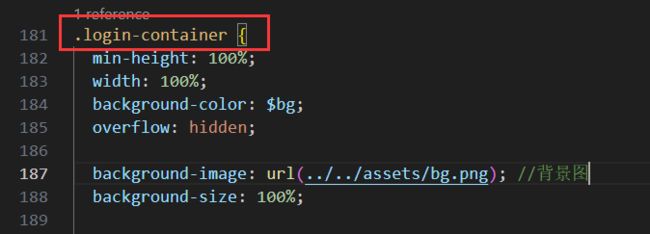
打开VScode搜索.login-container ,注意页面显示的.login.container中第二个.替换为-变为.login-container,此处就是我们需要修改的样式的地方
其他的修改:
- 将英文变中文,其实就是找到对应的英文修改为中文,可在页面记住英文单词,然后进代码查找对应的英文在哪儿,然后打上中文即可
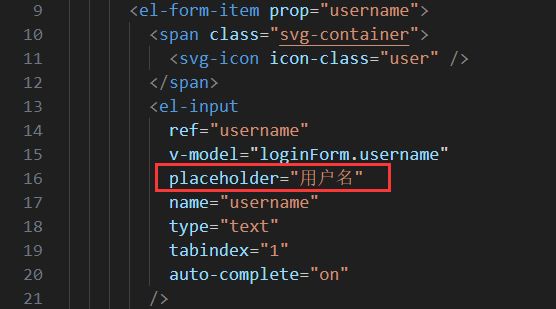
- 修改登录表单为半透明,同样
查找元素然后搜索login-form

.login-form { position: relative; width: 520px; max-width: 100%; padding: 30px 35px 0; margin: 0 auto; overflow: hidden; background-color: #2d3a4b; // 背景颜色 border-radius: 5px; // 表单圆角 opacity: 0.85; // 透明度,值越小越越透明,取值为[0,1] } - 附上我的
src\views\login\inde.vue文件的全部代码<template> <div class="login-container"> <el-form ref="loginForm" :model="loginForm" :rules="loginRules" class="login-form" auto-complete="on" label-position="left"> <div class="title-container"> <h3 class="title">神盾局管理系统</h3> </div> <el-form-item prop="username"> <span class="svg-container"> <svg-icon icon-class="user" /> </span> <el-input ref="username" v-model="loginForm.username" placeholder="用户名" name="username" type="text" tabindex="1" auto-complete="on" /> </el-form-item> <el-form-item prop="password"> <span class="svg-container"> <svg-icon icon-class="password" /> </span> <el-input :key="passwordType" ref="password" v-model="loginForm.password" :type="passwordType" placeholder="密码" name="password" tabindex="2" auto-complete="on" @keyup.enter.native="handleLogin" /> <span class="show-pwd" @click="showPwd"> <svg-icon :icon-class="passwordType === 'password' ? 'eye' : 'eye-open'" /> </span> </el-form-item> <el-button :loading="loading" type="primary" style="width:100%;margin-bottom:30px;" @click.native.prevent="handleLogin">登录</el-button> <!-- <div class="tips"> <span style="margin-right:20px;">username: admin</span> <span> password: any</span> </div> --> </el-form> </div> </template> <script> import { validUsername } from '@/utils/validate' export default { name: 'Login', data() { const validateUsername = (rule, value, callback) => { if (!validUsername(value)) { callback(new Error('请输入正确的用户名')) } else { callback() } } const validatePassword = (rule, value, callback) => { if (value.length < 6) { callback(new Error('密码不能少于6位')) } else { callback() } } return { loginForm: { username: 'admin', password: '123456' }, loginRules: { username: [{ required: true, trigger: 'blur', validator: validateUsername }], password: [{ required: true, trigger: 'blur', validator: validatePassword }] }, loading: false, passwordType: 'password', redirect: undefined } }, watch: { $route: { handler: function(route) { this.redirect = route.query && route.query.redirect }, immediate: true } }, methods: { showPwd() { if (this.passwordType === 'password') { this.passwordType = '' } else { this.passwordType = 'password' } this.$nextTick(() => { this.$refs.password.focus() }) }, handleLogin() { this.$refs.loginForm.validate(valid => { if (valid) { this.loading = true this.$store.dispatch('user/login', this.loginForm).then(() => { this.$router.push({ path: this.redirect || '/' }) this.loading = false }).catch(() => { this.loading = false }) } else { console.log('error submit!!') return false } }) } } } </script> <style lang="scss"> /* 修复input 背景不协调 和光标变色 */ /* Detail see https://github.com/PanJiaChen/vue-element-admin/pull/927 */ $bg:#283443; $light_gray:#fff; $cursor: #fff; @supports (-webkit-mask: none) and (not (cater-color: $cursor)) { .login-container .el-input input { color: $cursor; } } /* reset element-ui css */ .login-container { .el-input { display: inline-block; height: 47px; width: 85%; input { background: transparent; border: 0px; -webkit-appearance: none; border-radius: 0px; padding: 12px 5px 12px 15px; color: $light_gray; height: 47px; caret-color: $cursor; &:-webkit-autofill { box-shadow: 0 0 0px 1000px $bg inset !important; -webkit-text-fill-color: $cursor !important; } } } .el-form-item { border: 1px solid rgba(255, 255, 255, 0.1); background: rgba(0, 0, 0, 0.1); border-radius: 5px; color: #454545; } } </style> <style lang="scss" scoped> $bg:#2d3a4b; $dark_gray:#889aa4; $light_gray:#eee; .login-container { min-height: 100%; width: 100%; background-color: $bg; overflow: hidden; background-image: url(../../assets/bg.png); //背景图 background-size: 100%; display: flex; align-items: center; .login-form { position: relative; width: 520px; max-width: 100%; padding: 30px 35px 0; margin: 0 auto; overflow: hidden; background-color: #2d3a4b; // 背景颜色 border-radius: 5px; // 表单圆角 opacity: 0.85; // 透明度,值越小越越透明,取值为[0,1] } .tips { font-size: 14px; color: #fff; margin-bottom: 10px; span { &:first-of-type { margin-right: 16px; } } } .svg-container { padding: 6px 5px 6px 15px; color: $dark_gray; vertical-align: middle; width: 30px; display: inline-block; } .title-container { position: relative; .title { font-size: 26px; color: $light_gray; margin: 0px auto 40px auto; text-align: center; font-weight: bold; } } .show-pwd { position: absolute; right: 10px; top: 7px; font-size: 16px; color: $dark_gray; cursor: pointer; user-select: none; } } </style>复制代码后注意背景图的链接地址下要有文件存在
修改 页面标签 找到src\settings.js文件,然后修改第3行title
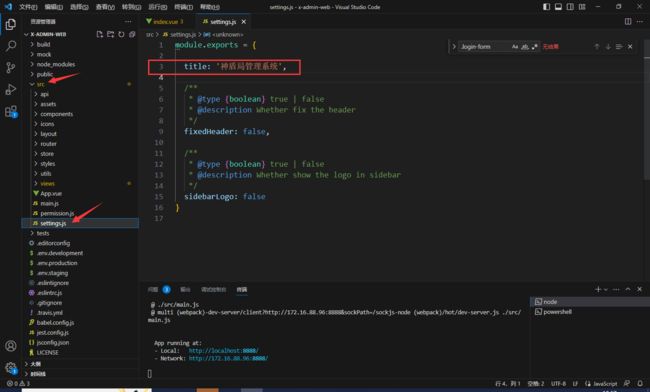
修改完毕后浏览器标签会改变
修改导航栏
点击此处会有导航窗口
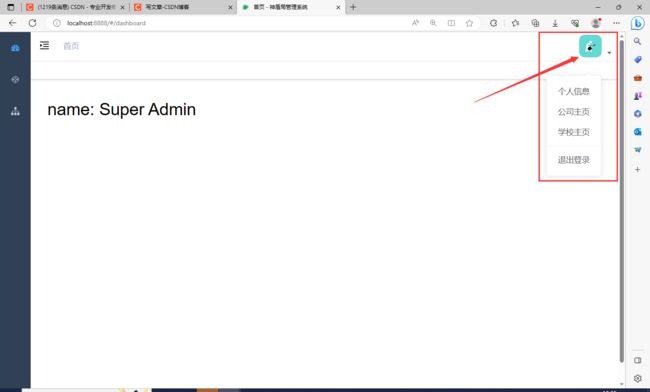
可自定义修改,找到scr\layout\components\Navbar.vue文件,修改红框处的代码
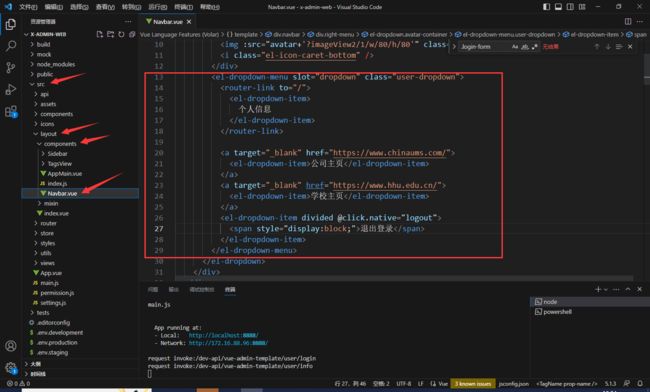
<el-dropdown-menu slot="dropdown" class="user-dropdown">
<router-link to="/">
<el-dropdown-item>
个人信息
</el-dropdown-item>
</router-link>
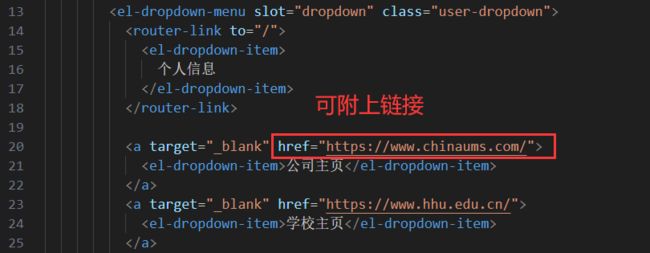
<a target="_blank" href="https://www.chinaums.com/">
<el-dropdown-item>公司主页</el-dropdown-item>
</a>
<a target="_blank" href="https://www.hhu.edu.cn/">
<el-dropdown-item>学校主页</el-dropdown-item>
</a>
<el-dropdown-item divided @click.native="logout">
<span style="display:block;">退出登录</span>
</el-dropdown-item>
</el-dropdown-menu>
自定义菜单与子菜单
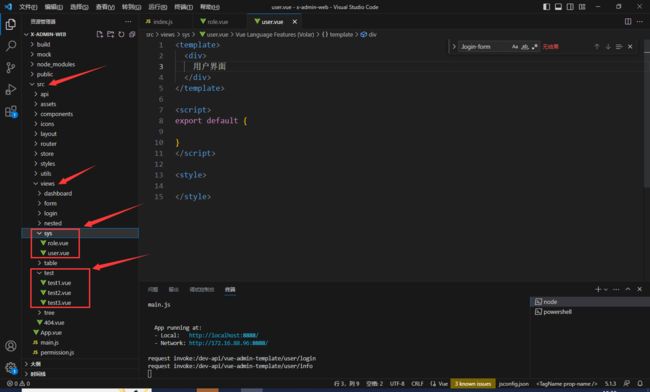
首先,在src\views\下新建文件夹sys和test,然后再分别在这两个文件夹中新建role.vue、user.vue、test1.vue、test2.vue、test3.vue文件,如下图所示
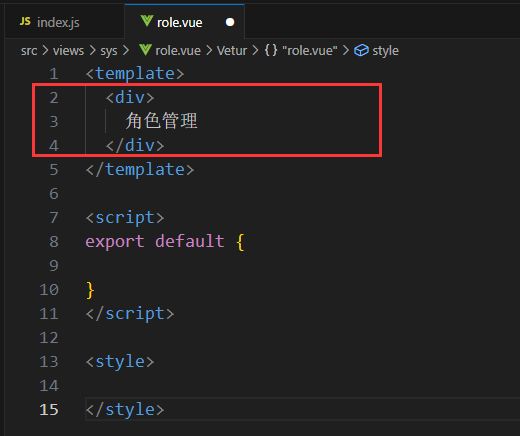
进入role.vue写代码
在VScode中输入vue会自动代码提示(需在VScode中安装vue插件),回车即可
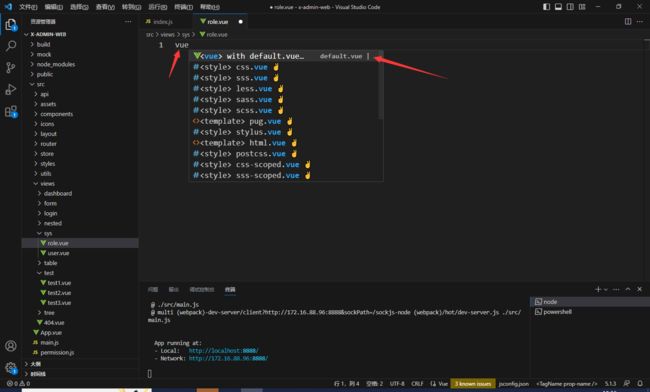
会自动生成模板
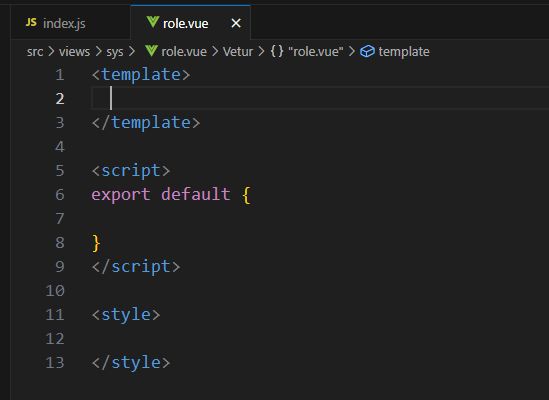
此时写上一些代码
其他新建的vue文件如法炮制
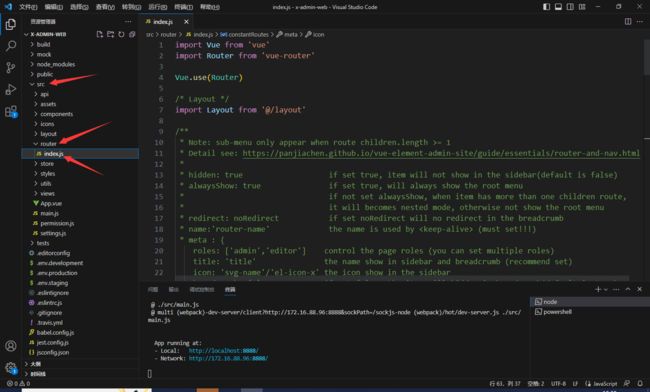
然后我们在src\router\index.js中路由链接这些新建的vue文件
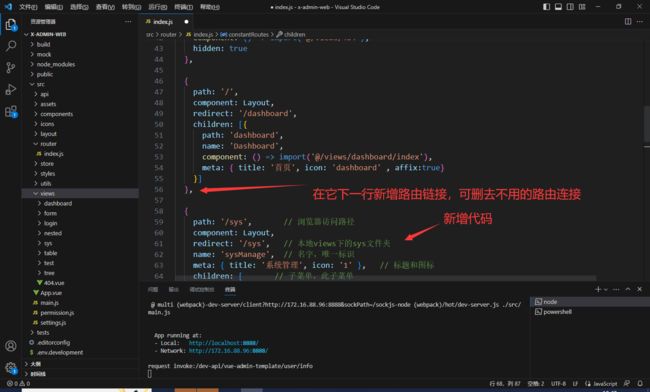
新增代码及注释
{
path: '/sys', // 浏览器访问路径
component: Layout,
redirect: '/sys', // 本地views下的sys文件夹
name: 'sysManage', // 名字,唯一标识
meta: { title: '系统管理', icon: '1' }, // 标题和图标
children: [ // 子菜单
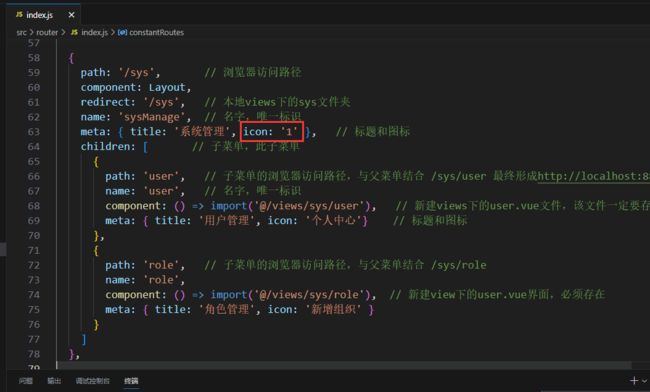
{
path: 'user', // 子菜单的浏览器访问路径,与父菜单结合 /sys/user 最终形成http://localhost:8888/#/sys/user
name: 'user', // 名字,唯一标识
component: () => import('@/views/sys/user'), // 新建views下的user.vue文件,该文件一定要存在
meta: { title: '用户管理', icon: '个人中心'} // 标题和图标
},
{
path: 'role', // 子菜单的浏览器访问路径,与父菜单结合 /sys/role
name: 'role',
component: () => import('@/views/sys/role'), // 新建view下的user.vue界面,必须存在
meta: { title: '角色管理', icon: '新增组织' }
}
]
},
注意该代码中的icon:'1',这是自定义的图标,可在阿里巴巴矢量图标库中下载自己喜欢的图标
找到喜欢的图标后点击SVG下载
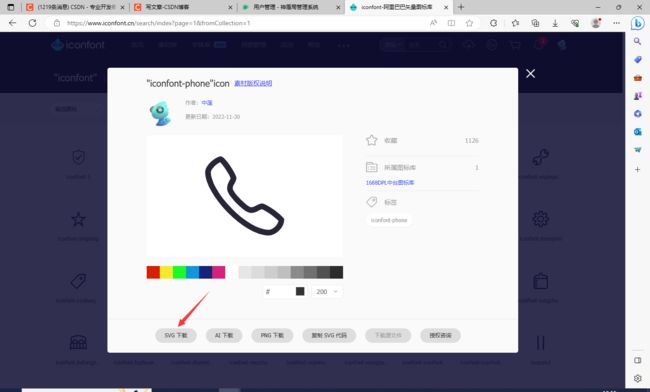
下好的图标重命名后保存在src\icons\svg文件夹中
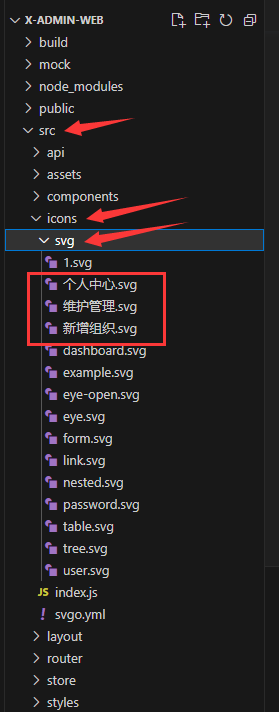
然后就可以在代码中用上该图标了,不用写路径和后缀名
![]()
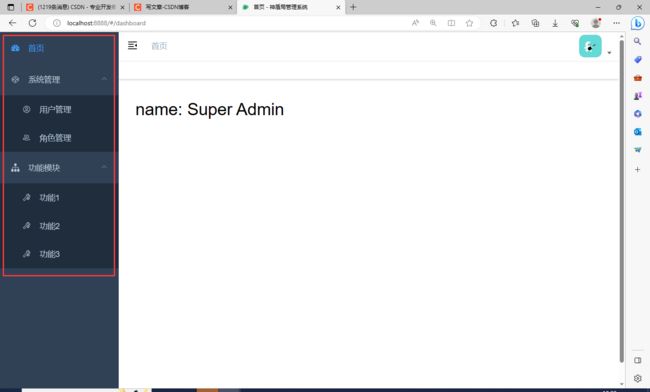
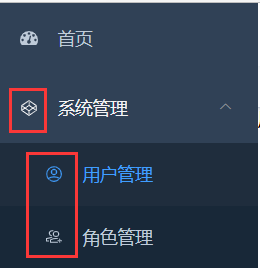
图标效果如下
我的src\router\index.js全部代码
import Vue from 'vue'
import Router from 'vue-router'

Vue.use(Router)

/* Layout */
import Layout from '@/layout'

/**
 * Note: sub-menu only appear when route children.length >= 1
 * Detail see: https://panjiachen.github.io/vue-element-admin-site/guide/essentials/router-and-nav.html
 *
 * hidden: true                   if set true, item will not show in the sidebar(default is false)
 * alwaysShow: true               if set true, will always show the root menu
 *                                if not set alwaysShow, when item has more than one children route,
 *                                it will becomes nested mode, otherwise not show the root menu
 * redirect: noRedirect           if set noRedirect will no redirect in the breadcrumb
 * name:'router-name'             the name is used by  (must set!!!)
 * meta : {
    roles: ['admin','editor']    control the page roles (you can set multiple roles)
    title: 'title'               the name show in sidebar and breadcrumb (recommend set)
    icon: 'svg-name'/'el-icon-x' the icon show in the sidebar
    breadcrumb: false            if set false, the item will hidden in breadcrumb(default is true)
    activeMenu: '/example/list'  if set path, the sidebar will highlight the path you set
  }
 */

/**
 * constantRoutes
 * a base page that does not have permission requirements
 * all roles can be accessed
 */
export const constantRoutes = [
  {
    path: '/login',
    component: () => import('@/views/login/index'),
    hidden: true
  },

  {
    path: '/404',
    component: () => import('@/views/404'),
    hidden: true
  },

  {
    path: '/',
    component: Layout,
    redirect: '/dashboard',
    children: [{
      path: 'dashboard',
      name: 'Dashboard',
      component: () => import('@/views/dashboard/index'),
      meta: { title: '首页', icon: 'dashboard' , affix:true}
    }]
  },

  {
    path: '/sys',       // 浏览器访问路径
    component: Layout,
    redirect: '/sys',   // 本地views下的sys文件夹
    name: 'sysManage',  // 名字,唯一标识
    meta: { title: '系统管理', icon: '1' },   // 标题和图标
    children: [       // 子菜单,此子菜单
      {
        path: 'user',   // 子菜单的浏览器访问路径,与父菜单结合 /sys/user 最终形成http://localhost:8888/#/sys/user
        name: 'user',   // 名字,唯一标识
        component: () => import('@/views/sys/user'),   // 新建views下的user.vue文件,该文件一定要存在
        meta: { title: '用户管理', icon: '个人中心'}    // 标题和图标
      },
      {
        path: 'role',   // 子菜单的浏览器访问路径,与父菜单结合 /sys/role
        name: 'role',
        component: () => import('@/views/sys/role'),  // 新建view下的user.vue界面,必须存在
        meta: { title: '角色管理', icon: '新增组织' }
      }
    ]
  },

  {
    path: '/test',
    component: Layout,
    redirect: '/test',
    name: 'test',
    meta: { title: '功能模块', icon: 'tree' },
    children: [   //子菜单
      {
        path: 'test1',
        name: 'test1',
        component: () => import('@/views/test/test1'),   // 新建view下的user.vue界面
        meta: { title: '功能1', icon: '维护管理' }
      },
      {
        path: 'test2',
        name: 'test2',
        component: () => import('@/views/test/test2'),  // 新建view下的user.vue界面,必须存在
        meta: { title: '功能2', icon: '维护管理' }
      },
      {
        path: 'test3',
        name: 'test3',
        component: () => import('@/views/test/test3'),  // 新建view下的user.vue界面,必须存在
        meta: { title: '功能3', icon: '维护管理' }
      }
    ]
  },


  // 404 page must be placed at the end !!!
  { path: '*', redirect: '/404', hidden: true }
]

const createRouter = () => new Router({
  // mode: 'history', // require service support
  scrollBehavior: () => ({ y: 0 }),
  routes: constantRoutes
})

const router = createRouter()

// Detail see: https://github.com/vuejs/vue-router/issues/1234#issuecomment-357941465
export function resetRouter() {
  const newRouter = createRouter()
  router.matcher = newRouter.matcher // reset router
}

export default router
注意复制代码时,确认好自己的icon图标文件
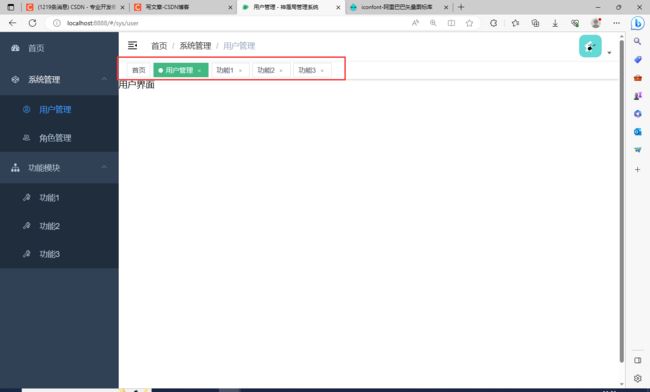
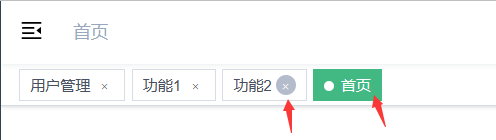
增加导航标签功能
如下图所示需要新增一个功能
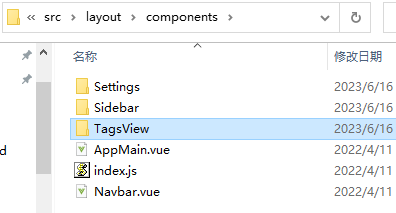
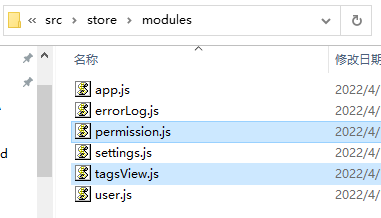
此功能的代码在之前介绍的第一个项目中,现在需要将代码copy过来
下载好最新的一个压缩包后,解压缩,找到以下三个文件,注意这些文件复制到正在开发的项目中对应的路径中去,两个项目的路径设置是一样的
src/layout/components/TagsView
src/store/modules/tagsView.js
src/store/modules/permission.js
然后进入VScode中添加代码:
-
进入
src/layout/components/AppMain.vue文件修改红框代码
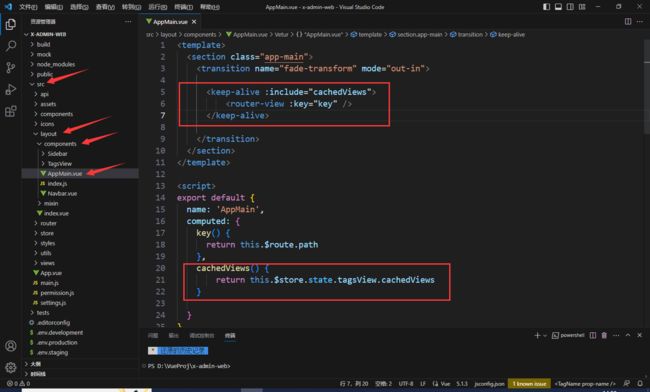
<keep-alive :include="cachedViews"> <router-view :key="key" /> </keep-alive> export default { name: 'AppMain', computed: { key() { return this.$route.path }, cachedViews() { return this.$store.state.tagsView.cachedViews } } } -
修改文件
src/store/getters.js
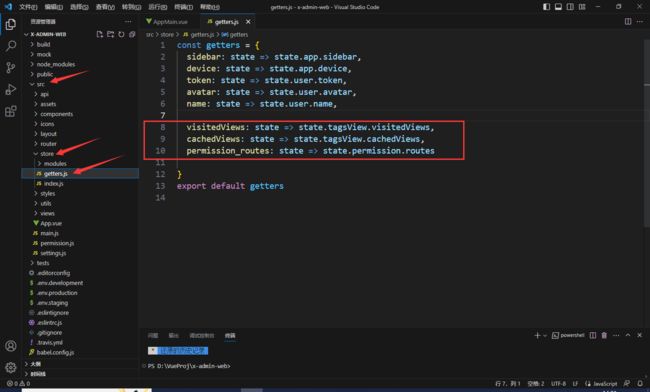
visitedViews: state => state.tagsView.visitedViews, cachedViews: state => state.tagsView.cachedViews, permission_routes: state => state.permission.routes -
修改文件
src/store/index.js
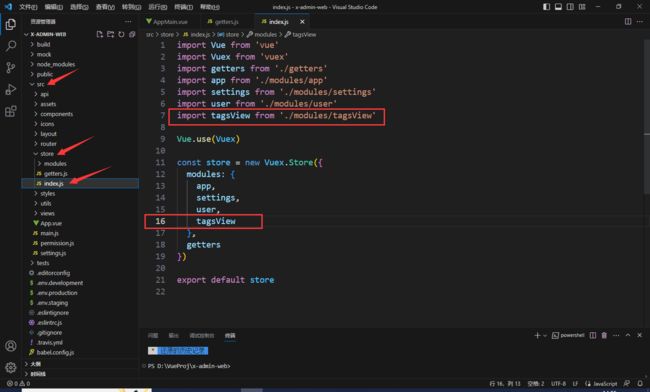
import Vue from 'vue' import Vuex from 'vuex' import getters from './getters' import app from './modules/app' import settings from './modules/settings' import user from './modules/user' import tagsView from './modules/tagsView' Vue.use(Vuex) const store = new Vuex.Store({ modules: { app, settings, user, tagsView }, getters }) export default store -
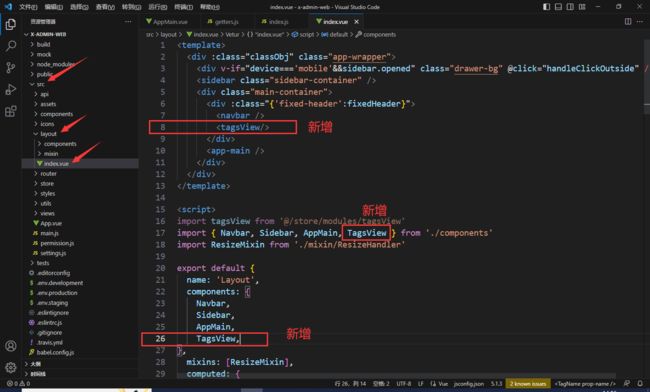
修改文件
src\layout\index.vue
-
修改文件
src\layout\components\index.js
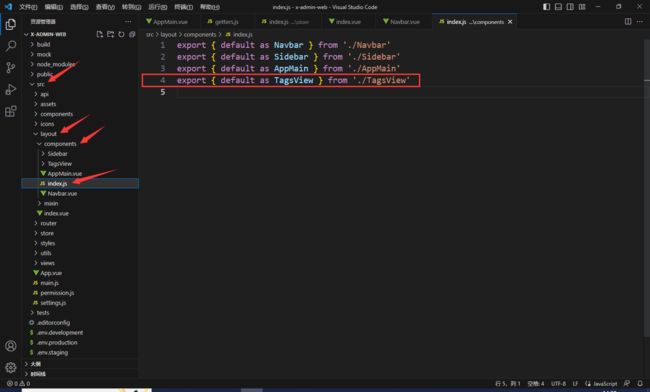
export { default as TagsView } from './TagsView'
大功告成!重新启动项目npm run dev
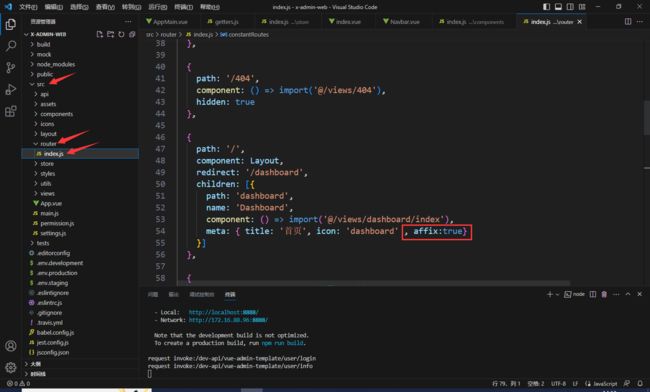
如果我们想要设置某个标签不可关闭,如下图中首页标签,此时需要在src\router\index.js文件中找到首页然后添加属性affix:true
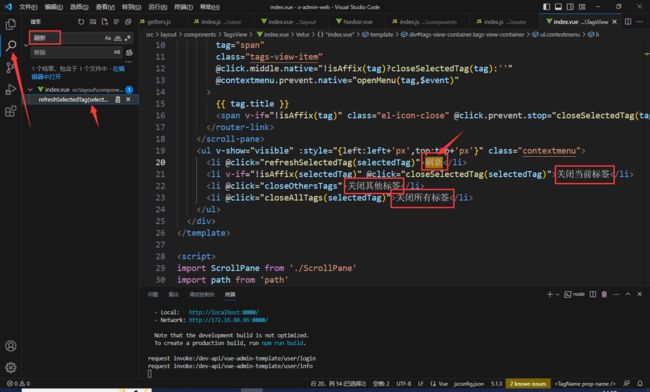
另外,标签导航是可以右击的,此处我将英文修改为了中文
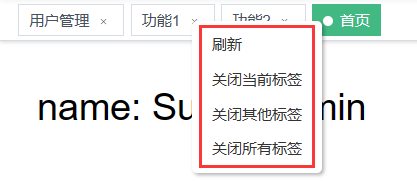
大家可以在VScode中全局搜索浏览器弹出来的英文,然后查找,再将其修改为对应中文即可,此处修改路径为src\layout\components\TagsView\index.vue中第20行
此时前端页面修改就大差不差了
前端数据格式
前后端对接需要知道前端登录的json数据传递格式
打开浏览器界面,按F12选择网络
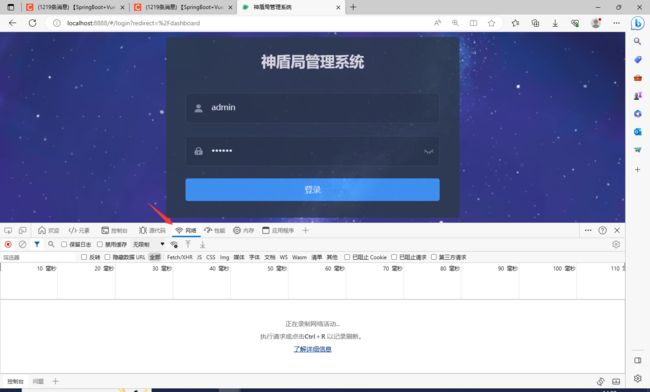
然后点击登录,此时浏览器会记录状态
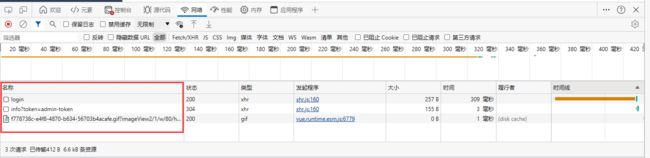
单击login会出现数据响应格式,如红框所示,这个格式后端写代码会用到
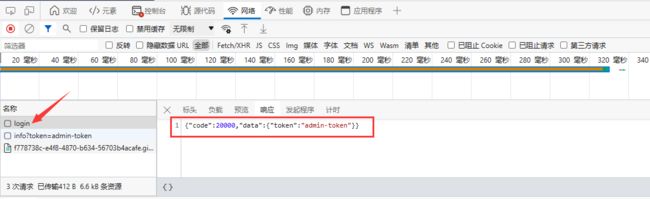
{"code":20000,"data":{"token":"admin-token"}}