3.8.cuda运行时API-使用cuda核函数加速yolov5后处理
目录
-
- 前言
- 1. Yolov5后处理
- 2. 后处理案例
-
- 2.1 cpu_decode
- 2.2 gpu_decode
- 总结
前言
杜老师推出的 tensorRT从零起步高性能部署 课程,之前有看过一遍,但是没有做笔记,很多东西也忘了。这次重新撸一遍,顺便记记笔记。
本次课程学习精简 CUDA 教程-使用 cuda 核函数加速 yolov5 的后处理
课程大纲可看下面的思维导图
1. Yolov5后处理
Yolov5 是目标检测中比较经典的模型,学习对其后处理进行解码是非常有必要的。在这里我们仅使用核函数对 Yolov5 推理的结果进行解码并恢复成框,掌握后处理所解决的问题,以及对于性能的考虑。
经验之谈:
- 对于后处理的代码研究,可以把 PyTorch 的数据通过转换成 numpy 后,tobytes 再写到文件,然后再到 c++ 中读取的方式,能够快速进行问题研究和排查,此时不需要 tensorRT 推理也可以做后处理研究。这也叫变量控制法
- fast_nms_kernel 会在极端情况下少框,但是这个极端情况一般不会出现,实测几乎没有影响
- fast nms 在 cuda 实现上比较简单,高效,不用排序
2. 后处理案例
我们来看下 Yolov5 整个后处理过程:decode解码 + nms
由于整个后处理过程可能有点复杂,因此我们可以先在 CPU 上完成,然后再考虑 GPU 上的工作。
为了方便演示整个后处理过程,我们通过 PyTorch 去进行推理,把推理的结果利用 numpy 保存下来,然后利用 c++ 读取进行后处理,同时也可以看下 PyTorch 最终的结果和我们后处理的结果是否一致。
numpy 保存推理结果的代码如下:
with open("../workspace/predict.data", "wb") as f:
   f.write(pred.cpu().data.numpy().tobytes())
Yolov5 在 COCO 数据集上的输入是一个 [n,85] 为维度的 tensor,其中 85 是 [cx,cy,width,objectness,classfication * 80]
关于后处理原理和更多细节请查看 YOLOv5推理详解及预处理高性能实现
2.1 cpu_decode
我们先来看 cpu_decode,CPU 解码的重点有:
- 避免多余的计算,需要知道有些数学运算需要的事件远超过很多 if,减少他们的次数就是提高性能的关键
- nms 的实现是可以优化的,例如 remove_flags 并且预先分配内存,reserve 对输出分配内存
核心代码如下:
vector<Box> cpu_decode(float* predict, int rows, int cols, float confidence_threshold = 0.25f, float nms_threshold = 0.45f){

    vector<Box> boxes;
    int num_classes = cols - 5;
    for(int i = 0; i < rows; ++i){
        float* pitem = predict + i * cols;
        float objness = pitem[4];
        if(objness < confidence_threshold)
            continue;

        float* pclass = pitem + 5;
        int label     = std::max_element(pclass, pclass + num_classes) - pclass;
        float prob    = pclass[label];
        float confidence = prob * objness;
        if(confidence < confidence_threshold)
            continue;

        float cx     = pitem[0];
        float cy     = pitem[1];
        float width  = pitem[2];
        float height = pitem[3];
        float left   = cx - width * 0.5;
        float top    = cy - height * 0.5;
        float right  = cx + width * 0.5;
        float bottom = cy + height * 0.5;
        boxes.emplace_back(left, top, right, bottom, confidence, (float)label);
    }

    std::sort(boxes.begin(), boxes.end(), [](Box& a, Box& b){return a.confidence > b.confidence;});
    std::vector<bool> remove_flags(boxes.size());
    std::vector<Box> box_result;
    box_result.reserve(boxes.size());

    auto iou = [](const Box& a, const Box& b){
        float cross_left   = std::max(a.left, b.left);
        float cross_top    = std::max(a.top, b.top);
        float cross_right  = std::min(a.right, b.right);
        float cross_bottom = std::min(a.bottom, b.bottom);

        float cross_area = std::max(0.0f, cross_right - cross_left) * std::max(0.0f, cross_bottom - cross_top);
        float union_area = std::max(0.0f, a.right - a.left) * std::max(0.0f, a.bottom - a.top)
                         + std::max(0.0f, b.right - b.left) * std::max(0.0f, b.bottom - b.top) - cross_area;
        if(cross_area == 0 || union_area == 0) return 0.0f;
        return cross_area / union_area;
    };

    for(int i = 0; i < boxes.size(); ++i){
        if(remove_flags[i]) continue;

        auto& ibox = boxes[i];
        box_result.emplace_back(ibox);
        for(int j = i + 1; j < boxes.size(); ++j){
            if(remove_flags[j]) continue;

            auto& jbox = boxes[j];
            if(ibox.label == jbox.label){
                // class matched
                if(iou(ibox, jbox) >= nms_threshold)
                    remove_flags[j] = true;
            }
        }
    }
    return box_result;
}
该代码主要可分为预处结果解码和非极大值抑制两部分
预测结果解码:
首先遍历每个预测框,通过置信度阈值(confidence_threshold)对预测结果进行过滤。然后,计算预测框的类别,选择 80 个类别中最高概率的类别作为预测框的标签。接下来,将预测框的中心点和宽高转变成左上角和右下角坐标,并将预测框的信息保存到 boxes 中
非极大值抑制(NMS):
首先我们需要对 boxes 中的所有预测框按照置信度进行降序排序,方便后续 NMS 操作。NMS 的实现主要是通过 remove_flags 这个标志来实现的,将未标记为需要移除的预测框保存到 box_result 中
关键的性能优化点:
- 预测框过滤,在 decode 过程中先利用置信度阈值过滤,避免了不必要的后续计算和处理
- 预测框排序,在 lambda 函数中传引用,同时对 box_result 利用 reverse 进行预分配提升性能
- 使用标志位:在 NMS 过程中,使用
remove_flags标志位来标记需要移除的预测框,相比于两两预测框比较提高了效率
2.2 gpu_decode
我们再来看 gpu_decode,GPU 解码的重点有:
- 表示输出数量不确定的数组,用 [count, box1, box2, box3] 的方式,此时需要有最大数量限制
- 通过 atomicAdd 实现数组元素的加入,并返回索引
- 和 cpu_decode 一样,不必要的计算尽量省掉
decode 核心代码如下:
static __global__ void decode_kernel(
    float* predict, int num_bboxes, int num_classes, float confidence_threshold,
    float* invert_affine_matrix, float* parray, int max_objects, int NUM_BOX_ELEMENT
){
    int position = blockDim.x * blockIdx.x + threadIdx.x;
    if (position >= num_bboxes) return;

    float* pitem     = predict + (5 + num_classes) * position;
    float objectness = pitem[4];
    if(objectness < confidence_threshold)
        return;

    float* class_confidence = pitem + 5;
    float confidence        = *class_confidence++;
    int label               = 0;
    for(int i = 1; i < num_classes; ++i, ++class_confidence){
        if(*class_confidence > confidence){
            confidence = *class_confidence;
            label      = i;
        }
    }

    confidence *= objectness;
    if(confidence < confidence_threshold)
        return;

    int index = atomicAdd(parray, 1);
    if(index >= max_objects)
        return;

    float cx         = *pitem++;
    float cy         = *pitem++;
    float width      = *pitem++;
    float height     = *pitem++;
    float left   = cx - width * 0.5f;
    float top    = cy - height * 0.5f;
    float right  = cx + width * 0.5f;
    float bottom = cy + height * 0.5f;
    // affine_project(invert_affine_matrix, left,  top,    &left,  &top);
    // affine_project(invert_affine_matrix, right, bottom, &right, &bottom);

    // left, top, right, bottom, confidence, class, keepflag
    float* pout_item = parray + 1 + index * NUM_BOX_ELEMENT;
    *pout_item++ = left;
    *pout_item++ = top;
    *pout_item++ = right;
    *pout_item++ = bottom;
    *pout_item++ = confidence;
    *pout_item++ = label;
    *pout_item++ = 1; // 1 = keep, 0 = ignore
}
上述 gpu_decode 代码和 cpu 处理非常像,其中核函数启动的线程数为预测框的数量,每个线程处理一个框的解码工作,position 代表当前线程的 Idx,*predict 为所有预测框的首地址,pitem 为当前线程要处理的预测框的起始地址,如下图所示:
同时为了保存 decode 后的预测框,我们使用原子加(atomicAdd)操作来避免多个线程同时写入输出数组时的冲突问题,可以确保结果的准确性。具体来说,index = atomicAdd(parray, 1) 表示将 parray 指向的内存位置的值加上 1,并将加前的值赋给 index,而 index 表示当前所处理的边界框在所有边界框中的索引值。为了避免超过最大边界框数量,会在 index 超过 MAX_IMAGE_BOXES 时直接返回,不再处理该边界框。
将预测框完成解码后就需要将其解码后的框信息保存下来,保存的首地址是 *parray,parray 的第一个元素是保存下来的框的数量,后面才是一个个框的信息,如下图所示。
当然对于 nsm 你也可以采用 cuda 加入,代码如下:
static __global__ void fast_nms_kernel(float* bboxes, int max_objects, float threshold, int NUM_BOX_ELEMENT){

    int position = (blockDim.x * blockIdx.x + threadIdx.x);
    int count = min((int)*bboxes, max_objects);
    if (position >= count)
        return;

    // left, top, right, bottom, confidence, class, keepflag
    float* pcurrent = bboxes + 1 + position * NUM_BOX_ELEMENT;
    for(int i = 0; i < count; ++i){
        float* pitem = bboxes + 1 + i * NUM_BOX_ELEMENT;
        if(i == position || pcurrent[5] != pitem[5]) continue;

        if(pitem[4] >= pcurrent[4]){
            if(pitem[4] == pcurrent[4] && i < position)
                continue;

            float iou = box_iou(
                pcurrent[0], pcurrent[1], pcurrent[2], pcurrent[3],
                pitem[0],    pitem[1],    pitem[2],    pitem[3]
            );

            if(iou > threshold){
                pcurrent[6] = 0;  // 1=keep, 0=ignore
                return;
            }
        }
    }
}
fast_nms_kernel 在极端情况下会少框,比如当存在多个重叠框,并且它们具有相同的置信度时,由于核函数中的条件判断和并行计算的特性,可能会导致后面的框覆盖前面的框,从而使得前面的框被忽略。
值得注意的是在对 mAP 进行测试性能的时候,只能采用 CPU 版本的 nms,这是因为 mAP 测试需要精确计算每个框的重叠情况,并且需要按照特定的算法进行排序和抑制。而在 GPU 上进行并行计算的 nms 方法往往会牺牲一定的精确性,无法满足 mAP 测试的要求。
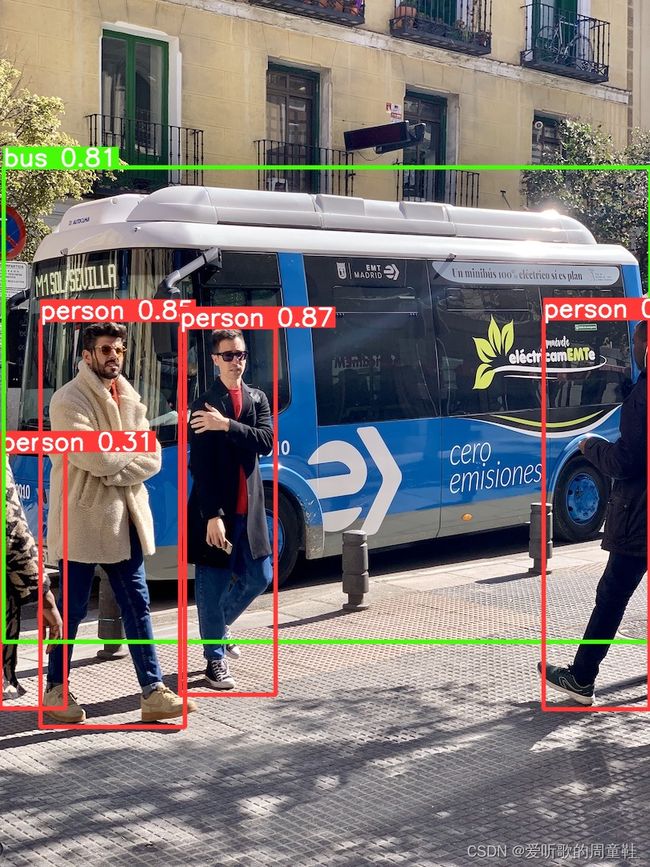
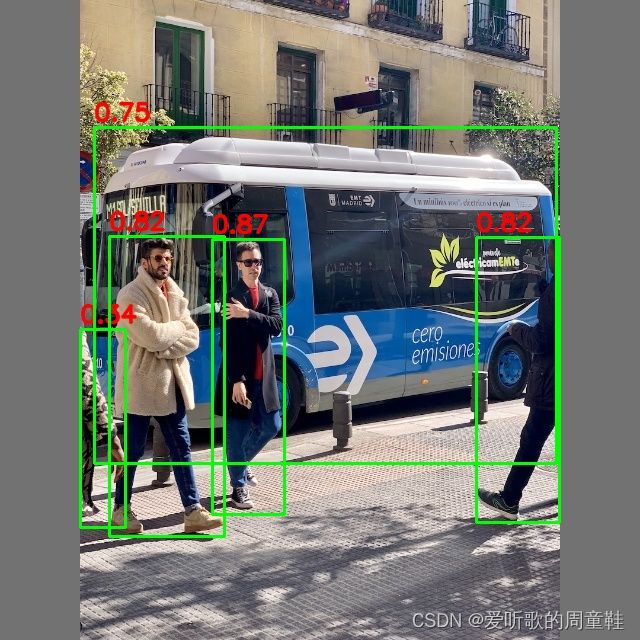
下图对比了 PyTorch 的效果和我们自己实现的后处理的效果,可以看到结果是没问题的
总结
本次课程学习了经典目标检测算法 Yolov5 的后处理,我们先在 cpu 上实现了整个 decode,cpu 版本的实现性能已经非常高了,适合在一些边缘嵌入式设备上运行,随后我们根据 cpu 版本的 decode 编写了核函数来加速整个 decode 解码过程,很多东西还是需要大家自己多去动手,多去尝试。
关于代码的更多探讨可参考 infer源码阅读之yolo.cu


