react 配置路径别名
创建别名让import或require某些模块更容易。比较适合文件层级较深,只需一处配置就不再担心在不同的地方引用相对路径过于繁琐导致出错。
1、打开配置文件
默认情况下,react脚手架搭建的项目配置文件都是隐藏的,我们首先需要打开它,进行自定义设置。
//在项目路径下输入该命令
yarn run eject
注意:该行为是不可逆的,如果碰到如下错误,是因为代码还未提交存到仓库(本地仓库)

输入以下命令
git add .
git commit -m "-"
2、配置别名
在这里,我为大家介绍两种自己一般配置的方法。
2.1 直接在config文件夹里面的webpack.config.js中配置
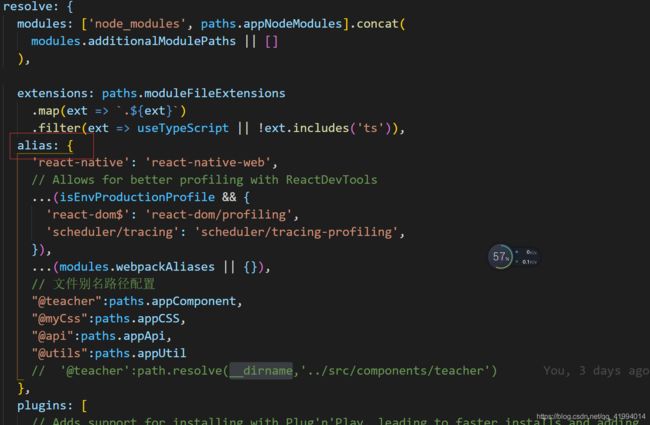
2.1.1 打开webpack.config.js,搜索alias
位置如下所示:
  resolve: {
      modules: ['node_modules', paths.appNodeModules].concat(
        modules.additionalModulePaths || []
      ),

      extensions: paths.moduleFileExtensions
        .map(ext => `.${ext}`)
        .filter(ext => useTypeScript || !ext.includes('ts')),
      alias: {
        'react-native': 'react-native-web',
        // Allows for better profiling with ReactDevTools
        ...(isEnvProductionProfile && {
          'react-dom$': 'react-dom/profiling',
          'scheduler/tracing': 'scheduler/tracing-profiling',
        }),
        ...(modules.webpackAliases || {}),
        // 文件别名路径配置
        // "@teacher":paths.appComponent,
         '@teacher':path.resolve(__dirname,'../src/components/teacher')
      },
      plugins: [
        // Adds support for installing with Plug'n'Play, leading to faster installs and adding
        // guards against forgotten dependencies and such.
        PnpWebpackPlugin,

        new ModuleScopePlugin(paths.appSrc, [paths.appPackageJson]),
      ],
    },
2.2.2 在config文件夹里面的paths文件结合webpack.config文件配置
首先打开paths.js文件
找到模块导出位置
写入自定义导出模块的名字以及配置其路径。
module.exports = {
  dotenv: resolveApp('.env'),
  appPath: resolveApp('.'),
  appBuild: resolveApp('build'),
  appPublic: resolveApp('public'),
  appHtml: resolveApp('public/index.html'),
  appIndexJs: resolveModule(resolveApp, 'src/index'),
  appPackageJson: resolveApp('package.json'),
  appSrc: resolveApp('src'),
  appTsConfig: resolveApp('tsconfig.json'),
  appJsConfig: resolveApp('jsconfig.json'),
  yarnLockFile: resolveApp('yarn.lock'),
  testsSetup: resolveModule(resolveApp, 'src/setupTests'),
  proxySetup: resolveApp('src/setupProxy.js'),
  appNodeModules: resolveApp('node_modules'),
  appComponent:resolveApp('src/components/teacher'),
  publicUrlOrPath,

};
在webpack.config.js中引入该模块
 resolve: {
      modules: ['node_modules', paths.appNodeModules].concat(
        modules.additionalModulePaths || []
      ),

      extensions: paths.moduleFileExtensions
        .map(ext => `.${ext}`)
        .filter(ext => useTypeScript || !ext.includes('ts')),
      alias: {
        'react-native': 'react-native-web',
        // Allows for better profiling with ReactDevTools
        ...(isEnvProductionProfile && {
          'react-dom$': 'react-dom/profiling',
          'scheduler/tracing': 'scheduler/tracing-profiling',
        }),
        ...(modules.webpackAliases || {}),
        // 文件别名路径配置
        "@teacher":paths.appComponent
        )
      },
      plugins: [
        // Adds support for installing with Plug'n'Play, leading to faster installs and adding
        // guards against forgotten dependencies and such.
        PnpWebpackPlugin,

        new ModuleScopePlugin(paths.appSrc, [paths.appPackageJson]),
      ],
    },
注意:两种方法任选一种即可哟。
3、在需要的文件中使用别名

这里的“@teacher就相当于我们开始配置的src/components文件夹里面的teacher文件夹,这样就不会由于引用时相对路径层级过深而出错啦,而且文件夹的修改也只需要该配置处,再也不需要每一个引入的位置都改动啦。
希望能够帮到需要的小伙伴。

