Vue3+Vite+Pinia+Naive后台管理系统搭建之六:Axios 网络请求
前言
如果对 vue3 的语法不熟悉的,可以移步Vue3.0 基础入门快速入门。
Axios 详情可移步官网参看:Axios 官网
1. 安装依赖
yarn add axios
// or
npm install axios
2. .env 环境配置
对环境配置不了解的可移步:Vue 入门系列:.env 环境变量
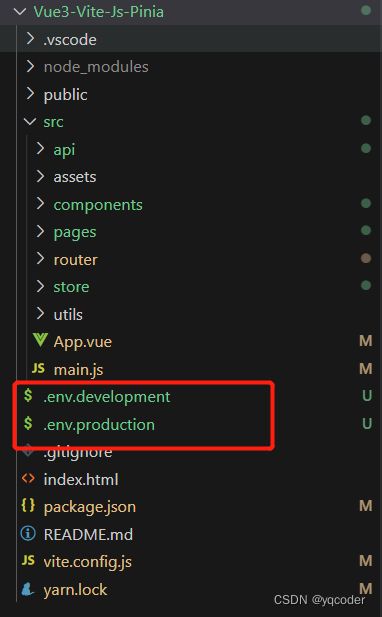
新建 .env.development .env.production
.env.development 开发环境变量
# 开发环境配置
ENV = 'development'

# 开发环境
VITE_APP_BASE_API = '/dev-api'
.env.production 生产环境变量
# 生产环境配置
ENV = 'production'

# 生产环境
VITE_APP_BASE_API = '/prod-api'
3. 构建 vite.config.js 中的 server
// vite.config.js
import { defineConfig } from "vite";
import vue from "@vitejs/plugin-vue";

import { resolve } from "path";

// https://vitejs.dev/config/
export default defineConfig({
  plugins: [vue()],
  resolve: {
    alias: {
      "@": resolve(__dirname, "./src"),
    },
  },
  // 服务配置
  server: {
    // 是否开启https
    https: false,
    // 端口号
    port: 3000,
    // 监听所有地址
    host: "0.0.0.0",
    // 启服务自动打开浏览器
    open: false,
    // 允许跨域
    cors: true,
    proxy: {
      "/dev-api": {
        target: "http://xxx.x.xxx.xxx:8080",
        changeOrigin: true,
        ws: true,
        rewrite: (path) => path.replace(/^\/dev-api/, ""),
      },
      "/dev/file": {
        target: "http://xxx.x.xxx.xxx:9300",
        changeOrigin: true,
        ws: true,
        rewrite: (path) => path.replace(/^\/dev/, ""),
      },
    },
  },
});
4. 新建 src/api/http.js 配置 aixos 基础配置
// src/api/http.js
import axios from "axios";

// 请求和响应的消息主体用什么方式编码
axios.defaults.headers["Content-Type"] = "application/json;charset=utf-8";
const service = axios.create({
  baseURL: import.meta.env.VITE_APP_BASE_API,
  timeout: 10000,
});

// 请求拦截器
service.interceptors.request.use((config) => {
  // TODO
  return config;
});

// 响应拦截器
service.interceptors.response.use((res) => {
  // TODO
  return res.data;
});

export default service;
5. 新建 src/api/login.js 接口封装
// src/api/login.js
import api from "./http.js";

// 登录
export function login(data) {
  return api({
    url: "/login",
    method: 'post',
    data
  })
}

// 登出
export function logout() {
  return api({
    url: '/logout',
    method: 'delete'
  })
}
6. 在 src/pages/login.vue 组件中调用接口
登录
注意:不是真实的配置,所以请求失败,请根据自己项目需求,修改请求配置
综上
axios 安装完成。下一章 utils 工具构建,然后根据 utils 工具,完善 src/api/http.js 接口请求逻辑、src/store/user.js 登录逻辑、src/router/index.js 路由跳转逻辑。
下一章:Vue3+Vite+Pinia+Naive后台管理系统搭建之七:utils 工具构建


