IP静态路由实验
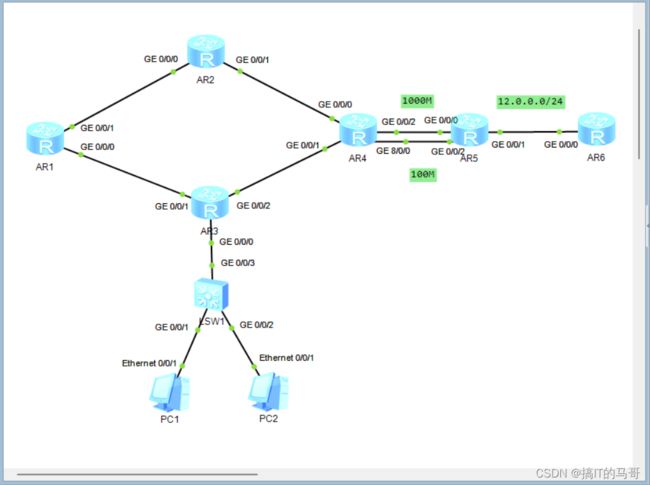
1、搭建拓扑图
2、实现如下要求
3、 大致思路和过程
由于地址不够,所以需要先进性子网划分,一共需要借4位,得到16个网段
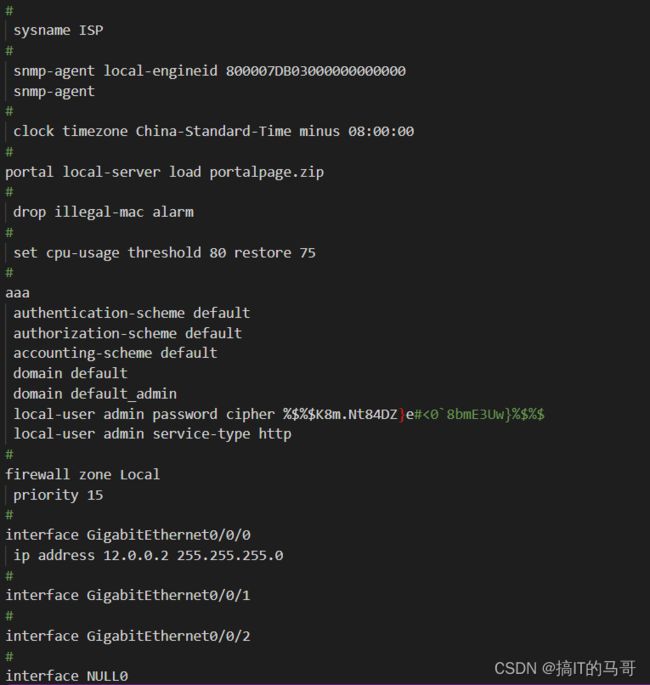
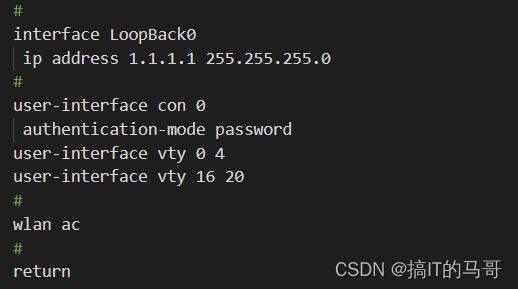
配置好各个接口的IP地址和环回地址
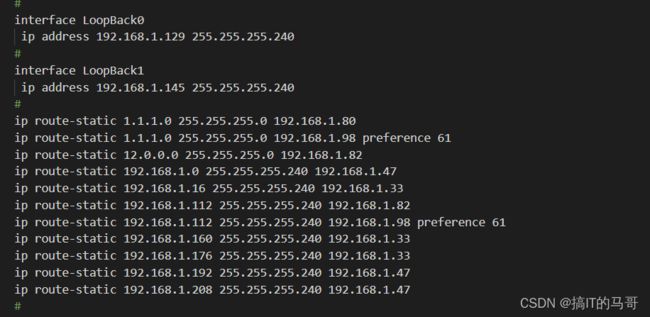
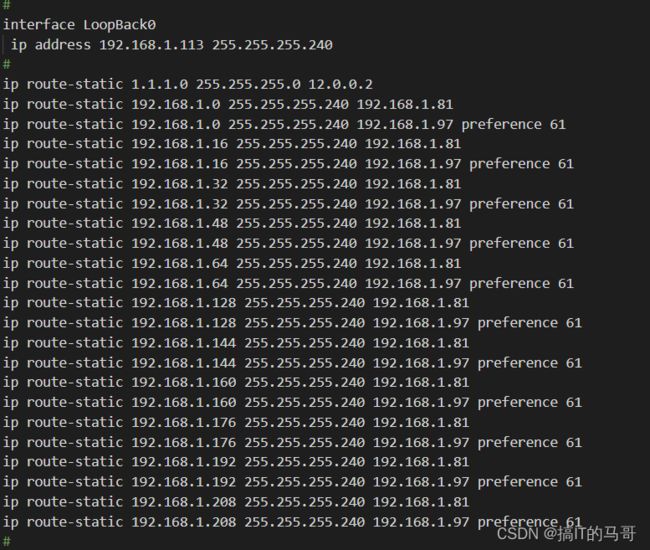
接着配置静态路由,再通过百兆链路时,修改其优先级,配置浮动路由
在R3上启用dhcp使PC1和PC2自动获取IP地址、网关、dns服务器地址
在R5上启用easy-nat实现私有地址和公有地址之间的转化
在R1上启用telnat的远程登陆,并在R5上做一条专属R1g0/0/1接口的端口映射使R6访问R5的g0/0/1接口实际访问g0/0/0接口
R1
#
set cpu-usage threshold 80 restore 75
#
aaa
authentication-scheme default
authorization-scheme default
accounting-scheme default
domain default
domain default_admin
local-user admin password cipher %$%$K8m.Nt84DZ}e#<0`8bmE3Uw}%$%$
local-user admin service-type http
local-user zws666 password cipher %$%$pW0vT,%siPNrtzQ)-Z{+A(l#%$%$
local-user zws666 privilege level 15
local-user zws666 service-type telnet
#
firewall zone Local
priority 15
#
interface GigabitEthernet0/0/0
ip address 192.168.1.17 255.255.255.240
#
interface GigabitEthernet0/0/1
ip address 192.168.1.1 255.255.255.240
#
interface GigabitEthernet0/0/2
#
interface NULL0
#
interface LoopBack0
ip address 192.168.1.193 255.255.255.240
#
interface LoopBack1
ip address 192.168.1.209 255.255.255.240
#
ip route-static 12.0.0.0 255.255.255.0 192.168.1.18
ip route-static 192.168.1.32 255.255.255.240 192.168.1.18
ip route-static 192.168.1.48 255.255.255.240 192.168.1.2
ip route-static 192.168.1.64 255.255.255.240 192.168.1.2
ip route-static 192.168.1.80 255.255.255.240 192.168.1.18
ip route-static 192.168.1.96 255.255.255.240 192.168.1.18 preference 61
ip route-static 192.168.1.112 255.255.255.240 192.168.1.18
ip route-static 192.168.1.128 255.255.255.240 192.168.1.18
ip route-static 192.168.1.144 255.255.255.240 192.168.1.18
ip route-static 192.168.1.160 255.255.255.240 192.168.1.18
ip route-static 192.168.1.176 255.255.255.240 192.168.1.18
#
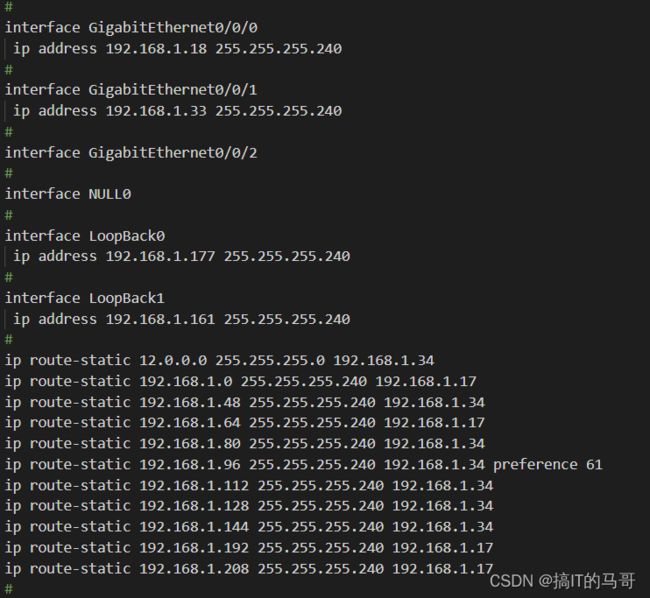
R3
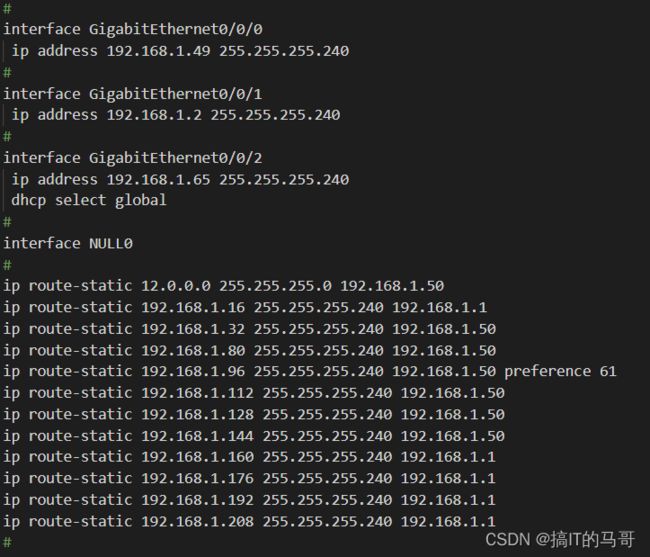
R4
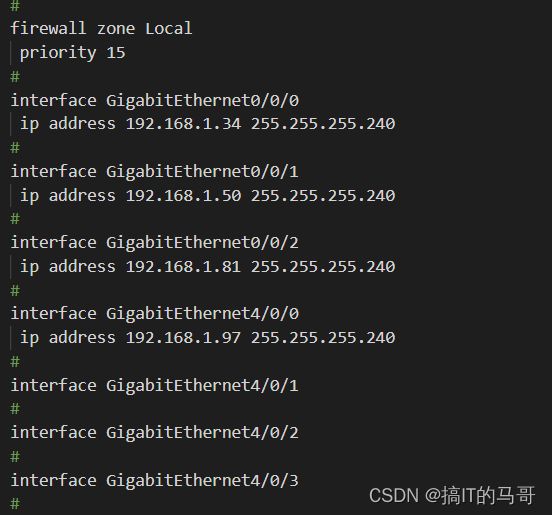
R6
