Spring Cache简单介绍和使用
目录
一、简介
二、使用默认ConcurrentMapManager
(一)创建数据库和表
(二)创建boot项目
(三)使用Api
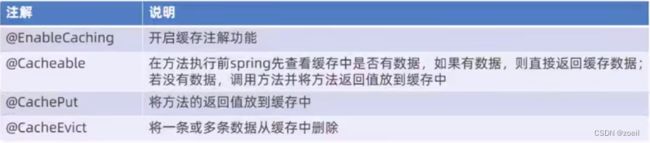
1、@EnableCaching
2、@CachePut
3、@cacheable
4、@CacheEvict
三、使用redis作为cache
一、简介
Spring Cache是一个框架,实现了基于注解的缓存功能,只需要简单地加一个注解,就能实现缓存功能。
Spring Cache提供了一层抽象,底层可以切换不同的cache实现。具体就是通过CacheManager接口来统一不同的缓存技术。
CacheManager是Spring提供的各种缓存技术抽象接口
针对不同的缓存技术需要实现不同的CacheManager:

CacheManager默认使用的ConcurrentMapManager
Spring Cache 常用注解
在spring boot项目中,使用缓存技术只需在项目中导入相关缓存技术的依赖包,并在启动类上使用@EnableCaching开启缓存支持即可。
例如,使用Redis作为缓存技术,只需要导入Spring data Redis的maven坐标即可。
            org.springframework.boot
            spring-boot-starter-data-redis
spring cache的基本api在web下的context包中
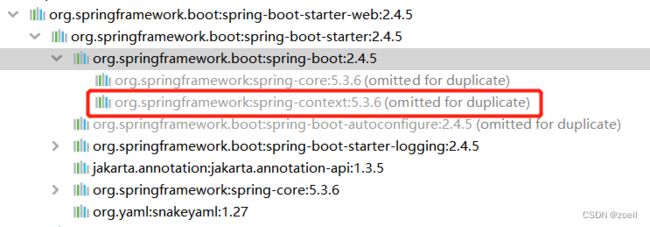
如果有使用其他的api可以导入cache的依赖
            org.springframework.boot
            spring-boot-starter-cache
二、使用默认ConcurrentMapManager
(一)创建数据库和表
创建cache_demo数据库,并创建user表
> create database cache_demo;
Query OK, 1 row affected (0.02 sec)

> use cache_demo;
Database changed

> create table user (
> id bigint primary key,
> name varchar(50),
> age int,
> address varchar(50)
>); 
(二)创建boot项目
改POM
    4.0.0

        org.springframework.boot
        spring-boot-starter-parent
        2.4.5


    com.itheima
    cache_demo
    1.0-SNAPSHOT

        1.8


            org.springframework.boot
            spring-boot-starter-web
            compile


            org.projectlombok
            lombok
            1.18.20


            com.alibaba
            fastjson
            1.2.76


            commons-lang
            commons-lang
            2.6


            org.springframework.boot
            spring-boot-starter-cache


            mysql
            mysql-connector-java
            runtime


            com.baomidou
            mybatis-plus-boot-starter
            3.4.2


            com.alibaba
            druid-spring-boot-starter
            1.1.23


                org.springframework.boot
                spring-boot-maven-plugin
                2.4.5
写YML
server:
  port: 8080
spring:
  application:
    #应用的名称,可选
    name: cache_demo
  datasource:
    druid:
      driver-class-name: com.mysql.cj.jdbc.Driver
      url: jdbc:mysql://localhost:3306/cache_demo?serverTimezone=Asia/Shanghai&useUnicode=true&characterEncoding=utf-8&zeroDateTimeBehavior=convertToNull&useSSL=false&allowPublicKeyRetrieval=true
      username: root
      password: root
mybatis-plus:
  configuration:
    #在映射实体或者属性时,将数据库中表名和字段名中的下划线去掉,按照驼峰命名法映射
    map-underscore-to-camel-case: true
    log-impl: org.apache.ibatis.logging.stdout.StdOutImpl
  global-config:
    db-config:
      id-type: ASSIGN_ID
User
@Data
public class User implements Serializable {

    private static final long serialVersionUID = 1L;

    private Long id;

    private String name;

    private int age;

    private String address;

}


UserMapper
====================================================
@Mapper
public interface UserMapper extends BaseMapper{
}


UserController
====================================================
@RestController
@RequestMapping("/user")
@Slf4j
public class UserController {

    @Autowired
    private UserService userService;


    // 增加User
    @PostMapping
    public User save(User user){
        userService.save(user);
        return user;
    }


    // 删除User
    @DeleteMapping("/{id}")
    public void delete(@PathVariable Long id){
        userService.removeById(id);
    }

    // 更新User
    @PutMapping
    public User update(User user){
        userService.updateById(user);
        return user;
    }

    // 根据id查询User
    @GetMapping("/{id}")
    public User getById(@PathVariable Long id){
        User user = userService.getById(id);
        return user;
    }

    // 根据id和name查询User集合
    @GetMapping("/list")
    public List list(User user){
        LambdaQueryWrapper queryWrapper = new LambdaQueryWrapper<>();
        queryWrapper.eq(user.getId() != null,User::getId,user.getId());
        queryWrapper.eq(user.getName() != null,User::getName,user.getName());
        List list = userService.list(queryWrapper);
        return list;
    }
}
主启动类
@Slf4j
@SpringBootApplication
public class CacheDemoApplication {
    public static void main(String[] args) {
        SpringApplication.run(CacheDemoApplication.class,args);
        log.info("项目启动成功...");
    }
}
(三)使用Api
1、@EnableCaching
启动类上加注解@EnableCaching // 使用spring cache
2、@CachePut
// 在controller中加入缓存对象
@Autowired
private CacheManager cacheManager;
/**
* CachePut:将方法返回值放入缓存
* value:缓存的名称,每个缓存名称下面可以有多个key
* key:缓存的key
*/
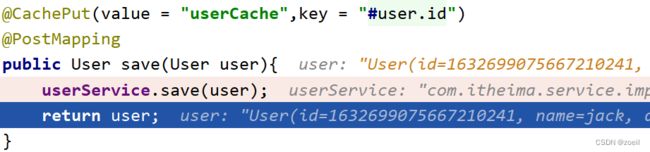
@CachePut(value = "userCache",key = "#user.id")
@PostMapping
public User save(User user){
userService.save(user);
return user;
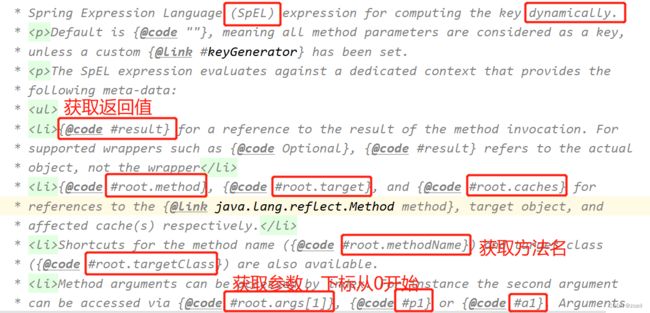
}通过ctrl点进key下载源码后我们可以看到这里使用的是SpEL语言动态获取值
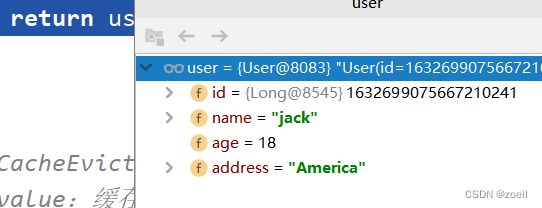
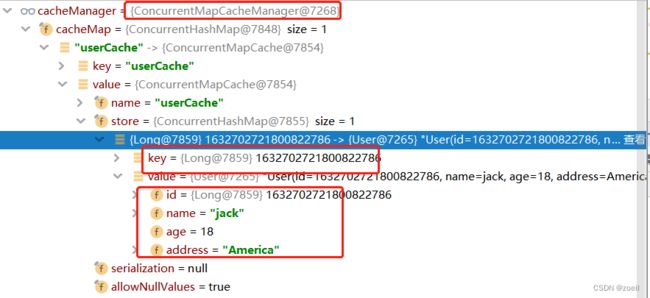
测试,使用 postman 发请求
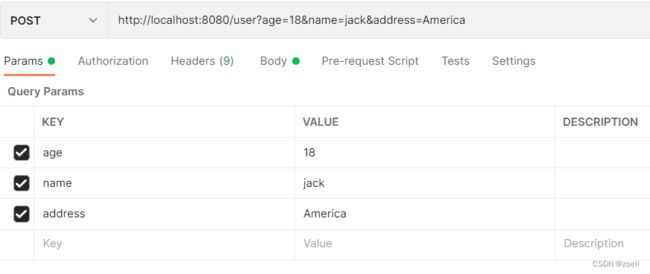
第一次添加会将返回的user存放进cacheManager中
3、@cacheable
在方法执行前spring先查看缓存中是否有数据,如果有数据,则直接返回缓存数据;若没有数据,调用方法并将方法返回值放到缓存中
    /**
     * Cacheable:在方法执行前spring先查看缓存中是否有数据,如果有数据,则直接返回缓存数据;若没有数据,调用方法并将方法返回值放到缓存中
     * value:缓存的名称,每个缓存名称下面可以有多个key
     * key:缓存的key
     * condition:条件,满足条件时才缓存数据
     * unless:满足条件则不缓存
     */
    @Cacheable(value = "userCache",key = "#id",unless = "#result == null")
    @GetMapping("/{id}")
    public User getById(@PathVariable Long id){
        User user = userService.getById(id);
        return user;
    }
测试,我们使用jack的id去查询一下,同样使用postman,在这个方法设置断点,如果没有触发断点说明是在cache中查询直接返回的
4、@CacheEvict
/**
* CacheEvict:清理指定缓存
* value:缓存的名称,每个缓存名称下面可以有多个key
* key:缓存的key
*/
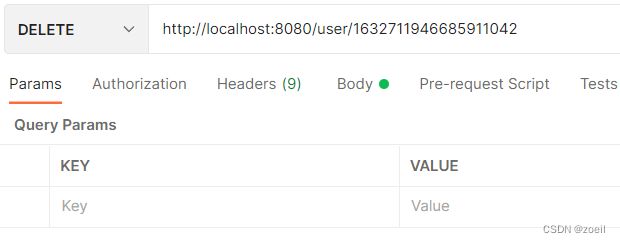
@CacheEvict(value = "userCache",key = "#p0")
//@CacheEvict(value = "userCache",key = "#root.args[0]")
//@CacheEvict(value = "userCache",key = "#id")
@DeleteMapping("/{id}")
public void delete(@PathVariable Long id){
userService.removeById(id);
}
//@CacheEvict(value = "userCache",key = "#p0.id")
//@CacheEvict(value = "userCache",key = "#user.id")
//@CacheEvict(value = "userCache",key = "#root.args[0].id")
@CacheEvict(value = "userCache",key = "#result.id")
@PutMapping
public User update(User user){
userService.updateById(user);
return user;
}三、使用redis作为cache
导入redis依赖
            org.springframework.boot
            spring-boot-starter-data-redis
修改YML
server:
  port: 8080
spring:
  application:
    #应用的名称,可选
    name: cache_demo
  datasource:
    druid:
      driver-class-name: com.mysql.cj.jdbc.Driver
      url: jdbc:mysql://localhost:3306/cache_demo?serverTimezone=Asia/Shanghai&useUnicode=true&characterEncoding=utf-8&zeroDateTimeBehavior=convertToNull&useSSL=false&allowPublicKeyRetrieval=true
      username: root
      password: 123456
  redis:
    host: 192.168.23.100
    port: 6379
    password: zjy123...000
    database: 1
  cache:
    redis:
      time-to-live: 1800000 #设置缓存过期时间,可选
mybatis-plus:
  configuration:
    #在映射实体或者属性时,将数据库中表名和字段名中的下划线去掉,按照驼峰命名法映射
    map-underscore-to-camel-case: true
    log-impl: org.apache.ibatis.logging.stdout.StdOutImpl
  global-config:
    db-config:
      id-type: ASSIGN_ID
启动项目后,cache变成了RedisCacheManager

使用postman发送save请求

db01

发送DELETE删除缓存
![]()