使用MyBatis(1)
目录
一、什么是MyBatis
二、搭建MyBatis开发环境
添加MyBatis依赖
在数据库添加数据
设置MyBatis配置
数据库的相关连接信息xml的保存和设置路径
三、使用MyBatis模式和语法操作数据库
接口:方法声明(给service层调用)
XML:实现接口
生成测试类
四、相关插件下载
一、什么是MyBatis
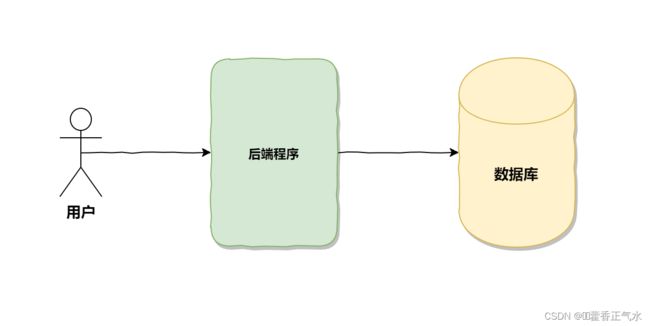
MyBatis是一款持久层框架,支持自定义SQL、存储过程以及高级映射。可以嗲提JDBC代码以及设置参数和获取结果集的工作。MyBatis可以通过简单的XML或者注解来配置和映射原始类型、接口和Java POJO为数据库中的记录。
它是更见但完成程序和数据库交互的工具,使得能够简单操作和读取数据库工具。
二、搭建MyBatis开发环境
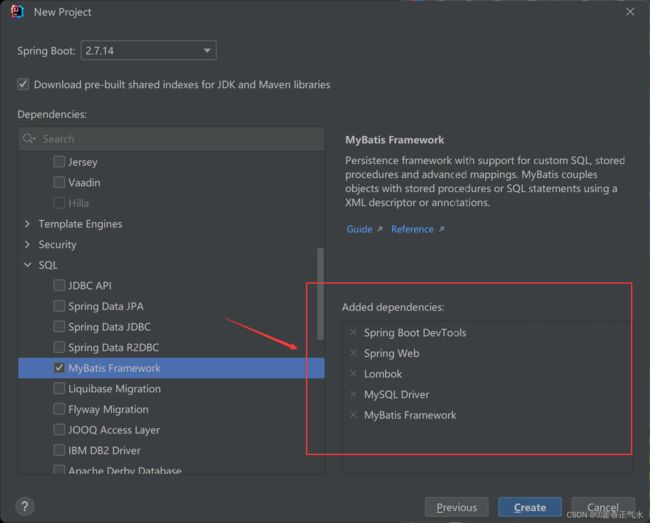
添加MyBatis依赖
创建Spring boot 时添加MyBatis的相关依赖
在数据库添加数据
drop database if exists mycnblog;

create database myblog DEFAULT CHARACTER SET utf8mb4;

-- 创建表[⽤户表]

drop table if exists userinfo;

create table userinfo(
 id int primary key auto_increment,
 username varchar(100) not null,
 password varchar(32) not null,
 photo varchar(500) default '',
 createtime datetime default now(),
 updatetime datetime default now(),
 `state` int default 1

) default charset 'utf8mb4';


-- 在表中添加数据
INSERT INTO `userinfo` (`id`, `username`, `password`, `photo`,
`createtime`, `updatetime`, `state`) VALUES
(1, 'admin', 'admin', '', '2021-12-06 17:10:48', '2021-12-06 17:10:48', 1)
;
设置MyBatis配置
数据库的相关连接信息xml的保存和设置路径
# 设置数据库的相关连接信息
spring.datasource.url=jdbc:mysql://127.0.0.1:3306?myblog?characterEncoding=utf8
spring.datasource.username=root
# 自己的mysql密码,不要写我的
spring.datasource.password=111111
spring.datasource.driver-class-name=com.mysql.cj.jdbc.Driver

# MyBatis配置信息
# myBatis的实现类
# 设置MyBatis XML存放路径和命名格式,
# 路径就是冒号后面的斜杠前面的,我这里时和.properties同级的mybatis包
mybatis.mapper-locations=classpath:mybatis/*Mapper.xml

# 以上是必须要设置的,
# 以下是可选配置
# 配置MyBatis执行时打印SQL
mybatis.configuration.log-impl=org.apache.ibatis.logging.stdout.StdOutImpl
# 设置日志级别
logging.level.com.example.demo=debug 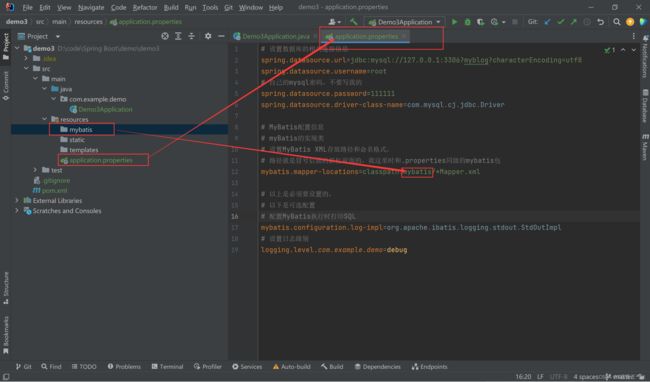
三、使用MyBatis模式和语法操作数据库
首先先在数据库添加数据
常规写法包含了两个文件:
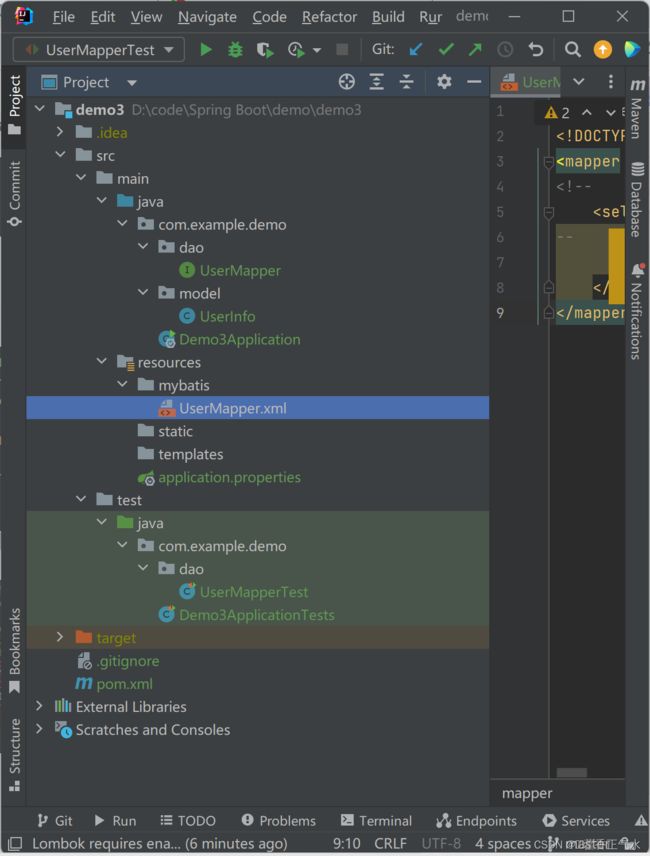
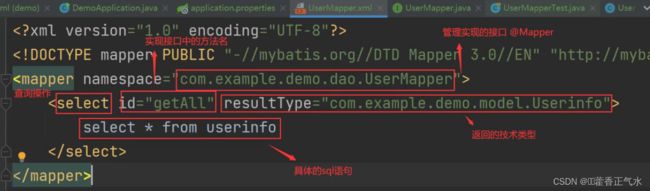
接口:方法声明(给service层调用)
定义实体类
@Data
public class UserInfo {
    private int id;
    private String username;
    private String password;
    private String photo;
    private LocalDateTime updatatime;
    private LocalDateTime createtime;
    private int state;

}
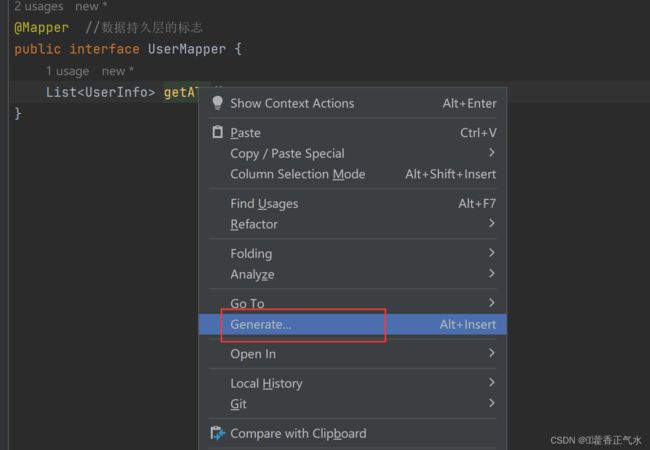
在接口中进行方法声明
@Mapper  //数据持久层的标志
public interface UserMapper {
//UserInfo是一个自定义的实体类
    List getAll();
}
XML:实现接口
固定格式:
-- 查询操作,其他操作同理
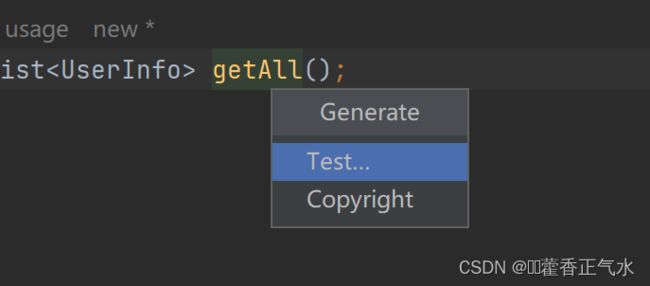
生成测试类
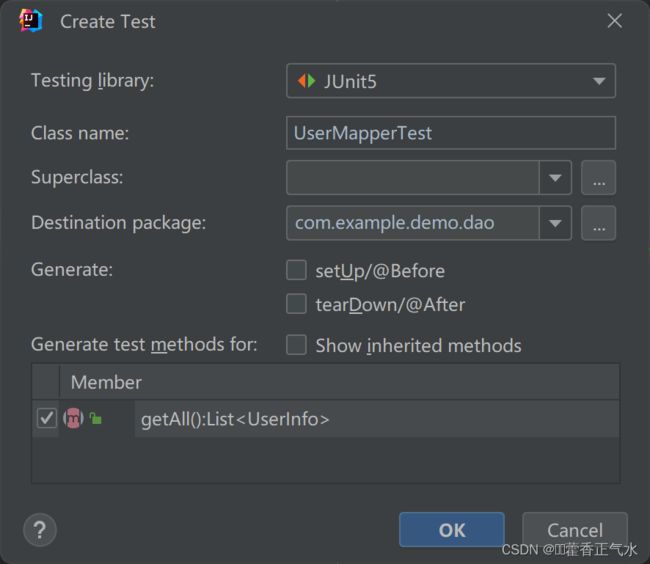
@SpringBootTest     //一定要加该注解,目的是为了告诉当前的测试程序是运行在Springboot容器中的
class UserMapperTest {
    @Autowired
    private UserMapper userMapper;
    @Test
    void getAll() {
    List list = userMapper.getAll();
    System.out.println(list);
    }
}
查询结果:

四、相关插件下载
做完上述步骤以后,可以发现,UserMapper.xml实现了UserMapper接口,但是如果在接口和xml文件不叫多的情况下要对文件进行修改,这样找起来很麻烦,我们就可以下载一个mybatisx的插件。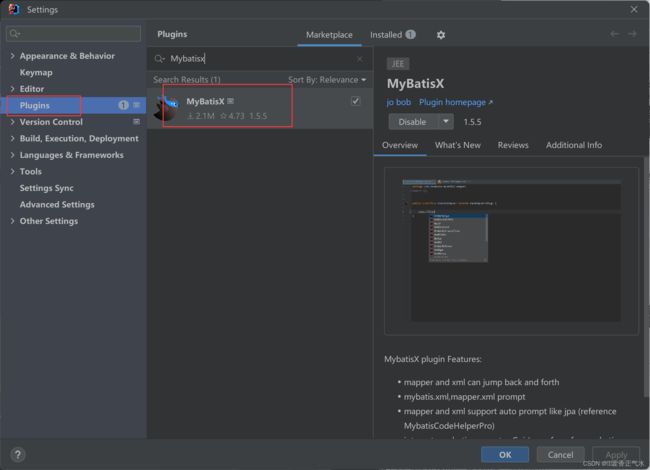
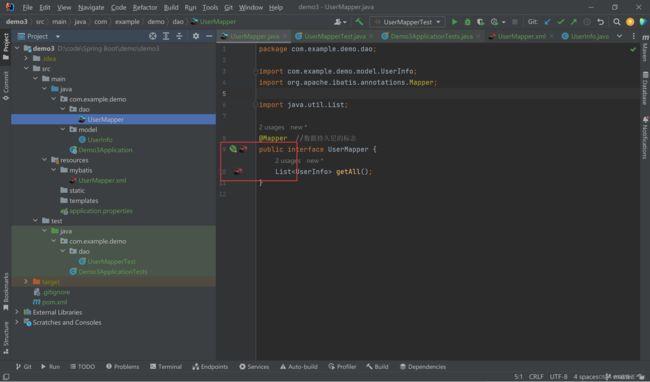
点击图标就可以直接跳转到对应的xml文件或者接口文件中。