一文搞懂CSS 3D动画效果
文章目录
- 前言
- 一、先来看几个动画案例
-
- ①旋转飞人
- ②翻转纽扣
- ③立体导航栏
- ④立体轮播图
- 二、3D动画效果简述
-
- 1.转换类型: transform-style: preserve-3d;
- 2.透视 perspective: 400px;(拉进我们眼睛与图像的距离)
- 三、项目案例代码
-
- 1.立体导航栏
- 2.旋转木马
- 总结
前言
3D动画效果使页面看起来更加立体,图形更下加生动,实现原理是通过透视的视距,改变图像在人眼内成像的类型,从而达到图像立体的展示在人的眼前。
一、先来看几个动画案例
这几个动画案例均是由CSS 3D动画技术制成。大家知道javascript可以很轻松的实现动画效果
今天带大家不用js也实现一些简单的动画效果。
①旋转飞人
实现图片的翻转,可以自己制定旋转轴
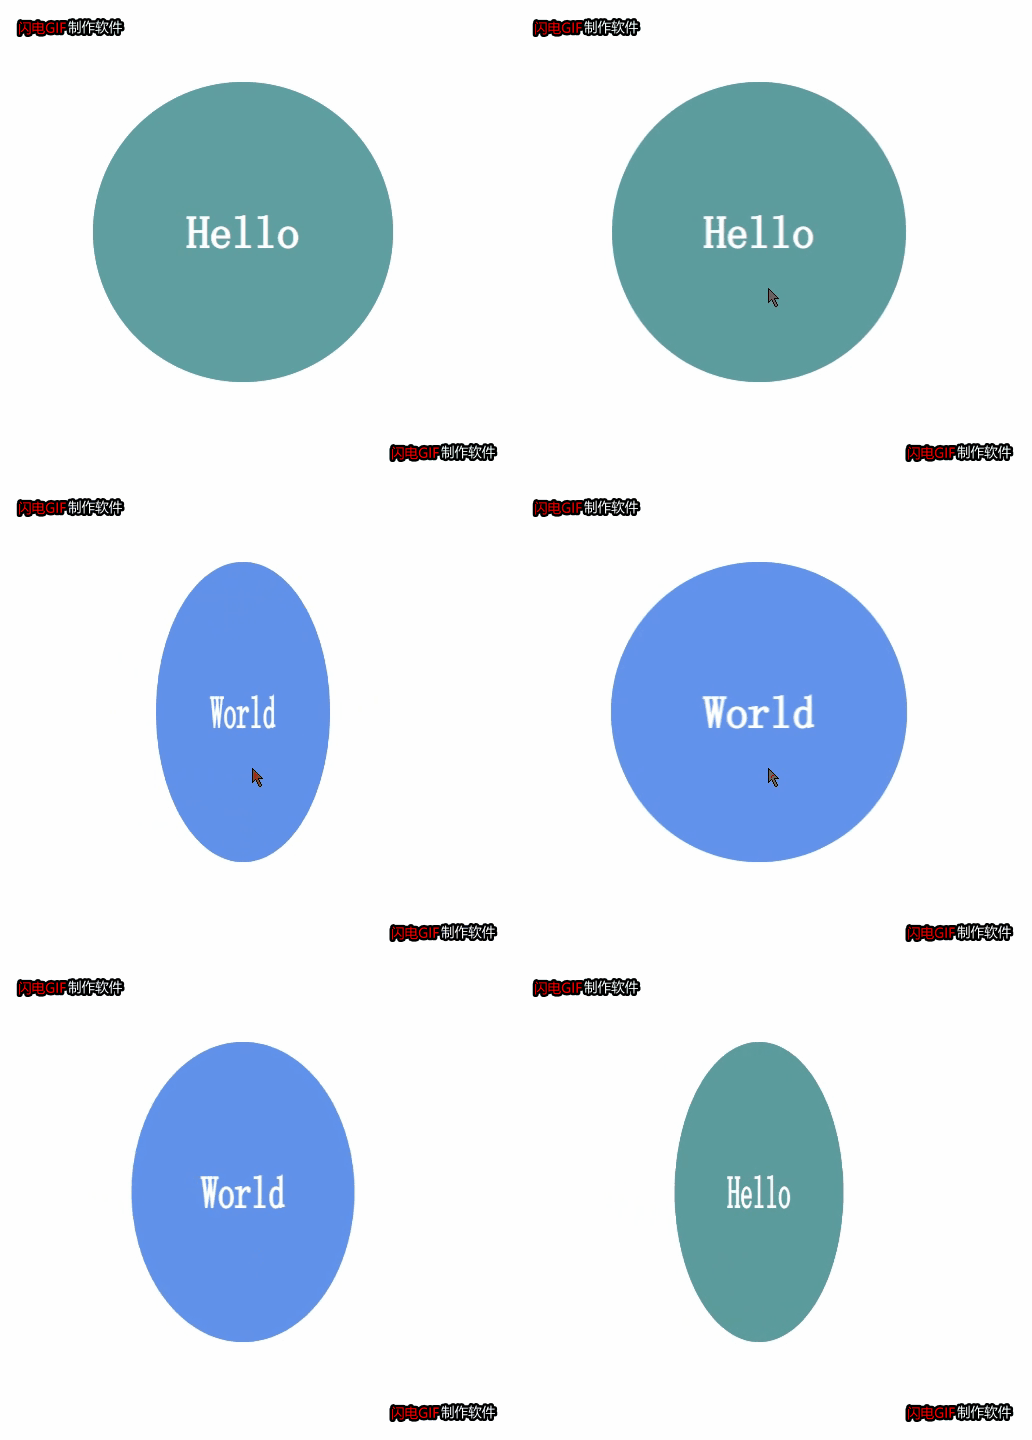
②翻转纽扣
实现了两个盒子的前后翻转
③立体导航栏
实现了导航栏立体化
④立体轮播图
比普通的轮播图更加立体^_^
二、3D动画效果简述
3D动画效果展示只不过是对2D动画效果的延伸,2D动画进行定位、旋转、缩放的轴是
我们头部与电脑屏幕连线所在的直线,而3D动画效果可以自定义旋转轴。然后进行相应的操作。

在3D旋转的时候有三个轴X、Y、Z(X是横向的、Y是竖向的、Z垂直与X、Y)
 1.以X轴旋转
            transform: rotateX(45deg);
 2.以Y轴旋转
          /* transform: rotateY(45deg); */
 3.以Z轴旋转(与2D的旋转没有本质的区别)
            transform: rotateZ(45deg);
 4.综合旋转(遵守规则:各个轴的矢量和)
1.转换类型: transform-style: preserve-3d;
这个属性的作用是告诉浏览器,以3D的形式对图片进行旋转。
这个属性一般是加在需要进行变换的盒子上
以下通过翻转纽扣进行体会:
代码如下:
DOCTYPE html>
<html lang="en">

<head>
    <meta charset="UTF-8">
    <meta http-equiv="X-UA-Compatible" content="IE=edge">
    <meta name="viewport" content="width=device-width, initial-scale=1.0">
    <title>Documenttitle>

    <style>
        body {
        /*可以修改该属性,达到纽扣的不同效果的展示。*/
            perspective: 400px;
        }

        .root {
            position: relative;
            width: 300px;
            height: 300px;
            margin: 100px auto;
        }

        .root:hover .box {
            transform: rotateY(180deg);
        }

        .box {
            position: relative;
            width: 100%;
            height: 100%;
            transition: all 2s;
            transform-style: preserve-3d;
        }


        .nav,
        .qwe {
            position: absolute;
            top: 0;
            left: 0;
            width: 100%;
            height: 100%;
            border-radius: 50%;
            text-align: center;
            line-height: 300px;
            font-size: 45px;
            font-family: '幼圆';
            font-weight: 700;
            color: #fff;
            transition: all 2s;
        }

        .nav {
            background-color: cadetblue;
            z-index: 1;
        }

        .qwe {

            background-color: cornflowerblue;
            transform: rotateY(180deg);
        }
    style>
head>

<body>
    <div class="root">
        <div class="box">
            <div class="nav">Hellodiv>
            <div class="qwe">Worlddiv>
        div>
    div>


body>

html>
2.透视 perspective: 400px;(拉进我们眼睛与图像的距离)
这里指物理距离不变,改变的是展示的效果(就像在平时观察真实的物
体走近了几步,观察的角度改变了)
这个属性一般加在需要变换盒子的父盒子上。
以下使用翻转飞人案例进行代码展示
修改透视距离为100px会看到飞人踢你。(嘿嘿)
代码如下:
DOCTYPE html>
<html lang="en">

<head>
    <meta charset="UTF-8">
    <meta http-equiv="X-UA-Compatible" content="IE=edge">
    <meta name="viewport" content="width=device-width, initial-scale=1.0">
    <title>Documenttitle>
    <style>
        body {
            perspective: 400px;
            /* 保持三D效果 */
            transform-style: preserve-3d;
        }

        div {
            margin: 200px auto;
            width: 300px;
            height: 300px;
            background: url(../3.gif);
            background-size: 100% 100%;
            transition: all 2s;
        }

        div:hover {
            transform: rotate3d(1, 1, 1, 360deg);

        }
    style>
    <style>style>
head>

<body>
    <div>div>
body>

html>
三、项目案例代码
1.立体导航栏
	这个的实现过程就是将盒子通过x轴进行旋转,直到与电脑屏幕垂直,然后添加一个新的
	盒子,与第一个盒子垂直,在鼠标聚焦在第二个盒子上的时候盒子进行90度旋转
DOCTYPE html>
<html lang="en">

<head>
    <meta charset="UTF-8">
    <meta http-equiv="X-UA-Compatible" content="IE=edge">
    <meta name="viewport" content="width=device-width, initial-scale=1.0">
    <title>Documenttitle>

    <style>
        .navrootr {
            float: left;
            position: relative;
            width: 100px;
            height: 40px;
            margin: 100px 10px;
            perspective: 400px;
        }

        .navrootr:hover .navroot {
            transform: rotateX(90deg);
        }

        .navroot {
            position: relative;
            width: 100%;
            height: 100%;
            /* perspective: 400px; */
            transform-style: preserve-3d;
            transition: all .4s;
        }

        .box1,
        .box2 {
            color: #fff;
            position: absolute;
            width: 100%;
            height: 100%;
            text-align: center;
            line-height: 40px;
        }

        .box1 {
            transform: translateZ(50%);
            background-color: teal;
            transform: translateZ(20px);
        }

        .box2 {
            background-color: cornflowerblue;
            transform: translateY(20px) rotateX(-90deg);
        }
    style>
head>

<body>
    <div class="navrootr">
        <div class="navroot">
            <div class="box1">哔哩哔哩div>
            <div class="box2">百度知道div>

        div>
    div>
    <div class="navrootr">
        <div class="navroot">
            <div class="box1">哔哩哔哩div>
            <div class="box2">百度知道div>

        div>
    div>
    <div class="navrootr">
        <div class="navroot">
            <div class="box1">哔哩哔哩div>
            <div class="box2">百度知道div>

        div>
    div>
    <div class="navrootr">
        <div class="navroot">
            <div class="box1">哔哩哔哩div>
            <div class="box2">百度知道div>

        div>
    div>
    <div class="navrootr">
        <div class="navroot">
            <div class="box1">哔哩哔哩div>
            <div class="box2">百度知道div>

        div>
    div>
    <div class="navrootr">
        <div class="navroot">
            <div class="box1">哔哩哔哩div>
            <div class="box2">百度知道div>

        div>
    div>


body>

html>
2.旋转木马
添加了6个盒子,中间一个,将每一个图片按照第一个图片先旋转,再平移
【例如translateZ(350px),沿z轴平移350px】,可以在纸上先画一个俯视图,
看看每一个图片具体旋转多少度,移动多少可以达到固定的位置。
DOCTYPE html>
<html lang="en">

<head>
    <meta charset="UTF-8">
    <meta http-equiv="X-UA-Compatible" content="IE=edge">
    <meta name="viewport" content="width=device-width, initial-scale=1.0">
    <title>Documenttitle>

    <style>
        @keyframes run {
            0% {
                transform: rotateY(0);
            }

            100% {
                transform: rotateY(360deg);
            }
        }

        .bodyroot {
            perspective: 1000px;
        }
        section {
            position: relative;
            width: 350px;
            height: 200px;
            background: url(../IMG_1770\(20210111-231055\).JPG) no-repeat;
            background-size: 100% 100%;
            margin: 200px auto;
            transform-style: preserve-3d;
            animation: run 6s linear infinite;
        }

        section:hover {
            animation-play-state: paused;
        }

        section div {
            position: absolute;
            top: 0px;
            left: 0px;
            width: 300px;
            height: 200px;
            background: url(../dog.jpg) no-repeat;
        }

        /* 前 */
        section div:nth-child(1) {
            transform: translateZ(350px);
            background: url(../q.jpg) no-repeat;
            background-size: 100% 100%;
        }

        /* 后 */
        section div:nth-child(2) {
            transform: rotateY(60deg) translateZ(350px);
            background: url(../w.jpg) no-repeat;
            background-size: 100% 100%;
        }

        /* 前左 */
        section div:nth-child(3) {
            transform: rotateY(120deg) translateZ(350px);
            background: url(../e.jpg) no-repeat;
            background-size: 100% 100%;
        }

        /* 前右 */
        section div:nth-child(4) {
            transform: rotateY(180deg) translateZ(350px);
            background: url(../r.jpg) no-repeat;
            background-size: 100% 100%;
        }

        /* 后左 */
        section div:nth-child(5) {
            transform: rotateY(240deg) translateZ(350px);
            background: url(../t.jpg) no-repeat;
            background-size: 100% 100%;
        }

        /* 后右 */
        section div:nth-child(6) {
            transform: rotateY(300deg) translateZ(350px);
            background: url(../y.jpg) no-repeat;
            background-size: 100% 100%;
        }
    style>
head>

<body>
    <div class="bodyroot">
         <section>
        <div>div>
        <div>div>
        <div>div>
        <div>div>
        <div>div>
        <div>div>
    section>
    div>
body>

html>
总结
以上的案例将图片路径替换成你的图片所在的路径就可以直接运行,对于3D动画效果,整不清楚就画图,可以先局部后整体。


