flutter 导出iOS问题2
问题1:The Swift pod FirebaseCoreInternal depends upon GoogleUtilities, which does not define modules. To opt into those targets generating module maps (which is necessary to import them from Swift when building as static libraries)
参考
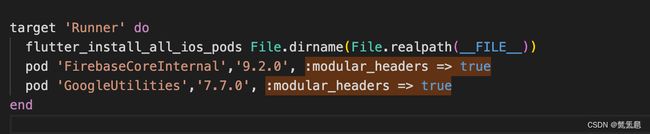
正如上图报错第三方库The Swift pod FirebaseCoreInternal depends upon GoogleUtilities,那么就在FirebaseCoreInternal和GoogleUtilities添加上:modular_headers => true即可
在你的ios项目文件夹中找到Podfile文件,找到target配置
例:
pod ‘FirebaseCoreInternal’,‘9.2.0’, :modular_headers => true
pod ‘GoogleUtilities’,‘7.7.0’, :modular_headers => true
问题2:[!] CocoaPods did not set the base configuration of your project because your project already has a custom config set. In order for CocoaPods integration to work at all, please either set the base configurations of the target Runner to Target Support Files/Pods-Runner/Pods-Runner.profile.xcconfig or include the Target Support Files/Pods-Runner/Pods-Runner.profile.xcconfig in your build configuration (Flutter/Release.xcconfig).
参考
[!] CocoaPods没有设置项目的基本配置,因为您的项目已经有一个自定义配置集。为了让CocoaPods集成工作,请将目标“Runner”的基本配置设置为“target Support Files/Pods Runner/Pods-Runner.profile”。xcconfig或包含“Target Support Files/Pods Runner/Pods-Runner.profile”。xcconfig在构建配置中(Flutter/Release.xcconf)。

Release.xcconfig 添加:
#include? "Pods/Target Support Files/Pods-Runner/Pods-Runner.release.xcconfig"
#include? "Pods/Target Support Files/Pods-Runner/Pods-Runner.profile.xcconfig"
#include "Generated.xcconfig"
Debug.xcconfig 添加:
#include? "Pods/Target Support Files/Pods-Runner/Pods-Runner.debug.xcconfig"
#include "Generated.xcconfig"
再次 pod install
pod instal
Analyzing dependencies
Downloading dependencies
Generating Pods project
Integrating client project
Pod installation complete! There are 27 dependencies from the Podfile and 35 total pods installed.
问题3
Compiling for iOS xxx, but module ‘xxx‘ ‘has a minimum deployment target of iOS xxx 错误的解决方案
参考
错误原因:
iphone或者iPad设置最低运行的版本是ios10.0,但是使用的第三方库,最低运行是 ios12.0,因为第三方库最低要求比iPhone或者iPad高,所以运行报错。
解决方案:
1.查看iphone iPad Target的最低ios版本
我的iphone iPad设置的target运行版本是iOS 10.0, 查看界面如下,选中自己项目,targets,然后General → Deployment Info → ios 设置了10.0,现在需要把pod里面的第三方库也设置成10.0或者以下

2.修改pod里第三方库的target 版本
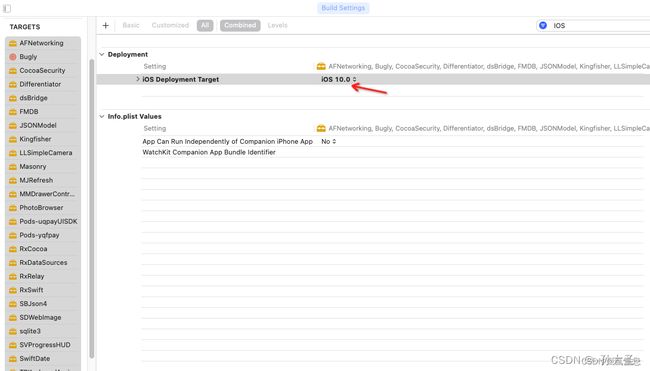
点击左边目录的Pods,选择 Targets →选中报错的第三方库→ Deployment->IOS Deployment Target 把之前的12.0改成10.0,找不到的话就在搜索框搜索即可。如下图:

因为xcode 12就开始默认把所有第三方库都设置成iOS12.0,所以按住shift选中左边所有第三方库,然后再选择12.0,如下图:
再编译就编译成功了。
问题4:‘flutter_vibrate/flutter_vibrate-Swift.h’ file not found
把项目的插件注释掉
转到Ios / Podfile添加以下行:
platform :ios, '12.0'
use_frameworks!

target 'Runner' do
  use_frameworks!
end
Framework:实际上是一种打包方式,将库的二进制文件,头文件和有关的资源文件打包到一起,方便管理和分发。
CocoaPods 通过use_frameworks来控制是否是用Framework。
如果不使用use_frameworks!则会使用static libraries 方式生成.a文件。
如果使用use_frameworks!则会使用dynamic frameworks 方式生成.framework文件。
在纯oc的项目中,一般不使用frameworks,但是在pod导入的swift项目,必须要使用use_frameworks!,我这个flutter项目也是用pod导入的第三方库,所以必须加入use_frameworks
然后进行
flutter clean清理
删除Podfile.lock文件重新运行
执行pod install安装等等
平时flutter项目中遇到问题,我们用的最多的方法就是:
1、flutter clean清理;
2、Android Studio中File–Invalidate Caches / Restart–Invalidate and Restart清理、或AS重启;
3、xcode中的Command+Shift+K清理;
4、重新插拔手机;
5、重新启动手机;
6、重启电脑;
7、重启xcode;
8、删除Podfile.lock文件重新运行;
9、执行pod install安装等等
faceBook填写数据
右键info,用code打开
Configure iOS
Read through the "Getting Started with App Events for iOS" tutorial and in particular, follow step 5 by opening info.plist "As Source Code" and add the following

If your code does not have CFBundleURLTypes, add the following just before the final </dict> element:
<key>CFBundleURLTypes</key>
<array>
  <dict>
  <key>CFBundleURLSchemes</key>
  <array>
    <string>fb[APP_ID]</string>
  </array>
  </dict>
</array>
<key>FacebookAppID</key>
<string>[APP_ID]</string>
<key>FacebookClientToken</key>
<string>[CLIENT_TOKEN]</string>
<key>FacebookDisplayName</key>
<string>[APP_NAME]</string>

If your code already contains CFBundleURLTypes, insert the following:
<array>
 <dict>
 <key>CFBundleURLSchemes</key>
 <array>
   <string>fb[APP_ID]</string>
 </array>
 </dict>
</array>
<key>FacebookAppID</key>
<string>[APP_ID]</string>
<key>FacebookClientToken</key>
<string>[CLIENT_TOKEN]</string>
<key>FacebookDisplayName</key>
<string>[APP_NAME]</string>