CENTOS上的网络安全工具(十四)搬到Docker上(2)?
既然说要搬到Docker上,那么肯定是要把咱日常习惯用的那些东西都往docker上堆一堆看的。我最先考虑的居然是SSH,乃至于到现在我都不知道我为什么第一个想到的是SSH——因为对虚拟机来说,首先考虑的当然是如何远程管理集群中的每个机器,这个自然是需要SSH的;但是对于docker来说,难道不是直接使用docker命令就可以了?为什么要SSH?
本篇的内容,记录了诸如此类的,我在初入docker时的一系列奇思妙想,以及在这些奇思妙想引导下掉进的一个有一个大坑。不幸的是,没几个坑最终爬出来了;幸运的是,正是因为扑街得很惨,所以更容易体会“docker不是虚拟机,只是进程隔离的工具”这句话的涵义。有助于后面在使用docker时正确的认识并定位它。
一、Systemd
直接在docker里执行systemctl,一般只会得到如下反馈:
[root@d47ccf7a7196 /]# systemctl
System has not been booted with systemd as init system (PID 1). Can't operate.
Failed to connect to bus: Host is down
原因?就藏在docker的run命令里面——为什么docker run命令后面会跟一个/bin/bash之类的默认执行程序地址?或者在dockerfile文件里会使用[CMD]或者[ENTRYPOINT]来指示docker执行时默认执行程序?——从进程隔离的角度来理解,docker就是干这个事的,给你一个能够执行某个进程的最小操作系统环境而已。所以,如果没有明确的只是,docker是不会执行一个特定的进程的,比如systemd,这也就导致systemctl所依赖的服务不会被启动起来,从而我们也就没有办法使用systemctl。
1. 提前启动systemd
Linux系统的启动过程大致分为5个阶段:①内核引导;②运行init程序;③系统初始化;④建立终端;⑤用户登录操作系统。从Centos7以后,init程序就由systemd来实现,其配置文件在/usr/lib/systemd/system和/etc/systemd/system下。 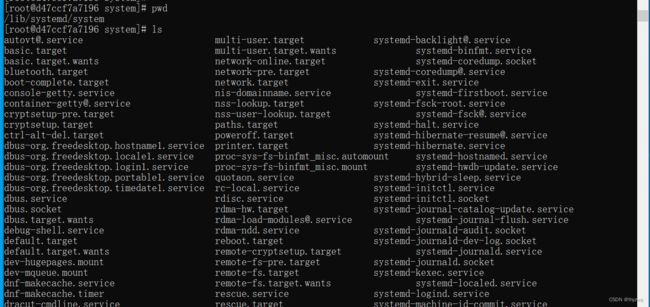
可以看到systemd包含了多个类型的服务配置,实际上systemd和之前init的区别在于init是逐个启动的,systemd支持多线程并行启动,效率上要高很多。为了提前启动systemd,可以执行/sbin/init,将其作为docker启动时的默认入口
C:\Users\dell>docker run -it --name pig01 --privileged centos:latest /sbin/init

Welcome to CentOS Linux 8!

[  OK  ] Reached target Swap.
[  OK  ] Listening on Process Core Dump Socket.
[  OK  ] Listening on udev Control Socket.
[  OK  ] Reached target Remote File Systems.
[  OK  ] Listening on Journal Socket (/dev/log).
[  OK  ] Reached target Network is Online.
[  OK  ] Set up automount Arbitrary Executable File Formats File System Automount Point.
[  OK  ] Started Forward Password Requests to Wall Directory Watch.
[  OK  ] Reached target Local File Systems.
[  OK  ] Started Dispatch Password Requests to Console Directory Watch.
[  OK  ] Reached target Local Encrypted Volumes.
[  OK  ] Reached target Paths.
[  OK  ] Listening on udev Kernel Socket.
[  OK  ] Reached target Slices.
[  OK  ] Listening on initctl Compatibility Named Pipe.
[  OK  ] Listening on Journal Socket.
         Starting udev Coldplug all Devices...
         Starting Rebuild Dynamic Linker Cache...
         Starting Rebuild Journal Catalog...
         Starting Restore /run/initramfs on shutdown...
         Starting Read and set NIS domainname from /etc/sysconfig/network...
         Starting Load/Save Random Seed...
         Starting Journal Service...
         Mounting Kernel Debug File System...
         Starting Create System Users...
         Starting Apply Kernel Variables...
         Starting Rebuild Hardware Database...
[  OK  ] Started Restore /run/initramfs on shutdown.
[  OK  ] Started Read and set NIS domainname from /etc/sysconfig/network.
[  OK  ] Mounted Kernel Debug File System.
[  OK  ] Started Create System Users.
[  OK  ] Started Apply Kernel Variables.
[  OK  ] Started Rebuild Hardware Database.
         Starting Create Static Device Nodes in /dev...
[  OK  ] Started Rebuild Journal Catalog.
[  OK  ] Started Load/Save Random Seed.
[  OK  ] Started Create Static Device Nodes in /dev.
         Starting udev Kernel Device Manager...
[  OK  ] Started Journal Service.
         Starting Flush Journal to Persistent Storage...
[  OK  ] Started Flush Journal to Persistent Storage.
         Starting Create Volatile Files and Directories...
[  OK  ] Started Rebuild Dynamic Linker Cache.
         Starting Update is Completed...
[  OK  ] Started udev Coldplug all Devices.
[  OK  ] Started udev Kernel Device Manager.
[  OK  ] Started Create Volatile Files and Directories.
[  OK  ] Started Update is Completed.
         Starting Update UTMP about System Boot/Shutdown...
[  OK  ] Started Update UTMP about System Boot/Shutdown.
[  OK  ] Reached target System Initialization.
[  OK  ] Started dnf makecache --timer.
[  OK  ] Started Daily Cleanup of Temporary Directories.
[  OK  ] Reached target Timers.
[  OK  ] Listening on D-Bus System Message Bus Socket.
[  OK  ] Reached target Sockets.
[  OK  ] Reached target Basic System.
[  OK  ] Started D-Bus System Message Bus.
         Starting Permit User Sessions...
         Starting dnf makecache...
         Starting Cleanup of Temporary Directories...
[  OK  ] Started Permit User Sessions.
[  OK  ] Reached target Multi-User System.
         Starting Update UTMP about System Runlevel Changes...
[  OK  ] Started Cleanup of Temporary Directories.
[  OK  ] Started Update UTMP about System Runlevel Changes.
See 'systemctl status dnf-makecache.service' for details.
看起来是不是特别像系统启动时的样子——其实就是一摸一样的。
系统服务目录/usr/lib/systemd下边有系统(system)和用户(user),system是需要开机没有登陆情况下就能运行的程序,user是用户登录后才能运行的程序。
然后这个程序就挂住了,需要以exec重新进入这个容器:
C:\Users\dell>docker exec -it pig01 bash
[root@6f9f323be393 /]# systemctl
  UNIT                                   LOAD   ACTIVE     SUB       DESCRIPTION
  proc-sys-fs-binfmt_misc.automount      loaded active     waiting   Arbitrary Executable File Formats File System Automount Point
  dev-sdc.device                         loaded activating tentative /dev/sdc
  -.mount                                loaded active     mounted   Root Mount
  dev-mqueue.mount                       loaded active     mounted   POSIX Message Queue File System
  etc-hostname.mount                     loaded active     mounted   /etc/hostname
  etc-hosts.mount                        loaded active     mounted   /etc/hosts
  etc-resolv.conf.mount                  loaded active     mounted   /etc/resolv.conf
  sys-kernel-debug.mount                 loaded active     mounted   Kernel Debug File System
  systemd-ask-password-console.path      loaded active     waiting   Dispatch Password Requests to Console Directory Watch
  systemd-ask-password-wall.path         loaded active     waiting   Forward Password Requests to Wall Directory Watch
  init.scope                             loaded active     running   System and Service Manager
  dbus.service                           loaded active     running   D-Bus System Message Bus
  ldconfig.service                       loaded active     exited    Rebuild Dynamic Linker Cache
  nis-domainname.service                 loaded active     exited    Read and set NIS domainname from /etc/sysconfig/network
  systemd-hwdb-update.service            loaded active     exited    Rebuild Hardware Database
  systemd-journal-catalog-update.service loaded active     exited    Rebuild Journal Catalog
  systemd-journal-flush.service          loaded active     exited    Flush Journal to Persistent Storage
  systemd-journald.service               loaded active     running   Journal Service
  systemd-random-seed.service            loaded active     exited    Load/Save Random Seed
  systemd-sysctl.service                 loaded active     exited    Apply Kernel Variables
  systemd-sysusers.service               loaded active     exited    Create System Users
  systemd-tmpfiles-setup-dev.service     loaded active     exited    Create Static Device Nodes in /dev
  systemd-tmpfiles-setup.service         loaded active     exited    Create Volatile Files and Directories
  systemd-udev-trigger.service           loaded active     exited    udev Coldplug all Devices
  systemd-udevd.service                  loaded active     running   udev Kernel Device Manager
  systemd-update-done.service            loaded active     exited    Update is Completed
  systemd-update-utmp.service            loaded active     exited    Update UTMP about System Boot/Shutdown
  systemd-user-sessions.service          loaded active     exited    Permit User Sessions
  -.slice                                loaded active     active    Root Slice
  system.slice                           loaded active     active    System Slice
  dbus.socket                            loaded active     running   D-Bus System Message Bus Socket
  systemd-coredump.socket                loaded active     listening Process Core Dump Socket
lines 1-35
systemctl也能够使用了。(使用dokken/centos-stream-8试验,如果使用官方的那个centos:latest,因为已经不更了,所以yum库会有问题,需要后面手工更改)
为了测试一下这个ssh是否确实通了,我们另开一个容器,安装openssh-clients来测试:
C:\Users\dell>docker run -it --name pig02 dokken/centos-stream-8 bash
[root@fc88b5d2d81f /]#
[root@fc88b5d2d81f /]#
[root@fc88b5d2d81f /]#
[root@fc88b5d2d81f /]# yum list openssh*
CentOS Stream 8 - AppStream                                                             6.7 MB/s |  26 MB     00:03
CentOS Stream 8 - BaseOS                                                                2.4 MB/s |  26 MB     00:10
CentOS Stream 8 - Extras                                                                 30 kB/s |  18 kB     00:00
CentOS Stream 8 - Extras common packages                                                2.8 kB/s | 5.2 kB     00:01
Available Packages
openssh.x86_64                                              8.0p1-16.el8                                       baseos
openssh-askpass.x86_64                                      8.0p1-16.el8                                       appstream
openssh-cavs.x86_64                                         8.0p1-16.el8                                       baseos
openssh-clients.x86_64                                      8.0p1-16.el8                                       baseos
openssh-keycat.x86_64                                       8.0p1-16.el8                                       baseos
openssh-ldap.x86_64                                         8.0p1-16.el8                                       baseos
openssh-server.x86_64                                       8.0p1-16.el8                                       baseos
[root@fc88b5d2d81f /]# yum install -y openssh-clients
Last metadata expiration check: 0:00:27 ago on Fri Dec  2 04:07:55 2022.
Dependencies resolved.
========================================================================================================================
 Package                        Architecture          Version                               Repository             Size
========================================================================================================================
Installing:
 openssh-clients                x86_64                8.0p1-16.el8                          baseos                669 k
Installing dependencies:
 libedit                        x86_64                3.1-23.20170329cvs.el8                baseos                102 k
 openssh                        x86_64                8.0p1-16.el8                          baseos                523 k

Transaction Summary
========================================================================================================================
Install  3 Packages

Total download size: 1.3 M
Installed size: 4.5 M
Downloading Packages:
(1/3): libedit-3.1-23.20170329cvs.el8.x86_64.rpm                                        1.1 MB/s | 102 kB     00:00
(2/3): openssh-clients-8.0p1-16.el8.x86_64.rpm                                          3.8 MB/s | 669 kB     00:00
(3/3): openssh-8.0p1-16.el8.x86_64.rpm                                                  837 kB/s | 523 kB     00:00
------------------------------------------------------------------------------------------------------------------------
Total                                                                                   1.1 MB/s | 1.3 MB     00:01
Running transaction check
Transaction check succeeded.
Running transaction test
Transaction test succeeded.
Running transaction
  Preparing        :                                                                                                1/1
  Running scriptlet: openssh-8.0p1-16.el8.x86_64                                                                    1/3
  Installing       : openssh-8.0p1-16.el8.x86_64                                                                    1/3
  Installing       : libedit-3.1-23.20170329cvs.el8.x86_64                                                          2/3
  Installing       : openssh-clients-8.0p1-16.el8.x86_64                                                            3/3
  Running scriptlet: openssh-clients-8.0p1-16.el8.x86_64                                                            3/3
  Verifying        : libedit-3.1-23.20170329cvs.el8.x86_64                                                          1/3
  Verifying        : openssh-8.0p1-16.el8.x86_64                                                                    2/3
  Verifying        : openssh-clients-8.0p1-16.el8.x86_64                                                            3/3

Installed:
  libedit-3.1-23.20170329cvs.el8.x86_64      openssh-8.0p1-16.el8.x86_64      openssh-clients-8.0p1-16.el8.x86_64

Complete!
[root@fc88b5d2d81f /]# ssh
usage: ssh [-46AaCfGgKkMNnqsTtVvXxYy] [-B bind_interface]
           [-b bind_address] [-c cipher_spec] [-D [bind_address:]port]
           [-E log_file] [-e escape_char] [-F configfile] [-I pkcs11]
           [-i identity_file] [-J [user@]host[:port]] [-L address]
           [-l login_name] [-m mac_spec] [-O ctl_cmd] [-o option] [-p port]
           [-Q query_option] [-R address] [-S ctl_path] [-W host:port]
           [-w local_tun[:remote_tun]] destination [command]
安装openssh-server的容器,ip地址是172.17.0.2;
C:\Users\dell>docker run -it --name pig02 dokken/centos-stream-8 bash
[root@fc88b5d2d81f /]#
[root@fc88b5d2d81f /]#
[root@fc88b5d2d81f /]#
[root@fc88b5d2d81f /]# yum list openssh*
CentOS Stream 8 - AppStream                                                             6.7 MB/s |  26 MB     00:03
CentOS Stream 8 - BaseOS                                                                2.4 MB/s |  26 MB     00:10
CentOS Stream 8 - Extras                                                                 30 kB/s |  18 kB     00:00
CentOS Stream 8 - Extras common packages                                                2.8 kB/s | 5.2 kB     00:01
Available Packages
openssh.x86_64                                              8.0p1-16.el8                                       baseos
openssh-askpass.x86_64                                      8.0p1-16.el8                                       appstream
openssh-cavs.x86_64                                         8.0p1-16.el8                                       baseos
openssh-clients.x86_64                                      8.0p1-16.el8                                       baseos
openssh-keycat.x86_64                                       8.0p1-16.el8                                       baseos
openssh-ldap.x86_64                                         8.0p1-16.el8                                       baseos
openssh-server.x86_64                                       8.0p1-16.el8                                       baseos
[root@fc88b5d2d81f /]# yum install -y openssh-clients
Last metadata expiration check: 0:00:27 ago on Fri Dec  2 04:07:55 2022.
Dependencies resolved.
========================================================================================================================
 Package                        Architecture          Version                               Repository             Size
========================================================================================================================
Installing:
 openssh-clients                x86_64                8.0p1-16.el8                          baseos                669 k
Installing dependencies:
 libedit                        x86_64                3.1-23.20170329cvs.el8                baseos                102 k
 openssh                        x86_64                8.0p1-16.el8                          baseos                523 k

Transaction Summary
========================================================================================================================
Install  3 Packages

Total download size: 1.3 M
Installed size: 4.5 M
Downloading Packages:
(1/3): libedit-3.1-23.20170329cvs.el8.x86_64.rpm                                        1.1 MB/s | 102 kB     00:00
(2/3): openssh-clients-8.0p1-16.el8.x86_64.rpm                                          3.8 MB/s | 669 kB     00:00
(3/3): openssh-8.0p1-16.el8.x86_64.rpm                                                  837 kB/s | 523 kB     00:00
------------------------------------------------------------------------------------------------------------------------
Total                                                                                   1.1 MB/s | 1.3 MB     00:01
Running transaction check
Transaction check succeeded.
Running transaction test
Transaction test succeeded.
Running transaction
  Preparing        :                                                                                                1/1
  Running scriptlet: openssh-8.0p1-16.el8.x86_64                                                                    1/3
  Installing       : openssh-8.0p1-16.el8.x86_64                                                                    1/3
  Installing       : libedit-3.1-23.20170329cvs.el8.x86_64                                                          2/3
  Installing       : openssh-clients-8.0p1-16.el8.x86_64                                                            3/3
  Running scriptlet: openssh-clients-8.0p1-16.el8.x86_64                                                            3/3
  Verifying        : libedit-3.1-23.20170329cvs.el8.x86_64                                                          1/3
  Verifying        : openssh-8.0p1-16.el8.x86_64                                                                    2/3
  Verifying        : openssh-clients-8.0p1-16.el8.x86_64                                                            3/3

Installed:
  libedit-3.1-23.20170329cvs.el8.x86_64      openssh-8.0p1-16.el8.x86_64      openssh-clients-8.0p1-16.el8.x86_64

Complete!
[root@fc88b5d2d81f /]# ssh
usage: ssh [-46AaCfGgKkMNnqsTtVvXxYy] [-B bind_interface]
           [-b bind_address] [-c cipher_spec] [-D [bind_address:]port]
           [-E log_file] [-e escape_char] [-F configfile] [-I pkcs11]
           [-i identity_file] [-J [user@]host[:port]] [-L address]
           [-l login_name] [-m mac_spec] [-O ctl_cmd] [-o option] [-p port]
           [-Q query_option] [-R address] [-S ctl_path] [-W host:port]
           [-w local_tun[:remote_tun]] destination [command]
我们从client的容器登录测试一下
[root@fc88b5d2d81f /]# ssh [email protected]
The authenticity of host '172.17.0.2 (172.17.0.2)' can't be established.
ECDSA key fingerprint is SHA256:qIaSvGeRl5K7FEw7Es39eiUyf1tV7p0h7tPRY0YT9HA.
Are you sure you want to continue connecting (yes/no/[fingerprint])? yes
Warning: Permanently added '172.17.0.2' (ECDSA) to the list of known hosts.
[email protected]'s password:
Last failed login: Fri Dec  2 04:15:46 UTC 2022 from 172.17.0.3 on ssh:notty
There were 3 failed login attempts since the last successful login.
[root@dd1e49279724 ~]#
从前面提示的容器号的改变可以看出,已经切换到server容器中了。
PS1:更改密码
dokken/centos-stream-8镜像载入容器是默认以root用户登录的,在ssh的时候需要提供密码——当然我并不知道初始密码是什么。不过解决办法也很简单,在容器内更改就是:
[root@dd1e49279724 system]# whoami
root
[root@dd1e49279724 system]# passwd
Changing password for user root.
New password:
Retype new password:
passwd: all authentication tokens updated successfully.
[root@dd1e49279724 system]#
PS2:为什么是新开一个容器
细心的话,可能已经看到了我们前面标红的一段字——新开一个容器?至于为什么这么麻烦,不是直接从windows的CMD直接ssh,我们后文分解。
2.安装systemctl替代工具
由于systemctl要以来systemd服务。那么,想在没有systemd支持的情况下使用systemctl功能的另一种方法,是使用第三方提供的systemctl替代工具gdraheim2 docker-systemctl-replacement。
该工具基于python2脚本,所以实现需要在容器中安装python2:
[root@44ed0fe563f3 bin]# yum install python2 -y
Last metadata expiration check: 0:00:12 ago on Fri Dec  2 04:55:56 2022.
Dependencies resolved.
======================================================================================================================================================================
 Package                                     Architecture              Version                                                     Repository                    Size
======================================================================================================================================================================
Installing:
 python2                                     x86_64                    2.7.18-11.module_el8.7.0+1179+42dadd5f                      appstream                    110 k
Installing dependencies:
 python2-libs                                x86_64                    2.7.18-11.module_el8.7.0+1179+42dadd5f                      appstream                    6.0 M
 python2-pip-wheel                           noarch                    9.0.3-19.module_el8.6.0+987+71f62bb6                        appstream                    892 k
 python2-setuptools-wheel                    noarch                    39.0.1-13.module_el8.5.0+743+cd2f5d28                       appstream                    287 k
Installing weak dependencies:
 python2-pip                                 noarch                    9.0.3-19.module_el8.6.0+987+71f62bb6                        appstream                    1.6 M
 python2-setuptools                          noarch                    39.0.1-13.module_el8.5.0+743+cd2f5d28                       appstream                    642 k
Enabling module streams:
 python27                                                              2.7

Transaction Summary
======================================================================================================================================================================
Install  6 Packages

Total download size: 9.5 M
Installed size: 37 M
Downloading Packages:
(1/6): python2-2.7.18-11.module_el8.7.0+1179+42dadd5f.x86_64.rpm                                                                      1.0 MB/s | 110 kB     00:00
(2/6): python2-pip-wheel-9.0.3-19.module_el8.6.0+987+71f62bb6.noarch.rpm                                                              2.3 MB/s | 892 kB     00:00
(3/6): python2-pip-9.0.3-19.module_el8.6.0+987+71f62bb6.noarch.rpm                                                                    2.4 MB/s | 1.6 MB     00:00
(4/6): python2-setuptools-39.0.1-13.module_el8.5.0+743+cd2f5d28.noarch.rpm                                                            2.5 MB/s | 642 kB     00:00
(5/6): python2-setuptools-wheel-39.0.1-13.module_el8.5.0+743+cd2f5d28.noarch.rpm                                                      2.4 MB/s | 287 kB     00:00
(6/6): python2-libs-2.7.18-11.module_el8.7.0+1179+42dadd5f.x86_64.rpm                                                                 4.4 MB/s | 6.0 MB     00:01
----------------------------------------------------------------------------------------------------------------------------------------------------------------------
Total                                                                                                                                 5.2 MB/s | 9.5 MB     00:01
Running transaction check
Transaction check succeeded.
Running transaction test
Transaction test succeeded.
Running transaction
  Preparing        :                                                                                                                                              1/1
  Installing       : python2-setuptools-wheel-39.0.1-13.module_el8.5.0+743+cd2f5d28.noarch                                                                        1/6
  Installing       : python2-pip-wheel-9.0.3-19.module_el8.6.0+987+71f62bb6.noarch                                                                                2/6
  Installing       : python2-libs-2.7.18-11.module_el8.7.0+1179+42dadd5f.x86_64                                                                                   3/6
  Installing       : python2-pip-9.0.3-19.module_el8.6.0+987+71f62bb6.noarch                                                                                      4/6
  Installing       : python2-setuptools-39.0.1-13.module_el8.5.0+743+cd2f5d28.noarch                                                                              5/6
  Installing       : python2-2.7.18-11.module_el8.7.0+1179+42dadd5f.x86_64                                                                                        6/6
  Running scriptlet: python2-2.7.18-11.module_el8.7.0+1179+42dadd5f.x86_64                                                                                        6/6
  Verifying        : python2-2.7.18-11.module_el8.7.0+1179+42dadd5f.x86_64                                                                                        1/6
  Verifying        : python2-libs-2.7.18-11.module_el8.7.0+1179+42dadd5f.x86_64                                                                                   2/6
  Verifying        : python2-pip-9.0.3-19.module_el8.6.0+987+71f62bb6.noarch                                                                                      3/6
  Verifying        : python2-pip-wheel-9.0.3-19.module_el8.6.0+987+71f62bb6.noarch                                                                                4/6
  Verifying        : python2-setuptools-39.0.1-13.module_el8.5.0+743+cd2f5d28.noarch                                                                              5/6
  Verifying        : python2-setuptools-wheel-39.0.1-13.module_el8.5.0+743+cd2f5d28.noarch                                                                        6/6

Installed:
  python2-2.7.18-11.module_el8.7.0+1179+42dadd5f.x86_64                          python2-libs-2.7.18-11.module_el8.7.0+1179+42dadd5f.x86_64
  python2-pip-9.0.3-19.module_el8.6.0+987+71f62bb6.noarch                        python2-pip-wheel-9.0.3-19.module_el8.6.0+987+71f62bb6.noarch
  python2-setuptools-39.0.1-13.module_el8.5.0+743+cd2f5d28.noarch                python2-setuptools-wheel-39.0.1-13.module_el8.5.0+743+cd2f5d28.noarch

Complete!
[root@44ed0fe563f3 bin]#
从github上将替代脚本拷贝到/usr/bin/下,替换systemctl,并赋予执行权限:
[root@44ed0fe563f3 bin]# wget https://raw.githubusercontent.com/gdraheim/docker-systemctl-replacement/master/files/docker/systemctl.py -O /usr/bin/systemctl
--2022-12-02 05:01:51--  https://raw.githubusercontent.com/gdraheim/docker-systemctl-replacement/master/files/docker/systemctl.py
Resolving raw.githubusercontent.com (raw.githubusercontent.com)... 185.199.110.133, 185.199.109.133, 185.199.111.133, ...
Connecting to raw.githubusercontent.com (raw.githubusercontent.com)|185.199.110.133|:443... connected.
HTTP request sent, awaiting response... 200 OK
Length: 291424 (285K) [text/plain]
Saving to: ‘/usr/bin/systemctl’

/usr/bin/systemctl                        100%[===================================================================================>] 284.59K  1.65MB/s    in 0.2s

2022-12-02 05:01:51 (1.65 MB/s) - ‘/usr/bin/systemctl’ saved [291424/291424]

[root@44ed0fe563f3 bin]# chmod a+x /usr/bin/systemctl
执行,虽然格式上没有官方的好看,但总是能用了嘛:
[root@44ed0fe563f3 /]# systemctl
README.service  loaded inactive dead
arp-ethers.service      loaded inactive dead    Load static arp entries
atd.service     loaded inactive dead    Job spooling tools
[email protected] loaded inactive dead    Getty on
basic.target    loaded inactive dead    Basic System
bluetooth.target        loaded active dead      Bluetooth
boot-complete.target    loaded active dead      Boot Completion Check
console-getty.service   loaded inactive dead
…………
…………
time-sync.target        loaded active dead      System Time Synchronized
timers.target   loaded active dead      Timers
tmp.mount       loaded unknown dead     Temporary Directory (/tmp)
umount.target   loaded active dead      Unmount All Filesystems
unbound-anchor.service  loaded inactive dead    update of the root trust anchor for DNSSEC validation in unbound
unbound-anchor.timer    loaded unknown dead     daily update of the root trust anchor for DNSSEC
[email protected]       loaded inactive dead    User runtime directory /run/user/
user.slice      loaded unknown dead     User and Session Slice
[email protected]   loaded inactive dead    User Manager for UID

185 loaded units listed.
To show all installed unit files use 'systemctl list-unit-files'.
[root@44ed0fe563f3 /]#
回头再来看一看作者提供的dockerfile:
FROM centos:7.7.1908

LABEL __copyright__="(C) Guido U. Draheim, licensed under the EUPL" \
      __version__="1.4.4147"
ARG PASSWORD=Test.P@ssw0rd
EXPOSE 22

# RUN yum install -y epel-release
RUN yum search sshd
RUN yum install -y openssh-server
RUN rpm -q --list openssh-server
COPY files/docker/systemctl.py /usr/bin/systemctl
RUN : \
  ; mkdir /etc/systemd/system/sshd-keygen.service.d \
  ; { echo "[Install]"; echo "WantedBy=multi-user.target"; } \
        > /etc/systemd/system/sshd-keygen.service.d/enabled.conf
RUN systemctl enable sshd-keygen
RUN systemctl enable sshd
#
RUN yum install -y openssh-clients
RUN rpm -q --list openssh-clients
RUN useradd -g nobody testuser
RUN echo $PASSWORD | passwd --stdin testuser
RUN date -I > /home/testuser/date.txt
CMD /usr/bin/systemctl作者给出了很多版本和服务的dockerfile,可以用来编译对应的images。以上面ssh的为例,实际就是在基础映像上安装了openssl,替换systemctl,然后启动ssh服务。这里一个需要注意的问题是,默认的程序入口设置在了/user/bin/systemctl。这个应该跟docker的管理机制有关。据该工具作者的说法,docker将CMD/ENTRYPOINT启动的程序的PID置为1,而docker向容器发送的stop命令,只有PID为1的程序能收到。这个白话一点,就是容器的生命周期管理等同于对容器中PID=1的进程的管理,不能随心所欲——比如不是我们正经用来干活的app,而是某个服务进程等等。所以,这里作者以这个替换的systemctl作为默认程序启动,在其内部还处理了一部分docker进程管理的内容;感兴趣的话可以cat一下systemctl.py的代码,搜索一下'pid'关键字。
二、Service那些事
不管是直接/sbin/init的方法,还是第三方工具替代的方法,总是给人一种不太稳妥的感觉。一个是一次启动一大堆,也不知道哪个有用哪个没用,环境对或不对——实际总能不经意看到各种报错信息;另一种是把生杀大权完全交给第三方,不知道它在那倒腾啥。相比之下,我们还是比较喜欢纯手撸的感觉,比如是否可以以非systemctl的方式将服务启动起来?
答案当然是完全可以,服务也是一个程序而已。
前面说到,与服务相关的配置文件,在系统中有2个地方,一个是/usr/lib/systemd/system,一个是etc/system/systemd。根据菜鸟教程上的解释:
etc 是etcetera(等等)的简写,该目录用来存放所有的系统管理所需要的配置文件,有那么一点类似于windows下的注册表。
usr 是unix share resource的简写,该目录用来存放用户应用程序,类似于windows下的program files目录。
据说,系统的服务存放在/usr/lib/systemd/system/下,用户的存放在/etc/systemd/user/下,虽然两边的systemd下其实都有system和user子目录。
手工启动服务,实际上只不过是根据服务配置文件描述,准备好服务的启动环境,然后以daemon方式启动服务的程序而已。
1. .service文件格式
继续以ssh为例。载入dokken/centos-stream-8镜像,yum安装openssl-server后,在/usr/lib/systemd/system下,可以找到sshd.service文件,它指出了ssh服务启动的条件,及其与其他服务的关系:
[root@6f8f39825b78 /]# cd /usr/lib/systemd
[root@6f8f39825b78 systemd]# cd system
[root@6f8f39825b78 system]# ls
arp-ethers.service                      network.target                        [email protected]
…… ……
initrd-cleanup.service                  sshd-keygen.target                    systemd-udev-trigger.service
initrd-fs.target                        [email protected]                  systemd-udev-trigger.service.d
initrd-parse-etc.service                sshd.service                          systemd-udevd-control.socket
initrd-root-device.target               sshd.socket                           systemd-udevd-kernel.socket
initrd-root-fs.target                   [email protected]                         systemd-udevd.service
…… ……
network-pre.target                      systemd-ask-password-wall.service
[root@6f8f39825b78 system]# cat sshd.service
[Unit]
Description=OpenSSH server daemon
Documentation=man:sshd(8) man:sshd_config(5)
After=network.target sshd-keygen.target
Wants=sshd-keygen.target

[Service]
Type=notify
EnvironmentFile=-/etc/crypto-policies/back-ends/opensshserver.config
EnvironmentFile=-/etc/sysconfig/sshd
ExecStart=/usr/sbin/sshd -D $OPTIONS $CRYPTO_POLICY
ExecReload=/bin/kill -HUP $MAINPID
KillMode=process
Restart=on-failure
RestartSec=42s

[Install]
WantedBy=multi-user.target
[root@6f8f39825b78 system]#
(1)unit字段:描述依赖关系与启动顺序
Description:服务的描述
Documention:服务的文档
After:表示不涉及依赖关系的启动顺序,本服务在该服务之后启动。不涉及依赖关系的含义指即使前序服务未启动,也不至于影响本服务的正常启动,但可能造成功能性问题。
Before:不涉及依赖关系的启动顺序,本服务在该服务之前启动。
Wants:表示本服务和某服务存在弱依赖关系,该服务停止运行或退出不影响本服务继续运行。
Requires:表示强依赖关系,即该服务停止运行或退出,则本服务也必须停止运行
(2)service字段:描述环境变量,启动、重启与停止方式
Type:服务启动类型。simple为立即启动,并不会启动其它服务(子进程方式);notify,与simple一样,不同在于其会向systemd回发一个通知信号;forking,该服务fork,且父进程退出后服务启动成功,使用该类型需要指定PIDFile,以便systemd管理;oneshot,适用于启动后完成一项操作立即退出的服务;dbus,当指定的busname出现在Dbus总线上时,服务启动成功。
EnvironmentFile:环境配置文件,用于配置服务程序运行时需要的环境变量
ExecStart:指定启动服务的命令(程序)及启动的命令行方式
ExeStartPre/ExeStartPost:指定在服务启动前后需要执行的用户自定义脚本
ExecStop:指定停止服务的命令及命令行方式
(3)install字段:描述开机自启动方式
RequiredBy:强依赖关系。
Also:指出需要被一起安装的协同服务。
DefaultInstance:允许运行的实例个数。
WantedBy字段:表示该服务所在的Target组。Target表示一组服务,WantedBy=multi-user.target指的是服务所在的Target组是multi-user.target。multi-user.target时systemd的默认启动组,在该组内的服务都会开机启动。
2.ssh服务配置
根据上面介绍的的服务配置字段,剥一下sshd.service的洋葱:
(1)启动顺序
After=network.target sshd-keygen.target。这个必须的,如果网络都不同这事就不用搞了
(2)依赖关系
Wants=sshd-keygen.target。指sshd服务对于sshd-keygen这个服务组是弱依赖关系
我们知道sshd-keygen是ssh的密钥生成与管理程序。那么sshd-keygen这个服务组里有什么呢?:
[root@6f8f39825b78 system]# cat sshd-keygen.target
[Unit]
[email protected]
[email protected]
[email protected]
PartOf=sshd.service
从配置文件可以看出,这个服务组里包括一系列密码算法服务。 注意到服务名称里面的@,@符号前是基础的服务名,@符号后面是服务的参数。所以这3个服务的配置方式,其实都在[email protected]里面:
[root@6f8f39825b78 system]# cat [email protected]
[Unit]
Description=OpenSSH %i Server Key Generation
ConditionFileNotEmpty=|!/etc/ssh/ssh_host_%i_key

[Service]
Type=oneshot
EnvironmentFile=-/etc/sysconfig/sshd
ExecStart=/usr/libexec/openssh/sshd-keygen %i

[Install]
WantedBy=sshd-keygen.target
这里提一句这个ConditionFileNotEmpty,应该是存在这个文件的意思,但是值里面多了一个逻辑反的符号,应该是说,前提条件是这几个文件必须不存在。事实上,在启动服务前,这几个文件确实不存在。
首先是需要设置环境etc/sysconfig/sshd,这个文件里面实际就是环境变量:
[root@6f8f39825b78 sysconfig]# cat sshd
# Configuration file for the sshd service.

# The server keys are automatically generated if they are missing.
# To change the automatic creation, adjust sshd.service options for
# example using  systemctl enable [email protected]  to allow creation
# of DSA key or  systemctl mask [email protected]  to disable RSA key
# creation.

# Do not change this option unless you have hardware random
# generator and you REALLY know what you are doing

SSH_USE_STRONG_RNG=0
# SSH_USE_STRONG_RNG=1

# System-wide crypto policy:
# To opt-out, uncomment the following line
# CRYPTO_POLICY=
[root@6f8f39825b78 sysconfig]#
然后执行/usr/libexec/openssh/sshd-keygen命令,以上述那些算法名称为参数。
(3)环境变量
EnvironmentFile=-/etc/crypto-policies/back-ends/opensshserver.config
EnvironmentFile=-/etc/sysconfig/sshd
其中一个和sshd-keygen相同,另一个如下:
[root@6f8f39825b78 sysconfig]# cat /etc/crypto-policies/back-ends/opensshserver.config
CRYPTO_POLICY='[email protected],[email protected],aes256-ctr,aes256-cbc,[email protected],aes128-ctr,aes128-cbc [email protected],[email protected],[email protected],[email protected],hmac-sha2-256,hmac-sha1,[email protected],hmac-sha2-512 -oGSSAPIKexAlgorithms=gss-curve25519-sha256-,gss-nistp256-sha256-,gss-group14-sha256-,gss-group16-sha512-,gss-gex-sha1-,gss-group14-sha1- -oKexAlgorithms=curve25519-sha256,[email protected],ecdh-sha2-nistp256,ecdh-sha2-nistp384,ecdh-sha2-nistp521,diffie-hellman-group-exchange-sha256,diffie-hellman-group14-sha256,diffie-hellman-group16-sha512,diffie-hellman-group18-sha512,diffie-hellman-group-exchange-sha1,diffie-hellman-group14-sha1 -oHostKeyAlgorithms=ecdsa-sha2-nistp256,[email protected],ecdsa-sha2-nistp384,[email protected],ecdsa-sha2-nistp521,[email protected],ssh-ed25519,[email protected],rsa-sha2-256,[email protected],rsa-sha2-512,[email protected],ssh-rsa,[email protected] -oPubkeyAcceptedKeyTypes=ecdsa-sha2-nistp256,[email protected],ecdsa-sha2-nistp384,[email protected],ecdsa-sha2-nistp521,[email protected],ssh-ed25519,[email protected],rsa-sha2-256,[email protected],rsa-sha2-512,[email protected],ssh-rsa,[email protected] -oCASignatureAlgorithms=ecdsa-sha2-nistp256,ecdsa-sha2-nistp384,ecdsa-sha2-nistp521,ssh-ed25519,rsa-sha2-256,rsa-sha2-512,ssh-rsa'[root@6f8f39825b78 sysconfig]#
就是对加密算法策略的设置
(4)启动方式
ExecStart=/usr/sbin/sshd -D $OPTIONS $CRYPTO_POLICY
可以看到,其实就是以daemon方式启动sshd,参数是已经在配置文件中明确的环境变量。
2. 启动sshd服务
所以,根据配置文件翻译成shell脚本,我们就可以一步一步启动sshd了。比如我们在/下创建了一个test.sh文件,编辑如下:
[root@6f8f39825b78 /]# cat test.sh
source /etc/sysconfig/sshd
source /etc/crypto-policies/back-ends/opensshserver.config
/usr/libexec/openssh/sshd-keygen rsa
/usr/libexec/openssh/sshd-keygen ecdsa
/usr/libexec/openssh/sshd-keygen ed25519
echo OPTIONS=$OPTIONS
echo CRYPTO-POLICY=$CRYPTO_POLICY
/usr/sbin/sshd -D $OPTIONS $CRYPTO_POLICY
执行
[root@6f8f39825b78 /]# chmod a+x ./test.sh
[root@6f8f39825b78 /]# ./test.sh完毕以后,到[email protected]里面ConditionFileNotEmpty=|!/etc/ssh/ssh_host_%i_key所指示的路径,发现这些文件已经成功生成了:
[root@6f8f39825b78 ssh]# pwd
/etc/ssh
[root@6f8f39825b78 ssh]# ls
moduli              ssh_host_ecdsa_key.pub  ssh_host_ed25519_key.pub  ssh_host_rsa_key.pub
ssh_host_ecdsa_key  ssh_host_ed25519_key    ssh_host_rsa_key          sshd_config
[root@6f8f39825b78 ssh]#
从另一个容器中访问:
[root@723680cac971 /]# ssh [email protected]
The authenticity of host '172.17.0.2 (172.17.0.2)' can't be established.
ECDSA key fingerprint is SHA256:KL2b74VslHW8Lgs8z/2EYBONdt0YhFl21L1HaqkD3/s.
Are you sure you want to continue connecting (yes/no/[fingerprint])? yes
Warning: Permanently added '172.17.0.2' (ECDSA) to the list of known hosts.
[email protected]'s password:
[root@6f8f39825b78 ~]#
成功。
3. 配置开机启动
所谓配置开机启动,实际是需要利用dockerfile文件的RUN命令,RUN可以作为构建docker image时运行的命令,将之前我们手撸的sh COPY到image中,然后在RUN中执行。基于这一点生成新的镜像来使用。这个和我们之前提到的gdraheim2 docker-systemctl-replacement的dockerfile的做法是一样的。因为要抢饭去,所以就不测试了哈。
三、容器的网络问题
然而,解决服务问题并不是docker最大的坑——网络才是。
鉴于关于docker的组网有大量的文章介绍,这里不赘述了,之说结果——结果就是,docker desktop无法解决从宿主机向容器的网络路由,从而除非使用docker的网络映射机制(就是-p -P 等等将端口映射到主机的端口,然后使用localhost加端口来访问),从宿主机机器外部是无法访问docker的。从这个角度看,更应该在docker视作进程隔离的工具,而不应该将其作为虚拟机。
下面通过几个实验来说明这个问题。
1.在Linux上的Docker网络
第一个实验,是在我的windows主机上安装vmware,vmware上安装centos作为docker的宿主机,并在这个centos中启动一个centos的docker:
(1)centos宿主机上的网络配置
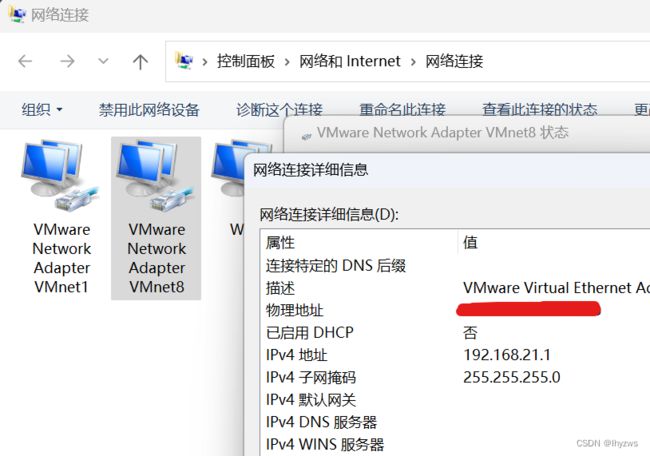
宿主机上,Vmware安装Centos时使用NAT配置方式,使用的Vmnet8.
(2)Linux宿主机的网络配置
[root@pig ~]# ifconfig
docker0: flags=4099  mtu 1500
        inet 172.17.0.1  netmask 255.255.0.0  broadcast 172.17.255.255
        ether ……  txqueuelen 0  (Ethernet)
        RX packets 114  bytes 3192 (3.1 KiB)
        RX errors 0  dropped 0  overruns 0  frame 0
        TX packets 19  bytes 2141 (2.0 KiB)
        TX errors 0  dropped 0 overruns 0  carrier 0  collisions 0

ens160: flags=4163  mtu 1500
        inet 192.168.21.11  netmask 255.255.255.0  broadcast 192.168.21.255
        inet6 fe80::20c:29ff:fec0:ce6f  prefixlen 64  scopeid 0x20
        ether ……  txqueuelen 1000  (Ethernet)
        RX packets 102612  bytes 149526664 (142.5 MiB)
        RX errors 0  dropped 0  overruns 0  frame 0
        TX packets 23494  bytes 1351782 (1.2 MiB)
        TX errors 0  dropped 0 overruns 0  carrier 0  collisions 0
…………………………
…………………………
[root@pig ~]# ip route show
default via 192.168.21.2 dev ens160 proto static metric 100
192.168.21.0/24 dev ens160 proto kernel scope link src 192.168.21.11 metric 100
Linux下的docker宿主机,除了本机网卡(192.168.21.11)以外,还能看到传说中的docker0网卡。 注意这里网关,时192.168.21.2。
(3)容器中的网络配置
[root@8a32b6f65a57 /]# ip address
1: lo:  mtu 65536 qdisc noqueue state UNKNOWN group default qlen 1000
    link/loopback 00:00:00:00:00:00 brd 00:00:00:00:00:00
    inet 127.0.0.1/8 scope host lo
       valid_lft forever preferred_lft forever
17: eth0@if18:  mtu 1500 qdisc noqueue state UP group default
    link/ether …… brd ff:ff:ff:ff:ff:ff link-netnsid 0
    inet 172.17.0.2/16 brd 172.17.255.255 scope global eth0
       valid_lft forever preferred_lft forever
[root@8a32b6f65a57 /]# ip route show
default via 172.17.0.1 dev eth0
172.17.0.0/16 dev eth0 proto kernel scope link src 172.17.0.2
容器中,网络地址为172.17.0.2
(4)Ping 测试
Ping测试之前,要把防火墙关闭,以免半天测了个寂寞。
windows 到 docker宿主机
C:\Users\lhyzw>ping 192.168.21.11

正在 Ping 192.168.21.11 具有 32 字节的数据:
来自 192.168.21.11 的回复: 字节=32 时间<1ms TTL=64
来自 192.168.21.11 的回复: 字节=32 时间<1ms TTL=64
来自 192.168.21.11 的回复: 字节=32 时间<1ms TTL=64
docker宿主机到windows主机
[root@pig ~]# ping 192.168.21.1
PING 192.168.21.1 (192.168.21.1) 56(84) bytes of data.
64 bytes from 192.168.21.1: icmp_seq=1 ttl=64 time=0.829 ms
64 bytes from 192.168.21.1: icmp_seq=2 ttl=64 time=0.508 ms
64 bytes from 192.168.21.1: icmp_seq=3 ttl=64 time=0.616 ms
docker宿主机到容器
[root@pig ~]# ping 172.17.0.2
PING 172.17.0.2 (172.17.0.2) 56(84) bytes of data.
64 bytes from 172.17.0.2: icmp_seq=1 ttl=64 time=0.164 ms
64 bytes from 172.17.0.2: icmp_seq=2 ttl=64 time=0.109 ms
64 bytes from 172.17.0.2: icmp_seq=3 ttl=64 time=0.069 ms
容器到docker宿主机
[root@d8436f439c04 /]# ping 192.168.21.11
PING 192.168.21.11 (192.168.21.11) 56(84) bytes of data.
64 bytes from 192.168.21.11: icmp_seq=1 ttl=64 time=0.227 ms
64 bytes from 192.168.21.11: icmp_seq=2 ttl=64 time=0.074 ms
64 bytes from 192.168.21.11: icmp_seq=3 ttl=64 time=0.082 ms
容器到windows
[root@d8436f439c04 /]# ping 192.168.21.1
PING 192.168.21.1 (192.168.21.1) 56(84) bytes of data.
64 bytes from 192.168.21.1: icmp_seq=1 ttl=63 time=1.70 ms
64 bytes from 192.168.21.1: icmp_seq=2 ttl=63 time=0.684 ms
64 bytes from 192.168.21.1: icmp_seq=3 ttl=63 time=0.493 ms
windows到容器
C:\Users\lhyzw>ping 172.17.0.2
正在 Ping 172.17.0.2 具有 32 字节的数据:
请求超时。
请求超时。
(5)连接windows到容器
从Windows连接到容器不通,是因为windows并不知道Vmware中的docker0下有个172.17.0.0/16的网段。这个没关系,在windows下使用超级管理员打开CMD,执行route add加一条路由,将172.17.0.0/16网段的报文流转到Vmware中的docker宿主机就行了。
PS C:\Users\lhyzw> route add 172.17.0.0 mask 255.255.0.0 192.168.21.11
 操作完成!
PS C:\Users\lhyzw> ping 172.17.0.2

正在 Ping 172.17.0.2 具有 32 字节的数据:
来自 172.17.0.2 的回复: 字节=32 时间<1ms TTL=63
来自 172.17.0.2 的回复: 字节=32 时间<1ms TTL=63

172.17.0.2 的 Ping 统计信息:
    数据包: 已发送 = 2,已接收 = 2,丢失 = 0 (0% 丢失),
往返行程的估计时间(以毫秒为单位):
    最短 = 0ms,最长 = 0ms,平均 = 0ms
Control-C
PS C:\Users\lhyzw> ping 172.17.0.1

正在 Ping 172.17.0.1 具有 32 字节的数据:
来自 172.17.0.1 的回复: 字节=32 时间<1ms TTL=64
来自 172.17.0.1 的回复: 字节=32 时间=1ms TTL=64
来自 172.17.0.1 的回复: 字节=32 时间<1ms TTL=64

172.17.0.1 的 Ping 统计信息:
    数据包: 已发送 = 3,已接收 = 3,丢失 = 0 (0% 丢失),
往返行程的估计时间(以毫秒为单位):
    最短 = 0ms,最长 = 1ms,平均 = 0ms
2.在windows docker desktop上的网络
实际上,基于windows docker desktop来使用容器,本质上和安装Vmware,使用Vmware上的centos作为docker宿主机是一样的。只不过此时替换Vmware的,是wsl中的Ubuntu而已。
PS C:\Users\lhyzw> wsl -l
适用于 Linux 的 Windows 子系统分发:
Ubuntu (默认)
docker-desktop
docker-desktop-data
PS C:\Users\lhyzw>
(1)Windows网络设置
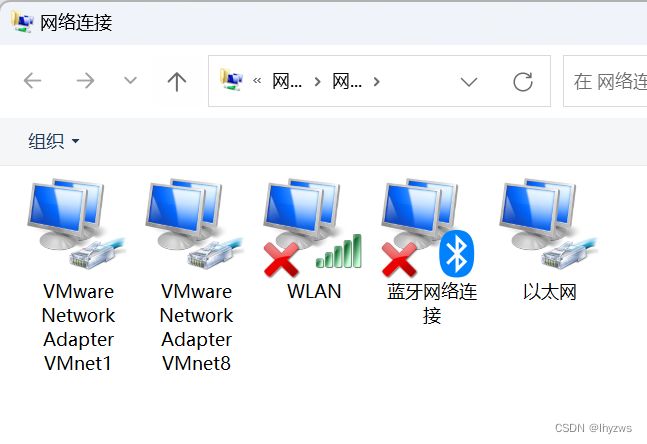
Windows的网络设置与前面并无两样。但是需要提一下的是,在Win10下,观察网络适配器,会发现一个名为wsl的虚拟适配器,但是在win11下没有。不过使用ipconfig命令,还是能够看到的,不知缘故,也许是因为该适配器默认隐藏的原因。
win10
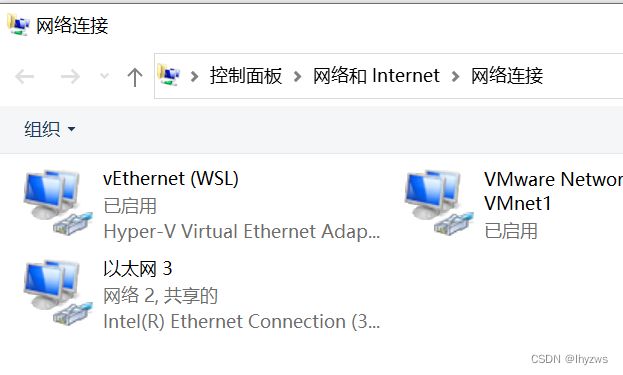
win11
win11下的命令行方式查看适配器结果:
PS C:\Users\lhyzw> ipconfig
Windows IP 配置
以太网适配器 VMware Network Adapter VMnet1:
   连接特定的 DNS 后缀 . . . . . . . :
   本地链接 IPv6 地址. . . . . . . . : fe80::dd77:d5f2:85e8:29e4%7
   IPv4 地址 . . . . . . . . . . . . : 192.168.70.1
   子网掩码  . . . . . . . . . . . . : 255.255.255.0
   默认网关. . . . . . . . . . . . . :
以太网适配器 VMware Network Adapter VMnet8:
   连接特定的 DNS 后缀 . . . . . . . :
   本地链接 IPv6 地址. . . . . . . . : fe80::97ff:5834:a003:eabe%4
   IPv4 地址 . . . . . . . . . . . . : 192.168.21.1
   子网掩码  . . . . . . . . . . . . : 255.255.255.0
   默认网关. . . . . . . . . . . . . :
无线局域网适配器 WLAN:
   连接特定的 DNS 后缀 . . . . . . . :
   IPv6 地址 . . . . . . . . . . . . :
   临时 IPv6 地址. . . . . . . . . . :
   本地链接 IPv6 地址. . . . . . . . :
   IPv4 地址 . . . . . . . . . . . . : 192.168.1.26
   子网掩码  . . . . . . . . . . . . : 255.255.255.0
   默认网关. . . . . . . . . . . . . :
                                      192.168.1.1
以太网适配器 vEthernet (WSL):
   连接特定的 DNS 后缀 . . . . . . . :
   本地链接 IPv6 地址. . . . . . . . : fe80::696d:4cf5:ade2:eee2%60
   IPv4 地址 . . . . . . . . . . . . : 172.23.160.1
   子网掩码  . . . . . . . . . . . . : 255.255.240.0
   默认网关. . . . . . . . . . . . . :
或者直接找它的名字:
PS C:\Users\lhyzw>  Get-NetAdapter -IncludeHidden 'vEthernet (WSL)' | Get-NetIPAddress


IPAddress         : fe80::696d:4cf5:ade2:eee2%60
InterfaceIndex    : 60
InterfaceAlias    : vEthernet (WSL)
AddressFamily     : IPv6
Type              : Unicast
PrefixLength      : 64
PrefixOrigin      : WellKnown
SuffixOrigin      : Link
AddressState      : Preferred
ValidLifetime     :
PreferredLifetime :
SkipAsSource      : False
PolicyStore       : ActiveStore

IPAddress         : 172.23.160.1
InterfaceIndex    : 60
InterfaceAlias    : vEthernet (WSL)
AddressFamily     : IPv4
Type              : Unicast
PrefixLength      : 20
PrefixOrigin      : Manual
SuffixOrigin      : Manual
AddressState      : Preferred
ValidLifetime     :
PreferredLifetime :
SkipAsSource      : False
PolicyStore       : ActiveStore
(2)宿主机WSL网络设置
确认Ubuntu是默认的子系统,否则下面的操作可能会报错。如果不是,可以使用--setdefault参数指定默认子系统,或者在使用wsl启动子系统的时候使用-d参数明确要启动的子系统。
PS C:\Users\lhyzw> wsl
To run a command as administrator (user "root"), use "sudo ".
See "man sudo_root" for details.
pig@LAPTOP-SA9UAFHF:/mnt/c/Users/lhyzw$ ip address
1: lo:  mtu 65536 qdisc noqueue state UNKNOWN group default qlen 1000
    link/loopback 00:00:00:00:00:00 brd 00:00:00:00:00:00
    inet 127.0.0.1/8 scope host lo
       valid_lft forever preferred_lft forever
    inet6 ::1/128 scope host
       valid_lft forever preferred_lft forever
2: bond0:  mtu 1500 qdisc noop state DOWN group default qlen 1000
    link/ether …… brd ff:ff:ff:ff:ff:ff
3: dummy0:  mtu 1500 qdisc noop state DOWN group default qlen 1000
    link/ether …… brd ff:ff:ff:ff:ff:ff
4: tunl0@NONE:  mtu 1480 qdisc noop state DOWN group default qlen 1000
    link/ipip 0.0.0.0 brd 0.0.0.0
5: sit0@NONE:  mtu 1480 qdisc noop state DOWN group default qlen 1000
    link/sit 0.0.0.0 brd 0.0.0.0
6: eth0:  mtu 1500 qdisc mq state UP group default qlen 1000
    link/ether …… brd ff:ff:ff:ff:ff:ff
    inet 172.23.162.71/20 brd 172.23.175.255 scope global eth0
       valid_lft forever preferred_lft forever
    inet6 fe80::215:5dff:fe0a:6609/64 scope link
       valid_lft forever preferred_lft forever
pig@LAPTOP-SA9UAFHF:/mnt/c/Users/lhyzw$ ip route show
default via 172.23.160.1 dev eth0 proto kernel
172.23.160.0/20 dev eth0 proto kernel scope link src 172.23.162.71
可以看到,宿主机WSL上的ubuntu,网络设置为172.23.162.71 ,网关是172.23.160.1。但是改宿主机上不存在传说中的docker0虚拟适配器。
(3)容器上的网络配置
在WSL中启动容器,进入容器中查看可以发现,其网络配置和前面基本是一样的
[root@ecfdc9c636d6 /]# ip address
1: lo:  mtu 65536 qdisc noqueue state UNKNOWN group default qlen 1000
    link/loopback 00:00:00:00:00:00 brd 00:00:00:00:00:00
    inet 127.0.0.1/8 scope host lo
       valid_lft forever preferred_lft forever
2: tunl0@NONE:  mtu 1480 qdisc noop state DOWN group default qlen 1000
    link/ipip 0.0.0.0 brd 0.0.0.0
3: sit0@NONE:  mtu 1480 qdisc noop state DOWN group default qlen 1000
    link/sit 0.0.0.0 brd 0.0.0.0
8: eth0@if9:  mtu 1500 qdisc noqueue state UP group default
    link/ether …… brd ff:ff:ff:ff:ff:ff link-netnsid 0
    inet 172.17.0.2/16 brd 172.17.255.255 scope global eth0
       valid_lft forever preferred_lft forever
[root@ecfdc9c636d6 /]# ip route show
default via 172.17.0.1 dev eth0
172.17.0.0/16 dev eth0 proto kernel scope link src 172.17.0.2
[root@ecfdc9c636d6 /]#
本机IP为172.17.0.2,网关为172.17.0.1.
(4)Ping测试
Windows到WSL宿主机
PS C:\Users\lhyzw> ping 172.23.162.71

正在 Ping 172.23.162.71 具有 32 字节的数据:
来自 172.23.162.71 的回复: 字节=32 时间<1ms TTL=64
来自 172.23.162.71 的回复: 字节=32 时间<1ms TTL=64
来自 172.23.162.71 的回复: 字节=32 时间<1ms TTL=64
来自 172.23.162.71 的回复: 字节=32 时间<1ms TTL=64

172.23.162.71 的 Ping 统计信息:
    数据包: 已发送 = 4,已接收 = 4,丢失 = 0 (0% 丢失),
往返行程的估计时间(以毫秒为单位):
    最短 = 0ms,最长 = 0ms,平均 = 0ms

PS C:\Users\lhyzw> ping 172.23.160.1

正在 Ping 172.23.160.1 具有 32 字节的数据:
来自 172.23.160.1 的回复: 字节=32 时间<1ms TTL=64
来自 172.23.160.1 的回复: 字节=32 时间<1ms TTL=64
来自 172.23.160.1 的回复: 字节=32 时间<1ms TTL=64

172.23.160.1 的 Ping 统计信息:
    数据包: 已发送 = 3,已接收 = 3,丢失 = 0 (0% 丢失),
往返行程的估计时间(以毫秒为单位):
    最短 = 0ms,最长 = 0ms,平均 = 0ms
Ping宿主机与宿主机的网关均没有问题
WSL宿主机到容器
pig@LAPTOP-SA9UAFHF:/mnt/c/Users/lhyzw$ ping 172.17.0.1
PING 172.17.0.1 (172.17.0.1) 56(84) bytes of data.
--- 172.17.0.1 ping statistics ---
4 packets transmitted, 0 received, 100% packet loss, time 3115ms

pig@LAPTOP-SA9UAFHF:/mnt/c/Users/lhyzw$ ping 172.17.0.2
PING 172.17.0.2 (172.17.0.2) 56(84) bytes of data.
--- 172.17.0.2 ping statistics ---
45 packets transmitted, 0 received, 100% packet loss, time 45789ms

pig@LAPTOP-SA9UAFHF:/mnt/c/Users/lhyzw$
这里会发现,实际上从WSL上的Ubuntu,是不可能Ping到内部的容器的
Windows到容器
这就不用试了,因为WSL就连不到容器,Windows更不可能连到
容器到WSL宿主机
[root@ecfdc9c636d6 /]# ping 172.23.162.71
PING 172.23.162.71 (172.23.162.71) 56(84) bytes of data.
64 bytes from 172.23.162.71: icmp_seq=1 ttl=37 time=1.71 ms
64 bytes from 172.23.162.71: icmp_seq=2 ttl=37 time=2.56 ms
64 bytes from 172.23.162.71: icmp_seq=3 ttl=37 time=1.79 ms
宿主机到Windows
pig@LAPTOP-SA9UAFHF:/mnt/c/Users/lhyzw$ ping 172.23.160.1
PING 172.23.160.1 (172.23.160.1) 56(84) bytes of data.
64 bytes from 172.23.160.1: icmp_seq=1 ttl=64 time=0.196 ms
64 bytes from 172.23.160.1: icmp_seq=2 ttl=64 time=0.240 ms
--- 172.23.160.1 ping statistics ---
2 packets transmitted, 2 received, 0% packet loss, time 1017ms
rtt min/avg/max/mdev = 0.196/0.218/0.240/0.022 ms

pig@LAPTOP-SA9UAFHF:/mnt/c/Users/lhyzw$ ping 192.168.1.26
PING 192.168.1.26 (192.168.1.26) 56(84) bytes of data.
64 bytes from 192.168.1.26: icmp_seq=1 ttl=63 time=0.206 ms
64 bytes from 192.168.1.26: icmp_seq=2 ttl=63 time=0.197 ms
64 bytes from 192.168.1.26: icmp_seq=3 ttl=63 time=0.242 ms
可以看到宿主机确实是可以Ping通WSL网关和Windows的
容器到Windows
[root@ecfdc9c636d6 /]# ping 172.23.160.1
PING 172.23.160.1 (172.23.160.1) 56(84) bytes of data.
64 bytes from 172.23.160.1: icmp_seq=1 ttl=37 time=1.07 ms
64 bytes from 172.23.160.1: icmp_seq=2 ttl=37 time=2.02 ms
64 bytes from 172.23.160.1: icmp_seq=3 ttl=37 time=1.20 ms
--- 172.23.160.1 ping statistics ---
3 packets transmitted, 3 received, 0% packet loss, time 2002ms
rtt min/avg/max/mdev = 1.070/1.430/2.021/0.421 ms

[root@ecfdc9c636d6 /]# ping 192.168.1.26
PING 192.168.1.26 (192.168.1.26) 56(84) bytes of data.
64 bytes from 192.168.1.26: icmp_seq=1 ttl=37 time=0.977 ms
64 bytes from 192.168.1.26: icmp_seq=2 ttl=37 time=1.49 ms
64 bytes from 192.168.1.26: icmp_seq=3 ttl=37 time=1.98 ms
--- 192.168.1.26 ping statistics ---
3 packets transmitted, 3 received, 0% packet loss, time 2003ms
rtt min/avg/max/mdev = 0.977/1.481/1.980/0.409 ms
容器也可以Ping到WSL的网关,以及Windows主机。
容器互联
在WSL下启动多个容器是否能够互联呢?事实证明确实是可以的:
[root@b5cf7a4cf154 /]# ip address
1: lo:  mtu 65536 qdisc noqueue state UNKNOWN group default qlen 1000
    link/loopback 00:00:00:00:00:00 brd 00:00:00:00:00:00
    inet 127.0.0.1/8 scope host lo
       valid_lft forever preferred_lft forever
2: tunl0@NONE:  mtu 1480 qdisc noop state DOWN group default qlen 1000
    link/ipip 0.0.0.0 brd 0.0.0.0
3: sit0@NONE:  mtu 1480 qdisc noop state DOWN group default qlen 1000
    link/sit 0.0.0.0 brd 0.0.0.0
10: eth0@if11:  mtu 1500 qdisc noqueue state UP group default
    link/ether 02:42:ac:11:00:03 brd ff:ff:ff:ff:ff:ff link-netnsid 0
    inet 172.17.0.3/16 brd 172.17.255.255 scope global eth0
       valid_lft forever preferred_lft forever
[root@b5cf7a4cf154 /]# ping 172.17.0.2
PING 172.17.0.2 (172.17.0.2) 56(84) bytes of data.
64 bytes from 172.17.0.2: icmp_seq=1 ttl=64 time=0.039 ms
64 bytes from 172.17.0.2: icmp_seq=2 ttl=64 time=0.064 ms
64 bytes from 172.17.0.2: icmp_seq=3 ttl=64 time=0.065 ms
^C
--- 172.17.0.2 ping statistics ---
3 packets transmitted, 3 received, 0% packet loss, time 2061ms
rtt min/avg/max/mdev = 0.039/0.056/0.065/0.012 ms
(5)连通WSL到容器?
那么是否我们也可以像连通Windows到容器一样,连通WSL到容器呢?这里有一个问题,就是windows不知道如何连通172.17.0.0/16网段,但是windows知道如何连到宿主机,宿主机又知道如何连到172.17.0.0/16,所以我们可以通过宿主机来构建路由通道。但是,WSL上的Ubuntu作为宿主机的情况下,它自己就不知道如何到通172.17.0.0/16网段,还能找谁去?!
所以,这个坑我们是爬不出去了……
当然了,Docker官方给出过正确的办法,就是使用--net:host,并-p绑定端口到主机端口上,直接使用主机IP加端口的方式来访问容器。这正是docker基于进程隔离的理念要求我们采用的“正确方式”。
3.可能的原因
这是一个很让人抓狂的事。网络上多数说法,是WSL没有docker0这个虚拟器。这个我们在前面也确实看到了。但是如果真的没有适配器,可能连从容器上行到WSL Ubuntu和Windows都不行,容器互联也应该不行。可见这一部分还是有程序在处理的。只是不太清除的是,为啥这个功能只实现了一半——WSL Ubuntu没有172.17.0.1这样一个适配器做网关,但是容器像172.17.0.1发的包确实被处理了;反过来,虽然容器主动发起的通信能够正常的返回,但WSL端主动发起的通信,却找不到172.17.0.1在哪——一个没有适配器的半拉儿网络暗流。
有空的话可以考虑截包来看看到底发生了什么……
当然,除了没有docker0,如果你在WSL Ubuntu上执行一下systemctl命令的话……
pig@LAPTOP-SA9UAFHF:/mnt/c/Users/lhyzw$ systemctl
System has not been booted with systemd as init system (PID 1). Can't operate.
Failed to connect to bus: Host is down
你会发现,这玩意和容器挺像的,都没有启动systemd服务,是一个阉割版的子系统,这也许是真正的原因所在吧~~~
PS:当然,在WSL Ubuntu下面也可以安装一个替代的systemctl:
 git clone https://github.com/DamionGans/ubuntu-wsl2-systemd-script.git

cd ubuntu-wsl2-systemd-script/

bash ubuntu-wsl2-systemd-script.sh
只不过对联网这件事而言,并不会有啥作用。
四、从虚拟机到(超级大的)容器
好了,为什么折腾了这么久的什么服务啊、网络啊这样的大坑呢。其实起源于本篇一开头提过的“奇思妙想”——从scratch创建镜像,从镜像/容器创建镜像我们都试过了。能不能从虚拟机创建一个镜像呢?
答案当然是可以的,因为前面提到过,其实镜像就是一个文件系统,容器不过使用一个通用的核心加载了这个文件系统而已。所以,从虚拟机到容器,只需要把虚拟机系统里面的文件系统打包出来就行了。
1.全盘压缩虚拟机文件系统
[root@localhost ~]# tar --numeric-owner --exclude=/proc --exclude=/sys --exclude=/mnt --exclude=/var/cache --exclude=/var/log --exclude=/root/share -zcvf ~/share/centos-stream-8.tar.gz /
对虚拟机中的CentOS系统——我们前面安装的可是很全的版本,各种工具及包括图形桌面都安装了,所以文件系统不会太小。当然,在tar的时候,可以使用--exclude参数排除一些对系统来说并不重要的目录。比如:
/proc:因为存储的是内核运行时状态的相关文件,是从内存映射出来的虚拟目录,伪文件系统。docker会使用承载系统的内核进行替代,所以可以不要。
/sys:Linux内核设备树及文件系统的映射。同样由于被替代,不需要
/var:日志文件等通常不断增加的变量性文件存放在这里,不需要。但是/var/lib还是不该轻易删除,不知道会不会映像一些已经安装的软件。所以选择性删一下
/mnt:用户临时挂载的别的文件系统,不需要
/root/share:我们自己在虚拟机上映射的共享目录,tar的结果会放在这里,不能被循环压缩,排除。
/tmp:存放临时文件的目录,事实上也不需要,可以考虑排除,不过我没尝试
/run:系统运行时生成的临时文件系统,重启时会被删除,应该排除,不过我也没有尝试
我们这里完全是在反docker之道而行之,不管系统里面的东西有用没用全给打包了,这当然是不理智的行为——正确的方法应该是在scratch的基础上,带上busybox等已经压缩得很紧凑的必要工具集,然后根据需要一点一点的添加。
当然,做实验的话就无所谓了:) 运行完以后,确实好大一个
[root@localhost share]# pwd
/root/share
[root@localhost share]# ls -lh
总用量 2.1G
-rwxrwxrwx. 1 root root 2.1G 11月 10 03:34 centos-stream-8.tar.gz
[root@localhost share]#
可以在rar里看看
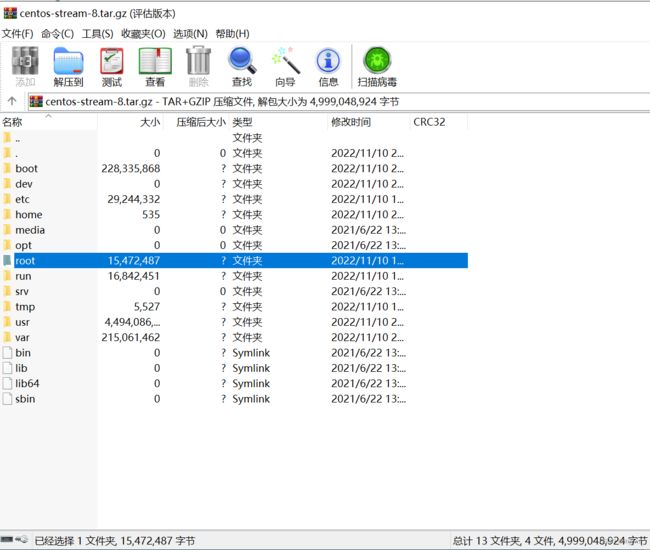
有5G那么多…… 。可以看到除了/boot、/etc、/usr、/bar/lib等绝对不能瘦身和不敢瘦身的东西外,其余目录其实所占空间也不算太多,大面还能节省的一眼看去也只有/run和/tmp了。/root下面还有一些桌面系统用的东西,也没有敢删,毕竟一会还想着用一下……。所以真要是想构造生产环境,还是别从虚拟机这头开始搞吧。
2.向docker导入镜像
[root@localhost ~]# cat share/centos-stream-8.tar.gz |docker import - centos-stream-8:pig01
sha256:3cf07981b4d47f1a90675d3bbcdb7e83e7053daec3f45d1abd1c5e0e3bb26d9e
[root@localhost ~]# docker images
REPOSITORY        TAG       IMAGE ID       CREATED         SIZE
centos-stream-8   pig01     3cf07981b4d4   2 minutes ago   5GB
hello-world       latest    feb5d9fea6a5   13 months ago   13.3kB
[root@localhost ~]#
很大,导入很慢……。不过这个工作最好在Linux环境下操作。直接在Windows CMD下操作似乎会因为字符编码问题出错。
PS D:\vm\share> cat .\centos-stream-8.tar.gz |docker import - centos-stream-8:pig01
程序“docker.exe”无法运行: 引发类型为“System.OutOfMemoryException”的异常。所在位置 行:1 字符: 31
+ cat .\centos-stream-8.tar.gz |docker import - centos-stream-8:pig01
+                               ~~~~~~~~~~~~~~~~~~~~~~~~~~~~~~~~~~~~~。
所在位置 行:1 字符: 1
+ cat .\centos-stream-8.tar.gz |docker import - centos-stream-8:pig01
+ ~~~~~~~~~~~~~~~~~~~~~~~~~~~~~~~~~~~~~~~~~~~~~~~~~~~~~~~~~~~~~~~~~~~
    + CategoryInfo          : ResourceUnavailable: (:) [], ApplicationFailedException
    + FullyQualifiedErrorId : NativeCommandFailed
3.确实能用
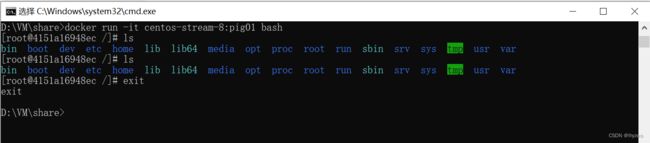
然后我们迫不及待的用一下看看,果然是可以的:
[root@localhost ~]# docker run -it centos-stream-8:pig01 bash
[root@c44c3094af96 /]# ls
bin  boot  dev  etc  home  lib  lib64  media  opt  proc  root  run  sbin  srv  sys  tmp  usr  var
[root@c44c3094af96 /]# ls root
公共  模板  视频  图片  文档  下载  音乐  桌面  anaconda-ks.cfg  initial-setup-ks.cfg
[root@c44c3094af96 /]#
4.导出以后换到Windows下面看看
如果需要在Windows下使用,可以从Linux环境下的Docker中导出dockers镜像
[root@localhost ~]# docker save -o share/testcentoimage.tar centos-stream-8:pig01
[root@localhost ~]# ls -lh share
总用量 6.8G
-rwxrwxrwx. 1 root root 2.1G 11月 10 03:34 centos-stream-8.tar.gz
-rwxrwxrwx. 1 root root 4.8G 11月 10 04:02 testcentoimage.tar
看大小就不一样,所以应当是不能直接使用docker load命令去load那个我们之前打包的2G大小的压缩包的。
D:\VM\share>dir
驱动器 D 中的卷没有标签。
卷的序列号是 0E5B-11E5
D:\VM\share 的目录
2022/11/10 17:02 .
2022/11/10 17:02 ..
2022/11/04 10:39 6,832,413 cascade-server-master.zip
2022/11/10 16:34 2,150,854,714 centos-stream-8.tar.gz
2022/11/04 15:03 32,118,944 mongodb-org-server-6.0.2-1.el8.x86_64.rpm
2022/11/10 17:02 5,093,537,792 testcentoimage.tar
4 个文件 7,283,343,863 字节
2 个目录 3,864,828,567,552 可用字节
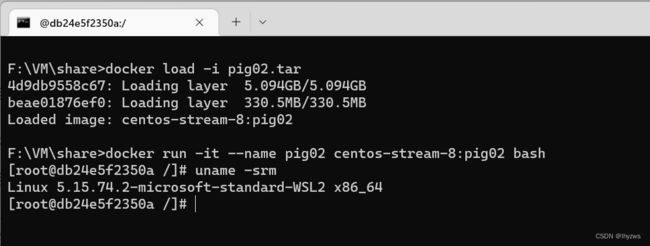
D:\VM\share>docker load -i testcentoimage.tar
4d9db9558c67: Loading layer [==================================================>] 5.094GB/5.094GB
Loaded image: centos-stream-8:pig01 嗯,看看命令行的风格都不一样了,就知道我换系统了
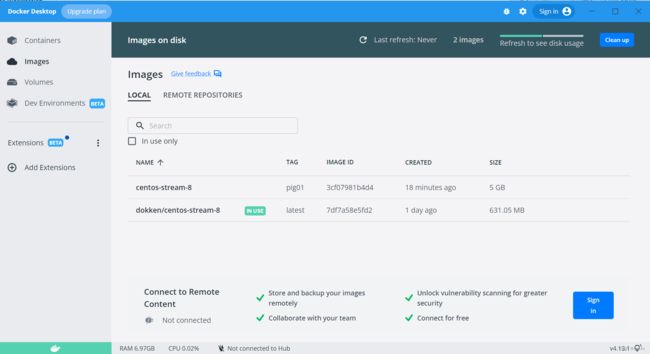
在docker desktop窗口也能看到。在命令行里先运行一下,这样会比较简单地生成容器,如果在窗口中还需要选择一些环境参数,就不研究了。
然后就可以从窗口进去,在docker命令行中使用了:

命令行:
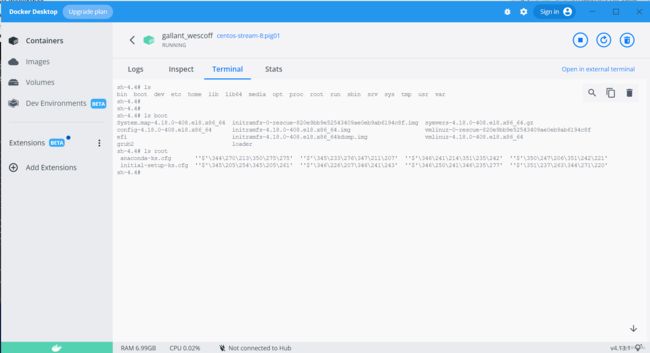
呃……存在一点UTF-8的问题。先放着不管。
五、远程桌面
之所以会搞这么大个镜像,是因为客户希望可以直接操作我们远程集群上的app,而且不希望通过浏览器连接,要通过VPN加远程桌面的方式连接,然后在桌面上使用浏览器连接本地集群……用户就是上帝,虽然我也不知道为啥。不过紧接着就突发奇想,能不能把这东西弄到docker上呢?
1. 使用xrdp远程桌面
当然事情还得一步一步做,至少我得先解决在虚拟机上能够使用远程桌面的问题。网上有好多使用xshell、vnc的方案,不过要么是需要购买,要么是配置起来太麻烦,不确定性太多。还在在我一通收罗下,找着一个不错的远程桌面XRDP。这个家伙不仅好安装,而且就连客户端都可以直接使用Windows的远程桌面。
xrdp需要首先安装epel的repo。
[root@localhost ~]# yum install epel-release
CentOS Stream 8 - AppStream                     1.4 MB/s |  25 MB     00:18
CentOS Stream 8 - BaseOS                        644 kB/s |  26 MB     00:40
CentOS Stream 8 - Extras                         12 kB/s |  18 kB     00:01
CentOS Stream 8 - Extras common packages        5.5 kB/s | 5.2 kB     00:00
依赖关系解决。
================================================================================
 软件包                架构            版本               仓库             大小
================================================================================
安装:
 epel-release          noarch          8-11.el8           extras           24 k

事务概要
================================================================================
安装  1 软件包

总下载:24 k
安装大小:35 k
确定吗?[y/N]: y
下载软件包:
epel-release-8-11.el8.noarch.rpm                 40 kB/s |  24 kB     00:00
--------------------------------------------------------------------------------
总计                                             21 kB/s |  24 kB     00:01
CentOS Stream 8 - Extras                        1.2 MB/s | 1.6 kB     00:00
导入 GPG 公钥 0x8483C65D:
 Userid: "CentOS (CentOS Official Signing Key) "
 指纹: 99DB 70FA E1D7 CE22 7FB6 4882 05B5 55B3 8483 C65D
 来自: /etc/pki/rpm-gpg/RPM-GPG-KEY-centosofficial
确定吗?[y/N]: y
导入公钥成功
运行事务检查
事务检查成功。
运行事务测试
事务测试成功。
运行事务
  准备中  :                                                                                                                                   1/1
  安装    : epel-release-8-11.el8.noarch                                                                                                      1/1
  运行脚本: epel-release-8-11.el8.noarch                                                                                                      1/1
  验证    : epel-release-8-11.el8.noarch                                                                                                      1/1

已安装:
  epel-release-8-11.el8.noarch

完毕!
安装xrdp
[root@localhost ~]# yum install xrdp -y
Extra Packages for Enterprise Linux 8 - x86_64                                                                    1.7 MB/s |  13 MB     00:07
Extra Packages for Enterprise Linux Modular 8 - x86_64                                                            1.0 MB/s | 733 kB     00:00
上次元数据过期检查:0:00:01 前,执行于 2022年11月11日 星期五 01时28分27秒。
依赖关系解决。
==================================================================================================================================================
 软件包                               架构                           版本                                      仓库                          大小
==================================================================================================================================================
安装:
 xrdp                                 x86_64                         1:0.9.20-1.el8                            epel                         471 k
安装依赖关系:
 imlib2                               x86_64                         1.4.9-8.el8                               epel                         222 k
安装弱的依赖:
 xrdp-selinux                         x86_64                         1:0.9.20-1.el8                            epel                          24 k

事务概要
==================================================================================================================================================
安装  3 软件包

总下载:717 k
安装大小:2.8 M
下载软件包:
(1/3): xrdp-selinux-0.9.20-1.el8.x86_64.rpm                                                                       184 kB/s |  24 kB     00:00
(2/3): imlib2-1.4.9-8.el8.x86_64.rpm                                                                              942 kB/s | 222 kB     00:00
(3/3): xrdp-0.9.20-1.el8.x86_64.rpm                                                                               983 kB/s | 471 kB     00:00
--------------------------------------------------------------------------------------------------------------------------------------------------
总计                                                                                                              794 kB/s | 717 kB     00:00
Extra Packages for Enterprise Linux 8 - x86_64                                                                    1.6 MB/s | 1.6 kB     00:00
导入 GPG 公钥 0x2F86D6A1:
 Userid: "Fedora EPEL (8) "
 指纹: 94E2 79EB 8D8F 25B2 1810 ADF1 21EA 45AB 2F86 D6A1
 来自: /etc/pki/rpm-gpg/RPM-GPG-KEY-EPEL-8
导入公钥成功
运行事务检查
事务检查成功。
运行事务测试
事务测试成功。
运行事务
  准备中  :                                                                                                                                   1/1
  安装    : imlib2-1.4.9-8.el8.x86_64                                                                                                         1/3
  安装    : xrdp-selinux-1:0.9.20-1.el8.x86_64                                                                                                2/3
  运行脚本: xrdp-selinux-1:0.9.20-1.el8.x86_64                                                                                                2/3
  安装    : xrdp-1:0.9.20-1.el8.x86_64                                                                                                        3/3
  运行脚本: xrdp-1:0.9.20-1.el8.x86_64                                                                                                        3/3
  验证    : imlib2-1.4.9-8.el8.x86_64                                                                                                         1/3
  验证    : xrdp-1:0.9.20-1.el8.x86_64                                                                                                        2/3
  验证    : xrdp-selinux-1:0.9.20-1.el8.x86_64                                                                                                3/3

已安装:
  imlib2-1.4.9-8.el8.x86_64                    xrdp-1:0.9.20-1.el8.x86_64                    xrdp-selinux-1:0.9.20-1.el8.x86_64

完毕!
[root@localhost ~]#
启动并设置服务
[root@localhost ~]# systemctl start xrdp
[root@localhost ~]# systemctl status xrdp
● xrdp.service - xrdp daemon
   Loaded: loaded (/usr/lib/systemd/system/xrdp.service; disabled; vendor preset: disabled)
   Active: active (running) since Fri 2022-11-11 01:29:55 EST; 10s ago
     Docs: man:xrdp(8)
           man:xrdp.ini(5)
 Main PID: 23053 (xrdp)
    Tasks: 1 (limit: 23329)
   Memory: 1004.0K
   CGroup: /system.slice/xrdp.service
           └─23053 /usr/sbin/xrdp --nodaemon

11月 11 01:29:55 localhost.localdomain systemd[1]: Started xrdp daemon.
11月 11 01:29:55 localhost.localdomain xrdp[23053]: [INFO ] starting xrdp with pid 23053
11月 11 01:29:55 localhost.localdomain xrdp[23053]: [INFO ] address [0.0.0.0] port [3389] mode 1
11月 11 01:29:55 localhost.localdomain xrdp[23053]: [INFO ] listening to port 3389 on 0.0.0.0
11月 11 01:29:55 localhost.localdomain xrdp[23053]: [INFO ] xrdp_listen_pp done
[root@localhost ~]# systemctl enable xrdp
Created symlink /etc/systemd/system/multi-user.target.wants/xrdp.service → /usr/lib/systemd/system/xrdp.service.
[root@localhost ~]#
停止防火墙。一般来说很早就会干这个事,不过这次我换了个新的虚拟机,把这个忘了,坑了一小会……
[root@localhost ~]# netstat -antpl
Active Internet connections (servers and established)
Proto Recv-Q Send-Q Local Address           Foreign Address         State       PID/Program name
tcp        0      0 0.0.0.0:111             0.0.0.0:*               LISTEN      1/systemd
tcp        0      0 192.168.122.1:53        0.0.0.0:*               LISTEN      2129/dnsmasq
tcp        0      0 0.0.0.0:22              0.0.0.0:*               LISTEN      1241/sshd
tcp        0      0 127.0.0.1:631           0.0.0.0:*               LISTEN      1237/cupsd
tcp6       0      0 :::111                  :::*                    LISTEN      1/systemd
tcp6       0      0 ::1:3350                :::*                    LISTEN      1292/xrdp-sesman
tcp6       0      0 :::22                   :::*                    LISTEN      1241/sshd
tcp6       0      0 ::1:631                 :::*                    LISTEN      1237/cupsd
tcp6       0      0 :::3389                 :::*                    LISTEN      1295/xrdp
[root@localhost ~]# systemctl stop firewalld.service
[root@localhost ~]# systemctl disable firewalld.service
Removed /etc/systemd/system/multi-user.target.wants/firewalld.service.
Removed /etc/systemd/system/dbus-org.fedoraproject.FirewallD1.service.
[root@localhost ~]#
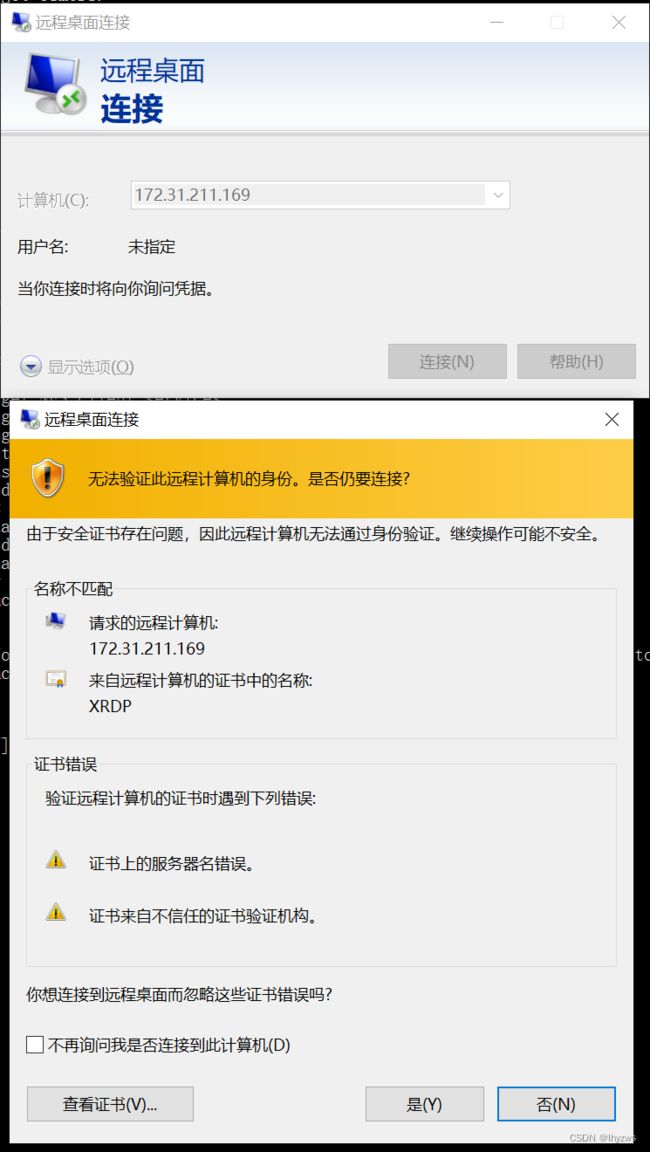
安装好了以后,就可以使用Windows的远程桌面连接进行登录。
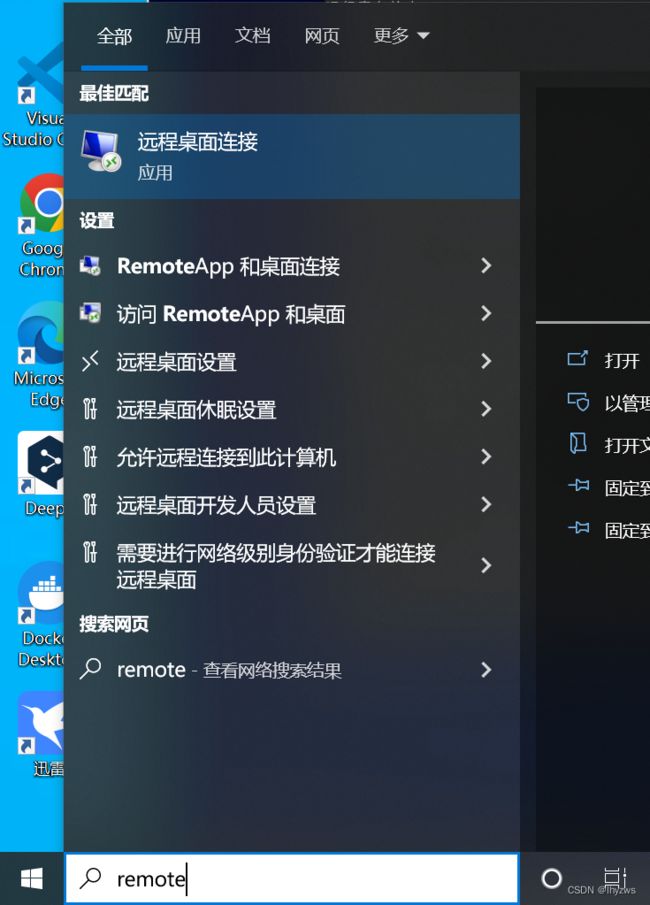
提示证书什么不用管,直接连接就好。但是有一件事需要注意,就是和windows远程桌面一样,不允许一个用户同时登录2次。在windows中,新的用户会把原来的用户挤下来,但是在Linux中,是新的用户挤不进去,闪退……
我被这个坑了好久,一直在查软件配置的问题,知道半天多以后猛然灵光一闪……
换了个用户,这样就登进去了
显示设置也可以更改一下,方便放多个窗口
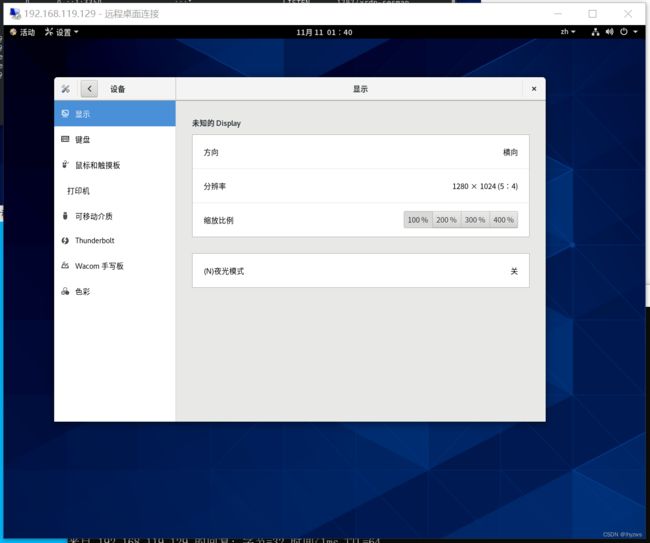
有趣的是,和Windows中不一样的是,如果在远程桌面中关机,不是注销用户,而是直接把主机也关掉了。这个要是用在生产环境中,哪个用户一关机……就相当尴尬了。
2. 把远程桌面架到Docker上
下一步该琢磨的,是怎么在dockers中装上远程桌面。
(1)安装epel和xrdp
首先是在我们现有的超大镜像上再构造一层,把epel和xrdp装上。
这个使用Dockerfile文件比较简单的可以做到:
FROM centos-stream-8:pig01
RUN yum install epel-release -y \
	&& yum install xrdp -y
CMD ["/bin/bash"]
然后如上一篇中所述,docker build -t centos-stream-8:pig02,把我的pig01更新一版就好。
PS D:\vm\share\docker> docker build -t centos-stream-8:pig02 .
[+] Building 0.4s (2/2) FINISHED
 => [internal] load build definition from Dockerfile                                                                                                                   0.1s
 => => transferring dockerfile: 282B                                                                                                                                   0.0s
 => [internal] load .dockerignore                                                                                                                                      0.1s
 => => transferring context: 2B                                                                                                                                        0.0s
failed to solve with frontend dockerfile.v0: failed to create LLB definition: dockerfile parse error line 3: unknown instruction: &&
[+] Building 451.9s (5/6)
 => [internal] load build definition from Dockerfile                                                                                                                   0.1s
 => => transferring dockerfile: 281B                                                                                                                                   0.0s
 => [internal] load .dockerignore                                                                                                                                      0.0s
 => => transferring context: 2B                                                                                                                                        0.0s
 => [internal] load metadata for docker.io/library/centos-stream-8:pig01                                                                                               0.0s
 => [1/3] FROM docker.io/library/centos-stream-8:pig01                                                                                                                 0.1s
 => [2/3] RUN yum install epel-release -y  && yum install xrdp -y                                                                                                    212.3s
 => [3/3] RUN source /etc/sysconfig/xrdp  && /usr/sbin/xrdp-sesman $SESMAN_OPTIONS --nodaemon  && /usr/sbin/xrdp $XRDP_OPTIONS --nodaemon                            239.1s
(2)启动xrdp服务
xrdp的服务配置如下所示:
[root@localhost system]# cat xrdp-sesman.service
[Unit]
Description=xrdp session manager
Documentation=man:xrdp-sesman(8) man:sesman.ini(5)
Wants=network-online.target nss-lookup.target nss-user-lookup.target
After=network-online.target nss-lookup.target nss-user-lookup.target
StopWhenUnneeded=true
BindsTo=xrdp.service

[Service]
EnvironmentFile=/etc/sysconfig/xrdp
ExecStart=/usr/sbin/xrdp-sesman $SESMAN_OPTIONS --nodaemon

[Install]
WantedBy=multi-user.target
[root@localhost system]# cat xrdp.service
[Unit]
Description=xrdp daemon
Documentation=man:xrdp(8) man:xrdp.ini(5)
Requires=xrdp-sesman.service
After=xrdp-sesman.service

[Service]
EnvironmentFile=/etc/sysconfig/xrdp
ExecStart=/usr/sbin/xrdp $XRDP_OPTIONS --nodaemon

[Install]
WantedBy=multi-user.target
[root@localhost system]#
可以看到,xrdp还依赖于xrdp-sesman服务,并且这些服务都需要再ns-lookup/nss-user-lookup等systemd的核心组成模块启动后才能正常运行。所以在启动这些服务前,还需要把systemd启动起来。
为什么我们没有在Dockerfile里面使用RUN来启动这几个服务呢?因为前面说过,不管是手撸还是使用RUN,本质上都是单线程的在启动程序,一旦碰见一个不支持-d参数按照daemon模式启动的,就会挂住。事实上如果都放在RUN里面,构造镜像的时候就会挂在那里不动了。
好在如果手撸,可以采取exec的方式,只要容器还在运行,就多开一个交互式bash挂进去,如此反复,可以将所有的服务都启动起来。
但是这里还有一个问题,就是systemd,xrdp在systemd没有启动的情况下,是不能正常工作的。所以我们最终还是得回到前面说的/sbin/init大法,在docker启动的时候指定启动/sbin/init,强行把systemd启动起来。
另外,如前所述的网络问题,我们还需要将docker的3350(xrdp-sesman)和3389(xrdp)端口和主机绑定:
PS D:\vm\share\docker> docker run -it -p 3350:3350 -p 3389:3389 --name pig02 --privileged centos-stream-8:pig02 /sbin/init

Welcome to CentOS Stream 8!

[  OK  ] Created slice User and Session Slice.
[  OK  ] Created slice system-getty.slice.
[  OK  ] Listening on initctl Compatibility Named Pipe.
[  OK  ] Created slice system-sshd\x2dkeygen.slice.
[  OK  ] Listening on udev Kernel Socket.
[  OK  ] Reached target Login Prompts.
[  OK  ] Set up automount Arbitrary Executable File Formats File System Automount Point.
[  OK  ] Listening on Journal Socket.
         Starting Load Kernel Modules...
         Starting Read and set NIS domainname from /etc/sysconfig/network...
         Starting Remount Root and Kernel File Systems...
         Mounting Kernel Debug File System...
         Starting Setup Virtual Console...
[  OK  ] Listening on Journal Socket (/dev/log).
         Starting Journal Service...
[  OK  ] Created slice Virtual Machine and Container Slice.
         Mounting Huge Pages File System...
[  OK  ] Listening on udev Control Socket.
         Starting udev Coldplug all Devices...
[  OK  ] Started Forward Password Requests to Wall Directory Watch.
[  OK  ] Listening on Device-mapper event daemon FIFOs.
         Starting Monitoring of LVM2 mirrors, snapshots etc. using dmeventd or progress polling...
[  OK  ] Listening on Process Core Dump Socket.
[  OK  ] Listening on RPCbind Server Activation Socket.
[  OK  ] Reached target RPC Port Mapper.
[  OK  ] Listening on LVM2 poll daemon socket.
[  OK  ] Reached target Slices.
[  OK  ] Started Read and set NIS domainname from /etc/sysconfig/network.
[  OK  ] Mounted Kernel Debug File System.
[  OK  ] Mounted Huge Pages File System.
[FAILED] Failed to start Load Kernel Modules.
See 'systemctl status systemd-modules-load.service' for details.
[  OK  ] Started Remount Root and Kernel File Systems.
         Starting Load/Save Random Seed...
         Starting Create Static Device Nodes in /dev...
         Mounting FUSE Control File System...
         Starting Apply Kernel Variables...
[  OK  ] Started Load/Save Random Seed.
[  OK  ] Mounted FUSE Control File System.
[  OK  ] Started Apply Kernel Variables.
[  OK  ] Started Create Static Device Nodes in /dev.
         Starting udev Kernel Device Manager...
[  OK  ] Started Journal Service.
         Starting Flush Journal to Persistent Storage...
[  OK  ] Started Setup Virtual Console.
[  OK  ] Started udev Kernel Device Manager.
[  OK  ] Started udev Coldplug all Devices.
         Starting udev Wait for Complete Device Initialization...
         Starting Show Plymouth Boot Screen...
[  OK  ] Started Flush Journal to Persistent Storage.
[  OK  ] Started Show Plymouth Boot Screen.
[  OK  ] Started Forward Password Requests to Plymouth Directory Watch.
[  OK  ] Reached target Local Encrypted Volumes.
[  OK  ] Started Monitoring of LVM2 mirrors, snapshots etc. using dmeventd or progress polling.
[  OK  ] Started udev Wait for Complete Device Initialization.
[  OK  ] Reached target Local File Systems (Pre).
[ TIME ] Timed out waiting for device dev-mapper-cs\x2dswap.device.
[DEPEND] Dependency failed for /dev/mapper/cs-swap.
[DEPEND] Dependency failed for Swap.
[ TIME ] Timed out waiting for device dev-mapper-cs\x2dhome.device.
[DEPEND] Dependency failed for /home.
[DEPEND] Dependency failed for Local File Systems.
[DEPEND] Dependency failed for Mark the need to relabel after reboot.
[ TIME ] Timed out waiting for device dev-disk-by\x2duuid-074b94e8\x2dbc92\x2d4781\x2d8880\x2d50e42d4aaeea.device.
[DEPEND] Dependency failed for /boot.
[  OK  ] Reached target Timers.
[  OK  ] Reached target User and Group Name Lookups.
[  OK  ] Reached target Network (Pre).
[  OK  ] Reached target Paths.
[  OK  ] Reached target Network.
[  OK  ] Reached target Network is Online.
         Starting Notify NFS peers of a restart...
         Starting Logout off all iSCSI sessions on shutdown...
[  OK  ] Started Emergency Shell.
         Starting Tell Plymouth To Write Out Runtime Data...
[  OK  ] Reached target Emergency Mode.
         Starting Create Volatile Files and Directories...
[  OK  ] Reached target Sockets.
[  OK  ] Started Notify NFS peers of a restart.
[  OK  ] Started Logout off all iSCSI sessions on shutdown.
[  OK  ] Started Tell Plymouth To Write Out Runtime Data.
[  OK  ] Started Create Volatile Files and Directories.
         Mounting RPC Pipe File System...
         Starting Security Auditing Service...
         Starting RPC Bind...
[  OK  ] Mounted RPC Pipe File System.
[  OK  ] Reached target rpc_pipefs.target.
[  OK  ] Reached target NFS client services.
[  OK  ] Reached target Remote File Systems (Pre).
[  OK  ] Reached target Remote File Systems.
[FAILED] Failed to start Security Auditing Service.
See 'systemctl status auditd.service' for details.
         Starting Update UTMP about System Boot/Shutdown...
[  OK  ] Started RPC Bind.
[  OK  ] Started Update UTMP about System Boot/Shutdown.
         Starting Update UTMP about System Runlevel Changes...
[  OK  ] Started Update UTMP about System Runlevel Changes.
You are in emergency mode. After logging in, type "journalctl -xb" to view
system logs, "systemctl reboot" to reboot, "systemctl default" or "exit"
to boot into default mode.
?? root ?????
(?? Control-D ???):
?????
启动到中间(看具体如何镜像的系统而定),我这个会报错,输入一下密码就进去了。
如果没有替换systemctl,直接使用系统原有的systemctl启动xrdp服务还是会存在问题。所以我们开了几个交互式界面进行手撸:
第一个:
PS D:\vm\share\docker> docker exec -it pig02 bash
[root@d84fc5536215 /]# /usr/sbin/xrdp-sesman --nodaemon
第二个:
PS D:\vm\share\docker> docker exec -it pig02 bash
[root@d84fc5536215 /]# /usr/sbin/xrdp --nodaemon
再开一个看看端口是否打开了:
C:\Users\dell>docker port pig02
3350/tcp -> 0.0.0.0:3350
3389/tcp -> 0.0.0.0:3389
(3)连接测试
最终,我们可以成功的启动xrdp服务,并且使用远程桌面连接也可以访问容器中的服务了。当然,在绑定主机端口时,所谓的主机实际上是wsl上的那个Ubuntu子系统,所以使用IP地址的时候不要弄错了。

登录的过程中,如果是手撸的服务,那个进程会不断的输出log来。
但最终的结果,还是闪退……但是对比虚拟机上成功的访问,和docker上不成功的访问,2者几乎没有区别,xrdp也没有报错(如果服务启动不正确的话,会有大量的[ERROR]和[WARNING]):
[root@925f040afc94 /]# /usr/sbin/xrdp-sesman --nodaemon
xauth:  file .Xauthority does not exist

Xvnc TigerVNC 1.12.0 - built Aug 27 2022 13:07:52
Copyright (C) 1999-2021 TigerVNC Team and many others (see README.rst)
See https://www.tigervnc.org for information on TigerVNC.
Underlying X server release 12011000, The X.Org Foundation


Mon Dec  5 02:10:45 2022
 vncext:      VNC extension running!
 vncext:      Listening for VNC connections on local interface(s), port 5910
 vncext:      created VNC server for screen 0
 Connections: accepted: 127.0.0.1::56400
 SConnection: Client needs protocol version 3.3
 VNCSConnST:  Server default pixel format depth 32 (32bpp) little-endian rgb
              max 255,255,255 shift 16,8,0
Global configuration:
    UseUnixSocket (derived):   true

Security configuration:
    RestrictOutboundClipboard: none
    RestrictInboundClipboard:  none

Chansrv configuration:
    EnableFuseMount            true
    FuseMountName:             thinclient_drives
    FileMask:                  077
    Nautilus 3 Flist Format:   false
chansrv::main: using log file [/home/pig/.local/share/xrdp/xrdp-chansrv.10.log]
 VNCSConnST:  Client pixel format depth 24 (32bpp) little-endian rgb888

Mon Dec  5 02:10:46 2022
 VNCSConnST:  closing 127.0.0.1::56400: Server shutdown
 EncodeManager: Framebuffer updates: 1
 EncodeManager:   Raw:
 EncodeManager:     Solid: 136 rects, 8.2944 Mpixels
 EncodeManager:            31.6422 MiB (1:1 ratio)
 EncodeManager:   Total: 136 rects, 8.2944 Mpixels
 EncodeManager:          31.6422 MiB (1:1 ratio)
 ComparingUpdateTracker: 0 pixels in / 0 pixels out
 ComparingUpdateTracker: (1:-nan ratio)
如果成功(比如在VMware上),应该是这样的
[root@localhost ~]# /usr/sbin/xrdp-sesman --nodaemon

Xvnc TigerVNC 1.12.0 - built Aug 27 2022 13:07:52
Copyright (C) 1999-2021 TigerVNC Team and many others (see README.rst)
See https://www.tigervnc.org for information on TigerVNC.
Underlying X server release 12011000, The X.Org Foundation


Mon Dec  5 02:51:29 2022
 vncext:      VNC extension running!
 vncext:      Listening for VNC connections on local interface(s), port 5911
 vncext:      created VNC server for screen 0
Global configuration:
    UseUnixSocket (derived):   true

Security configuration:
    RestrictOutboundClipboard: none
    RestrictInboundClipboard:  none

Chansrv configuration:
    EnableFuseMount            true
    FuseMountName:             thinclient_drives
    FileMask:                  077
    Nautilus 3 Flist Format:   false
chansrv::main: using log file [/home/pig/.local/share/xrdp/xrdp-chansrv.11.log]
 Connections: accepted: 127.0.0.1::32882
 SConnection: Client needs protocol version 3.3
 VNCSConnST:  Server default pixel format depth 32 (32bpp) little-endian rgb
              max 255,255,255 shift 16,8,0
 VNCSConnST:  Client pixel format depth 24 (32bpp) little-endian rgb888

Mon Dec  5 02:51:33 2022
 ComparingUpdateTracker: 0 pixels in / 0 pixels out
 ComparingUpdateTracker: (1:-nan ratio)
 VNCSConnST:  FramebufferUpdateRequest 3840x2160 at 0,0 exceeds framebuffer
              1280x1024
具体出了啥问题我就不知道了,只有最后那一步FramebufferUpdateRequest没有成功。
3.可能的原因
(1)宿主机和容器同操作系统的实验
接下来我突发奇想,如果就在VMware上的centos-stream-8中安装docker,并就在这个docker中运行一个同样版本的centos-stream-8的镜像,尽可能给它们一样的环境,xrdp是否能正常呢?结果还真是——又前进了一小步:在pig02从默认的/sbin/init启动时,居然整个主机都进入了交互式界面的欢迎界面:

当然,最后仍然不出意外的进入了emergency模式。
(2)docker的那个scratch内核到底是什么?
由于在不同的宿主机下,尝试远程登陆交互式界面得到的结果不一样,所以我多做了一步实验,看看不同宿主机下的容器的内核到底是什么:
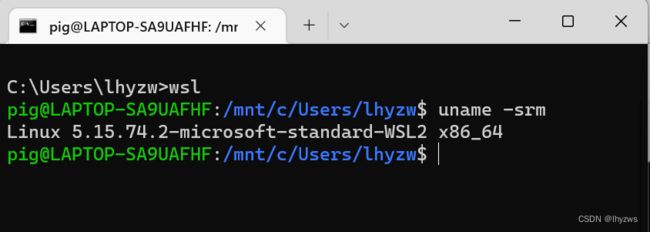
WSL下:
宿主机,也就WSL下的Ubuntu子系统
容器,使用的还是我们造的那个centos-strem-8的超大镜像:
VMware Centos-Stream-8下:
宿主机,那个超级大镜像的母体:

容器,那个超级大镜像载入后得到的容器:

可见,容器所使用的内核——也就是scratch所对应的内核,其实就是docker宿主机上那个Linux系统的内核——如果希望容器工作得更稳定一些,考虑宿主机和容器同内核看起来比较靠谱一点。
这正好强有力的说明了一个问题,对于基于操作系统虚拟化的Docker来说,进程隔离才是它真正的主业。
关于远程docker交互式界面这个事,也许仔细地去构建支持xrdp的服务树还是有可能办到的。鉴于我还没有打算去研究xrdp,也没有功夫去回溯systemd的服务树。在一顿磕磕绊绊下能走到这一步也还算不错,倒在革命的最后一步虽然心有不甘也只能就此罢了。
六、解决方案
当然,如果就是要在容器下使用远程桌面的话,用一用线程的镜像也不错,使用docker search xrdp,可以找到可用的镜像,比如danchitnis/xrdp的若干镜像,按照其加载说明加载(主要事docker run要在尾巴后面添加 用户 口令 sudo权限开关3个参数),就可以使用windows的远程桌面访问了。但是多数容器使用的都是轻量级的桌面系统xfce,我大致查看了一下,在xrdp方面和我们前面的做法并无二致,但就是搞不同,不知为何。当然,网上也有用VNC装成功的,可以参考在Docker搭建centos7远程桌面环境 - 腾讯云开发者社区-腾讯云 (tencent.com)
然后我们也参考这种办法,看看能不能直接从较小的镜像开始安装GNOME,只不过后面改成xrdp,事实证明,还真成功了……看起来还真是直接从虚拟机镜像存在某个方面的配置问题。也不想深究了。能用就好:
1. 启动基础容器
首先,是启动基于centos:centos7官方镜像的容器。启动过程中,需要绑定端口,并且从/sbin/init进入,因为后面我们需要使用一下systemctl。下面的-it也可以改成-d,免得看见不断初始化失败的某些组件心烦:)
C:\Users\lhyzw>docker run -it --name pig --privileged -p 3389:3389 centos:centos7 sbin/init然后,使用exec进入该容器
C:\Users\lhyzw>docker exec -it pig bash2. 安装GNOME
首先需要安装epel-release,然后可以使用yum grouplist命令查看可用软件包。GNOME属于可用环境,可以看到xfce也在可用软件包中。
[root@dbd139d35b50 /]# yum install epel-release -y
……………………
……………………

Installed:
  epel-release.noarch 0:7-11
Complete!
[root@dbd139d35b50 /]# yum grouplist
……………………
Available Environment Groups:
   Minimal Install
   Compute Node
   Infrastructure Server
   File and Print Server
   Cinnamon Desktop
   MATE Desktop
   Basic Web Server
   Virtualization Host
   Server with GUI
   GNOME Desktop
   KDE Plasma Workspaces
   Development and Creative Workstation
Available Groups:
   Cinnamon
   Compatibility Libraries
   Console Internet Tools
   Development Tools
   Educational Software
   Electronic Lab
   Fedora Packager
   General Purpose Desktop
   Graphical Administration Tools
   Haskell
   LXQt Desktop
   Legacy UNIX Compatibility
   MATE
   Milkymist
   Scientific Support
   Security Tools
   Smart Card Support
   System Administration Tools
   System Management
   TurboGears application framework
   Xfce
Done
然后使用yun groupinstall命令安装GNOME Desktop,800多个组件,等着就行。
[root@dbd139d35b50 /]# yum groupinstall GNOME Desktop -y
Loaded plugins: fastestmirror, ovl
There is no installed groups file.
Maybe run: yum groups mark convert (see man yum)
Loading mirror speeds from cached hostfile
 * base: mirrors.njupt.edu.cn
 * epel: mirrors.tuna.tsinghua.edu.cn
 * extras: mirrors.neusoft.edu.cn
 * updates: mirrors.neusoft.edu.cn
Warning: group Desktop does not exist.
Resolving Dependencies
--> Running transaction check
---> Package NetworkManager-libreswan-gnome.x86_64 0:1.2.4-2.el7 will be installed
--> Processing Dependency: NetworkManager-libreswan(x86-64) = 1.2.4-2.el7 for package: NetworkManager-libreswan-gnome-1.2.4-2.el7.x86_64
--> Processing Dependency: libnma.so.0(libnma_1_2_0)(64bit) for package: NetworkManager-libreswan-gnome-1.2.4-2.el7.x86_64
--> Processing Dependency: libnm.so.0(libnm_1_2_0)(64bit) for package: NetworkManager-libreswan-gnome-1.2.4-2.el7.x86_64
--> Processing Dependency: libnm.so.0(libnm_1_0_0)(64bit) for package: NetworkManager-libreswan-gnome-1.2.4-2.el7.x86_64
…………………………
3. 安装xrdp
同上,不赘述
[root@dbd139d35b50 /]# yum install xrdp -y4.配置默认启动模式
由于官方默认镜像是以命令行方式启动的,需要改为默认以图形方式启动:
[root@dbd139d35b50 /]# systemctl get-default
multi-user.target
[root@dbd139d35b50 /]# systemctl set-default graphical.target
Removed symlink /etc/systemd/system/default.target.
Created symlink from /etc/systemd/system/default.target to /usr/lib/systemd/system/graphical.target.
可以看到,实际systemctl的作用是更改了一下软链接,这个使用ln命令也能做到,所以如果要自己构建镜像,使用RUN ln ……构建链接就好,就不要求助于systemctl了。
5. 增加用户名密码
同上,使用root就行。当然如果需要增加其它用户也可以,不赘述。
[root@dbd139d35b50 sbin]# whoami
root
[root@dbd139d35b50 sbin]# passwd
Changing password for user root.
New password:
Retype new password:
6. 启动xrdp
简单一点,直接整命令行
[root@dbd139d35b50 sbin]# xrdp-sesman && xrdp由于没有加--no-daemon参数,所以这个执行完就会跳出来,但是监听的后台进程仍然在,不用担心。
7. WSL中查看
进入WSL中的Ubuntu子系统查看:
pig@LAPTOP-SA9UAFHF:/mnt/f/VM/share$ netstat -lntp
(Not all processes could be identified, non-owned process info
 will not be shown, you would have to be root to see it all.)
Active Internet connections (only servers)
Proto Recv-Q Send-Q Local Address           Foreign Address         State       PID/Program name
tcp6       0      0 :::3389                 :::*                    LISTEN      -
pig@LAPTOP-SA9UAFHF:/mnt/f/VM/share$ ifconfig
eth0: flags=4163  mtu 1500
        inet 172.27.99.221  netmask 255.255.240.0  broadcast 172.27.111.255
        inet6 fe80::215:5dff:fe5e:831e  prefixlen 64  scopeid 0x20
        ether ……  txqueuelen 1000  (Ethernet)
        RX packets 3704  bytes 416639 (416.6 KB)
        RX errors 0  dropped 0  overruns 0  frame 0
        TX packets 3510  bytes 8540060 (8.5 MB)
        TX errors 0  dropped 0 overruns 0  carrier 0  collisions 0

lo: flags=73  mtu 65536
        inet 127.0.0.1  netmask 255.0.0.0
        inet6 ::1  prefixlen 128  scopeid 0x10
        loop  txqueuelen 1000  (Local Loopback)
        RX packets 0  bytes 0 (0.0 B)
        RX errors 0  dropped 0  overruns 0  frame 0
        TX packets 0  bytes 0 (0.0 B)
        TX errors 0  dropped 0 overruns 0  carrier 0  collisions 0
主要是确认远程桌面要连接的IP,这是再连接,会发现非常顺利的成功了:
七、结论
结论就是重要的事情说三遍:docker不是虚拟机!docker不是虚拟机!docker不是虚拟机!
所以,无可奈何的最后结论——反过来也算我扣题了——“搬到Docker上?”,为什么我一早要加个问好来着?重要的还在于我们应该正确的认识docker,这只是个进程隔离的工具,其真正的运行基础核心其实在WSL的子系统上,我们所谓的镜像对docker来说,只是一些文件,如果在核心上能转起来就转起来了,如果支持不到位,分分钟撂挑子也是说来就来的。所以,用好Docker关键还在于认识Docker。