CSS相关知识【黑马程序员前端】
文章目录
- 一、CSS 的外部引入方式
- 二、 基础选择器
-
- 2.1 标签选择器
- 2.2 类选择器
- 2.3 id 选择器
- 2.4 通配符选择器
- 三、字体样式
-
- 3.1 字体大小(font-size)
- 3.2 字体粗细(font-weight)
- 3.3 字体样式(font-style)
- 3.4 字体系列(font-family)
- 3.5 字体font相关属性的连写
- 3.6 字体颜色(color)
- 四、文本样式
-
- 4.1 文本缩进
- 4.2 文本水平对齐方式
- 4.3 水平居中方法总结 text-align : center
- 4.4 文本修饰
- 五、复合选择器
-
- 5.1 后代选择器
- 5.2 子代选择器
- 5.3 并集选择器
- 5.4 交集选择器
- 5.5 hover 伪类选择器
- 5.6 Emmet 语法
- 六、背景相关属性
-
- 6.1 背景颜色
- 6.2 背景图片
- 6.3 背景平铺
- 6.4 背景位置
- 6.5 背景相关属性的连写形式
- 七、元素显示模式
-
- 7.1 块级元素
- 7.2 行内元素
- 7.3 行内块元素
- 7.4 元素显示模式转换
- 7.5 居中方法总结
- 八、CSS 特性
-
- 8.1 继承性
- 8.2 层叠性
- 8.3 优先级
- 九、盒子模型
-
- 9.1 内容的宽度和高度
- 9.2 盒子边框
- 9.3 盒子边框连写形式
- 9.4 盒子内边距
- 9.5 CSS3 盒模型(自动内减)
- 9.6 盒子外边距
- 9.7 清除默认内外边距
- 9.8 外边距折叠现象 – ① 合并现象
- 9.9 外边距折叠现象 – ② 塌陷现象
- 9.10 行内元素的margin和padding无效情况
- 十、结构伪类选择器
- 十一、伪元素
- 十二、浮动
- 十三、清除浮动
-
- 13.1 浮动的影响
- 13.2 清除浮动的方法 — ① 直接设置父元素高度
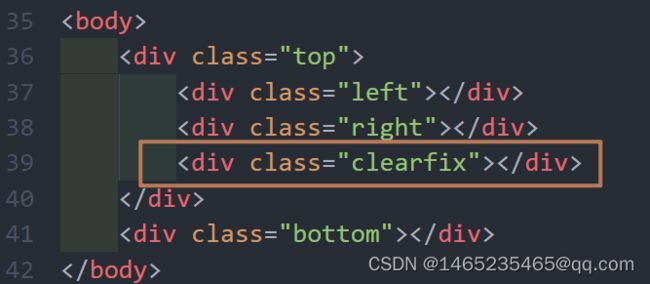
- 13.3 清除浮动的方法 — ② 额外标签法
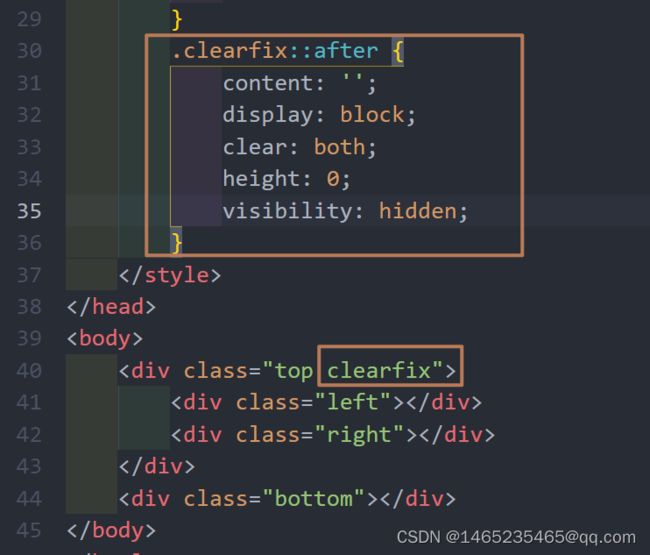
- 13.4 清除浮动的方法 — ③ 单伪元素清除法
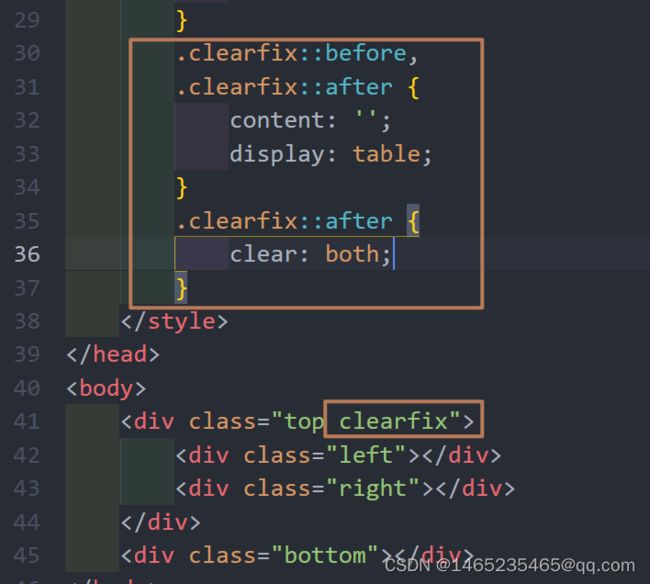
- 13.5 清除浮动的方法 — ④ 双伪元素清除法
- 13.6 **清除浮动的方法 — ⑤ 给父元素设置overflow : hidden**
- 十四、定位
-
- 14.1 静态定位
- 14.2 相对定位
- 14.3 绝对定位
- 14.4 子绝父相水平垂直都居中
- 14.5 固定定位
- 14.6 元素层级问题
- 14.7 更改定位元素的层级
- 十五、装饰
-
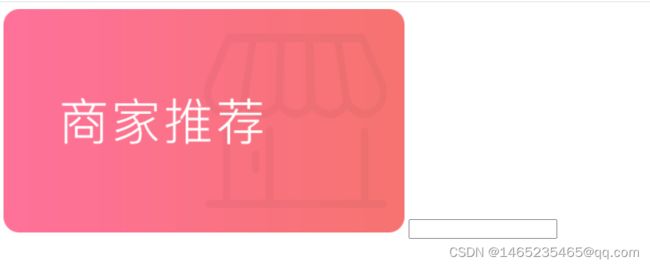
- 15.1 垂直对齐方式
- 15.2 光标类型
- 15.3 边框圆角
- 15.4 overflow 溢出部分显示效果
- 15.5 元素本身隐藏
一、CSS 的外部引入方式
<link rel="stylesheet" href="">
二、 基础选择器
2.1 标签选择器
标签名 { css属性名: 属性值; }
body {
	background-color: skyblue;
}
2.2 类选择器
.类名 { css属性名: 属性值; }
.box {
    width: 200px;
    height: 200px;
}
2.3 id 选择器
#id属性值 { css属性名: 属性值; }
#box {
    width: 200px;
    height: 200px;
}
2.4 通配符选择器
* { css属性名: 属性值; }
* {
    margin: 0;
    padding: 0;
}
三、字体样式
3.1 字体大小(font-size)
font-size: 16px;
注意点:
谷歌浏览器默认文字大小是16px
单位需要设置,否则无效
3.2 字体粗细(font-weight)
font-weight: bold;
取值:
| 效果 | 关键字 |
|---|---|
| 正常 | normal |
| 加粗 | bold |
| 正常 | 400 |
| 加粗 | 700 |
3.3 字体样式(font-style)
font-style: italic;
| 效果 | 取值 |
|---|---|
| 正常(默认值) | normal |
| 倾斜 | italic |
3.4 字体系列(font-family)
font-family: "Helvetica Neue",Helvetica,Arial,"Microsoft Yahei","Hiragino Sans GB","Heiti SC","WenQuanYiMicro Hei",sans-serif;
| 系统 | 默认字体 |
|---|---|
| Windows | 微软雅黑 |
| macOS | 苹方 |
3.5 字体font相关属性的连写
font: style weight size/line-height family;
3.6 字体颜色(color)
color: red;
color: #ff0000;
color: rgb(255, 0, 0);
四、文本样式
4.1 文本缩进
text-indent: 2em;
取值:
- 数字 + px
- 数字 + em(推荐:1em = 当前标签的 font-size 的大小)
4.2 文本水平对齐方式
text-align: center;
- 取值:
| 属性值 | 效果 |
|---|---|
| left | 左对齐 |
| center | 居中对齐 |
| right | 右对齐 |
4.3 水平居中方法总结 text-align : center
-
text-align : center 能让哪些元素水平居中?
-
文本
-
span标签、a标签
-
input标签、img标签
-
-
注意点:
- 如果需要让以上元素水平居中, text-align : center 需要给以上元素的 父元素 设置
4.4 文本修饰
text-decoration: none;
- 取值
| 属性值 | 效果 |
|---|---|
| underline | 下划线(常用) |
| line-through | 删除线(不常用) |
| overline | 上划线(几乎不用) |
| none | 无装饰线(常用) |
注意:
开发中会使用
text-decoration: none;清除a标签默认的下划线
五、复合选择器
5.1 后代选择器
选择器1 选择器2 { css }
5.2 子代选择器
选择器1 > 选择器2 { css }
5.3 并集选择器
选择器1, 选择器2 { css }
- 作用:同时选择多组标签,设置相同的样式
5.4 交集选择器
选择器1选择器2 { css }
- 选中页面中 同时满足 多个选择器的标签
5.5 hover 伪类选择器
// 鼠标悬停在元素上的状态
选择器:hover { css }
5.6 Emmet 语法
六、背景相关属性
6.1 背景颜色
background-color: #000;
background-color: black;
background-color: rgb(0,0,0);
background-color: rgb(0,0,0,0.5);
6.2 背景图片
background-image: url('图片的路径');
注意点:
背景图片中url中可以省略引号
背景图片默认是在水平和垂直方向平铺的
背景图片仅仅是指给盒子起到装饰效果,类似于背景颜色,是不能撑开盒子的
6.3 背景平铺
background-repeat: no-repeat;
- 属性值:
| 取值 | 效果 |
|---|---|
| repeat | (默认值) 水平和垂直方向都平铺 |
| no-repeat | 不平铺 |
| repeat-x | 沿着水平(x轴)平铺 |
| repeat-y | 沿着垂直(y轴)平铺 |
6.4 背景位置
background-position: 0 0;
-
属性值:
background-position: 水平方向位置 垂直方向位置; -
属性值:方位名词
-
属性值:数字 + px (坐标)
| 分类 | 方向 | 属性值 |
|---|---|---|
| 方位名词 | 水平方向 | left |
| 方位名词 | 水平方向 | center |
| 方位名词 | 水平方向 | right |
| 方位名词 | 垂直方向 | top |
| 方位名词 | 垂直方向 | center |
| 方位名词 | 垂直方向 | bottom |
| 数字 + px | x轴 | 水平向右 |
| 数字 + px | y轴 | 垂直向上 |
注意点:
方位名词取值和坐标取值可以混使用,第一个取值表示水平,第二个取值表示垂直
6.5 背景相关属性的连写形式
background: color image repeat position;
七、元素显示模式
7.1 块级元素
div、p、h系列、ul、li、dl、dt、dd、form、header、nav、footer……
显示特点:
独占一行(一行只能显示一个)
宽度默认是父元素的宽度,高度默认由内容撑开
可以设置宽高
7.2 行内元素
a、span 、b、u、i、s、strong、ins、em、del……
显示特点:
一行可以显示多个
宽度和高度默认由内容撑开
不可以设置宽高
7.3 行内块元素
input、textarea、button、select……
特殊情况:img标签有行内块元素特点,但是Chrome调试工具中显示结果是inline
显示特点:
一行可以显示多个
可以设置宽高
7.4 元素显示模式转换
| 属性 | 效果 | 使用频率 |
|---|---|---|
display: block |
转换成块级元素 | 较多 |
display: inline-block |
转换成行内块元素 | 较多 |
display: inline |
转换成行内元素 | 极少 |
7.5 居中方法总结
- 水平居中
text-align: center;
适用:
- 文本
- 行内元素。如:span、a
- 行内块元素。如:input、img
注意点:如果需要让以上元素水平居中,此时直接在以上元素的父元素中设置即可。
margin: 0 auto;
适用:
- 块级元素
注意点:直接给当前元素设置即可。
- 垂直居中
line-height 的值 (等于) 盒子的高度, 即 line-height: 盒子的高度;
适用:单行文本。
八、CSS 特性
8.1 继承性
子元素有默认继承父元素样式的特点
8.2 层叠性
1. 给同一个标签设置不同的样式 → 此时样式会层叠叠加 → 会共同作用在标签上
2. 给同一个标签设置相同的样式 → 此时样式会层叠覆盖 → 最终写在最后的样式会生效
8.3 优先级
继承 < 通配符选择器 < 标签选择器 < 类选择器 < id选择器 < 行内样式 < !important
九、盒子模型
9.1 内容的宽度和高度
width: 200px;
height: 200px;
9.2 盒子边框
| 作用 | 属性名 | 属性值 |
|---|---|---|
| 边框粗细 | border-width | 数字 + px |
| 边框样式 | border-style | 实线 solid、虚线 dashed、点线 dotted |
| 边框颜色 | border-color | 颜色取值 |
9.3 盒子边框连写形式
border: 1px solid red;
9.4 盒子内边距
padding-top: 10px;
padding-right: 20px;
padding-bottom: 30px;
padding-left: 40px;
padding: 10px;
padding: 10px 20px;
padding: 10px 20px 30px;
padding: 10px 20px 30px 40px;
| 取值 | 示例 | 含义 |
|---|---|---|
| 一个值 | padding: 10px; |
上右下左都设置为10px |
| 两个值 | padding: 10px 20px; |
上下设置为10px、左右设置为20px |
| 三个值 | padding: 10px 20px 30px; |
上设置为10px、左右设置为20px、下设置为30px |
| 四个值 | padding: 10px 20px 30px 40px; |
上设置为10px、右设置为20px、下设置为30px、左设置为40px |
9.5 CSS3 盒模型(自动内减)
box-sizing: border-box;
优点:浏览器会自动计算多余大小,自动在内容中减去。
9.6 盒子外边距
margin-top: 10px;
margin-right: 20px;
margin-bottom: 30px
margin-left: 40px;
margin: 10px;
margin: 10px 20px;
margin: 10px 20px 30px;
margin: 10px 20px 30px 40px;
| 取值 | 示例 | 含义 |
|---|---|---|
| 一个值 | margin: 10px; |
上右下左都设置为10px |
| 两个值 | margin: 10px 20px; |
上下设置为10px、左右设置为20px |
| 三个值 | margin: 10px 20px 30px; |
上设置为10px、左右设置为20px、下设置为30px |
| 四个值 | margin: 10px 20px 30px 40px; |
上设置为10px、右设置为20px、下设置为30px、左设置为40px |
9.7 清除默认内外边距
* {
    margin: 0;
    padding: 0;
}
9.8 外边距折叠现象 – ① 合并现象
-
场景:垂直布局 的 块级元素,上下的margin会合并
-
结果:最终两者距离为margin的最大值
-
解决方法:避免就好
- 只给其中一个盒子设置margin即可
9.9 外边距折叠现象 – ② 塌陷现象
-
场景:互相嵌套 的 块级元素,子元素的 margin-top 会作用在父元素上
-
结果:导致父元素一起往下移动
-
解决方法:
-
给父元素设置border-top 或者 padding-top(分隔父子元素的margin-top)
-
给父元素设置overflow:hidden
-
转换成行内块元素
-
设置浮动
9.10 行内元素的margin和padding无效情况
-
场景:给行内元素设置margin和padding时
-
结果:
-
水平方向的margin和padding布局中有效!
-
垂直方向的margin和padding布局中无效!
十、结构伪类选择器
| 选择器 | 说明 |
|---|---|
E:first-child {} |
匹配父元素中第一个子元素,并且是E元素 |
E:last-child {} |
匹配父元素中最后一个子元素,并且是E元素 |
E:nth-child(n) {} |
匹配父元素中第n个子元素,并且是E元素 |
E:nth-last-child(n) {} |
匹配父元素中倒数第n个子元素,并且是E元素 |
n的注意点:
- n为:0、1、2、3、4、5、6、……
- 通过n可以组成常见公式
功能 公式 偶数 2n、even奇数 2n+1、2n-1、odd找到前5个 -n+5找到从第5个往后 n+5
十一、伪元素
-
伪元素:一般页面中的非主体内容可以使用伪元素
-
区别:
-
元素:HTML 设置的标签
-
伪元素:由 CSS 模拟出的标签效果
- 种类:
| 伪元素 | 作用 |
|---|---|
::before |
在父元素内容的最前添加一个伪元素 |
::after |
在父元素内容的最后添加一个伪元素 |
注意点:
- 必须设置content属性才能生效
- 伪元素默认是行内元素
DOCTYPE html>
<html lang="en">
<head>
    <meta charset="UTF-8">
    <meta http-equiv="X-UA-Compatible" content="IE=edge">
    <meta name="viewport" content="width=device-width, initial-scale=1.0">
    <title>Documenttitle>
    <style>
        .father {
            width: 300px;
            height: 300px;
            background-color: pink;
        }

        .father::before {
            /* 内容 */
            /* content属性必须添加, 否则伪元素不生效 */
            // content: '老鼠';
			content: '';
            color: white;
            width: 100px;
            height: 100px;
            background-color: blue;

            /* 默认是行内元素, 宽高不生效 */
            display: block;
        }

        .father::after {
            content: '大米';
        }
    style>
head>
<body>


    <div class="father">爱div>


body>
html>
十二、浮动
float: left;
float: right
- 属性值:
| 属性名 | 效果 |
|---|---|
left |
左浮动 |
right |
右浮动 |
十三、清除浮动
13.1 浮动的影响
DOCTYPE html>
<html lang="en">
<head>
    <meta charset="UTF-8">
    <meta http-equiv="X-UA-Compatible" content="IE=edge">
    <meta name="viewport" content="width=device-width, initial-scale=1.0">
    <title>Documenttitle>
    <style>
        .top {
            margin: 0 auto;
            width: 1000px;
            /* height: 300px; */
            background-color: pink;
        }
        .bottom {
            height: 100px;
            background-color: green;
        }
        .left {
            float: left;
            width: 200px;
            height: 300px;
            background-color: #ccc;
        }
        .right {
            float: right;
            width: 790px;
            height: 300px;
            background-color: skyblue;
        }
    style>
head>
<body>
    <div class="top">
        <div class="left">div>
        <div class="right">div>
    div>
    <div class="bottom">div>
body>
html>
13.2 清除浮动的方法 — ① 直接设置父元素高度
-
特点:
- 优点:简单粗暴,方便
- 缺点:有些布局中不能固定父元素高度。如:新闻列表、京东推荐模块
-
例如:
.top { height: 300px; }
DOCTYPE html>
<html lang="en">
<head>
    <meta charset="UTF-8">
    <meta http-equiv="X-UA-Compatible" content="IE=edge">
    <meta name="viewport" content="width=device-width, initial-scale=1.0">
    <title>Documenttitle>
    <style>
        .top {
            margin: 0 auto;
            width: 1000px;
            height: 300px;
            background-color: pink;
        }
        .bottom {
            height: 100px;
            background-color: green;
        }
        .left {
            float: left;
            width: 200px;
            height: 300px;
            background-color: #ccc;
        }
        .right {
            float: right;
            width: 790px;
            height: 300px;
            background-color: skyblue;
        }
    style>
head>
<body>
    <div class="top">
        <div class="left">div>
        <div class="right">div>
    div>
    <div class="bottom">div>
body>
html>
13.3 清除浮动的方法 — ② 额外标签法
- 操作:
- 在父元素内容的最后添加一个块级元素
- 给添加的块级元素设置
clear:both;
- 特点:
- 缺点:会在页面中添加额外的标签,会让页面的HTML结构变得复杂
- 例如:
DOCTYPE html>
<html lang="en">
<head>
    <meta charset="UTF-8">
    <meta http-equiv="X-UA-Compatible" content="IE=edge">
    <meta name="viewport" content="width=device-width, initial-scale=1.0">
    <title>Documenttitle>
    <style>
        .top {
            margin: 0 auto;
            width: 1000px;
            background-color: pink;
        }
        .bottom {
            height: 100px;
            background-color: green;
        }
        .left {
            float: left;
            width: 200px;
            height: 300px;
            background-color: #ccc;
        }
        .right {
            float: right;
            width: 790px;
            height: 300px;
            background-color: skyblue;
        }
        .clearfix {
            clear: both;
        }
    style>
head>
<body>
    <div class="top">
        <div class="left">div>
        <div class="right">div>
        <div class="clearfix">div>
    div>
    <div class="bottom">div>
body>
html>
13.4 清除浮动的方法 — ③ 单伪元素清除法
- 操作:用伪元素替代了额外标签
① :基本写法
.clearfix::after {
    content: '';
    display: block;
    clear: both;
}
② :补充写法
.clearfix::after {
    content: '';
    display: block;
    clear: both;
    /* 补充代码:在网页中看不到伪元素 */
    height: 0;
    visibility: hidden;
}
- 特点:
- 优点:项目中使用,直接给标签加类即可清楚浮动
DOCTYPE html>
<html lang="en">
<head>
    <meta charset="UTF-8">
    <meta http-equiv="X-UA-Compatible" content="IE=edge">
    <meta name="viewport" content="width=device-width, initial-scale=1.0">
    <title>Documenttitle>
    <style>
        .top {
            margin: 0 auto;
            width: 1000px;
            background-color: pink;
        }
        .bottom {
            height: 100px;
            background-color: green;
        }
        .left {
            float: left;
            width: 200px;
            height: 300px;
            background-color: #ccc;
        }
        .right {
            float: right;
            width: 790px;
            height: 300px;
            background-color: skyblue;
        }
        .clearfix::after {
            content: '';
            display: block;
            clear: both;
            height: 0;
            visibility: hidden;
        }
    style>
head>
<body>
    <div class="top clearfix">
        <div class="left">div>
        <div class="right">div>
    div>
    <div class="bottom">div>
body>
html>
13.5 清除浮动的方法 — ④ 双伪元素清除法
- 操作:
.clearfix::before,
.clearfix::after {
    content: '';
    display: table;
}
.clearfix::after {
    clear: both;
}
- 特点:
- 优点:项目中使用,直接给标签加类即可清除浮动
DOCTYPE html>
<html lang="en">
<head>
    <meta charset="UTF-8">
    <meta http-equiv="X-UA-Compatible" content="IE=edge">
    <meta name="viewport" content="width=device-width, initial-scale=1.0">
    <title>Documenttitle>
    <style>
        .top {
            margin: 0 auto;
            width: 1000px;
            background-color: pink;
        }
        .bottom {
            height: 100px;
            background-color: green;
        }
        .left {
            float: left;
            width: 200px;
            height: 300px;
            background-color: #ccc;
        }
        .right {
            float: right;
            width: 790px;
            height: 300px;
            background-color: skyblue;
        }
        .clearfix::before,
        .clearfix::after {
            content: '';
            display: table;
        }
        .clearfix::after {
            clear: both;
        }
    style>
head>
<body>
    <div class="top clearfix">
        <div class="left">div>
        <div class="right">div>
    div>
    <div class="bottom">div>
body>
html>
13.6 清除浮动的方法 — ⑤ 给父元素设置overflow : hidden
- 操作:
- 直接给父元素设置
overflow : hidden;
- 直接给父元素设置
- 特点:
- 优点:方便
DOCTYPE html>
<html lang="en">
<head>
    <meta charset="UTF-8">
    <meta http-equiv="X-UA-Compatible" content="IE=edge">
    <meta name="viewport" content="width=device-width, initial-scale=1.0">
    <title>Documenttitle>
    <style>
        .top {
            margin: 0 auto;
            width: 1000px;
            background-color: pink;
            overflow: hidden;
        }
        .bottom {
            height: 100px;
            background-color: green;
        }
        .left {
            float: left;
            width: 200px;
            height: 300px;
            background-color: #ccc;
        }
        .right {
            float: right;
            width: 790px;
            height: 300px;
            background-color: skyblue;
        }
    style>
head>
<body>
    <div class="top">
        <div class="left">div>
        <div class="right">div>
    div>
    <div class="bottom">div>
body>
html>
十四、定位
- 属性值:
position
| 定位方式 | 属性值 |
|---|---|
| 静态定位 | static |
| 相对定位 | relative |
| 绝对定位 | absolute |
| 固定定位 | fixed |
- 设置偏移量
| 方向 | 属性名 | 属性值 | 含义 |
|---|---|---|---|
| 水平 | left | 数字 + px | 距离左边的距离 |
| 水平 | right | 数字 + px | 距离右边的距离 |
| 垂直 | top | 数字 + px | 距离上边的距离 |
| 垂直 | bottom | 数字 + px | 距离下边的距离 |
14.1 静态定位
静态定位是默认值,就是之前认识的标准流。
position: static;
14.2 相对定位
- 相对于自己原来位置进行移动
- 没有脱标
position: relative;
14.3 绝对定位
- 默认相对于浏览器可视区域进行移动
- 脱标
position: absolute;
14.4 子绝父相水平垂直都居中
-
子绝父相
-
让子盒子往右走大盒子一半
left:50%;
-
让子盒子往下走大盒子一半
top:50%; -
让子盒子往左+往上走自己的一半+ +
transform:translate(-50%,-50%);
DOCTYPE html>
<html lang="en">
<head>
    <meta charset="UTF-8">
    <meta http-equiv="X-UA-Compatible" content="IE=edge">
    <meta name="viewport" content="width=device-width, initial-scale=1.0">
    <title>Documenttitle>
    <style>
        .box {
            /* 1. 绝对定位的盒子不能使用左右margin auto居中 */
            position: absolute;
            /* margin: 0 auto; */
            /* left: 50%, 整个盒子移动到浏览器中间偏右的位置 */
            left: 50%;
            /* 把盒子向左侧移动: 自己宽度的一半 */
            /* margin-left: -150px; */

            top: 50%;
            /* margin-top: -150px; */

            /* 位移: 自己宽度高度的一半 */
            transform: translate(-50%, -50%);

            width: 400px;
            height: 300px;
            background-color: pink;
        }
    style>
head>
<body>
    <div class="box">div>
body>
html>
14.5 固定定位
-
相对于浏览器进行定位移动
-
代码:
position: fixed; -
相对于浏览器可视区域进行移动
-
已经脱标
14.6 元素层级问题
-
不同布局方式元素的层级关系:
- 标准流 < 浮动 < 定位
-
不同定位之间的层级关系:
- 相对、绝对、固定默认层级相同
- 此时HTML中写在下面的元素层级更高,会覆盖上面的元素
14.7 更改定位元素的层级
-
场景:改变定位元素的层级
-
属性名:
z-index -
属性值:数字
- 数字越大,层级越高
十五、装饰
15.1 垂直对齐方式
- 浏览器文字类型元素排版中存在用于对齐的基线(baseline)
- 浏览器把行内和行内块当做文字处理,默认基线对齐
| 属性值 | 效果 |
|---|---|
| baseline | 默认,基线对齐 |
| top | 顶部对齐 |
| middle | 中部对齐 |
| bottom | 底部对齐 |
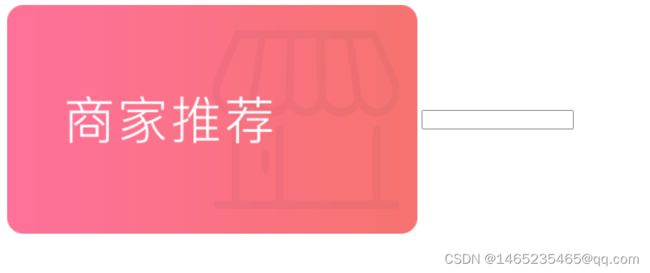
- 案例1:两个标签高度不没有对齐
DOCTYPE html>
<html lang="zh-CN">
	<head>
		<meta charset="UTF-8" />
		<meta http-equiv="X-UA-Compatible" content="IE=edge" />
		<meta name="viewport" content="width=device-width, initial-scale=1.0" />
		<title>Documenttitle>
		<style>
			input {
				height: 50px;
			}
		style>
	head>
	<body>
		<input type="text" />
		<input type="button" value="搜索" />
	body>
html>
在标签中加入box-sizing: border-box;和vertical-align: middle; 即:
input {
    height: 50px;
    box-sizing: border-box;
    vertical-align: middle;
}
- 案例2:
标签和的高度不一样
DOCTYPE html>
<html lang="zh-CN">
	<head>
		<meta charset="UTF-8" />
		<meta http-equiv="X-UA-Compatible" content="IE=edge" />
		<meta name="viewport" content="width=device-width, initial-scale=1.0" />
		<title>Documenttitle>
	head>
	<body>
		<img src="../微信小程序/mp-3/images/link-01.png" />
		<input type="text" />
	body>
html>
找到大盒子,即标签,让其添加
vertical-align: middle; 即可让居中:
img {
    vertical-align: middle;
}
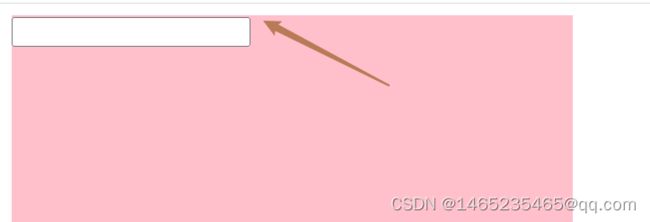
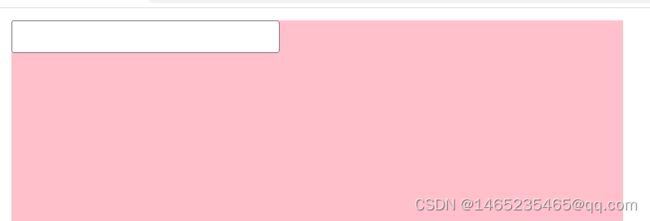
- 案例3:标签并没有跟底部的的上面重合,依然有间隙
DOCTYPE html>
<html lang="zh-CN">
	<head>
		<meta charset="UTF-8" />
		<meta http-equiv="X-UA-Compatible" content="IE=edge" />
		<meta name="viewport" content="width=device-width, initial-scale=1.0" />
		<title>Documenttitle>
		<style>
			.father {
				width: 400px;
				height: 400px;
				background-color: pink;
			}
		style>
	head>
	<body>
		<div class="father">
			<input type="text" />
		div>
	body>
html>
在 标签中加入
vertical-align: top;即可使 input标签与 div的顶部重合,即input { vertical-align: top; }- 案例4:图片和div的底部并没有重合
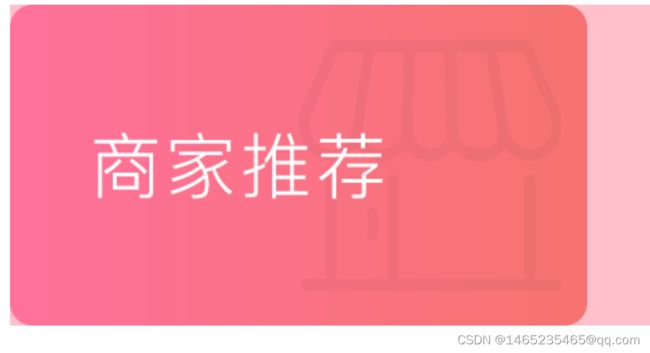
DOCTYPE html>
<html lang="zh-CN">
	<head>
		<meta charset="UTF-8" />
		<meta http-equiv="X-UA-Compatible" content="IE=edge" />
		<meta name="viewport" content="width=device-width, initial-scale=1.0" />
		<title>Documenttitle>
		<style>
			.father {
				background-color: pink;
			}
		style>
	head>
	<body>
		<div class="father">
			<img src="../微信小程序/mp-3/images/link-01.png" />
		div>
	body>
html>
给 input 标签添加
vertical-align: bottom;或者添加display: block;,即可img { /* display: block; */ vertical-align: bottom; }- 案例5:图片没有在 div 中居中显示
DOCTYPE html>
<html lang="zh-CN">
	<head>
		<meta charset="UTF-8" />
		<meta http-equiv="X-UA-Compatible" content="IE=edge" />
		<meta name="viewport" content="width=device-width, initial-scale=1.0" />
		<title>Documenttitle>
		<style>
			.father {
				width: 600px;
				height: 600px;
				background-color: pink;
				line-height: 600px;
			}
		style>
	head>
	<body>
		<div class="father">
			<img src="../微信小程序/mp-3/images/link-01.png" alt="" />
		div>
	body>
html>
在 img 中添加
vertical-align: middle;样式即可img { vertical-align: middle; }15.2 光标类型
-
场景:设置鼠标光标在元素上时显示的样式
-
属性名:cursor
-
常见属性值:
属性值 效果 default 默认值,通常是箭头 pointer 小手效果,提示用户可以点击 text 工字型,提示用户可以选择文字 move 十字光标,提示用户可以移动 15.3 边框圆角
-
场景:让盒子四个角变得圆润,增加页面细节,提升用户体验
-
属性名:
border-radius -
常见取值:
数字 + px、百分比 -
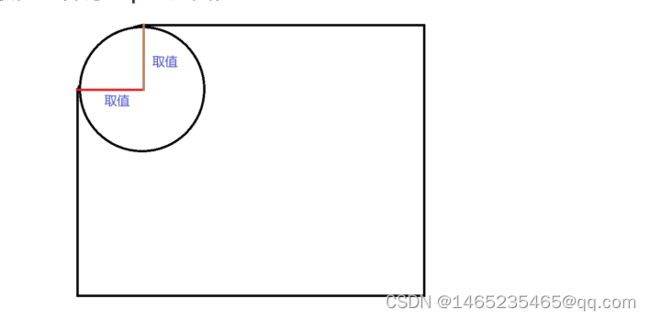
原理:
- 赋值规则:从左上角开始赋值,然后顺时针赋值,没有赋值的看对角!
DOCTYPE html> <html lang="zh-CN"> <head> <meta charset="UTF-8" /> <meta http-equiv="X-UA-Compatible" content="IE=edge" /> <meta name="viewport" content="width=device-width, initial-scale=1.0" /> <title>Documenttitle> <style> div { width: 200px; height: 200px; background-color: pink; margin: 50px auto; /* 一个值:表示4个角是相同的 */ /* border-radius: 20px; */ /* 4个值:左上 右上 右下 左下 -- 从左上顺时针转一圈 */ /* border-radius: 10px 20px 30px 40px; */ /* 3个值:左上 (右上和左下) 右下 */ /* border-radius: 10px 40px 80px; */ /* 2个值:(左上/右下) (右上/左下) */ border-radius: 10px 80px; } style> head> <body> <div>div> body> html>- 案例:圆角边框
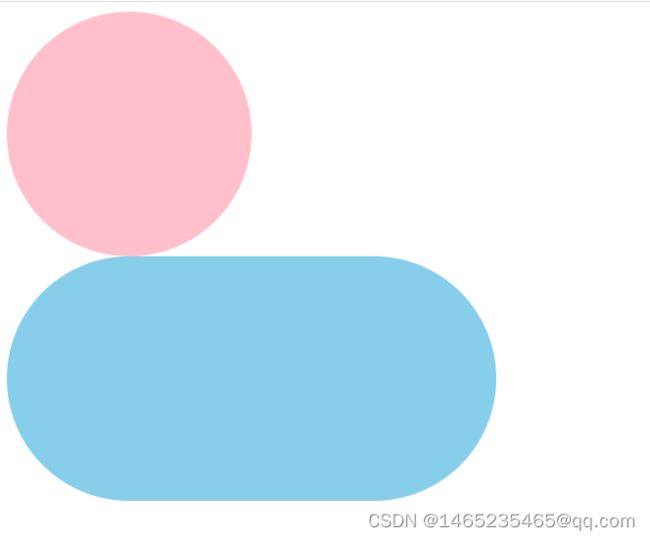
画一个正圆:
-
盒子必须是正方形
-
设置边框圆角为盒子宽高的一半 → border-radius:50%
胶囊按钮:
-
盒子要求是长方形
-
设置 → border-radius:盒子高度的一半
DOCTYPE html>
<html lang="zh-CN">
	<head>
		<meta charset="UTF-8" />
		<meta http-equiv="X-UA-Compatible" content="IE=edge" />
		<meta name="viewport" content="width=device-width, initial-scale=1.0" />
		<title>Documenttitle>
		<style>
			.one {
				width: 200px;
				height: 200px;
				background-color: pink;
				border-radius: 50%;
			}
			.two {
				height: 200px;
				width: 400px;
				background-color: skyblue;
				border-radius: 100px;
			}
		style>
	head>
	<body>
		<div class="one">div>
		<div class="two">div>
	body>
html>
15.4 overflow 溢出部分显示效果
-
溢出部分:指的是盒子 内容部分 所超出盒子范围的区域
-
场景:控制内容溢出部分的显示效果,如:显示、隐藏、滚动条……
-
属性名:
overflow -
常见属性值
属性值 效果 visible 默认值,溢出部分可见 hidden 溢出部分隐藏 scroll 无论是否溢出,都显示滚动条 auto 根据是否溢出,自动显示或隐藏滚动条 15.5 元素本身隐藏
-
场景:让某元素本身在屏幕中不可见。如:鼠标:hover之后元素隐藏
-
常见属性:
-
visibility: hidden; -
display: none;
- 区别:
-
visibility: hidden;隐藏元素本身,并且在网页中 占位置 -
display: none;隐藏元素本身,并且在网页中 不占位置
-
注意点:
开发中经常会通过 display属性完成元素的显示隐藏切换
display: none;(隐藏)、display: block;(显示)
本文参考及图片来源:最新前端开发入门教程,web前端零基础html5 +css3+前端项目视频教程


