大模型开发(四):OpenAI API调用方法
全文共8500余字,预计阅读时间约17~30分钟 | 满满干货(附代码示例),建议收藏!
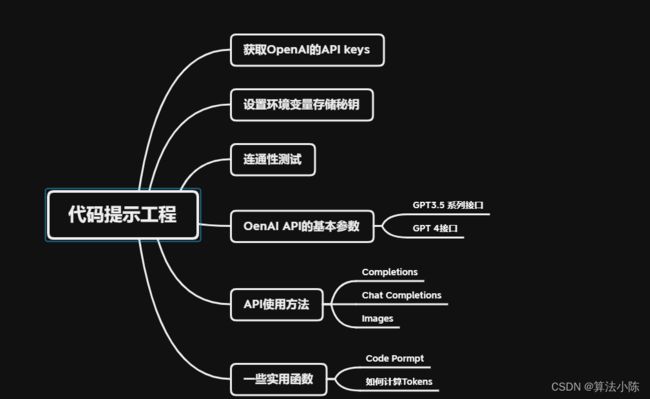
一、获取OpenAI的API keys
前提:拥有OpenAI账户,并可以魔法上网
如果涉及账户或魔法上网问题,请看本文末尾的内容,自行配置!
具体的流程如下:
OpenAI 官网
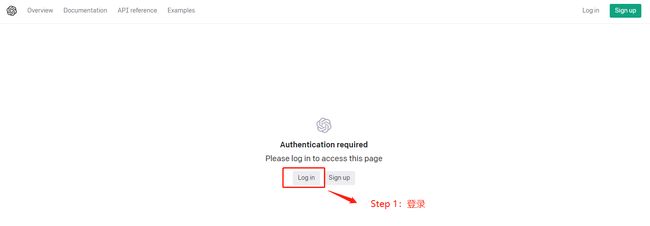
- 登录OpenAI 账户。 使用电子邮件地址和密码登录到 OpenAI 账户。
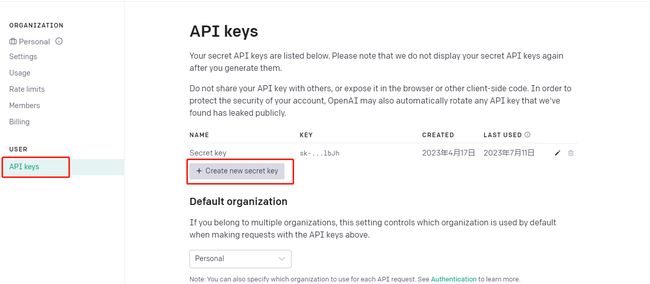
- 创建 API Key。 选择左侧菜单栏的“API Keys”,然后单击“+ Create new API key”按钮.
- 在弹出的窗口中,为该 API Key 创建一个名称
然后复制保存完成的key编码,注意:要保留好,这个key只在创建的时候可以复制。
二、设置环境变量存储秘钥
将API密钥存储在环境变量中,而不是直接写在代码中,可以降低泄露密钥的风险。这样,即使有人不小心看到了你的代码,他们也无法获得你的API密钥。毕竟这东西是花钱的,让别人盗用肯定是有风险的!
同时,如果在测试开发中,这样做也易于管理,如果有多个项目都使用了OpenAIAPI,只需修改环境变量,所有项目都能自动使用新的密钥,省时省力!
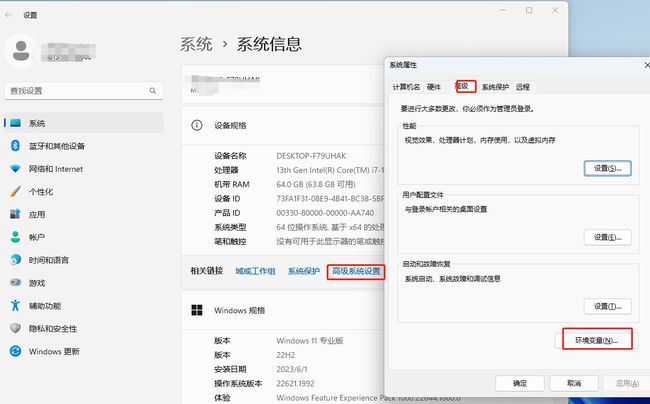
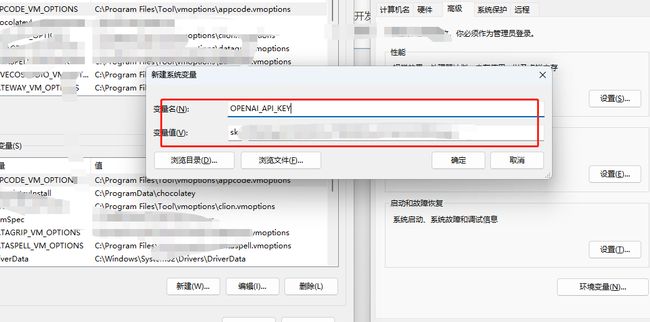
新建系统变量:
变量名:OPENAI_API_KEY
变量值:OpenAI API秘钥(上一步复制的那个key)
三、连通性测试
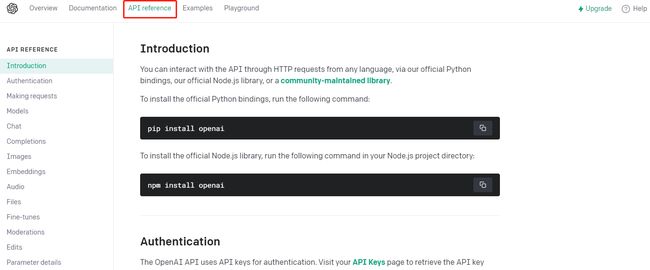
官网文档链接在这里
Step 1: 安装openai库
!pip install openai
Step 2:获取系统变量中的秘钥
import openai
import os

openai.api_key = os.getenv("OPENAI_API_KEY")
Step 3: 测试连通性
# 创建一个 GPT-3 请求
completion = openai.ChatCompletion.create(
  model="gpt-3.5-turbo-16k",
  messages=[
    {"role": "user", "content": "Hello, Nice to meet you"}
  ]
)

print(completion.choices[0].message)
测试成功!
四、OenAI API的基本参数
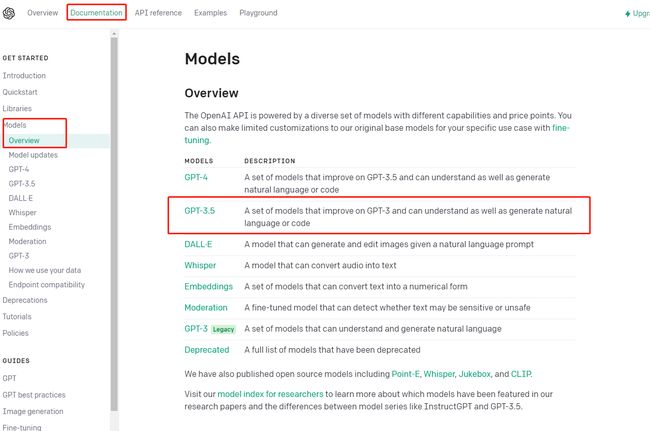
4.1 GPT3.5 系列接口
GPT-3.5系列是一系列在2021年第四季度之前的文本和代码混合训练的模型。
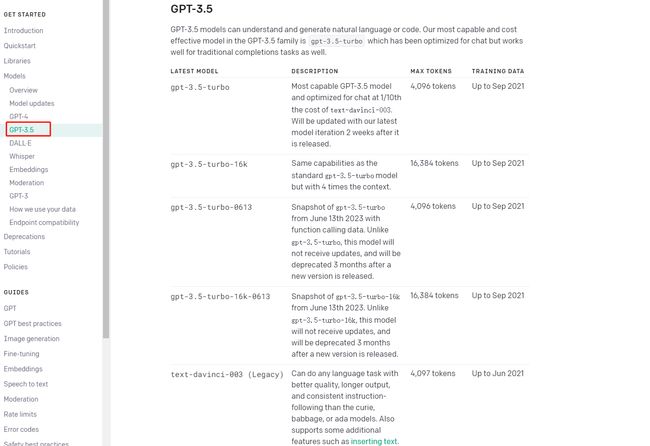
以下是GPT-3.5系列中的几个模型
-
code-davinci-oo2是一个基础模型,适用于纯代码补全任务。
-
text-davinci-002是基于code-davinci-002的lnstructGPT模型。
-
text-davinci-003是text-davinci-002的改进版。
-
gpt-3.5-turbo-0301是在text-davinci-003的基础上进行了改进,针对聊天应用进行了优化。
4.2 GPT 4接口
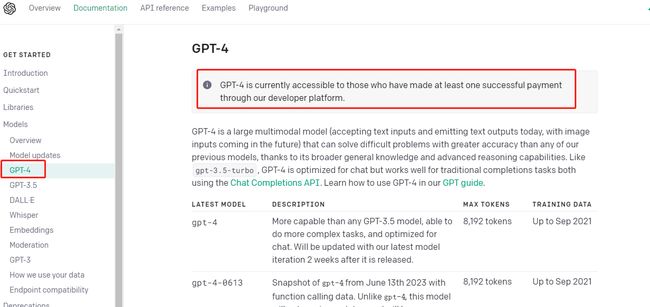
2023年7月7日,OpenAI在官网宣布,gpt-4 api全面开放使用。所有付费api用户都可直接访问8k上下文的gpt-4,无需任何等待。再也不用等申请了!
GPT-4是一个大型多模态模型(目前接受文本输入并生成文本输出,未来将支持图像输入),与gpt-3.5-turbo类似,GPT-4在聊天方面进行了优化,但在传统的完成任务中也能表现出色,都可以使用Chat Completions API。在我们的GPT指南中学习如何使用GPT-4。
以下是GPT-4系列中的几个模型
- gpt-4 比任何GPT-3.5模型更强大,能够执行更复杂的任务,并且针对聊天进行了优化。
- gpt-4-32k 与基础gpt-4模型具有相同的功能,但上下文长度增加了4倍。将随最新模型迭代进行更新。
五、API使用方法
5.1 Completions
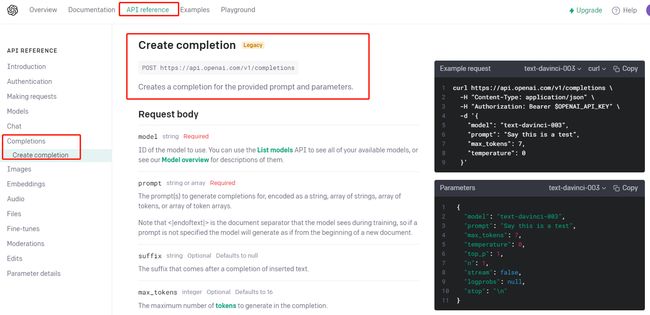
给定一个提示,模型将返回一个或多个预测的完成结果,并且还可以返回每个位置上备选标记的概率。
官方给的建议是使用的Chat Completions API
使用方式是:
openai.ChatCompletion.create()
官网看这里
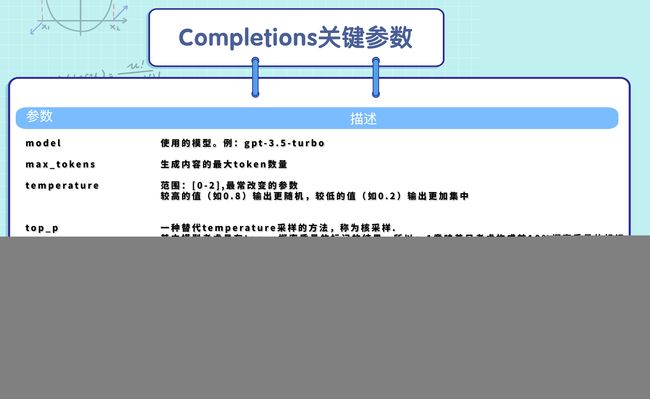
其重要及常用参数如下:
使用方法:
test_reponse = openai.Completion.create(
  model="text-davinci-003",
  prompt="Say this is a test",
  max_tokens=7,
  temperature=0
)
print(test_reponse)
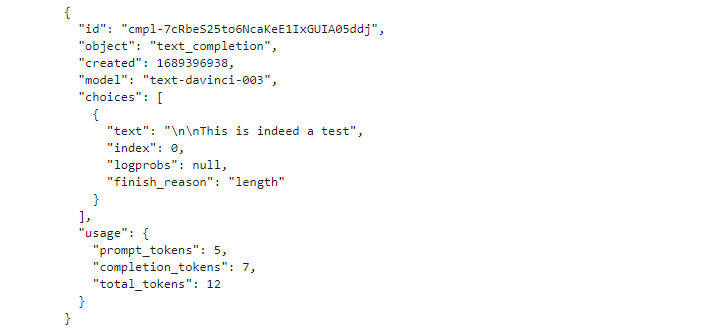
返回结果:
5.2 Chat Completions
Chat Completions是一种专门用于聊天补全的语言模型,可以接受消息列表作为输入,并返回模型生成的消息作为输出。类似于使用的ChatGPT对话,可以进行角色扮演,回答一系列问题,其参数如下:
代码实现:
completion = openai.ChatCompletion.create(
  model="gpt-3.5-turbo-16k-0613",
  messages=[
    {"role": "system", "content": "精通机器学习和自然语言处理的AI领域专家,具备20年相关经验"},

    {"role": "user", "content": "我是一个小白,我想入门AI领域,我需要学习哪些知识"}
  ]
)
print(completion.choices[0].message.content)
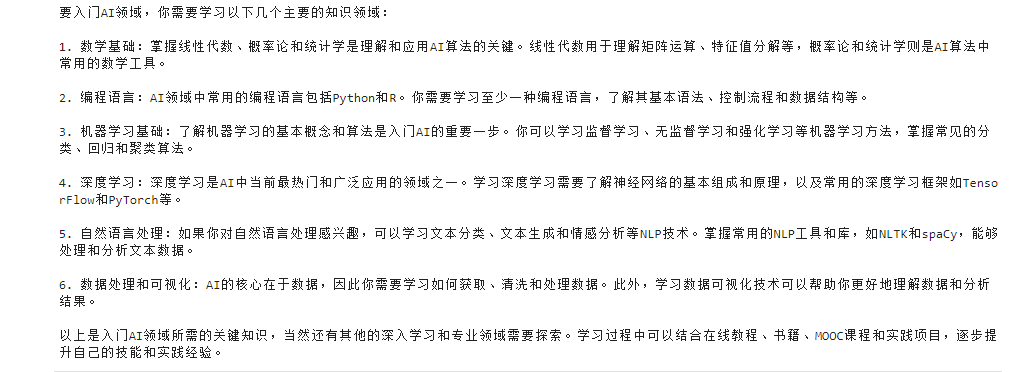
结果如下:
如果想进行多轮对话,可以把上一个的输出也传递给ChatGPT共同输入:
completion = openai.ChatCompletion.create(
  model="gpt-3.5-turbo-16k-0613",
  messages=[
    {"role": "system", "content": "精通机器学习和自然语言处理的AI领域专家,具备20年相关经验"},

    {"role": "user", "content": "我是一个小白,我想入门AI领域,我需要学习哪些知识"}
  ]
)
print(completion.choices[0].message)
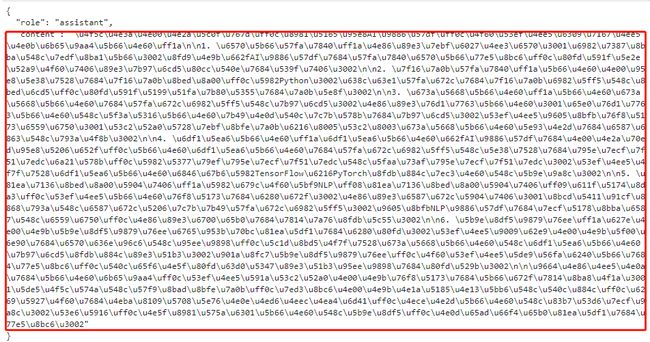
输出如下:
复制这个回答,和新对话一起送人ChatGPT新一轮的问答中,使其具备记忆上下文能力:
#加入上次对话的信息
completion = openai.ChatCompletion.create(
  model="gpt-3.5-turbo",
  messages=[
    {"role": "system", "content": "精通机器学习和自然语言处理的AI领域专家,具备20年相关经验"},

     {"role": "user", "content": "我是一个小白,我想入门AI领域,我需要学习哪些知识"},
     {"role": "assistant","content": "\u4f5c\u4e3a\u4e00\u4e2a\u5c0f\u767d\uff0c\u8981\u5165\u95e8AI\u9886\u57df\uff0c\u4f60\u53ef\u4ee5\u6309\u7167\u4ee5\u4e0b\u6b65\u9aa4\u5b66\u4e60\uff1a\n\n1. \u6570\u5b66\u57fa\u7840\uff1a\u4e86\u89e3\u7ebf\u6027\u4ee3\u6570\u3001\u6982\u7387\u8bba\u548c\u7edf\u8ba1\u5b66\u3002\u8fd9\u4e9b\u662fAI\u9886\u57df\u7684\u57fa\u7840\u6570\u5b66\u77e5\u8bc6\uff0c\u80fd\u591f\u5e2e\u52a9\u4f60\u7406\u89e3\u7b97\u6cd5\u80cc\u540e\u7684\u539f\u7406\u3002\n\n2. \u7f16\u7a0b\u57fa\u7840\uff1a\u5b66\u4e60\u4e00\u95e8\u5e38\u7528\u7684\u7f16\u7a0b\u8bed\u8a00\uff0c\u5982Python\u3002\u638c\u63e1\u57fa\u672c\u7684\u7f16\u7a0b\u6982\u5ff5\u548c\u8bed\u6cd5\uff0c\u80fd\u591f\u5199\u51fa\u7b80\u5355\u7684\u7a0b\u5e8f\u3002\n\n3. \u673a\u5668\u5b66\u4e60\uff1a\u5b66\u4e60\u673a\u5668\u5b66\u4e60\u7684\u57fa\u672c\u6982\u5ff5\u548c\u7b97\u6cd5\u3002\u4e86\u89e3\u76d1\u7763\u5b66\u4e60\u3001\u65e0\u76d1\u7763\u5b66\u4e60\u548c\u5f3a\u5316\u5b66\u4e60\u7b49\u4e0d\u540c\u7c7b\u578b\u7684\u7b97\u6cd5\u3002\u53ef\u4ee5\u9605\u8bfb\u76f8\u5173\u6559\u6750\u3001\u53c2\u52a0\u5728\u7ebf\u8bfe\u7a0b\u6216\u8005\u53c2\u8003\u673a\u5668\u5b66\u4e60\u5e93\u4e2d\u7684\u6587\u6863\u548c\u793a\u4f8b\u3002\n\n4. \u6df1\u5ea6\u5b66\u4e60\uff1a\u6df1\u5ea6\u5b66\u4e60\u662fAI\u9886\u57df\u7684\u4e00\u4e2a\u70ed\u95e8\u5206\u652f\uff0c\u5b66\u4e60\u6df1\u5ea6\u5b66\u4e60\u7684\u57fa\u672c\u6982\u5ff5\u548c\u5e38\u7528\u7684\u795e\u7ecf\u7f51\u7edc\u6a21\u578b\uff0c\u5982\u5377\u79ef\u795e\u7ecf\u7f51\u7edc\u548c\u5faa\u73af\u795e\u7ecf\u7f51\u7edc\u3002\u53ef\u4ee5\u4f7f\u7528\u6df1\u5ea6\u5b66\u4e60\u6846\u67b6\u5982TensorFlow\u6216PyTorch\u8fdb\u884c\u7ec3\u4e60\u548c\u5b9e\u9a8c\u3002\n\n5. \u81ea\u7136\u8bed\u8a00\u5904\u7406\uff1a\u5982\u679c\u4f60\u5bf9NLP\uff08\u81ea\u7136\u8bed\u8a00\u5904\u7406\uff09\u611f\u5174\u8da3\uff0c\u53ef\u4ee5\u5b66\u4e60\u76f8\u5173\u7684\u6280\u672f\u3002\u4e86\u89e3\u6587\u672c\u5904\u7406\u3001\u8bcd\u5411\u91cf\u8868\u793a\u548c\u6587\u672c\u5206\u7c7b\u7b49\u57fa\u672c\u6982\u5ff5\u3002\u9605\u8bfbNLP\u9886\u57df\u7684\u7ecf\u5178\u8bba\u6587\u548c\u6559\u6750\uff0c\u4e86\u89e3\u6700\u65b0\u7684\u7814\u7a76\u8fdb\u5c55\u3002\n\n6. \u5b9e\u8df5\u9879\u76ee\uff1a\u627e\u4e00\u4e9b\u5b9e\u8df5\u9879\u76ee\u6765\u953b\u70bc\u81ea\u5df1\u7684\u6280\u80fd\u3002\u53ef\u4ee5\u9009\u62e9\u4e00\u4e9b\u5f00\u6e90\u7684\u6570\u636e\u96c6\u548c\u95ee\u9898\uff0c\u5c1d\u8bd5\u4f7f\u7528\u673a\u5668\u5b66\u4e60\u548c\u6df1\u5ea6\u5b66\u4e60\u7b97\u6cd5\u8fdb\u884c\u89e3\u51b3\u3002\u901a\u8fc7\u5b9e\u8df5\u9879\u76ee\uff0c\u4f60\u53ef\u4ee5\u5de9\u56fa\u6240\u5b66\u7684\u77e5\u8bc6\uff0c\u540c\u65f6\u4e5f\u80fd\u63d0\u5347\u89e3\u51b3\u95ee\u9898\u7684\u80fd\u529b\u3002\n\n\u9664\u4e86\u4ee5\u4e0a\u7684\u5b66\u4e60\u6b65\u9aa4\uff0c\u53ef\u4ee5\u591a\u53c2\u52a0\u4e00\u4e9b\u76f8\u5173\u7684\u5b66\u672f\u7814\u8ba8\u4f1a\u3001\u5de5\u4f5c\u574a\u548c\u57f9\u8bad\u8bfe\u7a0b\uff0c\u7ed3\u8bc6\u4e00\u4e9b\u4e1a\u5185\u4e13\u5bb6\u548c\u540c\u884c\uff0c\u6269\u5927\u4f60\u7684\u4eba\u8109\u5708\u5e76\u4e0e\u4ed6\u4eec\u4ea4\u6d41\uff0c\u4ece\u4e2d\u5b66\u4e60\u548c\u83b7\u53d6\u7ecf\u9a8c\u3002\u53e6\u5916\uff0c\u4e5f\u8981\u575a\u6301\u5b66\u4e60\u548c\u5b9e\u8df5\uff0c\u4e0d\u65ad\u66f4\u65b0\u81ea\u5df1\u7684\u77e5\u8bc6\u3002"
     },
    {"role": "user", "content": "我想具体点了解机器学习方面的,你帮我详细的说明一下"}
  ]
)
print(completion.choices[0].message.content)
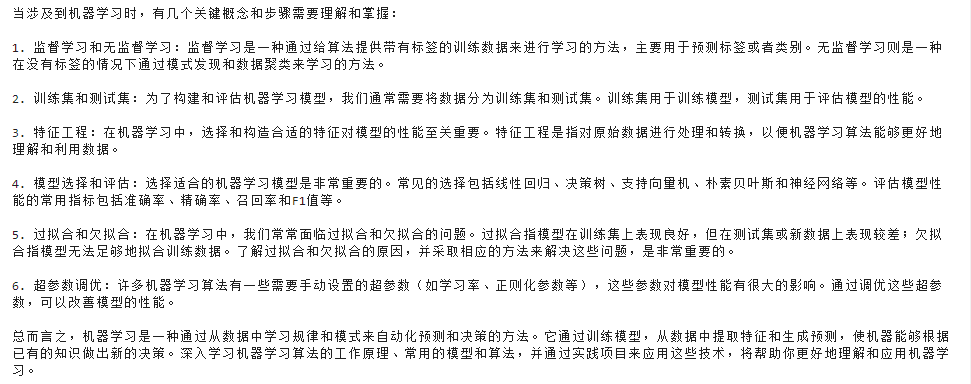
回复如下:
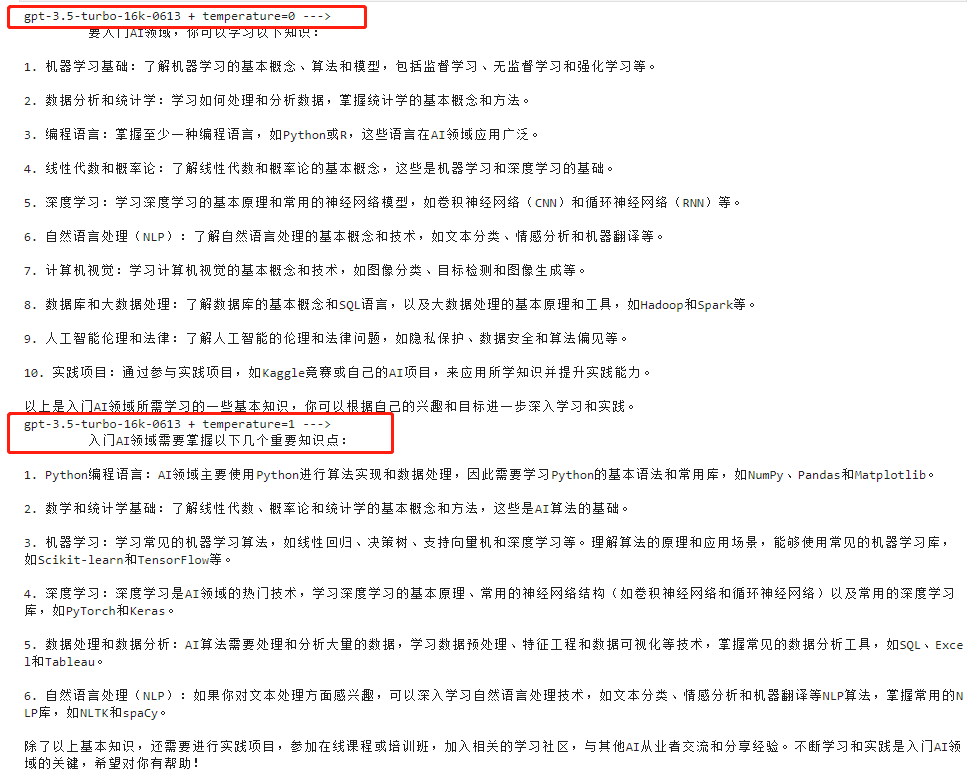
测试一下不同参数下 其效果如何,以temperature在取值为0和1两种不同的参数下,看下输出:
#不同参数的效果(temperature)
query="是一个小白,我想入门AI领域,我需要学习哪些知识"
completion_1=openai.ChatCompletion.create(
    model="gpt-3.5-turbo-16k-0613",
    messages=[
        {"role": "user", "content": query}
    ],
    temperature=0
)

completion_2=openai.ChatCompletion.create(
    model="gpt-3.5-turbo-16k-0613",
    messages=[
        {"role":"user","content": query}
    ],
    temperature=1
)

print("gpt-3.5-turbo-16k-0613 + temperature=0 --->\n\t", completion_1.choices[0].message['content'])
print("gpt-3.5-turbo-16k-0613 + temperature=1 --->\n\t", completion_2.choices[0].message['content'])
看下结果:
能很明显感觉出,temperature取值越大,回答更具创造性和发散性
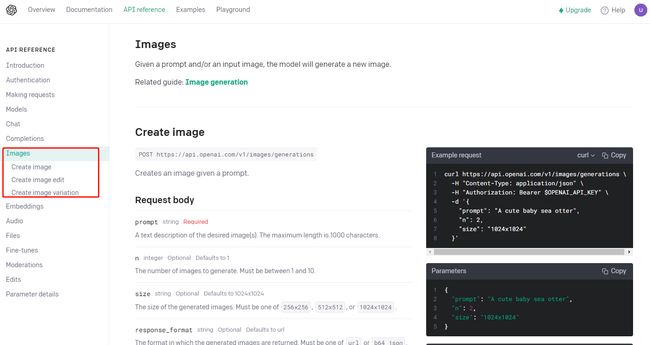
5.3 Images
根据给定的提示创建一个图像
图片API提供了三种与图片交互的方法:
1.根据文本提示从头开始创建图像
2.根据新文本提示创建现有图像的编辑
3.创建现有图像的变体
其参数如下:
看下代码:
openai.Image.create(
  prompt="一只白色小猫\在野地上\奔跑",
  n=1,
  size='512x512'
)
输出如下:
点击链接可查看生成的图片,虽然有点难看,这需要提示工程,此处就做一个简单示例
还可以修改图片尺寸、编辑图片等,可以自己试一下,代码参考:
# 修改图片尺寸
from PIL import Image

def transfer(infile, outfile):
    im = Image.open(infile)
    reim=im.resize((512, 512))#宽*高

    reim.save(outfile,dpi=(200.0,200.0)) ##200.0,200.0分别为想要设定的dpi值


if __name__ == '__main__':
    infil=r"mask.png"
    outfile=r"mask_512.png"
    transfer(infil, outfile)
# edit 图片
openai.Image.create_edit(
  image=open("小猫.png", "rb"),
  mask=open("mask_512.png", "rb"),
  prompt="小猫\趴着炕头上",
  n=1,
  size="512x512"
)
六:一些实用函数
6.1 Code Pormpt
分享一个Code Pormpt Example,提供一种实现思路:
def Iamadictionary(word:str='hello'):
    prompt = "你是一个英语单词查询助手,每当用户发送一个英语单词给你,你都要以固定格式响应用户," \
                    "如果用户发给你的不是一个单词,回复 'invalid token'"

    response_few_shot_text = "run [/rʌn/]" \
                                    "\n\nn. 奔跑;竞赛;连续的演出\nHe went for a run after work. (他下班后去跑步了)" \
                                    "\n\nv. 奔跑;运行\nI like to run in the park every morning. (我喜欢每天早上在公园里跑步)" \
                                    "\n\nadj. 连续的;流畅的\nThis printer is really fast and runs smoothly. (这台打印机速度非常快,而且运行流畅)"

    # message = 'color'

    data = {
            "model": "gpt-3.5-turbo-16k-0613",
            "temperature": 0,
            "top_p": 1,
            "frequency_penalty": 1,
            "presence_penalty": 1,
            "stream": False,
            "messages": [
                {"role": "system", "content": prompt},
                {"role": "user", "content": "run"},
                {"role": "assistant", "content": response_few_shot_text},
                {"role": "user", "content": word}
            ]
        }

    return openai.ChatCompletion.create(**data)

# 25个雅思最难词汇❗️认识5个就是真学霸~
# https://www.xiaohongshu.com/explore/641d813300000000130149fc


completion = Iamadictionary(word='uncanny')
# print(completion)
print(completion.choices[0].message['content'])
测试一下:
6.2 如何计算Tokens
调用API接口是按Tokens收费的,那么如何计算每次会话用了多少Tokens?
#计算toukens
import tiktoken
MODEL_gpt35 = "gpt-3.5-turbo-16k-0613" # 3.5
env35 = tiktoken.encoding_for_model(MODEL_gpt35)

def get_token(x:str):
    txt = env35.encode(x)
    len_ = len(txt)
    print(txt)
    print(len_)

get_token(x = '测试Token大小')
感谢您阅读这篇文章!如果您觉得有所收获,别忘了点赞、收藏并关注我,这是我持续创作的动力。您有任何问题或建议,都可以在评论区留言,我会尽力回答并接受您的反馈。如果您希望了解某个特定主题,也欢迎告诉我,我会乐于创作与之相关的文章。谢谢您的支持,期待与您共同成长!
最后,给大家送上干货!建议大家点赞&收藏,Mark住别丢了。有高质量资料免费送!
1. 关于魔法,你需要知道的
2. 超全流程!OpenAI账户注册看这里!
3. ChatGPT Plus 升级指南
