android-UI组件实例大全(六)------ImageView图像视图
图像视图:ImageView
继承view类,用于在屏幕上显示任何Drawable对象,通常用来显示图片:
这里的话我们介绍一些比较常用的属性:
Path 1:
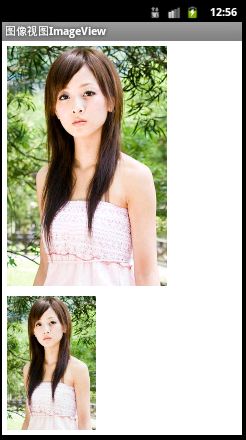
android:adjustViewBounds:设置ImageView是否调整自己的边界来保持所显示图片的长宽比
!!!下面的这两个属性需要adjustViewBounds为ture,不然是不起作用的哦!
android:maxHeight:设置ImageView的最大高度
android:maxWidth:设置ImageView的最大宽度
实例:
代码:
<!-- 正常的图片 -->

    <ImageView

        android:src="@drawable/meinv9"

        android:id="@+id/imageView1"

        android:layout_margin="5px"

        android:layout_height="wrap_content"

        android:layout_width="wrap_content"

    />

	<!-- 限制了最大宽度与高度,并且设置了调整边界来保持所显示图像的长宽比-->

    <ImageView

        android:src="@drawable/meinv9"

        android:id="@+id/imageView2"

        android:maxWidth="200px"

        android:maxHeight="200px"

        android:adjustViewBounds="true"

        android:layout_margin="5px"

        android:layout_height="wrap_content"

        android:layout_width="wrap_content"

    />
运行截图:

代码解释:
大的那个图片是没有任何处理的图片,下面的那个的话我们通过maxWidth和maxHeight限制ImageView最大宽度与高度为200px
就是最多只能显示200*200的图片,我们又设置了一个adjustViewBounds = "true"调整我们的边界来保持图片的长宽比,此时的ImageView宽搞为是87*133
Path 2:
android:scaleType:设置显示的图片如何缩放或者移动以适应ImageView的大小
属性:
fitXY:对图像的横向与纵向进行独立缩放,使得该图片完全适应ImageView,但是图片的横纵比可能会发生改变
fitStart:保持纵横比缩放图片,知道较长的边与Image的编程相等,缩放完成后将图片放在ImageView的左上角
fitCenter:同上,缩放后放于中间;
fitEnd:同上,缩放后放于右下角;
center:不做任何处理直接让图片在ImageView中居中
centerCrop:保持横纵比缩放图片,知道完全覆盖ImageView,可能会出现图片的显示不完全
centerInside:保持横纵比缩放图片,直到ImageView能够完全地显示图片
matrix:使用matrix方式进行缩放,这个有点复杂,占时不介绍...
实例:
1.fitEnd,fitStart,fitCenter使用,这里以fitEnd作为示范
代码:
<!-- 保持图片的横纵比缩放,知道该图片能够显示在ImageView组件上,并将缩放好的图片显示在imageView的右下角 -->

    <ImageView

        android:src="@drawable/meinv9"

        android:id="@+id/imageView3"

        android:layout_margin="5px"

        android:layout_width="180px"

        android:layout_height="180px"

        android:scaleType="fitEnd"

    />
运行截图:

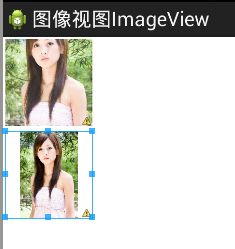
代码解释:保持横纵比缩放,直到最长边与imageview边相等,缩放完成,将图片放于右下角
其余两个类似
2.centerGroup与centerInside
代码:
<ImageView

        android:src="@drawable/meinv9"

        android:id="@+id/imageView3"

        android:layout_margin="5px"

        android:layout_width="180px"

        android:layout_height="180px"

        android:scaleType="centerCrop"

    />

    <ImageView

        android:src="@drawable/meinv9"

        android:id="@+id/imageView3"

        android:layout_margin="5px"

        android:layout_width="180px"

        android:layout_height="180px"

        android:scaleType="centerInside"

    />
运行截图:

代码解释:centerCrop:按横纵比缩放,直接完全覆盖整个ImageView
centerInside:按横纵比缩放,使得ImageView能够完全显示这个图片
path 3:
android:tint:为图片着色,填颜色值
代码:
<ImageView

        android:src="@drawable/meinv9"

        android:id="@+id/imageView3"

        android:layout_margin="5px"

        android:layout_width="180px"

        android:layout_height="180px"

        android:scaleType="centerInside"

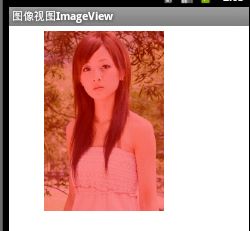
        android:tint="#77ff0000"

    />
运行截图:

代码解释:和上面的差不多,只是多了一句tint:...,对这个图片进行了着色
http://www.fenby.com/blog/blog/300