自动化运维工具——Ansible学习(三)——playbook学习完结
目录
一、批量创建文件
1.脚本内容
2.执行脚本
3.执行结果
二、变量封装成一个文件
1.定义变量文件
2.编写脚本
3.检查与执行脚本
4.运行结果
二、templates——模板
1.安装nginx
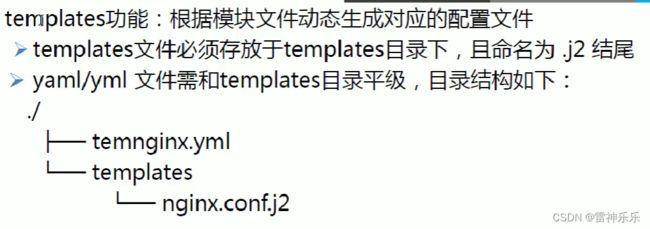
2.创建templates文件
3.复制nginx的配置文件到templates中,并重命名
4.编辑脚本
5.检查并执行脚本——nginx的worker进程根据被控机的cpu个数来指定
6.nginx的worker进程改为cpu的2倍
(1)修改模板
(2)修改前是auto
(3)cpu的个数需要变量来表示,因此,先查看被控机的cpu个数
(4)修改后
(5)修改配置文件,需要重启服务——handlers
(6)检查并执行脚本
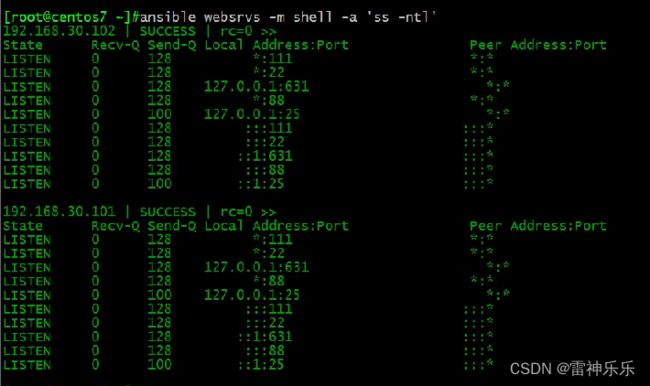
7.修改每台被控机nginx的端口号
(1)在主机清单中设置端口号
(2)找到j2文件的监听内容,配置变量
(3)执行脚本
(4)检查被控机各自的端口号是否更改 编辑
8.将变量写在playbook中
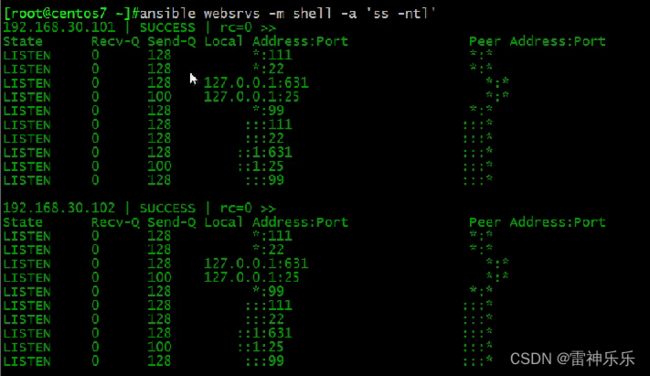
9.当变量在命令行中定义,命令行中的变量优先级最高
三、when ——条件测试
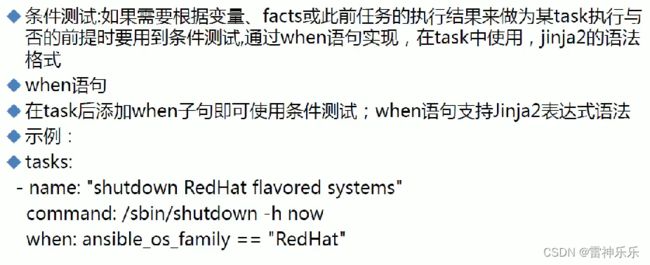
1.when概述
2.变量的优先级
3.when使用示例
(1)编写脚本
(2)修改j2配置文件
(3)修改nginx.conf6.j2文件的用户
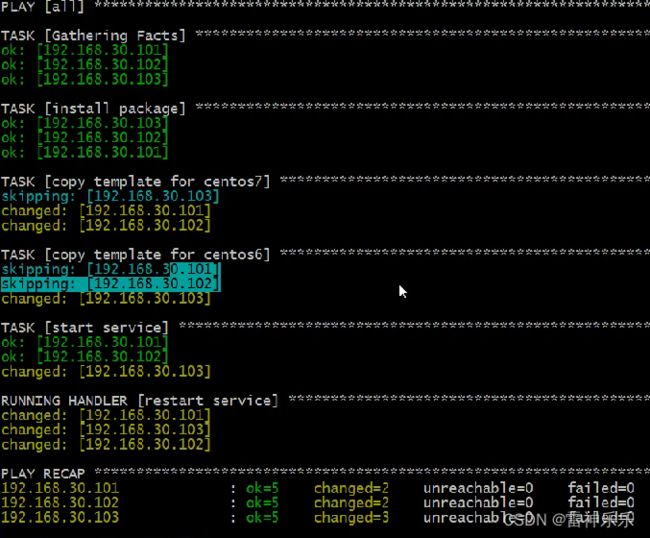
(4)执行脚本
(5)查看被控机端口信息
四、with_items——迭代
(一)批量下载程序
1.脚本示例
2.执行脚本并检查
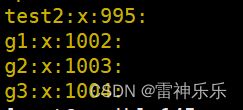
(二)批量创建用户组
1.编写脚本
2.检查group是否成功创建
(三)迭代嵌套子变量——批量创建用户名
1.编写脚本
2.查看脚本执行结果
五、playbook中template for if
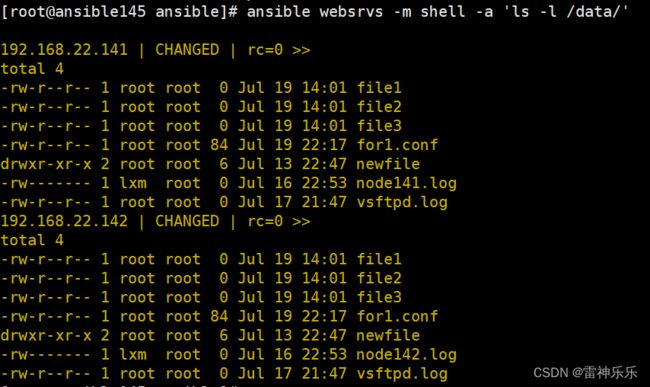
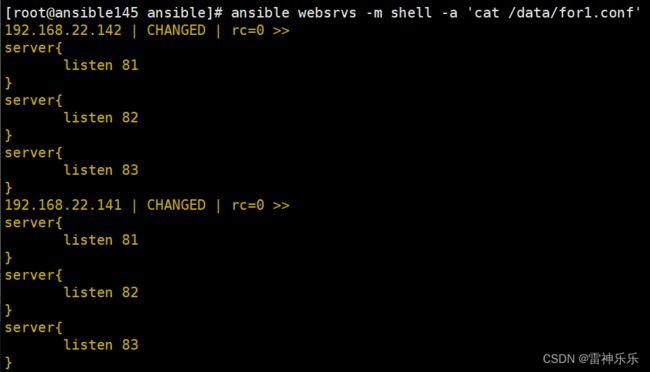
(一)遍历生成文件的内容
1.编写脚本
2.执行脚本并检查结果
(二)键值对形式的for循环
1.编写脚本
2.执行脚本并检查结果
(三)多层嵌套
1.编写脚本
2.执行脚本并检查结果
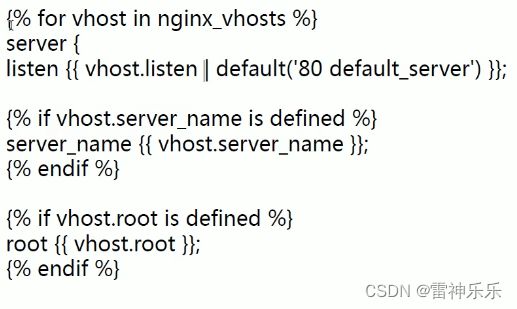
(四)if判断的用法
1.编写脚本
2.执行脚本并检查结果
书接上回《自动化运维工具——Ansible学习(二)》
一、批量创建文件
在被控机的/data/目录下创建以各个被控机主机名为文件名的.log文件
1.脚本内容
vim var.yml


---
- hosts: websrvs
  remote_user: root

  tasks:
    - name: create log file
      file: name=/data/{{ ansible_fqdn }}.log state=touch mode=600 owner=lxm
2.执行脚本
# 检查语法
[root@ansible145 ansible]# ansible-playbook -C var.yml


# 执行脚本
[root@ansible145 ansible]# ansible-playbook var.yml
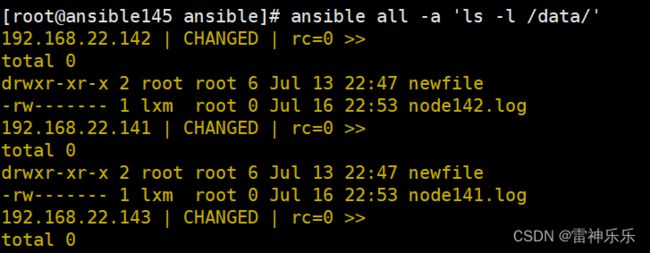
3.执行结果
二、变量封装成一个文件
如果变量过多,就可以将变量封装为一个文件。
1.定义变量文件
[root@ansible145 ansible]# vim vars.yml

var1: httpd
var2: vsftpd
2.编写脚本
[root@ansible145 ansible]# vim testvar.yml


---
- hosts: websrvs
  remote_user: root
  vars_files:
    - vars.yml

  tasks:
    - name: install package
      yum: name={{ var1 }}
    - name: create file
      file: name=/data/{{ var2 }}.log state=touch
3.检查与执行脚本
# 检查脚本
[root@ansible145 ansible]# ansible-playbook -C testvar.yml

# 执行脚本
[root@ansible145 ansible]# ansible-playbook testvar.yml
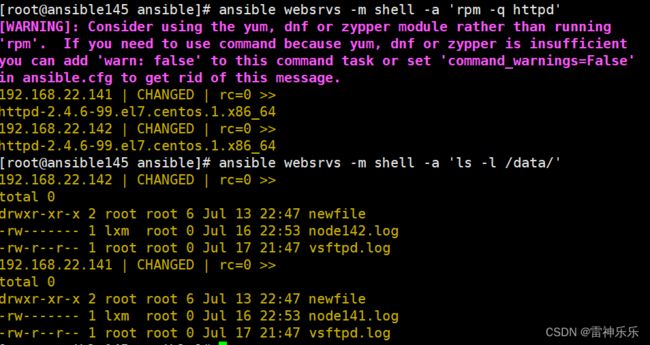
4.运行结果
二、templates——模板
即用一个文件作为模板,传送到远程的被控机上去,并且针对被控机的配置去改写文件,一般是配置文件。
template不能作为命令行调用,只能写在playbook中进行调用。
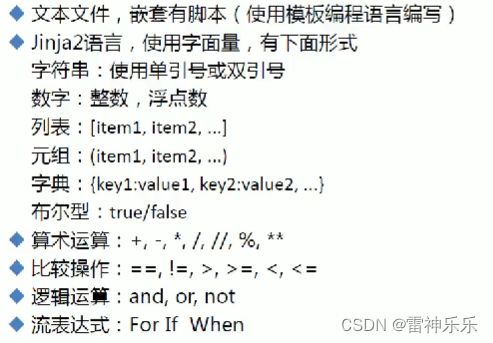
// 是整除的意思,例如9/2=4.5,9//2=4
**是幂次方,取指数
1.安装nginx
2.创建templates文件
[root@ansible145 ansible]# mkdir templates3.复制nginx的配置文件到templates中,并重命名
[root@ansible145 ansible]# cp /etc/nginx/nginx.conf templates/nginx.conf.j2[root@ansible145 ansible]# vim templates/nginx.conf.j2
4.编辑脚本
---
- hosts: websrvs
  remote_user: root

  tasks:
    - name: install package
      yum: name=nginx
    - name: copy template
      template: src=/nginx.conf.j2 dest=/ect/nginx/nginx.conf
    - name: start service
      service: name=nginx state=started enabled=yes
注意:
如果j2文件放在templates文件下,可以直接写template: src=nginx.conf.j2,ansible可以自动识别出来;
如果j2文件没有放在templates文件下,需要加上绝对路径template: src=xx/xx/nginx.conf.j2
5.检查并执行脚本——nginx的worker进程根据被控机的cpu个数来指定
[root@ansible145 ansible]# ansible-playbook -C testtempl.yml

[root@ansible145 ansible]# ansible-playbook testtempl.yml

[root@ansible145 ansible]# ansible websrvs -m shell -a 'rpm -q nginx'

# 检查端口
[root@ansible145 ansible]# ansible websrvs -m shell -a 'ss -ntpl'

[root@ansible145 ansible]# ansible websrvs -m shell -a 'ps aux | grep nginx'
102有4个nginx的worker进程
6.nginx的worker进程改为cpu的2倍
(1)修改模板
[root@ansible145 ansible]# vim templates/nginx.conf.j2(2)修改前是auto
(3)cpu的个数需要变量来表示,因此,先查看被控机的cpu个数
[root@ansible145 ansible]# ansible websrvs -m setup | grep "cpu"
        "ansible_processor_vcpus": 4,
        "ansible_processor_vcpus": 4,
(4)修改后
(5)修改配置文件,需要重启服务——handlers
---
- hosts: websrvs
  remote_user: root

  tasks:
    - name: install package
      yum: name=nginx
    - name: copy template
      template: src=/nginx.conf.j2 dest=/etc/nginx/nginx.conf
      notify: restart service
    - name: start service
      service: name=nginx state=started enabled=yes

   handlers:
    - name: restart service
      service: name=nginx state=restarted
(6)检查并执行脚本
[root@ansible145 ansible]# ansible-playbook -C testtempl.yml

[root@ansible145 ansible]# ansible-playbook testtempl.yml

[root@ansible145 ansible]# ansible websrvs -m shell -a 'ps aux | grep nginx'
7.修改每台被控机nginx的端口号
(1)在主机清单中设置端口号
[root@ansible145 ansible]# vim /etc/ansible/hosts

[websrvs]
192.168.22.141 http_port=81
192.168.22.142 http_port=82
(2)找到j2文件的监听内容,配置变量
(3)执行脚本
[root@ansible145 ansible]# ansible-playbook testtempl.yml(4)检查被控机各自的端口号是否更改 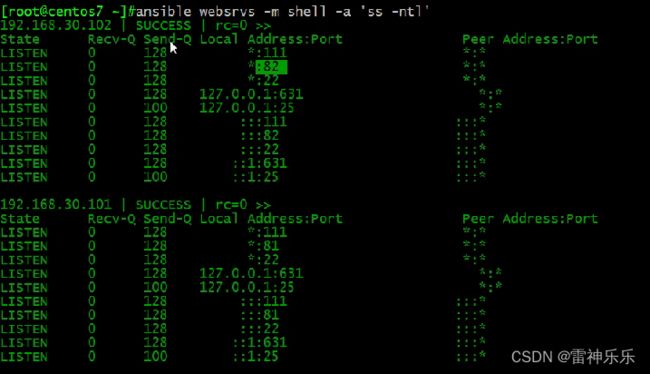
8.将变量写在playbook中
---
- hosts: websrvs
  remote_user: root
  vars:
    - http_port: 88

  tasks:
    - name: install package
      yum: name=nginx
    - name: copy template
      template: src=/nginx.conf.j2 dest=/etc/nginx/nginx.conf
      notify: restart service
    - name: start service
      service: name=nginx state=started enabled=yes

   handlers:
    - name: restart service
      service: name=nginx state=restarted
即使主机清单中已经定义了端口号,但是playbook优先于主机清单
修改后的端口号:
9.当变量在命令行中定义,命令行中的变量优先级最高
[root@ansible145 ansible]# ansible-playbook -e "http_port=99" testtempl.yml三、when ——条件测试
1.when概述
2.变量的优先级
-e 命令行<----playbook<-----主机清单中的普通变量<-----主机清单中的组变量
3.when使用示例
当CentOS版本不同时,选择不同的配置文件
注意:提前在未安装nginx的被控机上安装好nginx
(1)编写脚本
---
- hosts: all
  remote_user: root
  vars:
    - http_port: 88

  tasks:
    - name: install package
      yum: name=nginx
    - name: copy template for cnetos7
      template: src=/nginx.conf7.j2 dest=/etc/nginx/nginx.conf
      when: ansible_distribution_major_version == "7"
      notify: restart service
    - name: copy template for cnetos7
      template: src=/nginx.conf6.j2 dest=/ect/nginx/nginx.conf
      when: ansible_distribution_major_version == "6"
      notify: restart service
    - name: start service
      service: name=nginx state=started enabled=yes

   handlers:
    - name: restart service
      service: name=nginx state=restarted
(2)修改j2配置文件
将不同版本的CentOS上的nginx配置文件复制到主控机后再修改!
(3)修改nginx.conf6.j2文件的用户
(4)执行脚本
[root@ansible145 ansible]# ansible-playbook testtempl.yml(5)查看被控机端口信息
# 查看端口号
[root@ansible145 ansible]# ansible all -m shell -a 'ss -ntl'

# 查看nginx进程
[root@ansible145 ansible]# ansible all -m shell -a 'ps aux | grep nginx'
四、with_items——迭代
(一)批量下载程序
1.脚本示例
[root@ansible145 ansible]# vim testitem.yml


---
- hosts: all
  remote_user: root

  tasks:
    - name: create some files
      file: name=/data/{{ item }} state=touch
      when: ansible_distribution_major_version == "7"
      with_items:
        - file1
        - file2
        - file3
    - name: install some packages
      yum: name={{ item }}
      with_items:
        - htop
        - sl
        - hping3
2.执行脚本并检查
[root@ansible145 ansible]# ansible-playbook testitem.yml(二)批量创建用户组
1.编写脚本
[root@ansible145 ansible]# vim testitem2.yml


---
- hosts: all
  remote_user: root

  tasks:
    - name: create some group
      group: name={{ item }}
      when: ansible_distribution_major_version == "7"
      with_items:
        - g1
        - g2
        - g3
2.检查group是否成功创建
[root@ansible145 ansible]# ansible all -m shell -a 'getent group'
(三)迭代嵌套子变量——批量创建用户名
1.编写脚本
[root@ansible145 ansible]# vim testitem3.yml


---
- hosts: all
  remote_user: root

  tasks:
    - name: create some group
      group: name={{ item }}
      when: ansible_distribution_major_version == "7"
      with_items:
        - g1
        - g2
        - g3
    - name: create some user
      user: name={{ item.name }} group {{ item.group }}
      with_items:
        - { name: 'user1', group: 'g1' }
        - { name: 'user2', group: 'g2' }
        - { name: 'user3', group: 'g3' }
2.查看脚本执行结果
[root@ansible145 ansible]# ansible all -m shell -a 'getent passwd '
用户名的属组对应组ID
五、playbook中template for if
(一)遍历生成文件的内容
1.编写脚本
[root@ansible145 ansible]# vim testfor.yml


---
- hosts: websrvs
  remote_user: root
  vars:
     ports:
       - 81
       - 82
       - 83

  tasks:
     - name: copy conf
       template: src=for1.conf.j2 dest=/data/for1.conf
[root@ansible145 templates]# vim for1.conf.j2
{% for port in ports %}
server{
listen {{ port }}
}
{% endfor %}2.执行脚本并检查结果
[root@ansible145 ansible]# ansible-playbook testfor.yml(二)键值对形式的for循环
1.编写脚本
[root@ansible145 ansible]# vim testfor2.yml


---
- hosts: websrvs
  remote_user: root
  vars:
     ports:
       - listen_port: 81
       - listen_port: 82
       - listen_port: 83

  tasks:
     - name: copy conf
       template: src=for1.conf.j2 dest=/data/for1.conf
[root@ansible145 ansible]# vim ./templates/for1.conf.j2

{% for port in ports %}
server{
       listen {{ port.listen_port }}
}
{% endfor %}
2.执行脚本并检查结果
[root@ansible145 ansible]# ansible-playbook testfor2.yml(三)多层嵌套
1.编写脚本
[root@ansible145 ansible]# vim testfor3.yml

---
- hosts: websrvs
  remote_user: root
  vars:
     ports:
       - web1:
         port: 81
         name: node141
         rootdir: /data/website1
       - web2:
         port: 82
         name: node142
         rootdir: /data/website2
       - web3:
         port: 83
         name: node143
         rootdir: /data/website3

  tasks:
     - name: copy conf
       template: src=for3.conf.j2 dest=/data/for3.conf
[root@ansible145 ansible]# vim ./templates/for3.conf.j2

{% for p in ports %}
server{
   listen {{ p.port }}
   servername {{ p.name }}
   documentroot {{ p.rootdir }}
}
{% endfor %}
2.执行脚本并检查结果
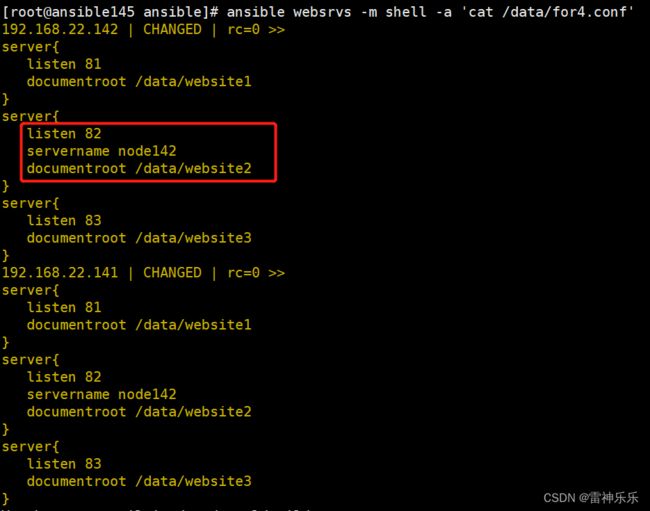
[root@ansible145 ansible]# ansible-playbook testfor3.yml(四)if判断的用法
1.编写脚本
[root@ansible145 ansible]# vim testfor4.yml

---
- hosts: websrvs
  remote_user: root
  vars:
     ports:
       - web1:
         port: 81
         # name: node141
         rootdir: /data/website1
       - web2:
         port: 82
         name: node142
         rootdir: /data/website2
       - web3:
         port: 83
         # name: node143
         rootdir: /data/website3

  tasks:
     - name: copy conf
       template: src=for4.conf.j2 dest=/data/for4.conf
[root@ansible145 ansible]# vim templates/for4.conf.j2

{% for p in ports %}
server{
   listen {{ p.port }}
{% if p.name is defined %}
   servername {{ p.name }}
{% endif %}
   documentroot {{ p.rootdir }}
}
{% endfor %}
2.执行脚本并检查结果
[root@ansible145 ansible]# ansible-playbook testfor4.yml至此,playbook学习完结。
