springcloud(7)springcloud-RabbitMQ 消息广播
本文主要介绍 使用RabbitMQ的消息广播,来实现springcloud-Config 配置信息在github上更新后,本地项目同时更新的功能。
关于 消息总线Bus 的介绍:
https://www.cnblogs.com/toov5/p/10293755.html
RabbitMQ 广播模式的介绍:
https://www.cnblogs.com/fone933/p/8284785.html
Linux环境下 RabbitMQ 安装:
https://blog.csdn.net/lettuce_/article/details/102501342
大致操作:
1. 首先挨个启动 EurekaServerApplication, ConfigServerApplication, ProductDataServiceApplication
2. 然后启动视图微服务 ProductViewServiceFeignApplication,端口号是 8083
3. 此时访问 http://127.0.0.1:8083/products,可以看到未更改前的配置信息
4. 修改 github 里的版本号为新的数值
5. 然后运行 FreshConfigUtil, 使用 post 的方式访问 http://localhost:8012/actuator/bus-refresh 地址,之所以要专门做一个 FreshConfigUtil 类,就是为了可以使用 post 访问,因为它不支持 get 方式访问,直接把这个地址放在浏览器里,是会抛出 405错误的。
这个地址的作用就是让 config-server 去 git 获取最新的配置信息,并把此信息广播给集群里的视图微服务。
6. 再次访问 http://127.0.0.1:8083/products,可以看到已更改的信息了
本次配置是在 原项目的基础上 新增功能实现的,原项目创建及配置请查看:
https://blog.csdn.net/lettuce_/article/details/102487673
具体操作
1.修改pom文件
新增spring-boot-starter-actuator 用于访问路径:/actuator/bus-refresh
新增spring-cloud-starter-bus-amqp 用于支持 rabbitmq
            org.springframework.boot
            spring-boot-starter-actuator


            org.springframework.cloud
            spring-cloud-starter-bus-amqp
2. 修改 bootstrap.yml
新增 bus总线配置
 bus:
      enabled: true
      trace:
        enabled: true
新增 rabbitMQ 配置
rabbitmq:
  host: 172.168.3.101
  port: 5672
  username: guest
  password: guest
bootstrap.yml配置文件如下:
# eureka 信息
eureka:
  client:
    serviceUrl:
      defaultZone: http://localhost:8761/eureka/

#springcloudConfig 服务器信息
spring:
  cloud:
    config:
      label: master
      profile: dev
      discovery:
        enabled:  true
        serviceId:  config-server
    bus:
      enabled: true
      trace:
        enabled: true

#RabbitMQ
rabbitmq:
  host: 172.168.3.101
  port: 5672
  username: guest
  password: guest
注意不要在 host:里加 http:// ,否者启动报错
3. 修改 application.yml
新增路径访问允许,这样才能访问 /actuator/bus-refresh:
management:
  endpoints:
    web:
      exposure:
        include: "*"
      cors:
        allowed-origins: "*"
        allowed-methods: "*"
application.yml配置文件如下:
    spring:
      application:
        name: product-consumer-feign
      thymeleaf:
        cache: false
        prefix: classpath:/templates/
        suffix: .html
        encoding: UTF-8
        mode: HTML5
        servlet:
          content-type: text/html

    server:
      port: 8083

    management:
      endpoints:
        web:
          exposure:
            include: "*"
          cors:
            allowed-origins: "*"
            allowed-methods: "*"
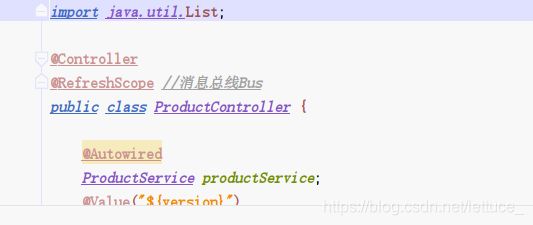
4. controller 添加注解
@RefreshScope注意:不添加此注解的话,后续postman调用接口,只触发远程配置文件重新加载 ,但页面数据不变的情况
5. 使用postman 调用接口
接口: 当前项目ip+端口+/actuator/bus-refresh
http://localhost:8083/actuator/bus-refresh
方式:post
headers:"Content-Type", "application/json; charset=utf-8"
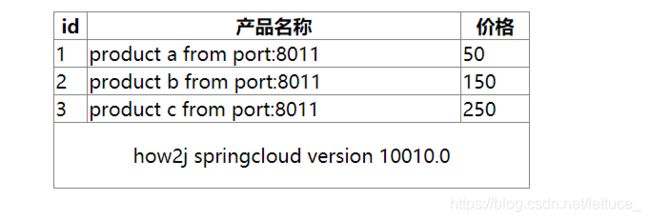
页面显示:
变化前:
变化后:
控制台提示:
如果不加第4步的注解,则控制台出现:(亲测)
Received remote refresh request. Keys refreshed []
关于 消息总线(Bus)以及 @RefreshScope
https://blog.csdn.net/memmsc/article/details/78348879


