SpringBoot学习——项目的多模块构建common、domain... & Knife4j接口测试使用初步
目录
- 引出
- 项目的多模块构建
-
- 总项目
- 模块构建
-
- 放后端的相关
- 放前端的代码,占位
- 问题:如果删除
- 依赖引入
-
- lombok通用
- 模块
-
- common模块,都要用
- domain模块,实体类相关
- book模块,主模块
- 运行测试
- 接口测试工具
-
- Knife4j
- 1.引入依赖
- 2.配置
- 3.常用注解
- 总结
引出
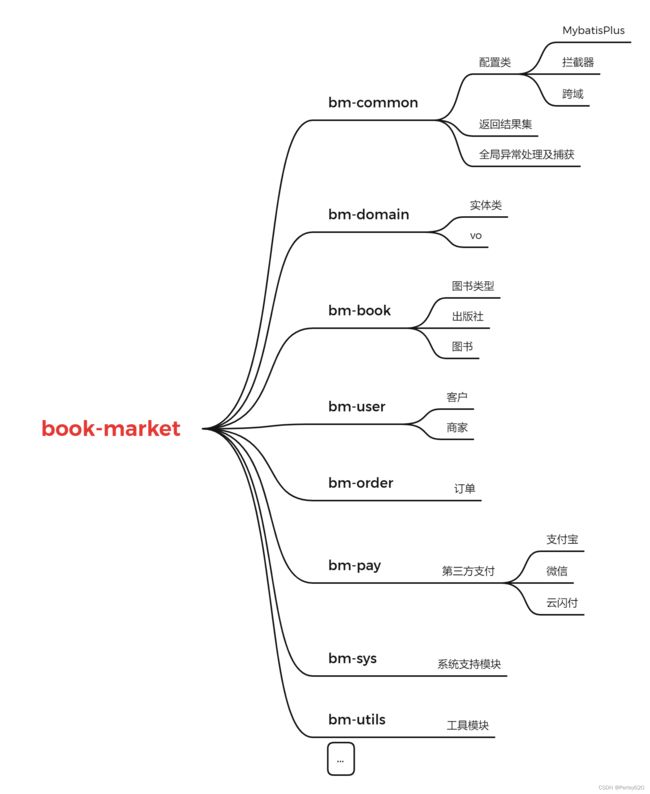
1.springboot项目的多模块构建
2.Knife4j接口测试使用初步
git代码仓库:
https://gitee.com/pet365/springBoot-multi-module
项目的多模块构建
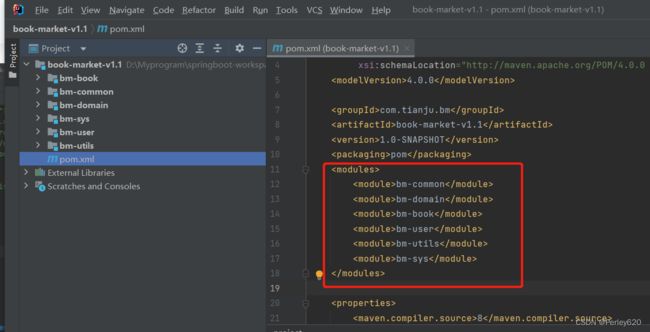
总项目
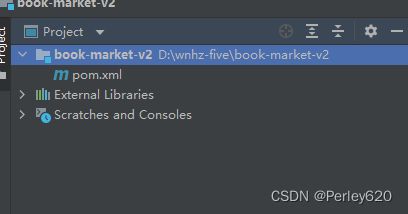
总项目是一个空的盒子,放置其他的模块
其他模块需要时,可以导入
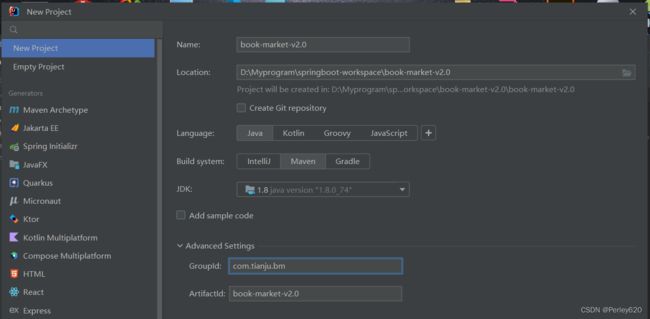
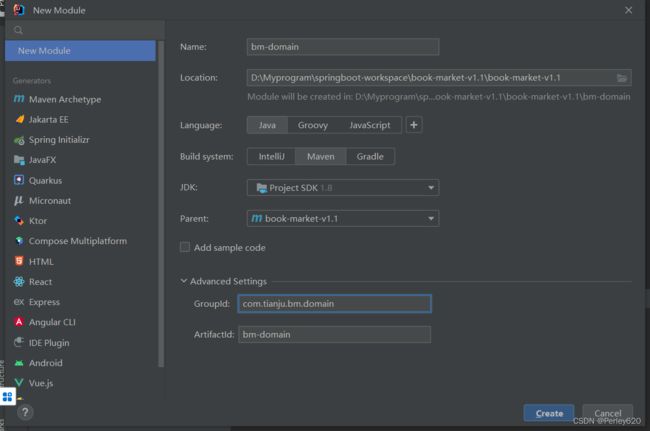
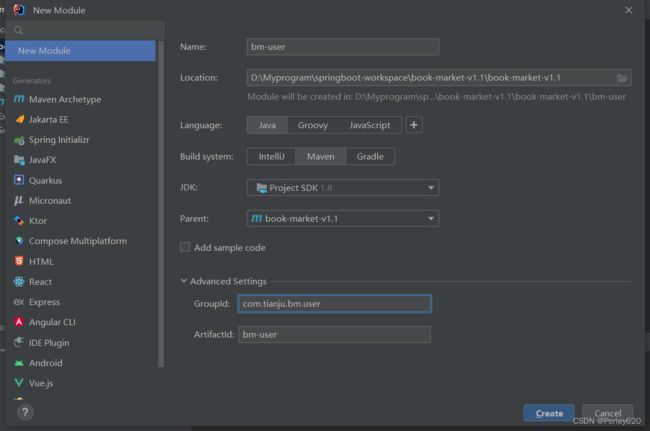
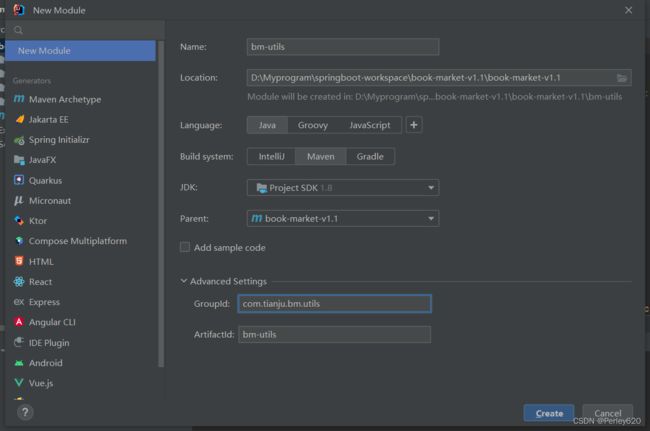
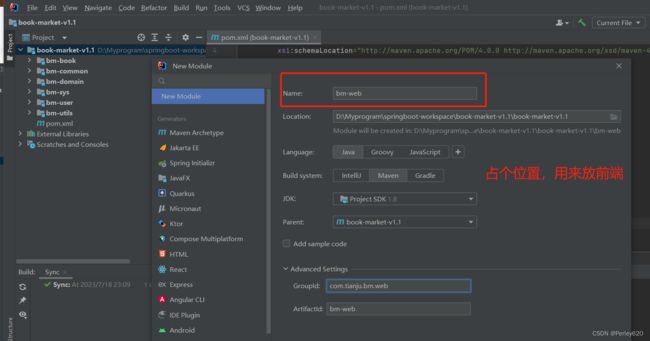
模块构建
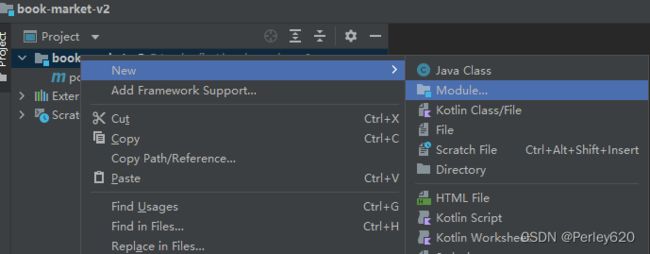
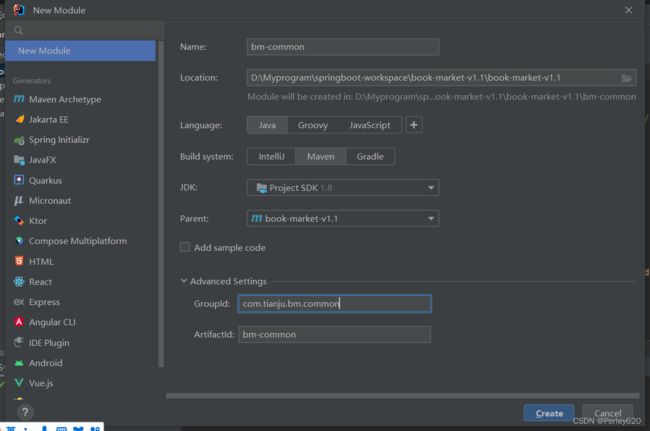
构建模块:添加model
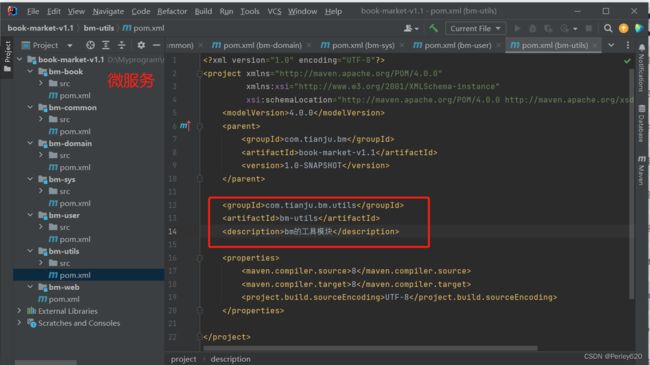
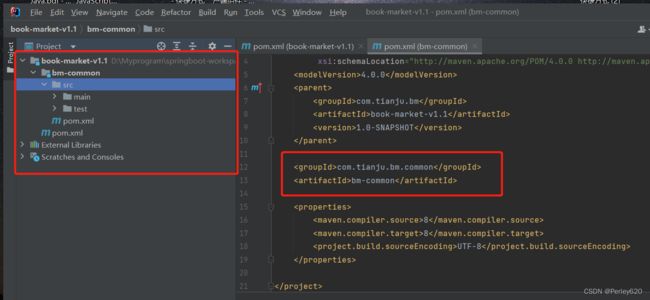
设置groupId
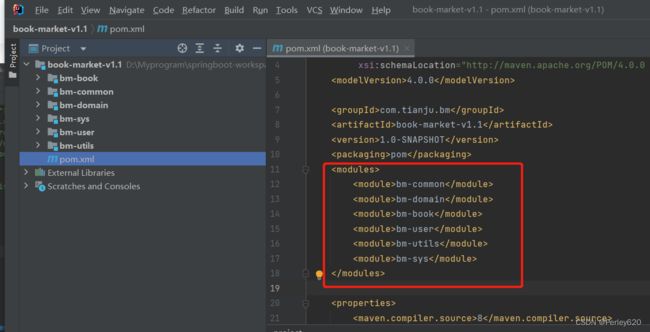
放后端的相关
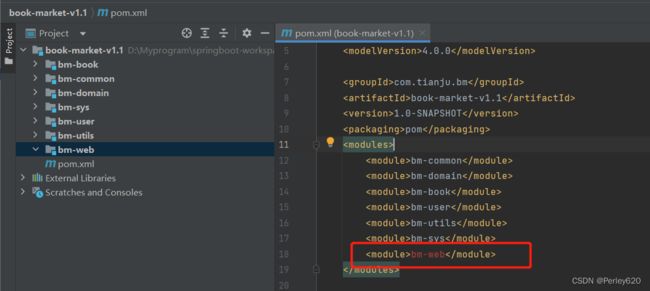
放前端的代码,占位
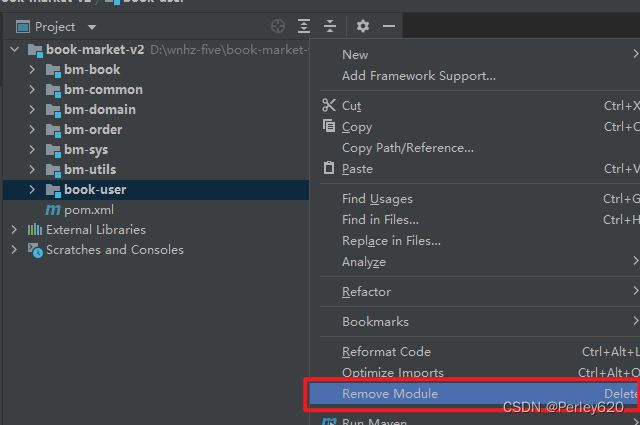
问题:如果删除
先删除模块,再删除文件,然后删一下pom的引用
依赖引入
lombok通用
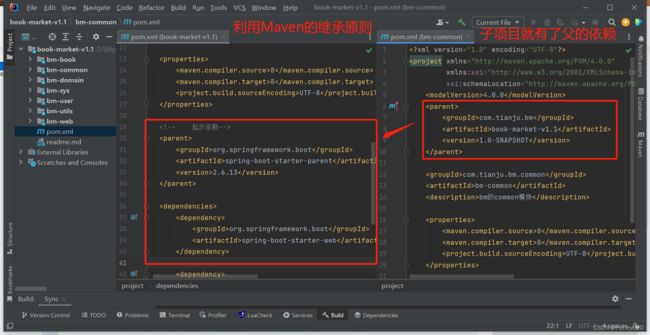
maven的基础原则:
A模块: B模块, C模块
book-market下面的子模块继承 book-market
父模块定义的 子模块自动继承
    <parent>
        <groupId>com.tianju.bmgroupId>
        <artifactId>book-market-v1.1artifactId>
        <version>1.0-SNAPSHOTversion>
    parent>
模块
common模块,都要用
    <dependencies>
        <dependency>
            <groupId>com.github.xiaoymingroupId>
            <artifactId>knife4j-openapi2-spring-boot-starterartifactId>
            <version>4.0.0version>
        dependency>
    dependencies>
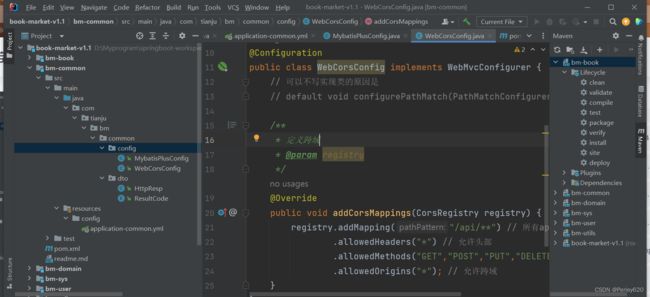
比如允许跨域放到common模块中
配置application
# 项目中可以使用Swagger做接口测试
knife4j:
  enable: true

mybatis-plus:
  configuration:
    log-impl: org.apache.ibatis.logging.stdout.StdOutImpl
domain模块,实体类相关
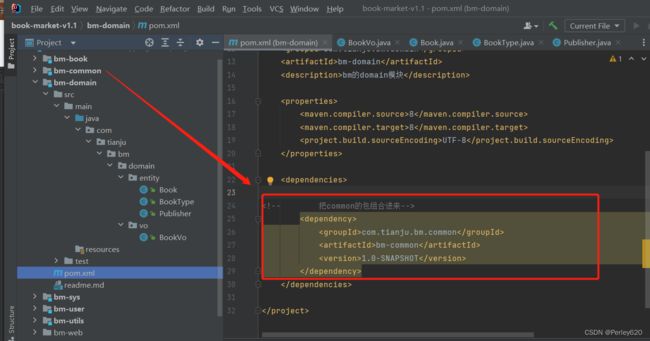
    <dependencies>

        <dependency>
            <groupId>com.tianju.bm.commongroupId>
            <artifactId>bm-commonartifactId>
            <version>1.0-SNAPSHOTversion>
        dependency>


        <dependency>
            <groupId>mysqlgroupId>
            <artifactId>mysql-connector-javaartifactId>
        dependency>

        <dependency>
            <groupId>com.alibabagroupId>
            <artifactId>druid-spring-boot-starterartifactId>
            <version>1.2.18version>
        dependency>
    dependencies>
引入上面设置好的common模块
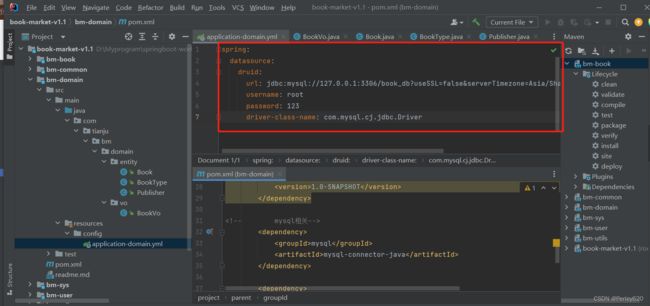
实体类相关,设置一下数据库的连接
配置application
spring:
  datasource:
    druid:
      url: jdbc:mysql://127.0.0.1:3306/book_db?useSSL=false&serverTimezone=Asia/Shanghai&allowPublicKeyRetrieval=true
      username: root
      password: 123
      driver-class-name: com.mysql.cj.jdbc.Driver
book模块,主模块
引入common和domain模块
    <dependencies>
        <dependency>
            <groupId>com.tianju.bm.domaingroupId>
            <artifactId>bm-domainartifactId>
            <version>1.0-SNAPSHOTversion>
        dependency>
    dependencies>
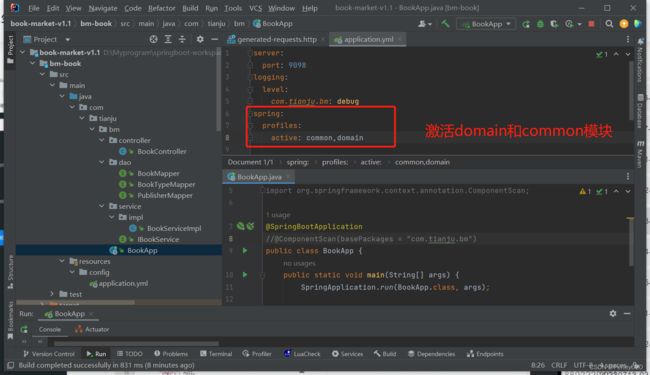
激活一下domain模块和common模块
server:
  port: 9098
logging:
  level:
    com.tianju.bm: debug
spring:
  profiles:
    #引用application-common,applicaiton-domain配置
    active: common,domain
运行测试
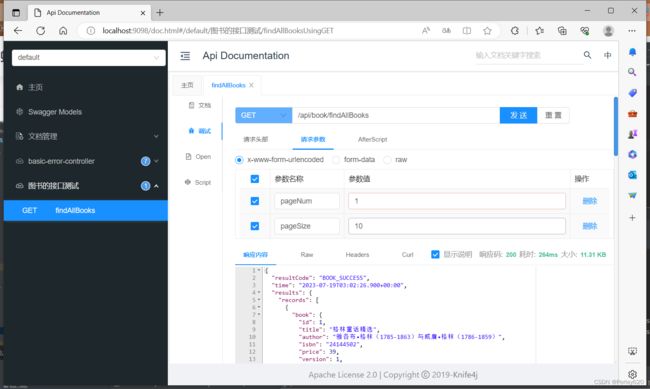
http://localhost:9098/doc.html
接口测试工具
https://apifox.com/
swagger2,较多
swagger3,
Knife4j
Knife4j的前身是swagger-bootstrap=ui,前身swagger–bootstrap-ui是一个纯swagger–ui的ui皮肤项目
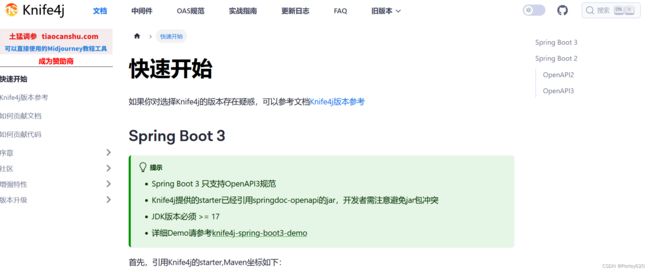
https://doc.xiaominfo.com/docs/quick-start
1.引入依赖
        <dependency>
            <groupId>com.github.xiaoymingroupId>
            <artifactId>knife4j-openapi2-spring-boot-starterartifactId>
            <version>4.1.0version>
        dependency>
底层就是swagger
2.配置
knife4j:
  enable: true
3.常用注解
import io.swagger.annotations.Api;
| 序号 | 注解 | 作用 |
|---|---|---|
| 1 | @Api(tags = “图书的api接口类”) | 左侧名字 |
| 2 | @ApiOperation(“findPage方法测试”) | get方法名字 |
| 3 | @ApiImplicitParam(name = “findByPage”,value = “分页查询”,required = true) | 参数相关 |
| 4 | @ApiModel(“DTO返回数据”) | 写在HttpResp实体类上 |
| 5 | @ApiModelProperty(“time”) | 写在HttpResp类属性上 |
BookController.java文件
package com.tinaju.bm.controller;

import com.tinaju.bm.dto.HttpResp;
import com.tinaju.bm.dto.ResultCode;
import com.tinaju.bm.entity.Book;
import com.tinaju.bm.service.IBookService;
import io.swagger.annotations.Api;
import io.swagger.annotations.ApiImplicitParam;
import io.swagger.annotations.ApiOperation;
import org.springframework.beans.factory.annotation.Autowired;
import org.springframework.web.bind.annotation.GetMapping;
import org.springframework.web.bind.annotation.RequestMapping;
import org.springframework.web.bind.annotation.RestController;

import java.util.Date;
import java.util.List;

@Api(tags = "图书的api接口类")
@RestController
@RequestMapping("/api/book")
public class BookController {
    @Autowired
    private IBookService bookService;

    @ApiOperation("findPage方法测试")
    @ApiImplicitParam(name = "findByPage",value = "分页查询",required = true)
    @GetMapping("/findByPage")
    public HttpResp findByPage(int currentPage){
        List<Book> bookList = bookService.findByPage(currentPage, 5);
        return HttpResp.results(ResultCode.BOOK_SUCCESS,new Date(),bookList);
    }
}
HttpResp.java返回给前端的实体类
package com.tinaju.bm.dto;

import io.swagger.annotations.ApiModel;
import io.swagger.annotations.ApiModelProperty;
import lombok.*;

import java.io.Serializable;
import java.util.Date;

/**
 * 返回给前端的响应
 * @param
 */
@ApiModel("DTO返回数据")
@Getter@Setter
@ToString
public class HttpResp<T> implements Serializable {

    private ResultCode resultCode;
    @ApiModelProperty("time")
    private Date time;
    @ApiModelProperty("results")
    private T results;

    private HttpResp(){}

    public static <T> HttpResp<T> results(ResultCode resultCode,Date time,T results){ // java泛型的写法
        HttpResp httpResp = new HttpResp();
        httpResp.setResultCode(resultCode);
        httpResp.setTime(time);
        httpResp.setResults(results);
        return httpResp;
    }
}
总结
1.springboot项目的多模块构建
2.Knife4j接口测试使用初步
