消息队列实现验证码请求
最近考虑验证码服务和请求的分离,用消息队列实现异步处理。简单记录一个demo实现,本来是准备用短信验证码接口的,不过找了一圈好像没有免费的就换成邮箱了,真是令人感叹。
主要结构
基于springboot实现。为了方便,实现的时候在一个项目下搭建了两个模块,这样能共用一些类和配置。同时每个模块都有各自的启动类。消息队列用了RabbitMq。
请求模块 rabbitMqServer
实现功能:
验证码页面请求
即时返回前端请求提示,并将发送验证码的消息传递给消息队列
页面接受验证码输入,redis中查询,完成校验
发送模块 rabbitMqClient
实现功能:
消息队列监听,获取消息
消费消息,redis限时存储验证码,验证码邮件发送
主要就是通过两个模块来模拟两个服务通过消息队列的异步通信。
具体实现
RabbitMq交换器和队列设置
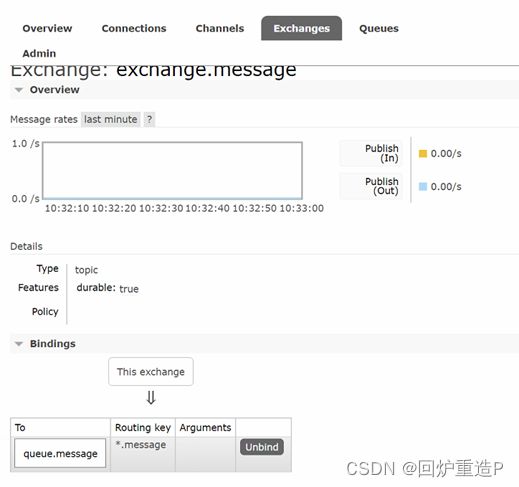
直接在控制页面中进行设置,exchange使用topic模式,这样后续增加队列就可以实现消息的多用户监听,比较方便,现在就先设置一个队列。
Exchange:exchange.message
绑定对应的queue,key设置为 *.message 来部分匹配。

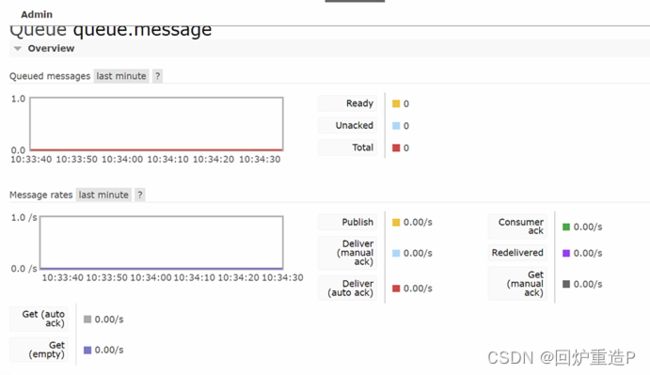
Queue:queue.message

rabbitMqServer 请求模块
主要包含两个功能部分:请求生成并传递给消息队列;访问缓存验证验证码信息。
Message实体类
包含手机号(邮箱)和对应的验证码信息
public class Message {
    private String phoneNumber;
	private String message;
}
InfoService
利用RabbitTemplate对消息队列进行操作
@Service
public class InfoService {
    @Autowired
    private RabbitTemplate rabbitTemplate;

    @Autowired
    private RedisUtil redisUtil;

    // 向消息队列发送消息
    public boolean sendMessage(String exchange, String routing, Object message){
        rabbitTemplate.convertAndSend(exchange, routing, message);
        return true;
    }
生成验证码信息
    // 生成随机六位数字
    public static String createRandomMessage(){
        int num = (int) ((Math.random() * 9 + 1) * 100000);
        return String.valueOf(num);
    }
将信息转换为json方便传递
    // 构建短信对象并传递json
    public String createMessage(String phoneNumber, String validCode) throws JsonProcessingException {
        Message m = new Message(phoneNumber, validCode);
        ObjectMapper mapper = new ObjectMapper();
        return mapper.writeValueAsString(m);
    }
验证方法,包括redis缓存读取与对比。RedisUtil是个工具类。要注意的是我这边写的add方法会将对应value对象转为json形式,所以纯字符串会有外层双引号,因此对比的时候需要将输入的validCode也利用toJSONString()转换一次再进行equals比较。
    // 读取redis中信息并验证
    public boolean checkValidCode(String phoneNumber, String inputValidCode){
        String validCode = redisUtil.get(phoneNumber);
        if(validCode==null)
            return false;
        inputValidCode = JSON.toJSONString(inputValidCode);
        if(inputValidCode.equals(validCode)){
            System.out.println(String.format("验证码正确 号码:%s,验证码:%s", phoneNumber, validCode));
            return true;
        }else{
            System.out.println(validCode);
            System.out.println(String.format("验证码错误 号码:%s", phoneNumber));
            return false;
        }
    }
RabbitInfoConfig
虽然这边没有使用代码定义exchange和queue,不过还是写了个rabbitMq的设置类来存放静态字符串。
@Configuration
public class RabbitInfoConfig {
    public static final String EXCHANGE = "exchange.message";
    public static final String ROUTING = "routing.message";
    public static final String QUEUE = "queue.message";
}
InfoController
主要页面访问方法
@Controller
public class InfoController {
    @Autowired
    private InfoService infoService;

    @RequestMapping("/main")
    public String main(){
        return "valid.html";
    }
传递消息,主要就是调用下方法将json传过去
    @ResponseBody
    @RequestMapping("/sendMessage")
    public CommonResponse sendMessage(String phoneNumber) throws JsonProcessingException {
        // 将信息放到message中并传给对应队列
        String validCode = InfoService.createRandomMessage();
        System.out.println(phoneNumber);
        String message = infoService.createMessage(phoneNumber, validCode);
        System.out.println(message);
        infoService.sendMessage(RabbitInfoConfig.EXCHANGE, RabbitInfoConfig.ROUTING, message);
        return new CommonResponse(true, "成功发送验证码请求");
    }
验证方法,根据请求的号码获取到对应的value判断结果,进行返回。这边简单写了个返回,真实情况可以增加一些权限授予逻辑啥的。
    @ResponseBody
    @RequestMapping("/validMessage")
    public CommonResponse validMessage(String phoneNumber, String code){
        System.out.println(phoneNumber);
        System.out.println(code);
        boolean result = infoService.checkValidCode(phoneNumber, code);
        if(result){
            return new CommonResponse(true, "成功验证验证码");
        }else{
            return new CommonResponse(false, "验证码错误或失效");
        }
    }
前端访问
valid.html 简单的获取和验证页面
<body>
    <h2>输入邮箱获取验证码h2>
    <label for="mail">邮箱:label><input type="text" id="mail"/> br>
    <input type="button" value="获取验证码" id="getButton"/> br>
    <label for="code">验证码:label><input type="text" id="code"/> br>
    <input type="button" value="验证" id="checkButton"/> br>
body>
validate.js 两个方法,利用ajax访问对应接口
因为用了消息队列,所以页面可以即可获取成功信息,体验更好。
$(function(){
    $('#getButton').bind('click', getValidCode)
    $('#checkButton').bind('click', validValidCode)
})

// 获取验证码
function getValidCode(){
    var mail = $('#mail').val()
    $.ajax({
        url:"/sendMessage",
        type:"post",
        cache: false,
        data: {
            'phoneNumber': mail,
        },
        dataType: 'json',
        success:function(data){
            var success = data.success
            var message = data.message
            if(success){
                console.log(message)
                alert(message)
            }else{
                console.log(message)
                alert(message)
            }
        },
        error:function(){
            console.log("验证码获取错误")
        }
    })
}

// 验证验证码
function validValidCode(){
    var mail = $('#mail').val()
    var code = $('#code').val()
    $.ajax({
        url:"/validMessage",
        type:"post",
        cache: false,
        data: {
            'phoneNumber': mail,
            'code': code
        },
        dataType: 'json',
        success:function(data){
            var success = data.success
            var message = data.message
            if(success){
                console.log(message)
                alert(message)
            }else{
                console.log(message)
                alert(message)
            }
        },
        error:function(){
            console.log("验证错误")
        }
    })
}
rabbitMqClient 发送模块
主要功能就是监听消息,并去进行验证码发送,成功后缓存。
application特别设置
需要设置下redis的过期时间。同时,邮件发送我用的是找的接口,需要敏感信息user和api key,也放在配置文件中。
  redis:
    host: 127.0.0.1
    port: 6379
    password:
    pool:
      max-active: 8
      max-wait: -1
      max-idle: 8
      min-idle: 0
    timeout: 3000

mail:
  user:
  key:
邮件接口 MailUtil
用的是这家 https://www.sendcloud.net,支持模板还挺好的。
使用httpClient进行api调用,%valid_code%会被替换成对应的验证码信息。
@Component
// 短信要钱..改成邮箱好了
public class MailUtil {
    private static final String SENDER = "huiluczP";
    private static final String API_URL = "https://api.sendcloud.net/apiv2/mail/sendtemplate";
    private static final String FROM = "[email protected]";
    private static final String TEMPLATE = "template_validCode";

    @Value("${mail.user}")
    private String API_USR;

    @Value("${mail.key}")
    private String API_KEY;

    public boolean sendMail(String mailAddress, String message) throws IOException {
        // 调用接口发送邮件
        CloseableHttpClient httpclient = HttpClientBuilder.create().build();
        HttpPost httpPost = new HttpPost(API_URL);

        List<NameValuePair> params = new ArrayList<>();
        // 您需要登录SendCloud创建API_USER,使用API_USER和API_KEY才可以进行邮件的发送。
        params.add(new BasicNameValuePair("apiUser", API_USR));
        params.add(new BasicNameValuePair("apiKey", API_KEY));
        params.add(new BasicNameValuePair("from", FROM));
        params.add(new BasicNameValuePair("fromName", SENDER));
        params.add(new BasicNameValuePair("to", mailAddress));

        ObjectMapper mapper = new ObjectMapper();
        HashMap<String, List<String>> codeMap = new HashMap<>();
        List<String> codes = new ArrayList<>();
        codes.add(message);
        codeMap.put("%valid_code%", codes);
        HashMap<String, Object> x_sm = new HashMap<>();
        x_sm.put("sub", codeMap);

        List<String> tos = new ArrayList<>();
        tos.add(mailAddress);
        x_sm.put("to", tos);

        String x_sm_tp_api = mapper.writeValueAsString(x_sm);
        System.out.println(x_sm_tp_api);

        params.add(new BasicNameValuePair("xsmtpapi", x_sm_tp_api));
        params.add(new BasicNameValuePair("templateInvokeName", TEMPLATE));

        httpPost.setEntity(new UrlEncodedFormEntity(params, "UTF-8"));
        // 请求
        CloseableHttpResponse response = httpclient.execute(httpPost);
        String result = null;
        boolean over = false;
        // 处理响应
        if (response.getStatusLine().getStatusCode() == HttpStatus.OK.value()) { // 正常返回
            result = EntityUtils.toString(response.getEntity());
            System.out.println(result);
            httpPost.releaseConnection();

            Map<String, Object> map = mapper.readValue(result, HashMap.class);
            return (boolean) map.get("result");
        } else {
            System.err.println("error");
            httpPost.releaseConnection();
            return false;
        }
    }
MessageService
解析并调用邮件接口发送,之后缓存存储。缓存过期时间从配置文件中读取。
@Service
public class MessageService {
    @Autowired
    RedisUtil redisUtil;

    @Value("${spring.redis.timeout}")
    private long timeout;

    @Autowired
    MailUtil mailUtil;

    // 获取message并解析,短信发送并存储到redis
    public boolean sendMessage(String messageJson) throws IOException {
        ObjectMapper objectMapper = new ObjectMapper();
        System.out.println(messageJson);
        Message message = objectMapper.readValue(messageJson, Message.class);

        // 发送邮件
        if(!mailUtil.sendMail(message.getPhoneNumber(), message.getMessage())){
            System.out.println("邮件发送失败");
            return false;
        }

        // 成功则存入redis
        redisUtil.add(message.getPhoneNumber(), message.getMessage(), timeout, TimeUnit.SECONDS);
        System.out.println("redis成功存储");
        return true;
    }
}
MessageReceiver
考虑延时情况,将自动ack修改为手动模式,完成消息消费后进行一次手动确认。
利用RabbitListener注解来确定监听队列和确认模式。
@Component
@RabbitListener(queues = RabbitInfoConfig.QUEUE, ackMode = "MANUAL")
// 手动ack
public class MessageReceiver {
    @Autowired
    MessageService messageService;

    // 监听方法,获取消息队列中信息
    // redis存储,短信发送
    @RabbitHandler
    public void sendPhoneMessage(String message, @Header(AmqpHeaders.DELIVERY_TAG) long deliveryTag, Channel channel) throws IOException, InterruptedException {
        boolean isOk = messageService.sendMessage(message);
        // 想了下不管成不成功都直接消费掉吧
        if(isOk) {
            channel.basicAck(deliveryTag, false);
            System.out.println("成功完成验证码发送");
        }
        else {
            channel.basicAck(deliveryTag, false);
            System.out.println("发送失败");
        }
    }
}
简单演示
总结
使用了消息队列进行多服务的交互,简单整理了下demo。中间多模块的依赖整理了蛮久,发现子模块依赖引用需要额外的@ComponentScan注解配置,卡住了属于是。消息队列比较容易扩展,挺好的。代码已上传github https://github.com/huiluczP/rabbitMqDemo,感兴趣的话看下吧。

