Android,上传一张本地图片到服务器,Okhttp的post请求上传图片本地服务器
前言
也许你查看了很多博客也没有解决“如何将一张手机图片上传到服务器”?,本博客将已最原始的方式,以一个萌新的角度非常细致的讲解,以最原始的方式解决你的问题。
我一开始弄这个也花了很多时间,踩了很多坑,才弄明白如何实现这个功能。所以读者或者萌新不要害怕遇到坑,遇到坑是好事,真的,是好事。
前期工具准备
- AndroidStudio 安卓集成开发环境,采用Java语言(作者没学Kotlin)
- MyEclipse 用于搭建本地服务器(也可以是Eclipse, 也可以是Eclipse-EE, 只要能创建Web项目)
- TomCat 服务器(就几Md大小,下载好后,在你的Eclipse中配置好,如何判断已经配置好了?方法就是:启动服务器,打开电脑的浏览器输入 localhost:8080能跳出Tomcat的首页)
- 安卓模拟器,也可以自己的手机。
当你工具的环境如sdk,jdk等配置好,AndroidStudio,Eclipse都能正常使用的时候,我们就开始学习了。
Android端配置
为什么Android端还要配置?因为Android目前已经到了11版本,新版本的项目弃用了很多很多api,有些要实现这个功能必要的方法已经不能再使用了。所以安卓项目运行的版本非常重要。新建一个Android项目,版本配置如下:

1.项目的AndroidManifest.xml配置
<manifest xmlns:android="http://schemas.android.com/apk/res/android"
    package="com.ilikexy.picturetest">

    <application
        android:allowBackup="true"
        android:icon="@mipmap/ic_launcher"
        android:label="@string/app_name"
        android:roundIcon="@mipmap/ic_launcher_round"
        android:supportsRtl="true"
        android:theme="@style/Theme.PictureTest"
        android:requestLegacyExternalStorage="true"
        android:networkSecurityConfig="@xml/network_config">
        <activity android:name=".MainActivity">
            <intent-filter>
                <action android:name="android.intent.action.MAIN" />

                <category android:name="android.intent.category.LAUNCHER" />
            intent-filter>
        activity>
        <provider
            android:name="androidx.core.content.FileProvider"
            android:authorities="${applicationId}.fileprovider"
            android:exported="false"
            android:grantUriPermissions="true">
            <meta-data
                android:name="android.support.FILE_PROVIDER_PATHS"
                android:resource="@xml/file_paths" />
        provider>

    application>
    <uses-permission android:name="android.permission.INTERNET" />
    <uses-permission android:name="android.permission.READ_EXTERNAL_STORAGE" />
    <uses-permission android:name="android.permission.READ_CONTACTS" />
    <uses-permission android:name="android.permission.VIBRATE" />
    <uses-permission android:name="android.permission.READ_CONTACTS" />
    <uses-permission android:name="android.permission.ACCESS_WIFI_STATE" />
    <uses-permission android:name="android.permission.INTERNET" />
    <uses-permission android:name="android.permission.ACCESS_NETWORK_STATE" />

    <uses-permission android:name="android.permission.WRITE_EXTERNAL_STORAGE" />
manifest>
上面配置中有一个android:networkSecurityConfig="@xml/network_config"
因为Android高版本已经不再使用http网络请求了,而是要使用https,这个配置可以让解决这个问题。
1.2 Okhttp网络框架的引入
2. 安卓项目目录详情

2.1 network_config.xml
<network-security-config>
    <base-config cleartextTrafficPermitted="true" />
network-security-config>
2.2 file_paths.xml
<paths xmlns:android="http://schemas.android.com/apk/res/android">
    <external-path name="my_images" path="." />
paths>
2.3 themes.xml添加代码,Dialog的弹出收回效果
<style name="JumpDialog" parent="@android:style/Theme.Dialog">
- "android:windowBackground"
>@android:color/transparent
- "android:windowContentOverlay">@null
- "android:windowIsFloating">true
- "android:windowFrame">@null
- "android:backgroundDimEnabled">true
- "android:windowNoTitle">true
- "android:windowIsTranslucent">true
- "android:windowAnimationStyle">@style/DialogAnimation
style>
<style name="DialogAnimation" parent="@android:style/Animation.Dialog">
- "android:windowEnterAnimation"
>@anim/dialog_in
- "android:windowExitAnimation"
>@anim/dialog_out
style>
2.4 anim/dialog_in
<translate xmlns:android="http://schemas.android.com/apk/res/android"
    android:duration="200"
    android:fromYDelta="100%"
    android:toYDelta="0" />
2.5 anim/dialog_out
<translate xmlns:android="http://schemas.android.com/apk/res/android"
    android:duration="200"
    android:fromYDelta="0"
    android:toYDelta="100%" />
2.6 layout/dialog_touxiang.xml
这个是弹出对话框的布局效果如下图:

<LinearLayout
    xmlns:android="http://schemas.android.com/apk/res/android"
    android:layout_width="match_parent"
    android:layout_height="wrap_content"
    android:orientation="vertical">
    <TextView
        android:id="@+id/text_camera"
        android:text="拍照获取"
        android:gravity="center"
        android:textSize="18dp"
        android:background="#ffffff"
        android:padding="10dp"
        android:typeface="monospace"
        android:layout_width="match_parent"
        android:layout_height="wrap_content">
    TextView>
    <View
        android:layout_width="match_parent"
        android:layout_height="0.1dp"
        android:background="#c0c0c0">View>
    <TextView
        android:id="@+id/text_dcim"
        android:text="从相册获取"
        android:gravity="center"
        android:textSize="18dp"
        android:typeface="monospace"
        android:padding="10dp"
        android:background="#ffffff"
        android:layout_width="match_parent"
        android:layout_height="wrap_content">
    TextView>
    <View
        android:layout_width="match_parent"
        android:layout_height="5dp"
        android:background="#c0c0c0">View>
    <TextView
        android:id="@+id/text_cancel"
        android:text="取消"
        android:gravity="center"
        android:textSize="18dp"
        android:background="#ffffff"
        android:typeface="monospace"
        android:padding="10dp"
        android:layout_width="match_parent"
        android:layout_height="wrap_content">
    TextView>
    <View
        android:layout_width="match_parent"
        android:layout_height="0.1dp"
        android:background="#c0c0c0">View>
LinearLayout>
2.7 DcimUriGet.java
这个类是用来获取不同安卓版本,获取本地相册路径的uri
public class DcimUriget {
    /**
     * 根据URI获取文件真实路径(兼容多张机型)
     * @param context
     * @param uri
     * @return
     */
    public static String getFilePathByUri(Context context, Uri uri) {
        if ("content".equalsIgnoreCase(uri.getScheme())) {

            int sdkVersion = Build.VERSION.SDK_INT;
            if (sdkVersion >= 19) { // api >= 19
                return getRealPathFromUriAboveApi19(context, uri);
            } else { // api < 19
                return getRealPathFromUriBelowAPI19(context, uri);
            }
        } else if ("file".equalsIgnoreCase(uri.getScheme())) {
            return uri.getPath();
        }
        return null;
    }

    /**
     * 适配api19及以上,根据uri获取图片的绝对路径
     *
     * @param context 上下文对象
     * @param uri     图片的Uri
     * @return 如果Uri对应的图片存在, 那么返回该图片的绝对路径, 否则返回null
     */
    @SuppressLint("NewApi")
    private static String getRealPathFromUriAboveApi19(Context context, Uri uri) {
        String filePath = null;
        if (DocumentsContract.isDocumentUri(context, uri)) {
            // 如果是document类型的 uri, 则通过document id来进行处理
            String documentId = DocumentsContract.getDocumentId(uri);
            if (isMediaDocument(uri)) { // MediaProvider
                // 使用':'分割
                String type = documentId.split(":")[0];
                String id = documentId.split(":")[1];

                String selection = MediaStore.Images.Media._ID + "=?";
                String[] selectionArgs = {id};

                //
                Uri contentUri = null;
                if ("image".equals(type)) {
                    contentUri = MediaStore.Images.Media.EXTERNAL_CONTENT_URI;
                } else if ("video".equals(type)) {
                    contentUri = MediaStore.Video.Media.EXTERNAL_CONTENT_URI;
                } else if ("audio".equals(type)) {
                    contentUri = MediaStore.Audio.Media.EXTERNAL_CONTENT_URI;
                }

                filePath = getDataColumn(context, contentUri, selection, selectionArgs);
            } else if (isDownloadsDocument(uri)) { // DownloadsProvider
                Uri contentUri = ContentUris.withAppendedId(Uri.parse("content://downloads/public_downloads"), Long.valueOf(documentId));
                filePath = getDataColumn(context, contentUri, null, null);
            }else if (isExternalStorageDocument(uri)) {
                // ExternalStorageProvider
                final String docId = DocumentsContract.getDocumentId(uri);
                final String[] split = docId.split(":");
                final String type = split[0];
                if ("primary".equalsIgnoreCase(type)) {
                    filePath = Environment.getExternalStorageDirectory() + "/" + split[1];
                }
            }else {
                //Log.e("路径错误");
            }
        } else if ("content".equalsIgnoreCase(uri.getScheme())) {
            // 如果是 content 类型的 Uri
            filePath = getDataColumn(context, uri, null, null);
        } else if ("file".equals(uri.getScheme())) {
            // 如果是 file 类型的 Uri,直接获取图片对应的路径
            filePath = uri.getPath();
        }
        return filePath;
    }

    /**
     * 适配api19以下(不包括api19),根据uri获取图片的绝对路径
     *
     * @param context 上下文对象
     * @param uri     图片的Uri
     * @return 如果Uri对应的图片存在, 那么返回该图片的绝对路径, 否则返回null
     */
    private static String getRealPathFromUriBelowAPI19(Context context, Uri uri) {
        return getDataColumn(context, uri, null, null);
    }

    /**
     * 获取数据库表中的 _data 列,即返回Uri对应的文件路径
     *
     * @return
     */
    private static String getDataColumn(Context context, Uri uri, String selection, String[] selectionArgs) {
        String path = null;

        String[] projection = new String[]{MediaStore.Images.Media.DATA};
        Cursor cursor = null;
        try {
            cursor = context.getContentResolver().query(uri, projection, selection, selectionArgs, null);
            if (cursor != null && cursor.moveToFirst()) {
                int columnIndex = cursor.getColumnIndexOrThrow(projection[0]);
                path = cursor.getString(columnIndex);
            }
        } catch (Exception e) {
            if (cursor != null) {
                cursor.close();
            }
        }
        return path;
    }

    /**
     * @param uri the Uri to check
     * @return Whether the Uri authority is MediaProvider
     */
    private static boolean isMediaDocument(Uri uri) {
        return "com.android.providers.media.documents".equals(uri.getAuthority());
    }

    private static boolean isExternalStorageDocument(Uri uri) {
        return "com.android.externalstorage.documents".equals(uri.getAuthority());
    }

    /**
     * @param uri the Uri to check
     * @return Whether the Uri authority is DownloadsProvider
     */
    private static boolean isDownloadsDocument(Uri uri) {
        return "com.android.providers.downloads.documents".equals(uri.getAuthority());
    }
}
以上就是安卓项目的关于一些效果,以及功能的配置文件,直接复制粘贴就好了,以下几个类更重要些:

3.1 DialogContainer.java.
Dialog容器,这个不是什么官方的api或者框架类哈,这个类名自定义的,因为作者的项目还有其他功能会用到不同的Dialog.对话框。调用这个类的不同方法就可以显示不同的对话框,一个项目多个地方都会用到对话框,每次都写20-30行关于对话框的代码实在是麻烦,所以简单封装一下(其实”封装“这个概念都说不上,嘿嘿)
public class DialogContainer{
    public static Dialog dialog;
    //弹出图片选择对话框,选择拍照、还是本地相册读取
    //4个参数,第一个参数是上下文,第二个参数是Dialog的布局xml文件,
    //第三个参数 是拍照广播的action名,第四个参数是本地相册广播的action名
    public static void showPictureDialog(final Context context, int c_dialogid,
                                         final String zhaoxiang_action, final String dcim_action){
        dialog = new Dialog(context, R.style.JumpDialog);//指明Dialog容器弹出的动画风格
        //根据layout文件绘制出加载动画的视图
        LinearLayout linear = (LinearLayout) LayoutInflater.from(context).inflate(c_dialogid,null);
        TextView kongjian1 = (TextView)linear.findViewById(R.id.text_camera);
        TextView kongjian2 = (TextView)linear.findViewById(R.id.text_dcim);
        TextView kongjian3 = (TextView)linear.findViewById(R.id.text_cancel);
        //点击拍照,发送 拍照的广播,这个拍照广播是在 MainActivity中注册的
        kongjian1.setOnClickListener(new View.OnClickListener() {
            @Override
            public void onClick(View view) {
                //发送打开相机通知
                Intent intent = new Intent(zhaoxiang_action);
                context.sendBroadcast(intent);
                deleteDialog();
            }
        });
        //点击相册,发送 相册的广播,这个相册广播是在 MainActivity中注册的
        kongjian2.setOnClickListener(new View.OnClickListener() {
            @Override
            public void onClick(View view) {
                Intent intent1 = new Intent(dcim_action);
                context.sendBroadcast(intent1);
                deleteDialog();
            }
        });
        //取消Dialog
        kongjian3.setOnClickListener(new View.OnClickListener() {
            @Override
            public void onClick(View view) {
                deleteDialog();
            }
        });
        dialog.setContentView(linear);//将视图加入容器
        Window dialogWindow = dialog.getWindow();//获得窗口
        dialogWindow.setGravity(Gravity.BOTTOM);//放置在底部
        WindowManager.LayoutParams lp = dialogWindow.getAttributes(); // 获取对话框当前的参数值
        lp.x = 0; // 新位置X坐标
        lp.y = 0; // 新位置Y坐标
        lp.width = (int)context.getResources().getDisplayMetrics().widthPixels; // 宽度
        linear.measure(0, 0);
        lp.height = linear.getMeasuredHeight();
        lp.alpha = 1; // 透明度
        dialogWindow.setAttributes(lp);
        dialog.setCancelable(false);
        dialog.show();
    }


    public static void deleteDialog(){
        if (dialog!=null){
            dialog.cancel();
        }
    }
}
3.2 CaptureClass
这个类,作者是将启动相机和访问相册两种方式封装在一起,提供给MainActivity调用,启动相机和访问相册两种方式都是隐式Intent的方式实现。启动相机是
Intent intent = new Intent(MediaStore.ACTION_IMAGE_CAPTURE);
访问相册是
Intent intentToPickPic = new Intent(Intent.ACTION_PICK, null);
对于相机的拍照结果,本地相册选择图片的结果,作者把他们放在MainActivity处理。
public class CaptureClass {
    private File mphotoFile;//图片文件
    private Uri mphotoUri;//图片Uri
    private Context context;
    public CaptureClass(AppCompatActivity c_base){
        context = c_base;
    }
    //打开相机
    public Uri openCamera(){
        Intent intent = new Intent(MediaStore.ACTION_IMAGE_CAPTURE);//Action为多媒体库的拍照
        intent.addCategory(Intent.CATEGORY_DEFAULT);//未指定categories
        mphotoFile = getPhotoFileFromDcim();//从相册中获取指定路径名称的空图片
        Uri photouri = null;//空图片的uri
        //根据Android版本不同,uri获取方式不同
        if (Build.VERSION.SDK_INT>=Build.VERSION_CODES.N){//Android api 大于 24 , Android版本7.0
            //获得临时读取权限
            intent.addFlags(Intent.FLAG_GRANT_READ_URI_PERMISSION);
            photouri = FileProvider.getUriForFile(context,
                    "com.ilikexy.picturetest.fileprovider",mphotoFile);
        }else{//Android api 小于 24 , Android版本小于7.0
            photouri = Uri.fromFile(mphotoFile);
        }//指定生成图片文件类型,将Uri通过intent传给相机活动,key名是绝对化固定的
        if (photouri!=null){
            mphotoUri = photouri;
            intent.putExtra(MediaStore.EXTRA_OUTPUT,mphotoUri);//Uri传入
            intent.putExtra("outputFormat", Bitmap.CompressFormat.JPEG.toString());//图片类型传入
            intent.addFlags(Intent.FLAG_GRANT_WRITE_URI_PERMISSION);
            ((AppCompatActivity)context).startActivityForResult(intent,1);//回调跳转,指明唯一请求码
            return mphotoUri;
        }else{
            Toast.makeText(context,"图片Uri生成失败!",Toast.LENGTH_SHORT).show();
            return null;
        }
    }
    //获取相册路径,用于将拍照的图片插入相册
    public File getPhotoFileFromDcim(){
        try {
            String dcimpath = context.getExternalFilesDir(Environment.DIRECTORY_DCIM).getAbsolutePath();//获取相册路径
            String filename = new SimpleDateFormat("yyyyMMdd_HHmmss").format(new Date());//图片名称
            File fatherFile = new File(dcimpath);//父类文件
            fatherFile.mkdirs();
            File sonFile = File.createTempFile(filename,".jpg",fatherFile);//生成子类文件
            return sonFile;
        } catch (IOException e) {
            e.printStackTrace();
        }
        return null;
    }

    //-----------------------------------相册-------------------------------------
    //相册
    public void openDcim(){
        //动态申请本地存储读取权限
        if (ContextCompat.checkSelfPermission(context, Manifest.permission.READ_EXTERNAL_STORAGE)!=
                PackageManager.PERMISSION_GRANTED){
            ActivityCompat.requestPermissions((AppCompatActivity)context,new String[]{
                    Manifest.permission.READ_EXTERNAL_STORAGE},11);
        }else{
            openDcimright();
        }
    }

    //打开相册
    public void openDcimright(){
        //打开系统相册, 未指定具体的uri, ACTION_PICK
        Intent intentToPickPic = new Intent(Intent.ACTION_PICK, null);
        intentToPickPic.setDataAndType(MediaStore.Images.Media.EXTERNAL_CONTENT_URI, "image/*");
        ((AppCompatActivity)context).startActivityForResult(intentToPickPic,2);
    }
    //对于相机或者本地相册图片结果处理需要在活动中实现

}
4 layout_mainactivity.xml
活动的布局文件:

非常简单, 一个ImageView, 两个button按钮,点击选择图片就会弹出图片方式的Dialog, 选择拍照或者相册获取。 获取后就会显示在Imagview控件中。点击发送到服务器就会将图片以post方式上传到服务器。
<LinearLayout xmlns:android="http://schemas.android.com/apk/res/android"
    xmlns:app="http://schemas.android.com/apk/res-auto"
    xmlns:tools="http://schemas.android.com/tools"
    android:layout_width="match_parent"
    android:layout_height="match_parent"
    android:orientation="vertical"
    tools:context=".MainActivity">
    <ImageView
        android:id="@+id/imagehere"
        android:layout_width="match_parent"
        android:layout_height="300sp">

    ImageView>

    <Button
        android:id="@+id/btn_click"
        android:text="选择图片"
        android:layout_width="120sp"
        android:layout_height="40sp"/>

    <Button
        android:id="@+id/btn_sendtoserver"
        android:text="发送到服务器!!"
        android:layout_width="120sp"
        android:layout_height="40sp"/>

LinearLayout>
安卓项目最后一个类就是 MainActivity.java主活动,这个类等我们在服务器项目实现后再贴出来吧。
-------------------------------------------分割线----------------------------
Web项目服务器端
项目目录:

要是你的Servlet版本较低,那么你需要导入这两个包,如果你的版本高就不用。
commons-fileupload包:
链接:https://pan.baidu.com/s/1Ogdryf7PXGekdfQsE8czEw
提取码:o9af
commons-io 包:
链接:https://pan.baidu.com/s/19q2sk0iVfddzxhGrNct1Lg
提取码:t6p3
index.jsp文件的表单
 <body>
    <form action="uploadServlet" enctype="multipart/form-data" method="POST" >

      selectimage: <input type="file" name="myfile"/><br>
                   <input type="submit" value="upload"/>
   </form>

  </body>
web.xml配置
<servlet>
    <servlet-name>uploadServletservlet-name>
    <servlet-class>com.ilikexy.network.UploadServletservlet-class>
  servlet>
  <servlet-mapping>
    <servlet-name>uploadServletservlet-name>
    <url-pattern>/uploadServleturl-pattern>
  servlet-mapping>
UploadServlet.java
public class UploadServlet extends HttpServlet {

public UploadServlet() {
   super();
}

public void destroy() {
   super.destroy(); // Just puts "destroy" string in log
   // Put your code here
}

public void doGet(HttpServletRequest request, HttpServletResponse response)
    throws ServletException, IOException {
	//图片存放路径
			String relpath="/Demo/WebRoot/jsp/upimgs";
			String path=request.getSession().getServletContext().getRealPath(relpath);
			String fn=null;

	        DiskFileItemFactory factory=new DiskFileItemFactory();
	        ServletFileUpload sfu=new ServletFileUpload(factory);
	        sfu.setHeaderEncoding("UTF-8");  //处理中文问题
	        sfu.setSizeMax(1024*1024);   //限制文件大小

	        try {
	            List<FileItem> fileItems= sfu.parseRequest(request);  //解码请求 得到所有表单元素
	            for (FileItem fi : fileItems) {
	                //有可能是 文件,也可能是普通文字
	                if (fi.isFormField()) { //这个选项是 文字
	                    System.out.println("表单值为:"+fi.getString());
	                }else{
	                    // 是文件
	                	//获取图片后缀名
	                    String format=fi.getName().substring(fi.getName().indexOf("."), fi.getName().length());
	                    //图片命名
	                    fn=UUID.randomUUID().toString().replaceAll("-", "")+format;
	                    System.out.println("文件名是:"+fn);  //文件名
	                    // fn 是可能是这样的 c:\abc\de\tt\fish.jpg
	                    File file = new File(path,fn);
	                    fi.write(file);
	                    System.out.println(file.getAbsolutePath());

	                }
	            }

	        } catch (Exception e) {
	            e.printStackTrace();
	        }

	        String imgpath="upimgs/"+fn;
	        System.out.println(imgpath);
	        response.setContentType("text/html;charset=utf-8");
	    	//转化为写入
	    	PrintWriter  writer = response.getWriter();
	    	writer.write("服务器已经收到了你发的图片"+fn);
	    	writer.close();
	      //  request.getRequestDispatcher("toimgs.jsp").forward(request, response);

}
public void doPost(HttpServletRequest request, HttpServletResponse response)
    throws ServletException, IOException {
   doGet(request,response);
}

public void init() throws ServletException {
   // Put your code here
}

}
这个就是服务器的全部代码,我们先看一下能不能用吧!
单击项目右键,选择run as Server, 将项目加到tomcat中:

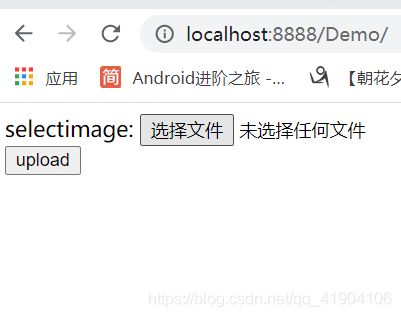
打开浏览器,输入: localhost:8080/Demo/

端口号默认是8080, 作者的电脑修改了端口,改成了8888;
然后就是选择图片,上传:


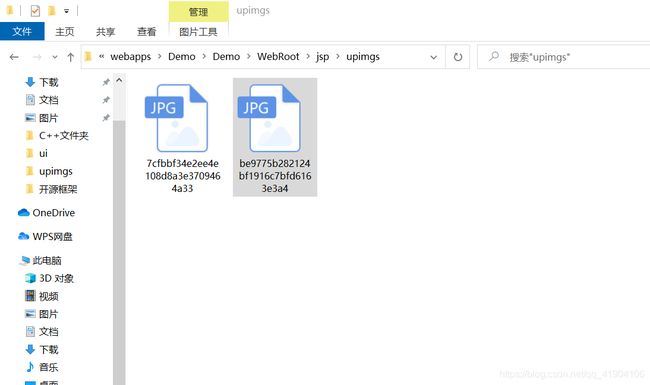
在这个输出目录里,我们就能在电脑的这个目录找到刚才上传的图片:

既然网页上能上传图片到Web服务器里,那么Android端怎么把图片上传到Web服务器呢?
让我们回到Android项目的主活动MainActivity.java中。。。。。
------------------分割线,欸,我又回来了-----------------------------
MainAcivity.java
public class MainActivity extends AppCompatActivity implements View.OnClickListener{
    private Button btnClick,btnSendtoServer;
    private ImageView picturehere;
    private XiangceReceiver xiangceReceiver;//启动相册的通知
    private CameraReceiver cameraReceiver;//启动相机的通知
    private Uri mphotoUri=null;
    private static File fileer;//全局文件,用于发送图片

    @Override
    protected void onCreate(Bundle savedInstanceState) {
        super.onCreate(savedInstanceState);
        setContentView(R.layout.activity_main);
        broadcastPicture();
        btnClick = (Button)findViewById(R.id.btn_click);
        picturehere = (ImageView)findViewById(R.id.imagehere);
        btnSendtoServer = (Button)findViewById(R.id.btn_sendtoserver);
        btnClick.setOnClickListener(this);
        btnSendtoServer.setOnClickListener(this);
    }

    @Override
    public void onClick(View v) {
        switch (v.getId()){
            case R.id.btn_click://调用图片方法
                DialogContainer.showPictureDialog(MainActivity.this,R.layout.dialog_touxiang,
                        "com.ilikexy.picturetest.paizhao","com.ilikexy.picturetest.xiangce");
                break;
            case R.id.btn_sendtoserver://发送到服务器
                sendToServer();
                break;
            default:
                break;
        }
    }
    //注册通知,处理照片选择的通知
    public void broadcastPicture(){
        IntentFilter intentFilter1 = new IntentFilter("com.ilikexy.picturetest.paizhao");
        IntentFilter intentFilter2 = new IntentFilter("com.ilikexy.picturetest.xiangce");
        xiangceReceiver = new XiangceReceiver();
        cameraReceiver = new CameraReceiver();
        registerReceiver(cameraReceiver,intentFilter1);
        registerReceiver(xiangceReceiver,intentFilter2);
    }
    //打开相册通知
    class XiangceReceiver extends BroadcastReceiver {
        @Override
        public void onReceive(Context context, Intent intent) {
            new CaptureClass(MainActivity.this).openDcim();//打开相册
        }
    }
    //打开相机通知
    class CameraReceiver extends BroadcastReceiver {
        @Override
        public void onReceive(Context context, Intent intent) {
            new CaptureClass(MainActivity.this).openCamera();//打开相机
        }
    }
    //对于captureclass读取本地图片动态权限申请处理结果
    @Override
    public void onRequestPermissionsResult(int requestCode, String[] permissions,int[] grantResults) {
        switch (requestCode){
            case 11:
                if (grantResults.length>0&&grantResults[0]== PackageManager.PERMISSION_GRANTED){
                    new CaptureClass(MainActivity.this).openDcimright();//请求成功
                }else{
                    Toast.makeText(this,"拒绝授权,程序销毁!",Toast.LENGTH_SHORT).show();
                    finish();
                }
                break;
            default:
                break;
        }
    }
    //对于图片获取的处理结果
    @Override
    protected void onActivityResult(int requestCode, int resultCode, Intent data) {
        super.onActivityResult(requestCode, resultCode, data);
        switch (requestCode) {
            case 1://打开相机
                if (resultCode == RESULT_OK) {
                   Toast.makeText(MainActivity.this,"相机代码出了点问题,不好意思哈",Toast.LENGTH_SHORT).show();
                }else{Toast.makeText(MainActivity.this,"拍照失败",Toast.LENGTH_SHORT).show();}
                break;
            case 2:
                if (resultCode==RESULT_OK){//打开相册成功
                    Uri uri = data.getData();//通过data获得图片uri
                    String filePath = DcimUriget.getFilePathByUri(MainActivity.this, uri);//调用根据uri获得图片路径的方法
                    if (!TextUtils.isEmpty(filePath)) {//如果路径不为空
                        //需要Glide加载图片
                        Bitmap bitmaperer = BitmapFactory.decodeFile(filePath);
                        fileer = new File(filePath);//将图片转为file形式。
                        Log.d("pathh",""+filePath+(bitmaperer==null));
                        runOnUiThread(new Runnable() {
                            @Override
                            public void run() {
                                picturehere.setImageBitmap(bitmaperer);
                            }
                        });
                    }
                }else{Toast.makeText(MainActivity.this,"打开相册失败",Toast.LENGTH_SHORT).show();}
                break;
            default:
                break;
        }//switchcasef方法
    }
    //网络请求,将图片数据发给服务器
    public void sendToServer(){
        new Thread(new Runnable() {
            @Override
            public void run() {
                OkHttpClient client = new OkHttpClient();
                //所有图片类型
                MediaType mediaType=MediaType.Companion.parse("image/*; charset=utf-8");
                //第一层,说明数据为文件,以及文件类型
                RequestBody fileBody=RequestBody.Companion.create(fileer,mediaType);

                //第二层,指明服务表单的键名,文件名,文件体
                RequestBody requestBody = new MultipartBody.Builder()
                        .setType(MultipartBody.FORM)
                        .addFormDataPart("myfile",fileer.getName(),fileBody)
                        .build();
                Request request = new Request.Builder()
                        .url("http://192.168.3.6:8888/Demo/uploadServlet")
                        .post(requestBody)
                        .build();
                //发送请求
                Call call = client.newCall(request);
                call.enqueue(new Callback() {
                    @Override
                    public void onFailure( Call call, IOException e) {
                        //网络故障
                        Looper.prepare();
                        Toast.makeText(MainActivity.this,"网络故障!",Toast.LENGTH_SHORT).show();
                        Looper.loop();
                    }

                    @Override
                    public void onResponse(Call call, Response response) throws IOException {
                        if (response.body()!=null){
                            Log.d("theresult",response.body().string());
                        }
                    }
                });


            }
        }).start();
    }
    @Override
    protected void onDestroy() {
        super.onDestroy();
        unregisterReceiver(xiangceReceiver);
    }
}
相机的照片处理有一定问题,我会尽快解决,打开相册选择图片是没问题的。

