consul windows本地伪集群搭建
1.编写service.json文件
service1
{
  "server": true,
  "ui_config": {
    "enabled": true
  },
  "datacenter": "mydc",
  "data_dir": "F:/consul_1.10/c1/data",
  "log_file":"F:/consul_1.10/c1/data/logs/service_1.log",
  "node_name": "service_1",
  "bootstrap_expect": 3,
  "client_addr": "0.0.0.0",
  "bind_addr": "127.0.0.1"
}
service2
{
  "server": true,
  "ui_config": {
    "enabled": true
  },
  "datacenter": "mydc",
  "data_dir": "F:/consul_1.10/c2/data",
  "log_file":"F:/consul_1.10/c2/data/logs/service_2.log",
  "node_name": "service_2",
  "bootstrap_expect": 3,
  "client_addr": "0.0.0.0",
  "bind_addr": "127.0.0.1"
}
service3
{
  "server": true,
  "ui_config": {
    "enabled": true
  },
  "datacenter": "mydc",
  "data_dir": "F:/consul_1.10/c3/data",
  "log_file":"F:/consul_1.10/c3/data/logs/service_3.log",
  "node_name": "service_3",
  "bootstrap_expect": 3,
  "client_addr": "0.0.0.0",
  "bind_addr": "127.0.0.1"
}
server: 以server身份启动。默认是client。
bootstrap_expect :集群要求的最少server数量,当低于这个数量,集群即失效。
data_dir:指定数据存储目录 需要提前创建好目录
log_file:日志文件所在位置 需要提前创建好目录
bind_addr:指定用来在集群内部的通讯地址,集群内的所有节点到此地址都必须是可达的,默认是0.0.0.0 当前设置成本地地址
client_addr:指定consul绑定在哪个client地址上,这个地址提供HTTP, DNS,RPC等服务,默认情况下,这是“127.0.0.1”,只允许回送连接.
node_name:节点在集群中的名称,在一个集群中必须是唯一的,默认是该节点的主机名。
datacenter:指定数据中心名称,默认是dc1.
2.分别启动3个consul
consul agent -config-dir=F:\consul_1.10\c1 -server-port 8300 -serf-lan-port 8301 -serf-wan-port 8302 -dns-port 8600 -http-port 8500 -enable-script-checks=true -log-json -disable-host-node-id -ui

consul agent -config-dir=F:\consul_1.10\c2 -server-port 9300 -serf-lan-port 9301 -serf-wan-port 9302 -dns-port 9600 -http-port 9500 -enable-script-checks=true -log-json -disable-host-node-id -ui

consul agent -config-dir=F:\consul_1.10\c3 -server-port 10300 -serf-lan-port 10301 -serf-wan-port 10302 -dns-port 10600 -http-port 10500 -enable-script-checks=true -log-json -disable-host-node-id -ui
-config-dir 要加载的配置文件的目录。Consul将加载后缀为“.json”的所有文件。加载顺序是按字母顺序排列的,并使用与上述config-file选项相同的合并例程 。可以多次指定此选项以加载多个目录。
port:
-
服务器RPC(默认8300)。这由服务器用来处理来自其他代理的传入请求。仅限TCP。
-
Serf LAN(默认8301)。这是用来处理局域网中的八卦。所有代理都需要。TCP和UDP。
-
Serf WAN(默认8302)。这被服务器用来在WAN上闲聊到其他服务器。TCP和UDP。从Consul 0.8开始,建议通过端口8302在LAN接口上为TCP和UDP启用服务器之间的连接,以及WAN加入泛滥功能
-
HTTP API(默认8500)。这被客户用来与HTTP API交谈。仅限TCP。
-
DNS接口(默认8600)。用于解析DNS查询。TCP和UDP。
-disable-host-node-id 将此设置为true将阻止Consul使用来自主机的信息生成确定性节点标识,并将生成随机节点标识,该标识将保留在数据目录中。在同一台主机上运行多个Consul代理进行测试时,这非常有用。Consul在版本0.8.5和0.8.5之前缺省为false,因此您必须选择加入基于主机的ID。基于主机的ID是使用https://github.com/shirou/gopsutil/tree/master/host生成的,与HashiCorp的Nomad共享 ,因此如果您选择加入基于主机的ID,则Consul和Nomad将使用信息在主机上在两个系统中自动分配相同的ID
3.将其它两个consul加入到集群
consul join -http-addr=127.0.0.1:8500 127.0.0.1:9301


consul join -http-addr=127.0.0.1:8500 127.0.0.1:10301
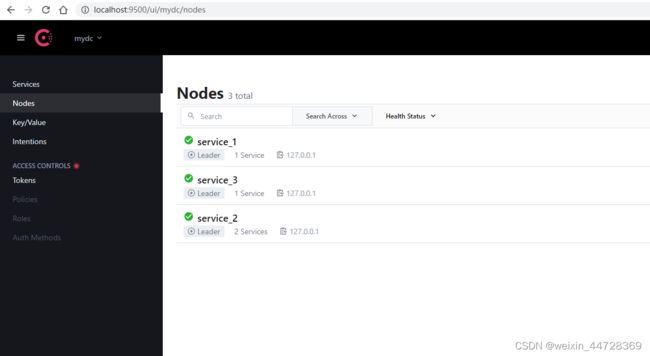
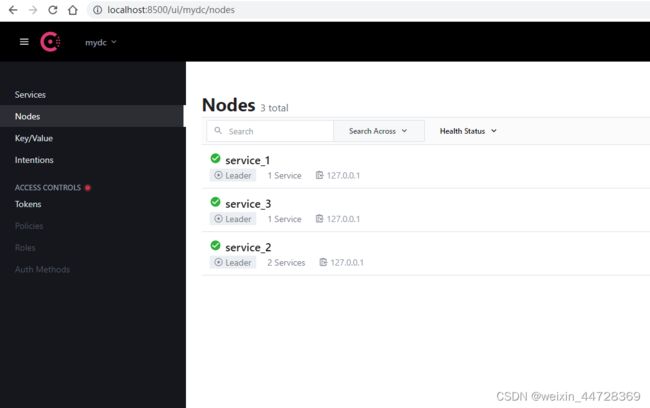
4.结果
更多指令可查看官网


