设计模式之原型模式
文章目录
- 一、介绍
- 二、实现步骤
- 三、案例
- 四、应用
- 五、细胞分裂
- 六、改造细胞分裂逻辑
- 七、总结
一、介绍
原型模式属于创建型设计模式,用于创建重复的对象,且同时又保证了性能。
该设计模式的好处是将对象的创建与调用方分离。
其目的就是**根据一个对象(称为原型)创建一个与其完全相同的对象(当然内存地址不同)。**原对象被认为是新对象的原型。
二、实现步骤
原型模式的实现步骤如下:
- 应用原型模式的类要实现
Cloneable接口。 - 应用原型模式的类要重写
Object类定义的clone()方法。 - 通过调用对象的
clone()方法,获得一个与该对象相同的对象。
在重写Object类定义的clone()方法时,直接通过调用super.clone()即可得到一个新对象,如下所示
@Override
public Object clone() {
    try {
        Object obj = super.clone();

        return obj;
    } catch (CloneNotSupportedException e) {
        throw new AssertionError();
    }
}
而super.clone()调用的其实就是在Object类中定义的方法
public class Object {
    // ...
    protected native Object clone() throws CloneNotSupportedException;
    // ...
}
该方法由native关键字修饰,表明其具体实现逻辑在JVM中已经完成了,我们无需知道其细节,只需知道调用该方法后将返回一个具有相同属性的对象即可。也正因此,该方式要比我们创建实例再初始化实例的性能好。
另外,该方法显式地抛出了CloneNotSupportedException异常,要求我们在调用clone()方法的对象必须实现Cloneable接口,否则将抛出该异常。
注意:调用super.clone()时,只能够满足浅拷贝,如果要实现深拷贝,则需要我们根据实际情况重写clone()的具体逻辑而不是调用super.clone()。
三、案例
我们创建一个Person类,实现Cloneable接口,并重写clone()方法。
public class Person implements Cloneable{

    private String name;
    private Integer age;
    private String sex;

    // 省略get、set方法

    @Override
    public Person clone() {
        try {
            Person person = (Person) super.clone();

            return person;
        } catch (CloneNotSupportedException e) {
            throw new AssertionError();
        }
    }
}
然后进行测试
public class PrototypeTest {

    public static void main(String[] args) {
        Person person = new Person();
        person.setName("name");
        person.setAge(1);
        person.setSex("男");

        Person clone = person.clone();
        System.out.println("获得的新对象:" + clone);
    }
}
得到的输出如下,可以发现,通过clone()方法可以获得一个与原对象具有相同属性的新对象。

四、应用
原型模式在实际应用中不是很广泛,因为绝大多数实例要么是有状态的(例如持有文件、远程链接等),则无法应用原型模式;要么是无状态的,此时应用单例模式更合适。
思来想去,基于原型模式创建重复对象的作用,我们可以利用该模式模拟细胞分裂。
五、细胞分裂
按照上面案例,我们新建一个细胞类Cell
public class Cell implements Cloneable{

    // 当前细胞为第num次分裂所得,细胞分裂是一个1变2,2变4,4变8的过程,
    private Integer num = 0;

    @Override
    public Cell clone() {
        try {
            // 每当克隆一次,num+1
            num++;

            Cell clone = (Cell) super.clone();
            return clone;
        } catch (CloneNotSupportedException e) {
            throw new AssertionError();
        }
    }
}
演示细胞分裂过程
public static void cellDivision() {
    // 第一个细胞
    Cell cell1 = new Cell();
    System.out.println("cell1:" + cell1);

    // cell1 通过自我复制, 产生一个新细胞 cell2
    Cell cell2 = cell1.clone();
    System.out.println("第一次分裂后:");
    System.out.println("cell1:" + cell1);
    System.out.println("cell2:" + cell2);

    // cell1、cell2 通过自我复制, 产生新细胞 cell3、cell4
    Cell cell3 = cell1.clone();
    Cell cell4 = cell2.clone();
    System.out.println("第二次分裂后:");
    System.out.println("cell1:" + cell1);
    System.out.println("cell2:" + cell2);
    System.out.println("cell3:" + cell3);
    System.out.println("cell4:" + cell4);
}
输出如下:
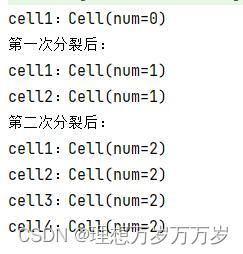
此时如果要计算当前一共有多少个细胞,就可以通过 2 n u m 2^{num} 2num得到结果。
六、改造细胞分裂逻辑
我们将N个细胞(无论分裂多少次)作为一个整体,假设该整体中所有细胞同时分裂,则可以将该细胞整体进行抽象。如下所示,新建一个细胞整体类Cells。
- 实现
Cloneable接口,表示该细胞整体可进行复制分裂。 - 重写
clone()方法,该细胞整体分裂的过程,其实就是所有个体在分裂,最后将其整合即可
public class Cells implements Cloneable{
	// 该细胞整体中的所有细胞个体
    private List<Cell> cellList = new ArrayList<>();

    // 添加一个细胞
    public void addCell(Cell cell) {
        cellList.add(cell);
    }

    // 该细胞整体复制分裂的过程
    @Override
    public Cells clone() {
        try {
            System.out.println("第" + (cellList.get(0).getNum()+1) + "次分裂...");

            // 新增的细胞数量和原细胞数量相同
            List<Cell> clonedCellList = new ArrayList<>(cellList.size());
            for (Cell cell : cellList) {
                // 将每一个细胞分裂得到的新细胞添加到clonedCellList集合中
                clonedCellList.add(cell.clone());
            }
            // 新细胞与原细胞合并
            cellList.addAll(clonedCellList);

            // 复制该细胞整体
            Cells clone = (Cells) super.clone();
            clone.setCellList(cellList);

            System.out.println("分裂后得到细胞数:" + cellList.size());
            return clone;
        } catch (CloneNotSupportedException e) {
            throw new AssertionError();
        }
    }
}
下面我们对该细胞整体的分裂过程进行演示
public static void cellDivision() {
    // 第一个细胞
    Cell cell = new Cell();
	// 向该细胞整体中添加第一个细胞
    Cells cells = new Cells();
    cells.addCell(cell);

    // 细胞分裂10次
    for (int i = 0; i < 10; i++) {
        cells = cells.clone();
    }
}
输出如下:

七、总结
- 原型模式用于创建具有相同属性的重复对象。
- 原型模式的实现就是实现
Cloneable接口 + 重写clone()方法实现的。 Object类的clone()方法实现由JVM实现,性能较好。但仅能实现浅拷贝。
纸上得来终觉浅,绝知此事要躬行。
————————我是万万岁,我们下期再见————————