多线程——学习笔记 1
目录
-
-
-
- 多线程的了解
- 多线程并行和并发的区别
- Java程序运行原理
- 多线程程序实现的方式
-
- 1.继承Thread
- 2.实现Runnable
- 多线程(实现Runnable的原理)
- 实现多线程两种方式的区别
- 匿名内部类实现线程的两种方式
- 获取线程名字和设置名字
- 获取当前线程的对象——hread.currentThread()
- 休眠线程——Thread.sleep
- 守护线程——setDaemon
- 加入线程——join
- 礼让线程——yield
- 设置线程的优先级——setPriority
- 同步代码块
- 线程安全问题
- 死锁
- 线程安全
-
-
多线程的了解
-
什么是线程
- 线程是程序执行的一条路径, 一个进程中可以包含多条线程
- 多线程并发执行可以提高程序的效率, 可以同时完成多项工作
-
多线程的应用场景
- 红蜘蛛同时共享屏幕给多个电脑
- 迅雷开启多条线程一起下载
- QQ同时和多个人一起视频
- 服务器同时处理多个客户端请求
多线程并行和并发的区别
-
并行就是两个任务同时运行,就是甲任务进行的同时,乙任务也在进行。(需要多核CPU)
-
并发是指两个任务都请求运行,而处理器只能按受一个任务,就把这两个任务安排轮流进行,由于时间间隔较短,使人感觉两个任务都在运行。
-
比如我跟两个网友聊天,左手操作一个电脑跟甲聊,同时右手用另一台电脑跟乙聊天,这就叫并行。
-
如果用一台电脑我先给甲发个消息,然后立刻再给乙发消息,然后再跟甲聊,再跟乙聊。这就叫并发。
Java程序运行原理
-
Java程序运行原理
- Java命令会启动java虚拟机,启动JVM,等于启动了一个应用程序,也就是启动了一个进程。该进程会自动启动一个 “主线程” ,然后主线程去调用某个类的 main 方法。
-
JVM的启动是多线程的吗
- JVM启动至少启动了垃圾回收线程和主线程,所以是多线程的。
多线程程序实现的方式
1.继承Thread
- 定义类继承Thread
- 重写run方法
- 把新线程要做的事写在run方法中
- 创建线程对象
- 开启新线程, 内部会自动执行run方法
public class Demo2_Thread {
	public static void main(String[] args) {
		MyThread mt = new MyThread();							//4,创建自定义类的对象
		mt.start();												//5,开启线程

		for(int i = 0; i < 3000; i++) {
			System.out.println("bb");
		}
	}

}
class MyThread extends Thread {									//1,定义类继承Thread
	public void run() {											//2,重写run方法
		for(int i = 0; i < 3000; i++) {							//3,将要执行的代码,写在run方法中
			System.out.println("aaaaaaaaaaaaaaa");
		}
	}
}
2.实现Runnable
- 定义类实现Runnable接口
- 实现run方法
- 把新线程要做的事写在run方法中
- 创建自定义的Runnable的子类对象
- 创建Thread对象, 传入Runnable
- 调用start()开启新线程, 内部会自动调用Runnable的run()方法
public class Demo3_Runnable {
     	public static void main(String[] args) {
     		MyRunnable mr = new MyRunnable();						//4,创建自定义类对象
     		Thread t = new Thread(mr);								//5,将其当作参数传递给Thread的构造函数
     		t.start();												//6,开启线程
for(int i = 0; i < 3000; i++) {
			System.out.println("bb");
		}
	}
}

class MyRunnable implements Runnable {							//1,自定义类实现Runnable接口
	@Override
	public void run() {											//2,重写run方法
		for(int i = 0; i < 3000; i++) {							//3,将要执行的代码,写在run方法中
			System.out.println("aaaaaaaaaaaaaaaaaa");
		}
	}

}
多线程(实现Runnable的原理)
- 1、看Thread类的构造函数,传递了Runnable接口的引用
- 2、通过init()方法找到传递的target给成员变量的target赋值
- 3、查看run方法,发现run方法中有判断,如果target不为null就会调用Runnable接口子类对象的run方法
实现多线程两种方式的区别
-
查看源码的区别:
-
a.继承Thread : 由于子类重写了Thread类的run(), 当调用start()时, 直接找子类的run()方法
-
b.实现Runnable : 构造函数中传入了Runnable的引用, 成员变量记住了它, start()调用run()方法时内部判断成员变量Runnable的引用是否为空, 不为空编译时看的是Runnable的run(),运行时执行的是子类的run()方法
-
继承Thread
-
好处是:可以直接使用Thread类中的方法,代码简单
-
弊端是:如果已经有了父类,就不能用这种方法
-
实现Runnable接口
-
好处是:即使自己定义的线程类有了父类也没关系,因为有了父类也可以实现接口,而且接口是可以多实现的
-
弊端是:不能直接使用Thread中的方法需要先获取到线程对象后,才能得到Thread的方法,代码复杂
匿名内部类实现线程的两种方式
-
继承Thread类
 new Thread() {                                                               //1.继承Thread类
            public void run() {                                                      //2.重写run方法
                for (int i = 0; i < 1000; i++) {                                     //3.将要执行的代码写在run方法中
                    System.out.println("saaaaaaaaaaaaaaaaaaaaaaaaaaaaaaaaaaa");
                }
            }
        }.start();                                                                   //4.开启线程
- 实现Runnable接口
        new Thread(new Runnable() {                                                  //1.将Runnable的子类对象传递给Thread
            @Override
            public void run() {                                                      //2.重写run方法
                for (int i = 0; i < 1000; i++) {                                     //3.将要执行的代码写在run方法中
                    System.out.println("bbbbbbbbbbb");
                }
            }
        }).start();                                                                  //4.开启线程
获取线程名字和设置名字
- 通过getName()方法获取线程对象的名字
new Thread() {                                                               //1.继承Thread类
            public void run() {                                                      //2.重写run方法
                for (int i = 0; i < 1000; i++) {                                     //3.将要执行的代码写在run方法中
                    System.out.println("线程名为:"+getName());
                }
            }
        }.start();                                                                   //4.开启线程

- 通过构造函数可以传入String类型的名字
new Thread("主线程1") {                                                               //1.继承Thread类
            public void run() {                                                      //2.重写run方法
                for (int i = 0; i < 1000; i++) {                                     //3.将要执行的代码写在run方法中
                    System.out.println("线程名为:"+getName());
                }
            }
        }.start();                                                                   //4.开启线程

- 通过setName(String)方法可以设置线程对象的名字
Thread t1 = new Thread() {                                                   //1.继承Thread类
            public void run() {                                                      //2.重写run方法
                for (int i = 0; i < 1000; i++) {                                     //3.将要执行的代码写在run方法中
                    System.out.println("线程名为:"+getName());
                }
            }
        };                                                                          //4.开启线程

        t1.setName("设置线程名1");
        t1.start();

获取当前线程的对象——hread.currentThread()
- hread.currentThread(),获取当前线程的对象,主线程也可以获取
Thread.currentThread().setName("1001");                                        //获取主函数线程的引用,并改名字
        System.out.println(Thread.currentThread().getName());                      //获取主函数线程的引用,并获取名字

        new Thread(new Runnable() {                                                  //1.将Runnable的子类对象传递给Thread
            @Override
            public void run() {                                                      //2.重写run方法
                for (int i = 0; i < 10; i++) {                                     //3.将要执行的代码写在run方法中
                    System.out.println("bbbbbbbbbbb");
                }
            }
        }).start();                                                                //4.开启线程

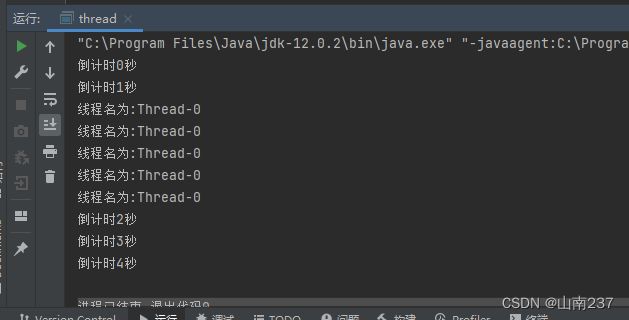
休眠线程——Thread.sleep
-
- Thread.sleep(毫秒), 控制当前线程休眠若干毫秒1秒= 1000毫秒
- Thread.sleep(毫秒,纳秒), 控制当前线程休眠若干毫秒1秒= 1000毫秒 1秒 = 1000 * 1000 * 1000纳秒 1000000000
 new Thread(new Runnable() {                                                  //1.将Runnable的子类对象传递给Thread
            @Override
            public void run() {                                                      //2.重写run方法
                for (int i = 0; i < 10; i++) {                                     //3.将要执行的代码写在run方法中
                    System.out.println("倒计时"+i+"秒");
                    try {
                        Thread.sleep(1000);
                    } catch (InterruptedException e) {
                        e.printStackTrace();
                    }
                }
            }
        }).start();                                                                //4.开启线程

守护线程——setDaemon
- setDaemon(), 设置一个线程为守护线程, 该线程不会单独执行, 当其他非守护线程都执行结束后, 自动退出
public static void main(String[] args) {
     Thread t1 = new Thread() {                                                   //1.继承Thread类
            public void run() {                                                      //2.重写run方法
                for (int i = 0; i < 2; i++) {                                     //3.将要执行的代码写在run方法中
                    System.out.println("线程名为:" + getName());
                    }
                }
        };                                                                          //4.开启线程

     Thread t2 = new Thread() {                                                  //1.将Runnable的子类对象传递给Thread
            @Override
            public void run() {                                                      //2.重写run方法
                for (int i = 0; i < 5; i++) {                                     //3.将要执行的代码写在run方法中
                    System.out.println("倒计时"+i+"秒");
                    try {
                        Thread.sleep(1000);
                    } catch (InterruptedException e) {
                        e.printStackTrace();
                    }
                }
            }
        };                                                                //4.开启线程

        t2.setDaemon(true);                                                //将t2设置为守护线程

        t1.start();
        t2.start();
    }
}

有时间缓冲,所以非守护线程有时也会执行
加入线程——join
- join(),当前线程暂停, 等待指定的线程执行结束后, 当前线程再继续
- join(int), 可以等待指定的毫秒之后继续
 public static void main(String[] args) {
     final Thread t1 = new Thread() {                                                   //1.继承Thread类
            public void run() {                                                      //2.重写run方法
                for (int i = 0; i < 5; i++) {                                     //3.将要执行的代码写在run方法中
                    System.out.println("线程名为:" + getName());
                    }
                }
        };                                                                          //4.开启线程

     Thread t2 = new Thread() {                                                  //1.将Runnable的子类对象传递给Thread
            @Override
            public void run() {                                                      //2.重写run方法
                for (int i = 0; i < 5; i++) {                                     //3.将要执行的代码写在run方法中
                  if (i==2){
                      try {
                         // t1.join();                                                //匿名内部类在使用它所在方法中的局部变量时必须用final修饰
                          t1.join(1);                                           //插队指定时间,在指定时间执行完后,两条线程继续交替执行
                      } catch (InterruptedException e) {
                          e.printStackTrace();
                      }
                  }

                    System.out.println("倒计时"+i+"秒");


                }
            }
        };                                                                //4.开启线程
        t1.start();
        t2.start();
    }
礼让线程——yield
- yield让出cpu
public static void main(String[] args) {
        new MyThread().start();
        new MyThread().start();
    }
}
    class MyThread extends Thread{
        public void run(){
            for (int i = 0 ;i<1000;i++){
                if (i % 10 ==0){
                    Thread.yield();

                }
                System.out.println(getName()+"线程"+i);
            }
        }
    }

设置线程的优先级——setPriority
- setPriority()设置线程的优先级
public static void main(String[] args) {
        Thread t1 = new Thread() {                                                   //1.继承Thread类
            public void run() {                                                      //2.重写run方法
                for (int i = 0; i < 100; i++) {                                     //3.将要执行的代码写在run方法中
                    System.out.println("线程名为:" + getName()+"____"+i);
                }
            }
        };                                                                          //4.开启线程

        Thread t2 = new Thread() {                                                  //1.将Runnable的子类对象传递给Thread
            @Override
            public void run() {                                                      //2.重写run方法
                for (int i = 0; i < 100; i++) {                                     //3.将要执行的代码写在run方法中
                    System.out.println(getName()+"倒计时" + i + "秒");
                }
            }
        };                                                                //4.开启线程
        t1.setPriority(Thread.MIN_PRIORITY);//设置最小优先级
        t2.setPriority(Thread.MAX_PRIORITY);//设置最大优先级

        t1.start();
        t2.start();
    }
}

同步代码块
- 1.什么情况下需要同步
- 当多线程并发, 有多段代码同时执行时, 我们希望某一段代码执行的过程中CPU不要切换到其他线程工作. 这时就需要同步.
- 如果两段代码是同步的, 那么同一时间只能执行一段, 在一段代码没执行结束之前, 不会执行另外一段代码.
- 2.同步代码块
- 使用synchronized关键字加上一个锁对象来定义一段代码, 这就叫同步代码块
- 多个同步代码块如果使用相同的锁对象, 那么他们就是同步的
public class Synchronized {
    public static void main(String[] agr) {
        final printer p = new printer();
        new Thread() {
            public void run() {
                while (true) {
                    p.print1();
                }
            }
        }.start();
        new Thread() {
            public void run() {
                while (true) {
                    p.print2();
                }
            }
        }.start();
    }
}

class printer {
    public void print1() {
        demo d = new demo();
        synchronized (d) {   //锁对象可以是任意对象,但是被锁的代码需要保证是同一把锁,不能用匿名对象
            System.out.print("北");
            System.out.print("京");
            System.out.print("欢");
            System.out.print("迎");
            System.out.print("您");
            System.out.print("\r\n");
        }
    }
    /*
     * 非静态同步函数的锁是:this
     * 静态的同步函数的锁是:字节码对象
     */
    public void print2() {
        demo d = new demo();
        synchronized (d) {
            System.out.print("武");
            System.out.print("汉");
            System.out.print("热");
            System.out.print("干");
            System.out.print("面");
            System.out.print("\r\n");
        }
    }
}

class demo {

}

- 使用synchronized关键字修饰一个方法, 该方法中所有的代码都是同步的
public class Synchronized {
    public static void main(String[] agr) {
        final printer p = new printer();
        new Thread() {
            public void run() {
                while (true) {
                    p.print1();
                }
            }
        }.start();
        new Thread() {
            public void run() {
                while (true) {
                    p.print2();
                }
            }
        }.start();
    }
}

/**
 * 非静态的同步方法的锁对象是this
 * 静态的同步方法的锁对象是该类的字节码对象
 */
class printer {
    public synchronized void print1() {
        //锁对象可以是任意对象,但是被锁的代码需要保证是同一把锁,不能用匿名对象
        //使用synchronized关键字修饰一个方法, 该方法中所有的代码都是同步的
        System.out.print("北");
        System.out.print("京");
        System.out.print("欢");
        System.out.print("迎");
        System.out.print("您");
        System.out.print("\r\n");

    }

    /*
     * 非静态同步函数的锁是:this
     * 静态的同步函数的锁是:字节码对象
     */
    public void print2() {

        synchronized (this) {
            System.out.print("武");
            System.out.print("汉");
            System.out.print("热");
            System.out.print("干");
            System.out.print("面");
            System.out.print("\r\n");
        }
    }
}

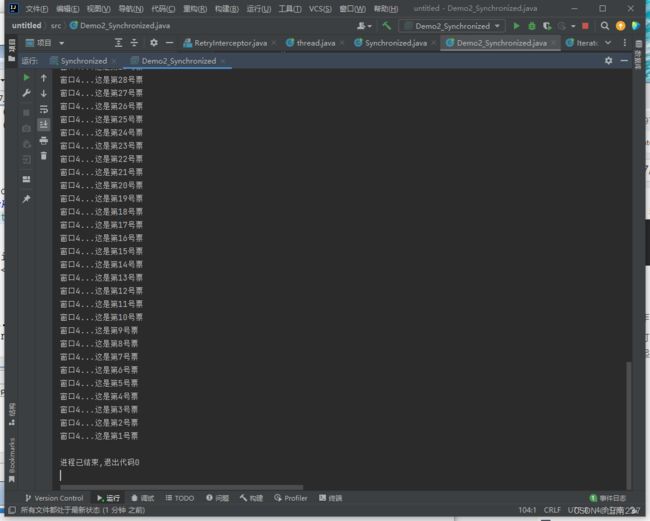
线程安全问题
- 多线程并发操作同一数据时, 就有可能出现线程安全问题
- 使用同步技术可以解决这种问题, 把操作数据的代码进行同步, 不要多个线程一起操作
public class Demo2_Synchronized {
    public static void main(String[] args) {
        TicketsSeller t1 = new TicketsSeller();
        TicketsSeller t2 = new TicketsSeller();
        TicketsSeller t3 = new TicketsSeller();
        TicketsSeller t4 = new TicketsSeller();

        t1.setName("窗口1");
        t2.setName("窗口2");
        t3.setName("窗口3");
        t4.setName("窗口4");
        t1.start();
        t2.start();
        t3.start();
        t4.start();
    }

}

class TicketsSeller extends Thread {
    private static int tickets = 100;
    static Object obj = new Object();
    public TicketsSeller() {
        super();

    }
    public TicketsSeller(String name) {
        super(name);
    }
    public void run() {
        while(true) {
            synchronized(obj) {
                if(tickets <= 0)
                    break;
                try {
                    Thread.sleep(10);//线程1睡,线程2睡,线程3睡,线程4睡
                } catch (InterruptedException e) {

                    e.printStackTrace();
                }
                System.out.println(getName() + "...这是第" + tickets-- + "号票");
            }
        }
    }
}
多次启动一个线程是非法的
public class Demo2_Synchronized {
    public static void main(String[] args) {
        TicketsSeller ticketsSeller = new TicketsSeller();

       /* Thread t1 = new Thread(ticketsSeller);//多次启动一个线程是非法的
        t1.start();
        t1.start();
        t1.start();
        t1.start();*/

    }
}

class TicketsSeller implements Runnable {
    private static int tickets = 100;

    public void run() {
        while(true) {
            synchronized(TicketsSeller.class) {
                if(tickets <= 0)
                    break;
                try {
                    Thread.sleep(10);//线程1睡,线程2睡,线程3睡,线程4睡
                } catch (InterruptedException e) {

                    e.printStackTrace();
                }
                System.out.println(Thread.currentThread().getName() + "...这是第" + tickets-- + "号票");
            }
        }
    }
}
死锁
-
多线程同步的时候, 如果同步代码嵌套, 使用相同锁, 就有可能出现死锁
-
尽量不要嵌套使用

    private static String s1 = "筷子左";
    private static String s2 = "筷子右";

    public static void main(String[] args) {
        new Thread() {
            public void run() {
                while (true) {
                    synchronized (s1) {
                        System.out.println(getName() + "...拿到" + s1 + "等待" + s2);
                        synchronized (s2) {
                            System.out.println(getName() + "...拿到" + s2 + "开吃");
                        }
                    }
                }
            }
        }.start();

        new Thread() {
            public void run() {
                while (true) {
                    synchronized (s2) {
                        System.out.println(getName() + "...拿到" + s2 + "等待" + s1);
                        synchronized (s1) {
                            System.out.println(getName() + "...拿到" + s1 + "开吃");
                        }
                    }
                }
            }
        }.start();
    }
线程安全
- Vector是线程安全的,ArrayList是线程不安全的
- StringBuffer是线程安全的,StringBuilder是线程不安全的
- Hashtable是线程安全的,HashMap是线程不安全的