一、字体属性
1、font-size(字体大小)
p {
  font-size: 14px;
}
font-size 属性可设置字体的尺寸。
px:像素,稳定和精确
%:把 font-size 设置为基于父元素的一个百分比值,布局时用到。
em:移动端字体样式大小,相对于其父元素来设置字体大小
rem:可以换算为各种移动端,相对于根元素来设置字体大小
2、font-weight(字体粗细)
font-weight字重,可用来调整字体粗细。
/*font-weight: normal;*/
/*font-weight: bold;*/
/*font-weight: bolder;*/
font-weight: 500;
取值:
/*值            描述
normal    默认值,标准粗细
bord      粗体
border    更粗
lighter   更细
100~900   设置具体粗细,400等同于normal,而700等同于bold
inherit   继承父元素字体的粗细值
*/
3、font-family(字体系列)
body {
  font-family: "Microsoft Yahei", "微软雅黑", "Arial", sans-serif;
}
font-family可以把多个字体名称作为一个“回退”系统来保存。如果浏览器不支持第一个字体,则会尝试下一个。浏览器会使用它可识别的第一个值。
字体设置综合性写法
p{
    width: 300px;
    height: 60px;

    /*综合性写法*/
    font: 14px/30px"宋体";
    /* 等价于
    font-size: 14px;
    line-height: 30px;
    font-family: '宋体';
    */
}
使用font-family的注意要点:
DOCTYPE html>
<html lang="en">
<head>
    <meta charset="UTF-8">
    <meta name="viewport" content="width=device-width, initial-scale=1.0">
    <meta http-equiv="X-UA-Compatible" content="ie=edge">
    <title>字体title>

    <style>
        p{
            width: 300px;
            height: 60px;
            /*综合性写法*/
            /*font: 14px/30px"宋体";*/
            font: 14px/30px"HanziPen SC";

            /* 等价于
            font-size: 14px;
            line-height: 30px;
            font-family: '宋体';
            */
            /*font:14px/30px  "Arial","Hanzipen SC","微软雅黑";*/


        }
    style>
head>

<body>


    <p> 我是文本p>

body>
html>
CSS font-family 各名称一览表:
https://blog.csdn.net/cddcj/article/details/70739481
4、color(字体颜色、背景颜色)
颜色表示方法有三种:颜色名称单词(如:red)、rgb表示法(如:rgb(255,0,0) )、十六进制值(如:#FF0000)。
(1)RGB原理:光学显示器每个像素都是由三原色(红绿蓝)发光原件组成的,靠明亮不同调成不同的颜色。
用逗号隔开,r、g、b的值,每个值的取值范围0~255,一共256个值;其中255代表纯色,0代表无色。
div{
    /*黑色:*/
    background-color: rgb(0,0,0);
    /*光学显示器,每个元件都不发光,黑色的。*/

    /*白色:*/
    background-color: rgb(255,255,255);

    /*颜色可以叠加,比如黄色就是红色和绿色的叠加:*/
    background-color: rgb(255,255,0);

    background-color: rgb(111,222,123);
    /*就是红、绿、蓝三种颜色的不同比例叠加。*/
}
后来还演化出了rgba,可以用来实现透明度的调整:
div{
    background-color: rgba(0,0,0,.1);
}
(2)16进制表示法:
所有用#开头的值,都是16进制的。例如:#ff0000:红色
16进制表示法,也是两位两位看,看r、g、b,但是没有逗号隔开。ff就是10进制的255 ,00 就是10进制的0,00就是10进制的0。所以等价于rgb(255,0,0)。
十六进制可以简化为3位,所有#aabbcc的形式(2位2位一样的),能够简化为#abc;
/*要记住:*/
#000   黑
#fff    白
#f00   红
#333   灰
#222   深灰
#ccc   浅灰
对于颜色最方便的还是使用各种取色工具辅助实现。下面是颜色代码示例详解:
DOCTYPE html>
<html lang="en">
<head>
    <meta charset="UTF-8">
    <title>title>
    <style type="text/css">
        div{
            width: 200px;
            height: 200px;
            /*background-color: rgb(0,0,0);*/
            background-color: rgba(0,0,0,.1);
            /*background-color: #f00;*/


            /* 颜色表示方法有哪些?
            一共有三种:单词、rgb表示法、十六进制表示法

            rgb:红色 绿色 蓝色 三原色
            光学显示器,每个像素都是由三原色的发光原件组成的,靠明亮度不同调成不同的颜色的。
            用逗号隔开,r、g、b的值,每个值的取值范围0~255,一共256个值。
            如果此项的值,是255,那么就说明是纯色:

            黑色:
            background-color: rgb(0,0,0);
            光学显示器,每个元件都不发光,黑色的。

            白色:
            background-color: rgb(255,255,255);

            颜色可以叠加,比如黄色就是红色和绿色的叠加:
            background-color: rgb(255,255,0);

            再比如:
            background-color: rgb(111,222,123);
            就是红、绿、蓝三种颜色的不同比例叠加。


            16进制表示法
            红色:
                background-color: #ff0000;
                所有用#开头的值,都是16进制的。
                #ff0000:红色
                16进制表示法,也是两位两位看,看r、g、b,但是没有逗号隔开。
                ff就是10进制的255 ,00 就是10进制的0,00就是10进制的0。所以等价于rgb(255,0,0);
                怎么换算的?我们介绍一下
                我们现在看一下10进制中的基本数字(一共10个):
                0、1、2、3、4、5、6、7、8、9

                16进制中的基本数字(一共16个):
                0、1、2、3、4、5、6、7、8、9、a、b、c、d、e、f

                16进制对应表:
                十进制数    十六进制数
                0                0
                1                1
                2                2
                3                3
                ……
                10                a
                11                b
                12                c
                13                d
                14                e
                15                f

                16                10
                17                11
                18                12
                19                13
                ……
                43                2b
                ……
                255                ff

                十六进制中,13 这个数字表示什么?
                表示1个16和3个1。 那就是19。 这就是位权的概念,开头这位表示多少个16,末尾这位表示多少个1。
                小练习:
                16进制中28等于10进制多少?
                答:2*16+8 = 40。

                16进制中的2b等于10进制多少?
                答:2*16+11 = 43。

                16进制中的af等于10进制多少?
                答:10 * 16 + 15 = 175

                16进制中的ff等于10进制多少?
                答:15*16 + 15 = 255

                所以,#ff0000就等于rgb(255,0,0)

                background-color: #123456;
                等价于:
                background-color: rgb(18,52,86);

                所以,任何一种十六进制表示法,都能够换算成为rgb表示法。也就是说,两个表示法的颜色数量,一样。

                十六进制可以简化为3位,所有#aabbcc的形式,能够简化为#abc;
                比如:
                background-color:#ff0000;
                等价于
                background-color:#f00;

                比如:
                background-color:#112233;
                等价于
                background-color:#123;

                只能上面的方法简化,比如
                background-color:#222333;
                无法简化!
                再比如
                background-color:#123123;
                无法简化!

要记住:
#000   黑
#fff    白
#f00   红
#333   灰
#222   深灰
#ccc   浅灰


             */

        }
    style>
head>
<body>

    <div>

    div>

body>
html>
二、文字属性
1、text-align(文本匹配)
text-align 属性规定元素中的文本的水平对齐方式。
| 值 | 描述 |
|---|---|
| left | 左边对齐 默认值 |
| right | 右对齐 |
| center | 居中对齐 |
| justify | 两端对齐 |
2、text-decoration(文字装饰)
| 值 | 描述 |
|---|---|
| none | 默认。定义标准的文本。 |
| underline | 定义文本下的一条线。 |
| overline | 定义文本上的一条线。 |
| line-through | 定义穿过文本下的一条线。 |
| inherit | 继承父元素的text-decoration属性的值。 |
具体使用时,还可以同时设置线的颜色。
text-decoration: underline blue;
运用最频繁的还是消除a标签的默认样式:
text-decoration: none;
3、line-height(行高)
p{
    /*行高*/
    line-height: 100px;
}
常用于文本垂直居中操作。
(1)单行文本垂直居中
示例如下所示:
DOCTYPE html>
<html lang="en">
<head>
    <meta charset="UTF-8">
    <title>Titletitle>
    <style type="text/css">
        div{
            width: 300px;
            height: 50px;
            border: 1px solid red;
            /*行高的意思:
            公式:行高=盒子的高度,让文本垂直居中,
            但是只适应于单行文本。
            */
            line-height: 50px;
            font-size: 18px;
        }
    style>
head>
<body>
    <div>
        内容 国家
    div>
body>
html>
公式:行高=盒子的高度,让文本垂直居中(只适用于单行)
(2)多行文本垂直居中
注意:line-height一定要大于font-size,否则所有字都会挤在一起,影响美观。
DOCTYPE html>
<html lang="en">
<head>
    <meta charset="UTF-8">
    <title>Titletitle>
    <style type="text/css">
        div{
            width: 300px;
            /*height: 200px;*/
            height: 160px;   /* padding加了40px,height一定要减40px */
            border: 1px solid red;
            /*运用padding居中*/
            padding-top: 40px;
            line-height: 30px;
            font-size: 16px;
        }
    style>
head>
<body>

    <div>
        文字文字文字文字文字文字文字文字文字文字文字文字文字文字文字文字文字文字
        文字文字文字文字文字文字文字文字文字文字文字文字文字文字文字文字文字文字
    div>
body>
html>
一个行高(line-height)30px,一共4列,那就是120px,总的高度是200px,如果让整个行高垂直居中在当前的盒子中。(200-120)/2=40px,设置padding-top=40px, height高度-40px。
总之:利用padding和line-height实现多行垂直居中需要通过精确计算实现。
4、cursor(光标)
p{
    text-decoration: underline blue;
    color: blue;
    cursor: pointer;  /* point在鼠标移上去时,光标呈现为指示链接的指针(一只手) */
}
cursor 属性规定要显示的光标的类型(形状)。该属性定义了鼠标指针放在一个元素边界范围内时所用的光标形状。
5、text-indent(首行缩进)
text-indent 属性规定文本块中首行文本的缩进。
注意:允许使用负值。如果使用负值,那么首行会被缩进到左边。
p{
    /*text-indent:50px;*/
    /* 首行缩进以em为准 */
    text-indent: 2em;   /* 不论字体大小, 2格字*/
}
三、超链接美化首页导航案例
通过下述代码实现了一个美化的首页导航栏:
DOCTYPE html>
<html lang="en">
<head>
    <meta charset="UTF-8">
    <title>超链接美化title>
    <style type="text/css">
        *{
            padding: 0;
            margin: 0;
        }
        ul{
            list-style: none;
        }
        .nav{
            width: 960px;
            /* height: 40px; */
            overflow: hidden;  /* 清除浮动 */
            margin: 100px auto 0;  /* 上:100px  左右居中  下:0 */
            background-color: purple;
            /* 设置圆角 */
            border-radius: 5px;  /* 上右下左都切除半径3px的一小块——美化导航栏边角 */
        }
        .nav ul li{
            float: left;
            width: 160px;
            height: 40px;   /* 浮动元素不会填充父元素的高度 */
            /* color: white; */
            line-height: 40px; /* 行高 */
            text-align: center;  /* 文本居中对齐 */
        }
        /* a标签不继承父元素的color,要给a标签单独设置 */
        .nav ul li a{
            display: block;  /* 标签是行内元素不能设宽高,因此转化为块级元素 */
            width: 160px;
            height: 40px;
            font-size: 18px;
            color: white;
            text-decoration: none; /* 去除a标签默认样式 */
            font-family: "HanziPen SC";   /*字体*/
        }
        .nav ul li a:hover{  /* 伪类选择器,鼠标悬浮在元素上应用样式 */
            background-color: #E766EA;  /* 字体变色 */
            font-size: 20px;  /* 字体变大 */
        }

    style>
head>
<body>
    <div class="nav">
        <ul>
            <li>
                <a href="">网站导航a>
            li>
            <li>
                <a href="">网站导航a>
            li>
            <li>
                <a href="">网站导航a>
            li>
            <li>
                <a href="">网站导航a>
            li>
            <li>
                <a href="">网站导航a>
            li>
            <li>
                <a href="">网站导航a>
            li>
        ul>
    div>
body>
html>
其中利用到了之前学的字体、文字等知识完成各种选择器如下:
.nav{
    width: 960px;
    /* height: 40px; */
    overflow: hidden;  /* 清除浮动 */
    margin: 100px auto 0;  /* 上:100px  左右居中  下:0 */
    background-color: purple;
    /* 设置圆角 */
    border-radius: 5px;  /* 上右下左都切除半径3px的一小块——美化导航栏边角 */
}
.nav ul li{
    float: left;
    width: 160px;
    height: 40px;   /* 浮动元素不会填充父元素的高度 */
    /* color: white; */
    line-height: 40px; /* 行高 */
    text-align: center;  /* 文本居中对齐 */
}
/* a标签不继承父元素的color,要给a标签单独设置 */
.nav ul li a{
    display: block;  /* 标签是行内元素不能设宽高,因此转化为块级元素 */
    width: 160px;
    height: 40px;
    font-size: 18px;
    color: white;
    text-decoration: none; /* 去除a标签默认样式 */
    font-family: "HanziPen SC";   /*字体*/
}
.nav ul li a:hover{  /* 伪类选择器,鼠标悬浮在元素上应用样式 */
    background-color: #E766EA;  /* 字体变色 */
    font-size: 20px;  /* 字体变大 */
}
四、背景属性
常用背景相关属性:
/*属性                      描述
background-color    规定要使用的背景颜色。
background-image    规定要使用的背景图像。
background-size    规定背景图片的尺寸。
background-repeat    规定如何重复背景图像。
background-attachment    规定背景图像是否固定或者随着页面的其余部分滚动。
background-position    规定背景图像的位置。
inherit    规定应该从父元素继承background属性的设置。*/
1、background-image(背景图片)和background-repeat(平铺)
给网页设置背景图写法:
body{
    background-image: url("./images/bojie.jpg");
}
背景和平铺结合使用:
上面代码设置水平方向平铺并设置padding:100px; 可以发现padding的区域也供background-image占用了。
background-repeat取值范围:
/*值               描述
repeat    默认。背景图像将在垂直方向和水平方向重复。
repeat-x    背景图像将在水平方向重复。
repeat-y    背景图像将在垂直方向重复。
no-repeat    背景图像将仅显示一次。
inherit    规定应该从父元素继承background-repeat属性的设置。*/
2、background-position(背景图像位置)
background-position:200px 100px——第一个是水平位置,第二个是垂直位置
正值的时候,第一个值往右偏移,第二个值表示往下偏移;负值则正好相反。
由于导入背景图片的时候,默认就会平铺。因此需要设置background-repeat: no-repeat;
3、雪碧图(精灵图)技术
background-position除了移动位置,更重要的是用来定位切图,也叫css精灵图。用处:为了避免网站大量img,请求过多,把很多小图标合并到一张图上,然后通过css的background-position切出来需要的图片。
DOCTYPE html>
<html lang="en">
<head>
    <meta charset="UTF-8">
    <title>雪碧图title>
    <style type="text/css">
        *{
            padding: 0;
            margin: 0;
        }
        box1{
            width: 48px;
            height: 48px;
            background-image: url("./images/1.png");
            background-repeat: no-repeat;
            background-position: 0 -528px;/*在Photoshop上查看宽高*/
        }
        box2{
            width: 48px;
            height: 48px;
            background-image: url("./images/1.png");
            background-repeat: no-repeat;
            background-position: 0 -440px;
        }
    style>
head>
<body>
    <div class="box1">div>
    <div class="box2">div>
body>
html>
设置背景图位置方向:
水平方向: left center right
垂直方向: top center bottom
DOCTYPE html>
<html lang="en">
<head>
    <meta charset="UTF-8">
    <title>title>

<style type="text/css">
    *{
        padding: 0;
        margin: 0;
    }
    div{
        width: 1500px;
        height: 1600px;
        border: 1px solid red;
        background-image: url(./images/bojie.jpg);
        background-repeat: no-repeat;
        /*水平方向 left center right
          垂直方向 top center bottom
        */
        background-position: center top;
    }
style>
head>
<body>
    <div>
        波多野结衣
    div>

body>
html>
常规写法:
body{
    background-image: url("./images/banner.jpg");
    background-repeat: no-repeat;
    /*水平居中通天banner图*/
    background-position: center top;
}
综合属性写法:
body{
    /*设置综合属性*/
    background: red url("./images/banner.jpg") no-repeat center top;
}
这个写法的顺序不是固定的,但是水平方向和垂直方向设置必须写在一起。
4、background-attachment(固定背景图像)
规定背景图像是否固定或者随着页面的其余部分滚动。
div{
    /*综合属性*/
    width: 1200px;
    height: 1600px;
    background: url(./images/bojie.jpg) no-repeat 0 0;
    /*固定背景*/
    background-attachment: fixed;
    color: white;
}
把固定背景属性也加入综合属性:
div{
    width: 1200px;
    height: 1600px;
    /*综合属性*/
    background: url(./images/bojie.jpg) no-repeat 0 0 fixed;
    color: white;
}
设置了background-attachment后,下上滚动页面内容时,背景图片保持不变。
DOCTYPE html>
<html lang="en">
<head>
    <meta charset="UTF-8">
    <title>background-attachtitle>
    <style type="text/css">
    div{
        /*综合属性*/
        width: 1200px;
        height: 1600px;
        background: url(./images/bojie.jpg) no-repeat 0 0 fixed;
        /*固定背景*/
        /*background-attachment: fixed;*/
        color: white;
    }
    style>
head>
<body>
    <div>
        <p>文字p>
        <p>文字p>
        <p>文字p>
        <p>文字p>
        <p>文字p>
        <p>文字p>
        <p>文字p>
        <p>文字p>
        <p>文字p>
        <p>文字p>
        <p>文字p>
        <p>文字p>
        <p>文字p>
        <p>文字p>
    div>
body>
html>
五、位置属性
position,定位有三种:
1.相对定位——position:relative;
2.绝对定位——position:absolute;
3.固定定位——position:fixed;
这三种定位,每一种都暗藏玄机,都非常重要,需要一一细讲。
六、相对定位:相对于自身位置定位
.box1{
    width: 200px;
    height: 200px;
    background-color: red;
    /*如果对当前元素仅仅设置相对定位,那么与标准流下的盒子没有什么区别*/
    position: relative;
}
如果对当前元素仅仅设置相对定位,那么与标准流下的盒子没有什么分别。
设置相对定位后,就可以使用四个方向的属性:top、left、right、bottom。
DOCTYPE html>
<html lang="en">
<head>
    <meta charset="UTF-8">
    <title>title>
    <style type="text/css">
.box1{
    width: 200px;
    height: 200px;
    background-color: red;
    /*如果对当前元素仅仅设置相对定位,那么与标准流下的盒子没有什么区别*/
    position: relative;
    /*设置相对定位 我们就可以使用四个方向的属性  top left right bottom

    相对定位:相对于自己原来的本身定位 top:20px; 那么盒子相对于原来的位置向下移动。相对定位仅仅的微调我们元素的位置
    */
    top: 20px;
    left: 30px;
}
    style>
head>
<body>


     <div class="box1">div>
body>
html>
top:20px; 那么盒子相对于原来的位置向下移动。相对定位仅仅的微调我们元素的位置。
1、相对定位三大特性
1.不脱标——不脱离标准流;
2.形影分离——本身和影子分不开
3.老家留坑——还保留原来的位置
DOCTYPE html>
<html lang="en">
<head>
    <meta charset="UTF-8">
    <title>相对定位特性title>
    <style type="text/css">
        *{
            padding: 0;
            margin: 0;
        }
        div{
            width: 200px;
            height: 200px;
        }
        .box1{
            background-color: red;
        }
        .box2{
            background-color: green;
            position: relative;
            top: 50px;
            left: 100px;
        }
        .box3{
            background-color: blue;
        }

    style>
head>
<body>

    <div class="box1">div>
    <div class="box2">div>
    <div class="box3">div>
body>
html>
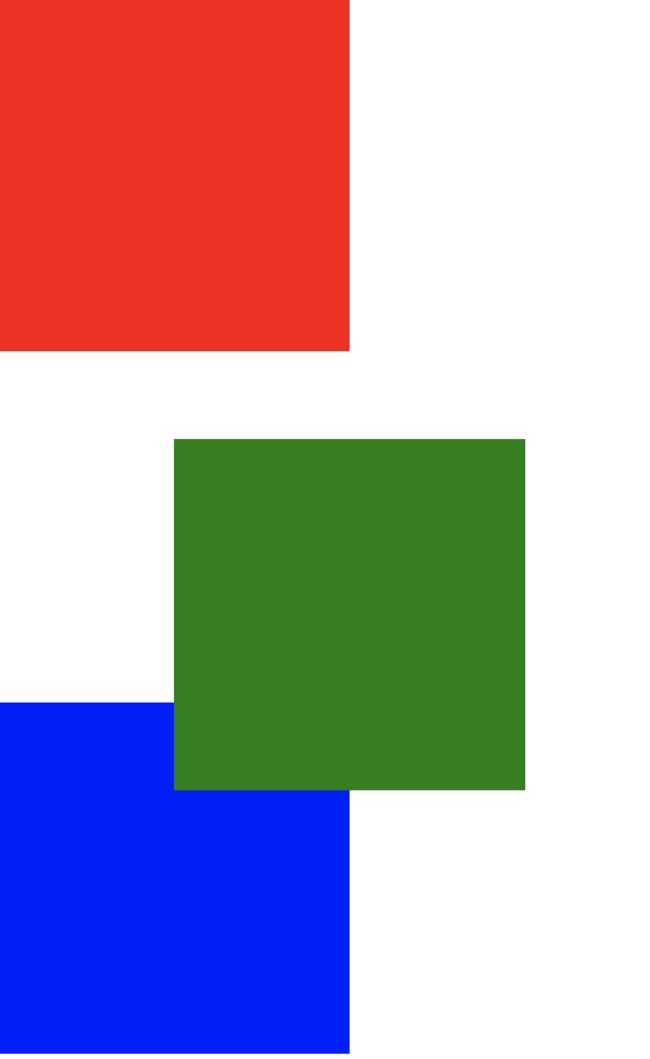
可以看到box3并不会离开自己的位置上移,box2原来的位置依然保留在原处。
因此会影响页面呃布局,相对定位在页面上没有太大的作用。
我们不要使用相对定位来做压盖效果。
2、相对定位的用途
因为相对定位有坑,占着茅坑不拉屎,所以一般都不要使用相对定位来做压盖效果。
它在页面中,作用极小,就两个作用:
1.微调元素位置
2.做绝对定位的参考(父相子绝)讲绝对定位会讲
DOCTYPE html>
<html lang="en">
<head>
    <meta charset="UTF-8">
    <title>Titletitle>
    <style type="text/css">
        *{
            padding: 0;
            margin: 0;
        }
        div{
            margin: 100px;
        }
        .user{
            font-size: 25px;
        }
        .btn{
            position: relative;
            top: 0;
            left: 0;
        }
    style>
head>
<body>

    <div>
        <input type="text" name="username" class="user">
        <input type="button" name="" value="点我" class="btn">
    div>
body>
html>
可以看到输入框和确认按钮底边没有完全对齐,设置relative微调后,实现对齐。
七、绝对定位
绝对定位的盒子:1.脱标(脱离标准流)
2.做遮盖效果,提升层级
3.设置绝对定位之后,不区分行内元素和块级元素,都能设置宽高.
DOCTYPE html>
<html lang="en">
<head>
    <meta charset="UTF-8">
    <title>绝对定位特性title>
    <style type="text/css">
        *{
            padding: 0;
            margin: 0;
        }
        div{
            width: 200px;
            height: 200px;
        }
        .box1{
            background-color: red;
            /*绝对定位的盒子:1.脱标(脱离标准流)
                            2.做遮盖效果,提升层级
                            3.设置绝对定位之后,不区分行内元素和块级元素,都能设置宽高
            */
            position: absolute;
        }
        .box2{
            background-color: green;
        }
        .box3{
            background-color: blue;
        }
        span{
            width: 100px;
            height: 100px;
            background-color: pink;
            position: absolute;
        }

    style>
head>
<body>

    <div class="box1">div>
    <div class="box2">div>
    <div class="box3">div>
    <span>文字span>
body>
html>
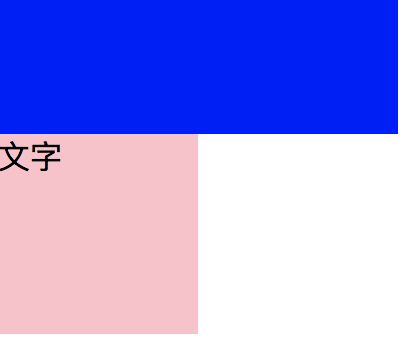
执行效果如上图所示,box1设置为绝对定位后,box1脱标后box2上移,但是box1层级更高,产生遮盖效果,因此只显示了红色(box1)和蓝色(box3)。
是行内标签,本来是不能设置宽高的,但是设置绝对定位后,设置宽高生效。
1、绝对定位参考点
参考点这个问题比较难理解,示例代码如下:
DOCTYPE html>
<html lang="en">
<head>
    <meta charset="UTF-8">
    <title>Titletitle>
    <style type="text/css">
        /**{*/
            /*padding: 0;*/
            /*margin: 0;*/
        /*}*/
        body{
            width: 100%;
            height: 2000px;
            border: 10px solid green;
        }
        .box{
            width: 200px;
            height: 200px;
            background-color: red;
            /*绝对定位参考点:当我使用top属性描述的时候
            是以页面的左上角(跟浏览器的左上角区分)为参考点来调整位置

            当我使用bottom属性描述得时候,以首屏左下角为参考点
            */
            position: absolute;
            /*top: 100px;*/
            bottom: 100px;
            left: 18px;
        }
    style>
head>
<body>
    <div class="box">

    div>
body>
html>
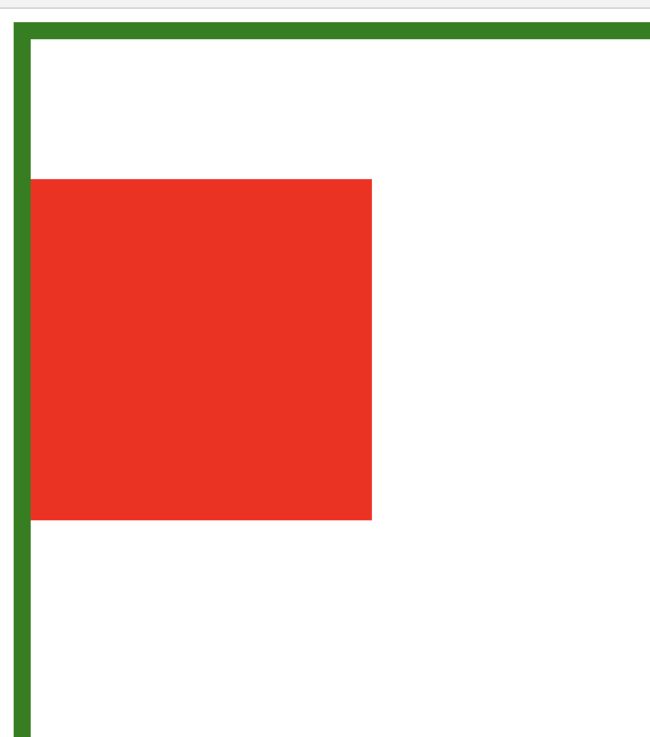
绝对定位参考点:
(1)当使用top属性描述的时候,是以页面的左上角(跟浏览器的左上角区分)为参考点来调整位置。
在滚动页面时,box跟着body一起上下移动,它的参考点是针对的浏览器的左上角。
如何确定参考点是浏览器?
box的left设置的是18px,body的边框(border)宽度是10px,body的margin宽度是8px。正好完成贴边,因此可以看出是针对浏览器移动。
(2)当使用bottom属性描述得时候,以首屏左下角为参考点
可以看到在从下往上缩小浏览器时,box跟着往上移动,始终保持与首屏左下角的绝对距离。
因此可以看出上下滚动页面时,box跟着浏览器移动也是相对首屏移动的。
2、绝对定位以父辈盒子作参考点
父辈元素设置相对定位,子元素设置绝对定位,那么会以父辈元素左上角为参考点。
这个父辈元素不一定是爸爸,也可以是爷爷(曾爷爷)。
DOCTYPE html>
<html lang="en">
<head>
    <meta charset="UTF-8">
    <title>Titletitle>
    <style type="text/css">
        *{
            padding: 0;
            margin: 0;
        }
        .box{
            width: 300px;
            height: 300px;
            border: 5px solid red;
            margin: 100px;
            /*给父盒子设置相对定位*/
            position: relative;
            padding: 50px;
        }
        .box2{
            width: 300px;
            height: 300px;
            background-color: green;
            position: relative;
        }
        .box p{
            width: 100px;
            height: 100px;
            background-color: pink;
            /*子元素设置了绝对定位*/
            position: absolute;
            top: 0px;
            left: 0px;
        }

        /*父辈元素设置相对定位,子元素设置绝对定位,那么会以父辈元素左上角为参考点。
        这个父辈元素不一定是爸爸,也可以是爷爷(曾爷爷)。
        */

        /*爷爷级设置了相对定位,父级也设置相对定位,儿子设置了绝对定位,那么是以父级为参考点*/
    style>
head>
<body>
    <div class="box">
        <div class="box2">
            <p>p>
        div>
    div>
body>
html>
爷爷设置了相对定位,父也设置相对定位,儿子设置了绝对定位,那么是以父作为参考点。
DOCTYPE html>
<html lang="en">
<head>
    <meta charset="UTF-8">
    <title>Titletitle>
    <style type="text/css">
        *{
            padding: 0;
            margin: 0;
        }
        .box{
            width: 300px;
            height: 300px;
            border: 5px solid red;
            margin: 100px;
            /*给父盒子设置相对定位*/
            position: relative;
            padding: 50px;
        }
        .box2{
            width: 300px;
            height: 300px;
            background-color: green;
            /*position: relative;*/
        }
        .box p{
            width: 100px;
            height: 100px;
            background-color: pink;
            /*子元素设置了绝对定位*/
            position: absolute;
            top: 0px;
            left: 0px;
        }

        /*父辈元素设置相对定位,子元素设置绝对定位,那么会以父辈元素左上角为参考点。
        这个父辈元素不一定是爸爸,也可以是爷爷(曾爷爷)。
        */

        /*爷爷级设置了相对定位,父级也设置相对定位,儿子设置了绝对定位,那么是以父级为参考点*/

        /*爷爷级设置相对定位,父级没有设置定位,儿子设置了绝对定位,那么是以爷爷级为参考点*/
    style>
head>
<body>
    <div class="box">
        <div class="box2">
            <p>p>
        div>
    div>
body>
html>
爷爷设置相对定位,父没有设置定位,儿子设置了绝对定位,那么是以爷爷为参考点。
总结:
如果父亲设置了定位,那么以父亲为参考点;如果父亲没有设置定位,那么以祖宗元素中设置定位最近的作为参考点。
DOCTYPE html>
<html lang="en">
<head>
    <meta charset="UTF-8">
    <title>Titletitle>
    <style type="text/css">
        *{
            padding: 0;
            margin: 0;
        }
        .box{
            width: 300px;
            height: 300px;
            border: 5px solid red;
            margin: 100px;
            /*给父盒子设置绝对定位*/
            position: absolute;
            padding: 50px;
        }
        .box p{
            width: 100px;
            height: 100px;
            background-color: pink;
            /*子元素设置了绝对定位*/
            position: absolute;
            top: 0px;
            left: 0px;
        }

    style>
head>
<body>
    <div class="box">

        <p>p>
    div>
body>
html>
可以看到不仅仅是父相子绝,父绝子绝、父固子固也都是以父辈元素为参考点。
注意:
1、父绝子绝没有实在意义,做站的时候不会出现父绝子绝。因为绝对定位脱离标准流,影响页面的布局。
2、相反父相子绝在页面布局中,是常用的布局方案。因为父亲设置相对定位,不脱离标准流,子元素设置绝对定位,仅仅是在当前父辈元素内调整位置信息。
3、绝对定位的盒子无视父辈的padding
DOCTYPE html>
<html lang="en">
<head>
    <meta charset="UTF-8">
    <title>无视父辈paddingtitle>
    <style type="text/css">
        *{
            padding: 0;
            margin: 0;
        }
        .father{
            width: 300px;
            height: 300px;
            margin: 100px;
            border: 10px solid red;
            position: relative;
            /*padding: 50px;*/
        }
        .father p{
            width: 100px;
            height: 100px;
            background-color: yellow;
            position: absolute;
            top: 0px;
            left: 0px;
        }
    style>
head>
<body>
    <div class="father">
        <p>p>
    div>
body>
html>
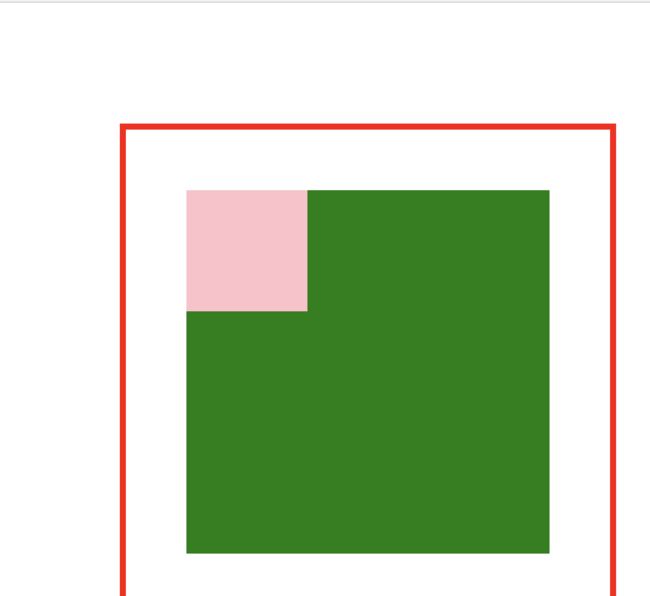
可以看到的是:
当父盒子不设置定位,子盒子设置绝对定位时:子盒子浮动与父盒子位置不相干。
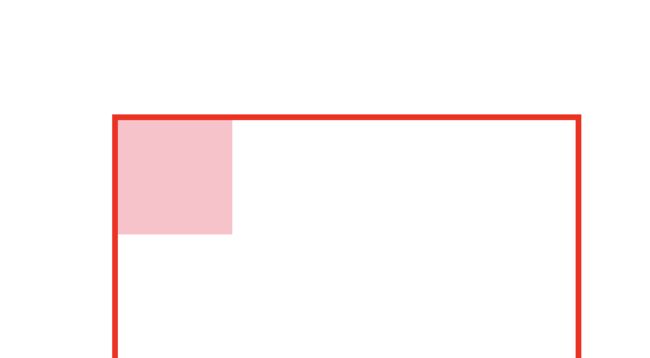
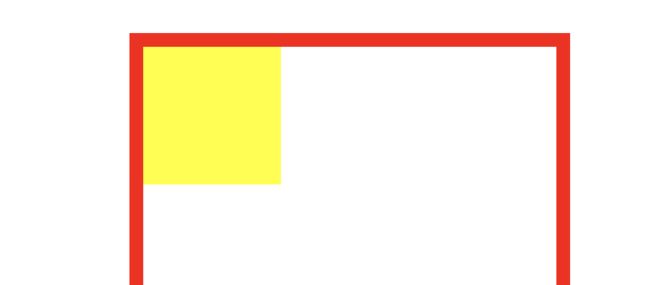
当父盒子设置相对定位,子盒子设置绝对定位时:子盒子在父盒子内调整位置,但父盒子padding的设置仅仅是扩大了父盒子的大小,不会影响子盒子。如下图所示:
当父盒子设置为绝对定位、子盒子设置绝对定位,效果同上。
4、绝对定位盒子居中
一般要实现元素居中都是运用的margin:0 auto;
DOCTYPE html>
<html lang="en">
<head>
    <meta charset="UTF-8">
    <title>绝对定位盒子居中title>
    <style type="text/css">
        *{
            padding: 0;
            margin: 0;
        }
        .box{
            width: 100%;  /* 继承body的100%的宽度 */
            height: 69px;
            background-color: #000;
        }
        .box .c{
            width: 960px;
            height: 69px;
            background-color: pink;
            margin: 0 auto;
            position: absolute;  /* 设置绝对定位后居中失效 */
            left: 50%;
            margin-left: -480px;
            /*设置绝对定位之后,margin:0 auto;不起任何作用
            如果想让绝对定位的盒子居中。当做公式记下来 设置元素绝对定位,left:50%;
            margin-left等于元素宽度的一半,实现绝对定位盒子居中
            */
        }
    style>
head>
<body>
    <div class="box">
        <div class="c">div>
    div>
body>
html>
设置绝对定位之后,margin:0 auto;是不起任何作用的。
如果想让绝对定位的盒子居中。当做公式记下来:设置元素绝对定位,left:50%;margin-left等于元素宽度的一半,实现绝对定位盒子居中。
p{
    width: 960px;
    position: absolute;
    left: 50%;
    margin-left: -480px; /*width的一半*/
}
八、固定定位
固定定位:固定当前的元素不会随着页面滚动而滚动。
特性:1、脱标 2、提升层级(压盖效果) 3、不会随页面滚动而滚动
固定定位


参考点:设置固定定位用top描述,那么是以浏览器的左上角设为参考点;
如果用bottom描述那么是以浏览器的左下角为参考点(注意与绝对定位的区别)
作用:1.返回顶部栏;2.固定导航栏;3.小广告
固定定位
返回顶部


另外用一个示例来展示固定导航栏:
DOCTYPE html>
<html lang="en">
<head>
    <meta charset="UTF-8">
    <title>固定导航栏title>
    <style type="text/css">
        *{
            padding: 0;
            margin: 0;
        }
        ul{
            list-style: none;
        }
        a{
            text-decoration: none;
        }
        body{
            /*给body设置导航栏的高度,来显示下放图片的整个内容*/
            padding-top: 49px;
        }
        .wrap{
            width: 100%;
            height: 49px;
            background-color: #000;
            /*给父盒子设置固定定位,一定一定要加top属性和left属性*/
            position: fixed;
            top: 0;
            left: 0;
        }
        .wrap .nav{
            width: 960px;
            height: 49px;
            margin: 0 auto;
        }
        .wrap .nav ul li{
            float: left;
            width: 160px;
            height: 49px;
            text-align: center;  /*中间对齐*/
        }
        .wrap .nav ul li a{
            width: 160px;
            height: 49px;
            display: block;
            color: #FFF;
            font: 20px/49px "Hanzipen SC";  /*大小、行高(让文字垂直居中)  字体*/
            background-color: paleturquoise;
        }
        .wrap .nav ul li a:hover{   /*选择鼠标指针浮动在其上的元素,并设置其样式*/
            background-color: #FC4838;
            font-size: 22px;
        }

    style>
head>
<body>
    <div class="wrap">
        <div class="nav">
            <ul>
                <li>
                    <a href="#">网页开发a>
                li>
                <li>
                    <a href="#">网页开发a>
                li>
                <li>
                    <a href="#">网页开发a>
                li>
                <li>
                    <a href="#">网页开发a>
                li>
                <li>
                    <a href="#">网页开发a>
                li>
                <li>
                    <a href="#">网页开发a>
                li>
            ul>
        div>
    div>
    <img src="./images/bojie.jpg" alt="">
    <img src="./images/bojie.jpg" alt="">
    <img src="./images/bojie.jpg" alt="">
    <img src="./images/bojie.jpg" alt="">
    <img src="./images/bojie.jpg" alt="">
    <img src="./images/bojie.jpg" alt="">
    <img src="./images/bojie.jpg" alt="">
    <img src="./images/bojie.jpg" alt="">
    <img src="./images/bojie.jpg" alt="">
body>
html>
在给warp设置固定定位后,图片背景最上面的图片会有一部分被导航栏遮盖。wrap和img都是body的子元素。给body设置padding-top,也就给body设置了导航栏高度,来显示下放图片的内容。
注意:给父盒子设置固定定位,一定一定要加top属性和left属性。
九、z-index属性
1、z-index的四大特性
1、z-index值表示谁压着谁,数值大的压盖住数值小的。z-index值没有单位,就是一个正整数,默认的z-index值为0
DOCTYPE html>
<html lang="en">
<head>
    <meta charset="UTF-8">
    <title>z-indextitle>
    <style type="text/css">
        *{
            padding: 0;
            margin: 0;
        }
        .box1{
            width: 200px;
            height: 200px;
            background-color: red;
            position: relative;
            top: 30px;
            left: 40px;
            z-index: 3;
        }
        .box2{
            width: 200px;
            height: 200px;
            background-color: yellow;
            position: relative;
            top: 0;
            left: 0;
            z-index: 2;
        }
    style>
head>
<body>
    <div class="box1">box1div>
    <div class="box2">box2div>
body>
html>
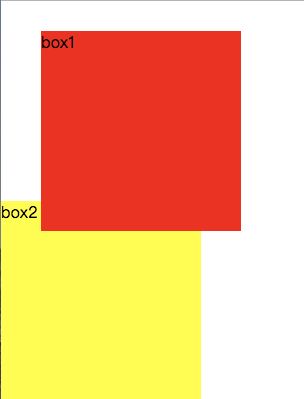
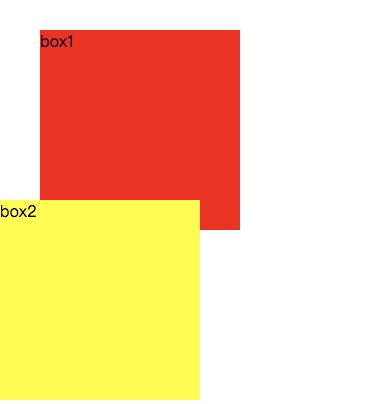
可以看到本来在都设置定位的情况下是box2压盖box1,在给box1的z-index设置为3,box2的z-index设置为2后,
数值更大的box1压盖box2。
2、只有定位了的元素,才能有z-index,也就是说不管是相对定位还是绝对定位或固定定位,都可以使用z-index,而浮动元素不能使用。
DOCTYPE html>
<html lang="en">
<head>
    <meta charset="UTF-8">
    <title>z-indextitle>
    <style type="text/css">
        *{
            padding: 0;
            margin: 0;
        }
        .box1{
            width: 200px;
            height: 200px;
            background-color: red;
            position: relative;
            top: 30px;
            left: 40px;
            z-index: 3;
        }
        .box2{
            width: 200px;
            height: 200px;
            background-color: yellow;
            position: relative;
            top: 0;
            left: 0;
            z-index: 2;
        }
        .box3{
            width: 200px;
            height: 200px;
            background-color: green;
            float: left;
            margin: -30px 0 0 20px;
            z-index: 5;
        }
    style>
head>
<body>
    <div class="box1">box1div>
    <div class="box2">box2div>
    <div class="box3">box3div>
body>
html>
可以看到box3没有定位但是设置了z-index值为5,数值最高,但实际没有起到任何作用。box3依然被box2压盖。
3、如果大家都没有z-index值,或者z-index值一样,那么谁写在HTML后面,谁在上面压着别人,定位了的元素永远压住没有定位的元素。
DOCTYPE html>
<html lang="en">
<head>
    <meta charset="UTF-8">
    <title>z-indextitle>
    <style type="text/css">
        *{
            padding: 0;
            margin: 0;
        }
        .box1{
            width: 200px;
            height: 200px;
            background-color: red;
            position: relative;
            top: 30px;
            left: 40px;
        }
        .box2{
            width: 200px;
            height: 200px;
            background-color: yellow;
        }
    style>
head>
<body>
    <div class="box1">div>
    <div class="box2">div>
body>
html>
可以看到定位了的元素box1压盖没有定位的元素box2。
DOCTYPE html>
<html lang="en">
<head>
    <meta charset="UTF-8">
    <title>z-indextitle>
    <style type="text/css">
        *{
            padding: 0;
            margin: 0;
        }
        .box1{
            width: 200px;
            height: 200px;
            background-color: red;
            position: relative;
            top: 30px;
            left: 40px;
        }
        .box2{
            width: 200px;
            height: 200px;
            background-color: yellow;
            position: relative;
        }
    style>
head>
<body>
    <div class="box1">box1div>
    <div class="box2">box2div>
body>
html>
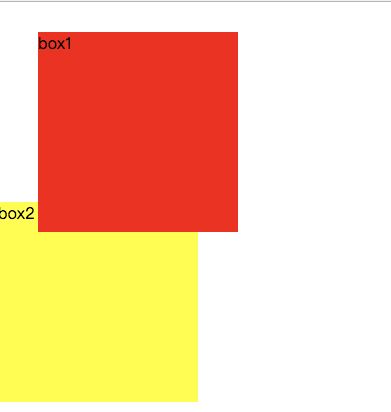
在box1和box2都定位了之后,在没有设置z-index的情况下,写在HTML后面的box2压着box1。
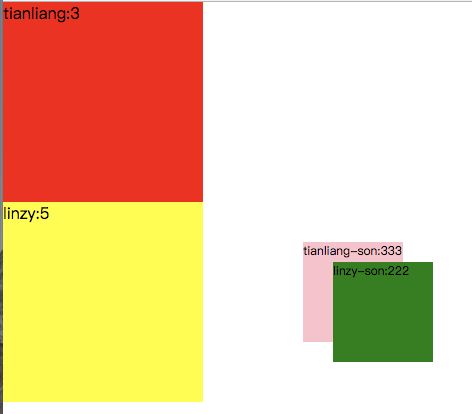
4、从父现象:父亲怂了,儿子再牛逼也没用
DOCTYPE html>
<html lang="en">
<head>
    <meta charset="UTF-8">
    <title>从父现象title>
    <style type="text/css">
        *{
            margin: 0;
            padding: 0;
        }
        .tianliang{
            width: 200px;
            height: 200px;
            background-color: red;
            position: relative;
            z-index: 3;
        }
        .tianliang .sendie{
            width: 100px;
            height: 100px;
            background-color: pink;
            position: absolute;
            top: 240px;
            left: 300px;
            z-index: 333;
        }
        .linzy{
            width: 200px;
            height: 200px;
            background-color: yellow;
            z-index: 2;
        }
        .linzy .brother{
            width: 100px;
            height: 100px;
            background-color: green;
            position: absolute;
            top: 260px;
            left: 330px;
            z-index: 222;
        }
        p{
            font-size: 12px;
        }
    style>
head>
<body>
    <div class="tianliang">
        tianliang:3
        <p class="sendie">tianliang-son:333p>
    div>
    <div class="linzy">
        linzy:5
        <p class="brother">linzy-son:222p>
    div>
body>
html>
可以看到在上例中tianliang儿子的z-index值是大于linzy儿子的。但是由于linzy的z-index值大于tianliang。因此依然是linzy-son压盖tianliang-son。
2、z-index的应用
在某些元素遮盖导航栏,或者某些元素没有在页面显示的时候。可以通过增加z-index的方式解决。
