SpringCloud超详细笔记(附源码)
SpringCloud超详细笔记(附源码)
引言:
本文主要分享了SpringCloud相关的知识,几乎包含了所有有关的知识并附有若干案例,篇幅较长;主要包括:SpringCloud五大神兽的简介、一个简单的访问外部链接的案例引入SpringCloud、Eureka的简介、Eureka的基本配置以及相关案例、Robbin(服务间的负载均衡)、Feign(服务间的调用)、基于Robbin与feign的增删查改案例、Hystrix(服务的隔离及断路器)、Zuul网关的简介及配置、Config(服务的动态配置)、Sidecar(多语言支持)的配置,均附加相应案例;
文章目录
- SpringCloud超详细笔记(附源码)
- 0. 微服务
- 1. SpringCloud简介
- 2. 利用httpClient访问外部链接
-
- 2.1 创建SpringBoot项目
- 2.2 编写访问程序
-
- 2.2.1 导入依赖
- 2.2.2 编写代码
- 3. Eureka_服务的注册发现
-
- Eureka注册原理
- 3.1 Eureka的简单引入
-
- 3.1.1 Eureka的服务端
- 配置application.yml
- 运行结果
- 3.1.2 服务的提供者
- 配置application.yml
- 编写MessageController
- 3.1.3 服务的调用者
- 配置application.yml
- 配置ConsumerMsgConfig
- 编写ConsumerMsgController
- 运行结果
- 3.2 Eureka安全性的处理
-
- 3.2.1 添加依赖
- 3.2.2 配置application.yml
- 3.2.3 编写WebSecurityConfig
- 3.2.4 运行的结果
- 3.3 使用Eureka实现跨服务的增删查改
-
- 3.3.1 Eureka的服务端
- 3.3.2 服务的提供者
-
- 3.3.2.1 配置application.yml
- 3.3.2.2 修改启动文件SpringcloudStudentserverApplication
- 3.3.2.3 添加对应的mapper、po、mapping
- 3.3.2.4 编写ActionResult
- 3.3.2.5 编写Service服务层
- 3.3.2.6编写StudentController
- 3.3.2.7 核心测试结果
- 3.3.3 服务的调用者
-
- 3.3.3.1 配置application.yml
- 3.3.3.2 修改启动文件SpringcloudGuestApplication
- 3.3.3.3 添加po包下的Student
- 3.3.3.4 编写ActionResult
- 3.3.3.5 配置RestConfig
- 3.3.3.6 编写StudentController
- 3.3.3.7 运行结果
- 3.4 Eureka心跳
- 4. Robbin_服务间的负载均衡
-
- 4.1 创建Eurekaserver
-
- 4.1.1 配置application.yml
- 4.2 创建producer
-
- 4.2.1 配置application.yml
- 4.2.2 修改为双实例运行
- 4.2.3 编写ProducerController
- 4.3 创建ribbon
-
- 4.3.1 配置RibbonConfig
- 4.3.2 配置server层
- 4.3.3 配置application.yml
- 4.3.4 编写ConsumerController
- 4.3.5 运行结果
- 4.4 Robbin配置负载均衡策略
-
- 4.4.1 采用注解的形式
- 4.4.2 通过配置文件去指定负载均衡的策略
- 5. Feign_服务间的调用
-
- 5.1 Feign简介
- 5.2 注册中心、提供者的编写
- 5.3 创建Feign
-
- 5.3.1 修改SpringcloudComsumerFeignApplication启动文件
- 5.3.2 配置application.yml
- 5.3.3 编写FeignRemoteService接口
- 5.3.3 编写FeignController
- 5.3.4 运行结果
- 5.4 Feign的传递参数方式
- 6. Ribbon和Feign实现增删查改
-
- 6.1 注册中心springcloud_eurekaserver
-
- 6.1.1 配置application.yml
- 6.1.2 运行结果
- 6.2 生产者springcloud_producer
-
- 6.2.1 配置application.yml
- 6.2.2 修改启动文件SpringcloudProducerApplication
- 6.2.3 添加对应的mapper、po、mapping
- 6.2.4 编写StudentService接口
- 6.2.5 编写StudentServiceImpl实现类
- 6.2.6 编写StudentController
- 6.2.7 测试
- 6.3 Ribbon的客户端springcloud_ribbonclient
-
- 6.3.1 配置application.yml
- 6.3.2 RibbonConfig
- 6.3.3 配置server层
- 6.3.4 配置StudentRibbonController层
- 6.3.5 测试
- 6.4 Feign的客户端springcloud_feignclient
-
- 6.4.1 修改SpringcloudComsumerFeignApplication启动文件
- 6.4.2 配置application.yml
- 6.4.3 编写StudentFeignService接口
- 6.4.4 编写StudentFeigncontroller
- 6.4.5 测试
- 6.5 管理实体类springcloud_entity
-
- 6.5.1 编写ActionResult
- 6.5.2 编写po
- 7. Hystrix_服务的隔离及断路器
-
- 7.1 Hystrix简介
- 7.2 环境的搭建
-
- 7.2.1 创建Eurekaserver
-
- 7.2.1.1 配置application.yml
- 7.2.2 创建springcloud_producer
-
- 7.2.2.1 配置application.yml
- 7.2.2.2 配置StudentController
- 7.2.3 创建springcloud_consumer_ribbon_hystrix
-
- 7.2.3.1 配置application.yml
- 7.2.3.2 配置Ribbon
- 7.2.3.3 配置Server层
- 7.2.3.3 配置StuController层
- 7.2.3.4 测试
- 7.2.4 创建springcloud_feign
-
- 7.2.4.1 修改SpringcloudConsumerFeignApplication启动文件
- 7.2.4.2 配置application.yml
- 7.2.4.3 编写RemoteFeignServer接口
- 7.2.4.3 编写StuController
- 7.2.4.4 测试
- 7.3 降级机制实现_ribbon
-
- 7.3.1 添加熔断的依赖
- 7.3.2 修改启动类
- 7.3.3 编写降级方法
- 7.3.4 测试
- 7.4 降级机制实现_fiegn
-
- 7.4.1 配置application.yml
- 7.4.2 修改接口属性
- 7.4.3 创建feign降级执行的类
- 7.4.4 测试
- 7.5 线程隔离
-
- 7.5.1 代码实现
- 7.5.2 Hystrix线程池的配置
- 7.6 断路器
- 在springcloud_ribbon_hystrix中操作
-
- 7.6.1 导入依赖
- 7.6.2 修改启动文件
- 7.6.3 配置Servlet路径
- 7.6.4 测试
- 7.6.5 断路器属性
- 7.7 请求缓存
- 在springcloud_ribbon_hystrix和springcloud_producer中操作
-
- 7.7.1 springcloud_producer中的controller
- 7.7.2 修改springcloud_ribbon_hystrix中server层
- 7.7.3 修改springcloud_ribbon_hystrix中StuController
- 7.7.4 测试结果
- 8. Zuul_服务的网关
-
- 8.1 创建springcloud_zuul
-
- 8.1.1 修改配置文件
- 8.1.2 配置application.yml
- 8.1.3 直接访问测试
- 8.2 Zuul中常用的配置
-
- 8.2.1 自定义路由
- 8.2.2 Zuul的监控信息
-
- 8.2.2.1 导入依赖
- 8.2.2.2 编写配置文件
- 8.2.2.2 测试结果
- 8.2.3 忽略服务配置
- 8.2.4 灰度发布
-
- 8.2.4.1 修改Zuul的启动类
- 8.2.4.2 在feign的yml中添加
- 8.2.4.3 测试
- 8.3 Zuul过滤器的执行流程
- 8.4 Zuul过滤器简单案例
-
- 8.4.1 FirstZuulFilter
- 8.4.2 SecondZuulFilter
- 8.4.3 结果
- 8.5 PreFilter实现token的检验
- 9. Sidecar_多语言支持
-
- 9.1 创建第三方服务
- 9.2 创建sidecar客户端
-
- 9.2.1 导入依赖
- 9.2.2 配置application.yml
- 9.2.3 在启动类中加入注解
- 9.2.4 在Zuul中加入sidecar的自定义路由
- 9.3 测试
- 10. Config_服务的动态配置
-
- 10.1 环境的搭建
- 10.2 第一版_在本服务中
-
- 10.2.1 springcloud_producer的yml配置
- 10.2.2 springcloud_consumer的yml配置
- 10.2.3 springcloud_zuul的yml配置
- 10.3 第二版_分离对应的端口
-
- 10.3.1 springcloud_producer
-
- application-dev.yml
- application-test.yml
- application-pro.yml
- bootstrap.yml
- 10.3.2 springcloud_consumer
- 10.4 第三版_新建config项目实现本地管理配置
-
- 10.4.1 配置application.yml
- 10.4.2 在resources文件夹下创建share文件
- 10.4.3 修改启动文件
- 10.4.4 在对应的服务上添加config_client依赖
- 10.4.5 修改producer的yml
- 10.4.6 运行流程
- 10.5 第四版_实现远程服务配置(手动刷新)
-
- 10.5.1 配置consumer-server-dev
- 10.5.2 配置consumer的bootstrap.yml
- 10.5.3 在consumer下实现简单的测试
- 10.5.4 上传到github上
- 10.5.5 配置application.yml
- 10.5.6 将分离出的文件内容放到GitHub上
- 10.5.7 测试
- 10.5.8 动态配置
-
- 10.5.8.1导入依赖
- 10.5.8.2 在ConfigTestController中加入注解
- 10.5.8.3 修改consumer中的bootstrap.yml
- 10.5.8.4 修改springcloud_remoteconfigserver中的application.yml
- 10.5.9 测试
- 10.6 第五版_实现远程服务配置(自动刷新)
-
- 10.6.1 内网穿透
- 10.6.2 运行得到
- 10.6.3 GitHub中配置
- 10.6.4 处理webhook反序列化异常
- 10.6.5 测试结果
0. 微服务
微服务架构样式就是把一个单体项目拆分为多个微小的服务,每个微服务可以在自己的进程中运行并与HTTP资源API进行通信。围绕业务功能进行构建,独立技术选型,独立开发,独立部署,独立运维,并且多个服务相互协调,相互配合,最终完成用户的价值;
微服务与单体项目的区别:
- 单体架构所有的模块全都耦合在一块,代码量大,维护困难,微服务每个模块就相当于一个单独的项目,代码量明显减少,遇到问题也相对来说比较好解决。
- 单体架构所有的模块都共用一个数据库,存储方式比较单一,微服务每个模块都可以使用不同的存储方式(比如有的用redis,有的用mysql等),数据库也是单个模块对应自己的数据库。
- 单体架构所有的模块开发所使用的技术一样,微服务每个模块都可以使用不同的开发技术,开发模式更灵活。
注:
- 微服务架构只是一个样式,一种风格;
- 可以将一个项目,拆分成多个模块去开发;
- 每一个模块都是单独运行在自己的容器中的;
- 每个模块需要相互通讯(HTTP、MQ);
- 每一个模块之间没有依赖关系,都是单独部署;
- 可以使用多种语言去开发不同模块;
将复杂的单体应用进行细粒度的划分,每个拆分出来的服务各自打包并且部署;
1. SpringCloud简介
SpringCloud是一个基于Spring Boot实现的服务治理工具包,在微服务架构中用于管理和协调服务;
本文包含七个技术点:
- Eureka:服务的注册发现
- Robbin:服务之间的负载均衡
- Feign:服务之间的通讯
- Hystrix:服务 线程隔离以及断路器
- Zuul:服务网关
- Config:动态配置
- Sidecar:多语言支持
2. 利用httpClient访问外部链接
使用Java访问外部链接,也就是访问外部服务;用到httpClient
2.1 创建SpringBoot项目
创建一个简单的SpringBoot的Web项目,充当外部访问服务
在java文件下创建controller包,在包下创建ExportController,模拟外部服务!!!
@RestController
public class ExportController {
    @RequestMapping("/hello")
    public String sayHello(String name){
        return "welcome to web http service!!!";
    }
}
2.2 编写访问程序
新建一个项目,作为访问的程序;
- 导入依赖
- 编写代码
2.2.1 导入依赖
<dependency>
    <groupId>org.apache.httpcomponentsgroupId>
    <artifactId>httpclientartifactId>
dependency>
2.2.2 编写代码
在测试类中编写
- 共有五步
package com.sx.kak;

import lombok.extern.slf4j.Slf4j;
import org.apache.http.HttpEntity;
import org.apache.http.client.methods.CloseableHttpResponse;
import org.apache.http.client.methods.HttpGet;
import org.apache.http.impl.client.CloseableHttpClient;
import org.apache.http.impl.client.HttpClients;
import org.apache.http.util.EntityUtils;
import org.junit.Test;
import org.junit.runner.RunWith;
import org.springframework.boot.test.context.SpringBootTest;
import org.springframework.test.context.junit4.SpringRunner;

import java.io.IOException;

@RunWith(SpringRunner.class)
@SpringBootTest
@Slf4j
public class WebSpringcloud02ApplicationTests {
    /**
     * 远程过程调用
     * RPC
     * Remote   Procedure   Call
     * Java程序访问现有的网站
     * @throws IOException
     */

    @Test
    public void contextLoads() throws IOException {
//        1、获取一个可以关闭的http访问客户端
        CloseableHttpClient httpClient = HttpClients.createDefault();
        String url="http://localhost:8080/hello?name=kaka";
//        2、构造一个get请求
        HttpGet httpGet = new HttpGet(url);
//        3、使用http客户端对象发出get请求,获取response响应对象
        CloseableHttpResponse execute = httpClient.execute(httpGet);
        //4、获取相应状态码
        int i = execute.getStatusLine().getStatusCode();
        if(i == 200){
            //5、获取相应体中的实体内容
            HttpEntity entity = execute.getEntity();
            //通过EntityUtils工具类将实体转为字符串
            String result = EntityUtils.toString(entity);
            log.info("请求响应的结果:"+result);
        }
    }
}
SpringCloud就是对以上的操作进行封装,不需要每次都记住连接,知道接口即可;
3. Eureka_服务的注册发现
Eureka是服务的注册与发现,便于服务之间的相互调用,用于任何需要注册的场景;基于REST的服务,由两个组件组成:Eureka服务器和Eureka客户端;
类似于房屋中介
- Eureka服务器用作服务注册服务器,也就是注册中心。
- Eureka客户端是一个java客户端,用来简化与服务器的交互、作为轮询负载均衡器,并提供服务的故障切换支持;
- Netflix在其生产环境中使用的是另外的客户端,它提供基于流量、资源利用率以及出错状态的加权负载均衡;
Eureka注册原理
首先搞清楚EurekaServer担任注册中心职责:
- 管理服务的注册
- 搜索服务
- 向调用者提供服务清单
- 监听服务状态,动态更新服务列表
从下图看出:
Eureka Server担任注册中心的角色,提供了服务的获取和注册功能;
Service Provider:服务提供者,将自身的服务注册到Eureka Server;
Service Consumer:服务调用者,从Eureka Server得到注册的服务列表,找到对应的服务地址调用并使用;
注册执行的步骤:
- 启动Eurekaserver
- 启动Provider-server(生产者启动)
- 向注册中心注册服务
- EurekaServer登记注册的服务,维护一个服务列表
- 启动Consumer-server(消费者启动 ),同时向注册中心注册滋生服务
- EurekaServer登记注册的服务,维护一个服务列表
- Consumer-server搜索服务
- 如果有,向Consumer-server返回一个服务清单
- 从服务清单中选择一个服务,获取服务的地址
- Consumer-server调用具体的服务(Producer-server)
- Producer-server返回响应服务结果
- EurekaServer通过心跳来检验Producer-server或者Consumer-server是否挂掉,默认情况下每30秒向注册中心的服务发送一次心跳,有响应表示存活;没有响应,隔60秒再次发送,还是没有响应;隔90秒再次发送一次请求;三次都没有响应就标记为不可达,需要使用时应该再次注册服务;
- 有两个EurekaService时应该互相注册,在第一个注册中心注册,注册不到在向下一个EurekaService中注册,直到注册成功(共同维护一份清单,只能在一份中看到清单);
3.1 Eureka的简单引入
分别创建三个项目:作为Eureka的服务端、服务的提供者、服务的调用者;
3.1.1 Eureka的服务端
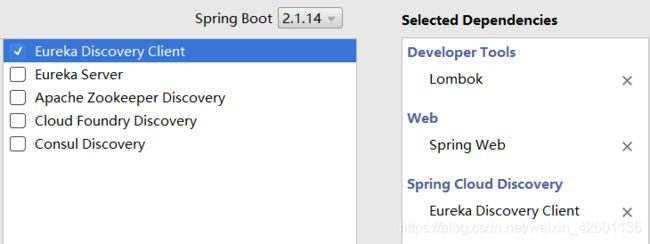
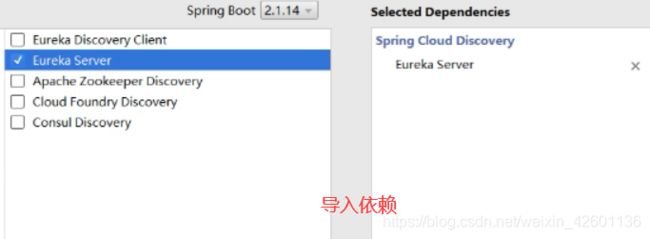
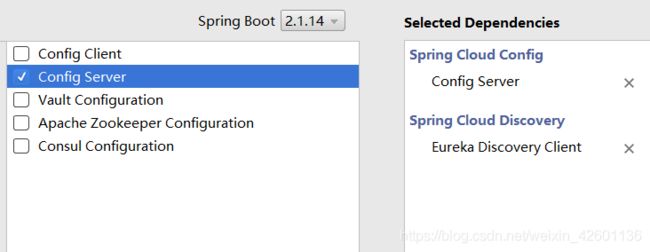
创建SpringBoot项目(springcloud_eurekaserver),只导入Eureka Server;
- 在启动文件中加入@EnableEurekaServer注解用于开启Eureka服务注册功能
<dependency>
    <groupId>org.springframework.cloudgroupId>
    <artifactId>spring-cloud-starter-netflix-eureka-serverartifactId>
dependency>
配置application.yml
server:
#默认端口号
  port: 8761
eureka:
  instance:
    hostname: 127.0.0.1
  client:
    service-url:
      defaultZone: http://${eureka.instance.hostname}:${server.port}/eureka/
      #是否注册,把自己当做一个服务注册到自身
    register-with-eureka: false
    #要不要抓取注册信息
    fetch-registry: false
运行结果
浏览器输入localhost:8761
3.1.2 服务的提供者
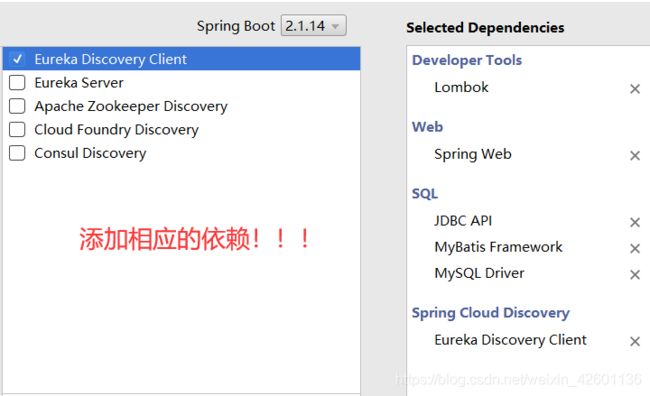
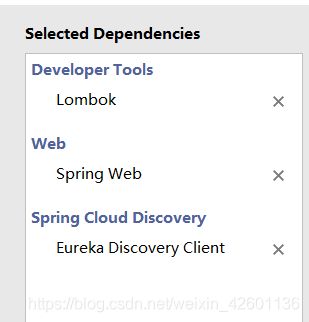
创建SpringBoot项目(springcloud_producer),选择以下依赖;
- 在启动文件中加入@EnableEurekaClient用于启动Eureka客户端注册功能
<dependency>
    <groupId>org.springframework.cloudgroupId>
    <artifactId>spring-cloud-starter-netflix-eureka-clientartifactId>
dependency>
配置application.yml
编写MessageController
用于模拟提供者信息
@RestController
public class MessageController {
    @RequestMapping("/msg")
    public String getMsg(String name){
        return "this is a springcloud web service message"+name;
    }
}
3.1.3 服务的调用者
创建SpringBoot项目(springcloud_consumer),选择以下依赖;
- 在启动文件中加入@EnableEurekaClient用于启动Eureka客户端注册功能
<dependency>
    <groupId>org.springframework.cloudgroupId>
    <artifactId>spring-cloud-starter-netflix-eureka-clientartifactId>
dependency>
配置application.yml
server:
  port: 9092
spring:
  application:
    name:  CONSUMER  #在eurekaserver中的服务名
#    注册中心的地址
eureka:
  client:
    service-url:
       defaultZone: http://localhost:8761/eureka
配置ConsumerMsgConfig
用于注册RestTemplate
@Configuration
public class ConsumerMsgConfig {
    @Bean
    public RestTemplate getRestTemplate(){
        return new RestTemplate();
    }
}
编写ConsumerMsgController
@RestController
public class ConsumerMsgController {
    //注入EurekaClient对象
    @Autowired(required = false)
    private EurekaClient eurekaClient;
    //提供访问webMVC服务
    @Autowired(required = false)
//    包含在springboot-web
    private RestTemplate restTemplate;

    @RequestMapping("/msg/{name}")
    public String getMsg(@PathVariable("name") String name) {
//        从EurekaClient中获取服务实例对象
        InstanceInfo producer = eurekaClient.getNextServerFromEureka("UNKNOWN", false);
        String url = producer.getHomePageUrl()+"msg?name="+name;
        System.out.println(url);
        String result = restTemplate.getForObject(url, String.class);
        return result;
    }
}
运行结果
- 调用者访问到了提供者,实现了两单体项目的交互!!!
3.2 Eureka安全性的处理
创建一个SpringBoot的web项目
- 在启动文件中加入@EnableEurekaServer注解用于开启Eureka服务注册功能
3.2.1 添加依赖
<dependency>
    <groupId>org.springframework.bootgroupId>
    <artifactId>spring-boot-starter-securityartifactId>
dependency>
3.2.2 配置application.yml
server:
  port: 8761
eureka:
  instance:
    hostname: 127.0.0.1
  client:
    register-with-eureka: false
    fetch-registry: false
    service-url:
       defaultZone: http://${eureka.instance.hostname}:${server.port}/eureka/
# 指定用户名和密码
spring:
  security:
    user:
      name: root
      password: root
3.2.3 编写WebSecurityConfig
用于拦截
@EnableWebSecurity
public class WebSecurityConfig extends WebSecurityConfigurerAdapter{
    @Override
    protected void configure(HttpSecurity http) throws Exception {
        // 忽略掉/eureka/**
        http.csrf().ignoringAntMatchers("/eureka/**");
        super.configure(http);
    }
}
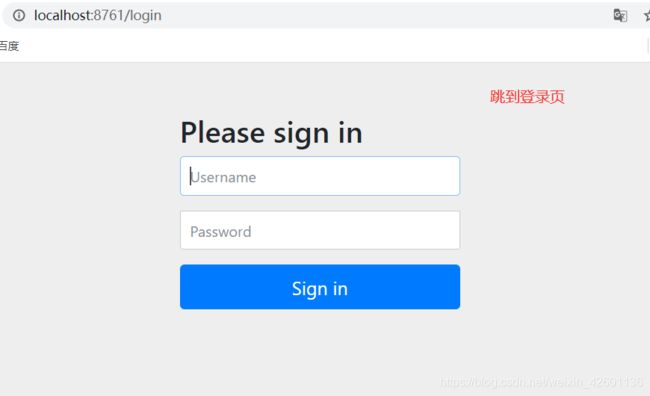
3.2.4 运行的结果
3.3 使用Eureka实现跨服务的增删查改
同上分别创建三个项目:作为Eureka的服务端、服务的提供者、服务的调用者;
- 两个服务间交互,需要序列化
- 链接的数据库:bd0711
- 表名:student
3.3.1 Eureka的服务端
创建SpringBoot项目(springcloud_eurekaserver),只导入Eureka Server;
- 具体查看3.2板块
服务的提供者和服务调用者在编写代码前应看看是否写入成功!!!
3.3.2 服务的提供者
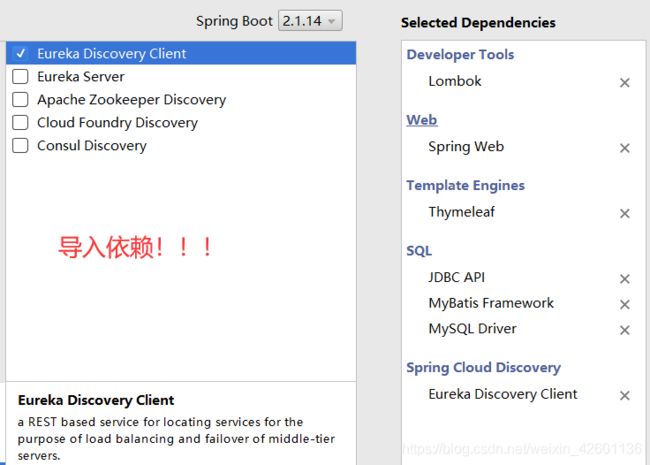
创建SpringBoot项目(springcloud_studentserver),选择以下依赖;
3.3.2.1 配置application.yml
对格式的要求很严格
server:
   port: 8081
spring:
  application:
    name: student-service
  datasource:
    driver-class-name: com.mysql.cj.jdbc.Driver
    url: jdbc:mysql://localhost:3306/db0711?serverTimezone=UTC
    username: root
    password: root
eureka:
  client:
    service-url:
       defaultZone: http://root:root@localhost:8761/eureka
mybatis:
  mapper-locations: classpath:mapping/*.xml
  type-aliases-package: com.sx.kak.po
3.3.2.2 修改启动文件SpringcloudStudentserverApplication
在启动文件中加入@EnableEurekaClient用于启动Eureka客户端注册功能
/**
 * 对数据库的访问封装为一个服务
 */
@SpringBootApplication
@EnableEurekaClient
@MapperScan(basePackages = {"com.sx.kak.mapper"})
public class SpringcloudStudentserverApplication {

    public static void main(String[] args) {
        SpringApplication.run(SpringcloudStudentserverApplication.class, args);
    }
}
3.3.2.3 添加对应的mapper、po、mapping
操作数据库的基本技能,这里是利用mybatis-generator-core-1.3.2生成:参考Mybatis中自动生成代码(利用mybatis-generator-core-1.3.2)一文;
- 注意序列化
3.3.2.4 编写ActionResult
用于接受传递状态
package com.sx.kak.utils;

import lombok.AllArgsConstructor;
import lombok.Data;
import lombok.NoArgsConstructor;
import org.springframework.beans.factory.annotation.Autowired;

import java.io.Serializable;

/**
 * 封装统一的响应对象
 * Created by Kak on 2020/9/22.
 */
@Data
@NoArgsConstructor
@AllArgsConstructor
public class ActionResult implements Serializable{
    private Integer statusCode;
    private String msg;
    private Object data;
}
3.3.2.5 编写Service服务层
分别对应增删查改包括单查
public interface StudentService {
    public List<Student> findAllStudentService();

    public Student addStudentService(Student student);

    public void updateStudent(Student student);

    public void deleteStudent(int id);

    public Student findOneById(int id);
}
package com.sx.kak.service.serviceImpl;

import com.sx.kak.mapper.StudentMapper;
import com.sx.kak.po.Student;
import com.sx.kak.po.StudentExample;
import com.sx.kak.service.StudentService;
import lombok.extern.log4j.Log4j;
import lombok.extern.slf4j.Slf4j;
import org.springframework.beans.factory.annotation.Autowired;
import org.springframework.stereotype.Service;

import java.util.List;

/**
 * Created by Kak on 2020/9/22.
 */
@Service
@Slf4j
public class StudentServiceImpl implements StudentService {
    @Autowired(required = false)
    private StudentMapper studentMapper;

    @Override
    public List<Student> findAllStudentService() {
        try {
            StudentExample example = new StudentExample();
            List<Student> students = studentMapper.selectByExample(example);
            return students;
        } catch (Exception ex) {
            log.info(ex.getMessage());
        }
        return null;
    }

    @Override
    public Student addStudentService(Student student) {
        try {
            studentMapper.insertSelective(student);
            return student;
        } catch (Exception ex) {
            log.info(ex.getMessage());
        }
        return null;
    }

    @Override
    public void updateStudent(Student student) {
        try {
            studentMapper.updateByPrimaryKeySelective(student);
        } catch (Exception ex) {
            log.info(ex.getMessage());
        }
    }

    @Override
    public void deleteStudent(int id) {
        try {
            studentMapper.deleteByPrimaryKey(id);
        } catch (Exception ex) {
            log.info(ex.getMessage());
        }
    }

    @Override
    public Student findOneById(int id) {
        try{
            Student student = studentMapper.selectByPrimaryKey(id);
            return student;
        }catch (Exception ex){
            log.info(ex.getMessage());
        }
        return null;
    }
}
3.3.2.6编写StudentController
用于模拟提供者信息
package com.sx.kak.controller;

import com.sx.kak.po.Student;
import com.sx.kak.service.StudentService;
import com.sx.kak.utils.ActionResult;
import org.springframework.beans.factory.annotation.Autowired;
import org.springframework.web.bind.annotation.*;

import java.util.List;

/**
 * Created by Kak on 2020/9/22.
 */
@RestController
public class StudentController {
    @Autowired
    private StudentService studentService;

    @RequestMapping("/students")
    public ActionResult findAllStu(){
        List<Student> allStudentService = studentService.findAllStudentService();
        ActionResult actionResult = new ActionResult();
        actionResult.setStatusCode(200);
        actionResult.setData(allStudentService);
        return actionResult;
    }

    @RequestMapping("/student")
    public ActionResult findStuById(int id){
        System.out.println("getId =====:"+id);
        Student oneById = studentService.findOneById(id);
        System.out.println(oneById);
        ActionResult result = new ActionResult(200, "", oneById);
        return result;
    }

    @PostMapping("/student")
    public ActionResult addStu(@RequestBody Student student){
        System.out.println("生产端接收参数:"+student);
        Student student1 = studentService.addStudentService(student);
        System.out.println(student1);
        ActionResult result = new ActionResult(200, "", student1);
        return result;
    }

    @PutMapping("/student")
    public ActionResult updateStudent(@RequestBody Student student){
        System.out.println("生产端接收参数:"+ student);
        studentService.updateStudent(student);
        ActionResult result = new ActionResult(200, "update ok", null);
        return result;
    }

    @DeleteMapping("/student/{id}")
    public ActionResult deleteStudent(@PathVariable("id") int id ){
        System.out.println("生产端接收参数:"+id);
        studentService.deleteStudent(id);
        ActionResult result = new ActionResult(200, "delete ok", null);
        return result;
    }
}
3.3.2.7 核心测试结果
3.3.3 服务的调用者
创建SpringBoot项目(springcloud_guest),选择以下依赖;
3.3.3.1 配置application.yml
server:
  port: 8082
spring:
  application:
    name: guest-service
eureka:
  client:
    service-url:
       defaultZone: http://root:root@localhost:8761/eureka
3.3.3.2 修改启动文件SpringcloudGuestApplication
在启动文件中加入@EnableDiscoveryClient用于启动Eureka客户端接收功能
@SpringBootApplication
@EnableDiscoveryClient
public class SpringcloudGuestApplication {

    public static void main(String[] args) {
        SpringApplication.run(SpringcloudGuestApplication.class, args);
    }
}
3.3.3.3 添加po包下的Student
package com.sx.kak.po;

import lombok.AllArgsConstructor;
import lombok.Data;
import lombok.NoArgsConstructor;

import java.io.Serializable;
@Data
@NoArgsConstructor
@AllArgsConstructor
public class Student implements Serializable{
    private Integer id;

    private String name;

    private String sex;

    private String age;
}
3.3.3.4 编写ActionResult
用于接受传递状态
package com.sx.kak.utils;

import lombok.AllArgsConstructor;
import lombok.Data;
import lombok.NoArgsConstructor;
import org.springframework.beans.factory.annotation.Autowired;

import java.io.Serializable;

/**
 * 封装统一的响应对象
 * Created by Kak on 2020/9/22.
 */
@Data
@NoArgsConstructor
@AllArgsConstructor
public class ActionResult implements Serializable{
    private Integer statusCode;
    private String msg;
    private Object data;
}
3.3.3.5 配置RestConfig
用于注册RestTemplate
@Configuration
public class RestConfig {
    @Bean
    public RestTemplate restTemplate(){
        return new RestTemplate();
    }
}
3.3.3.6 编写StudentController
package com.sx.kak.controller;

import com.netflix.appinfo.InstanceInfo;
import com.netflix.discovery.EurekaClient;
import com.sx.kak.po.Student;
import com.sx.kak.utils.ActionResult;
import org.springframework.beans.factory.annotation.Autowired;
import org.springframework.web.bind.annotation.RequestMapping;
import org.springframework.web.bind.annotation.RestController;
import org.springframework.web.client.RestTemplate;

/**
 * Created by Kak on 2020/9/23.
 */
@RestController
public class StudentController {
    @Autowired
    private EurekaClient eurekaClient;
    @Autowired
    private RestTemplate restTemplate;

    @RequestMapping("/students")
    public String getStudents() {
        //获取服务实例对象
        InstanceInfo info = eurekaClient.getNextServerFromEureka("student-service", false);
        //接口url
        String url = info.getHomePageUrl() + "students";
        //访问接口
        ActionResult result = restTemplate.getForObject(url, ActionResult.class);
        System.out.println(result);
        return "get students ok";
    }

    @RequestMapping("/student")
    public String getStudent(int id) {
        //获取服务实例对象
        InstanceInfo info = eurekaClient.getNextServerFromEureka("student-service", false);
        //接口url
        String url = info.getHomePageUrl() + "student?id={0}";
        // 访问接口
        ActionResult result = restTemplate.getForObject(url, ActionResult.class, id);
        System.out.println(result);
        return "get studentById:" + id + " ok";
    }

    @RequestMapping("/addStudent")
    public String addStudent() {
        //获取服务实例对象
        InstanceInfo info = eurekaClient.getNextServerFromEureka("student-service", false);
        // 接口url
        String url = info.getHomePageUrl() + "student";
        Student student = new Student(10, "gr", "woman", "23");

        //访问接口,发出post请求
        ActionResult result = restTemplate.postForObject(url, student, ActionResult.class);
        System.out.println(result);
        return "addstudent ok";
    }

    @RequestMapping("/studentUpdate")
    public String UpdateStudent() {
        //获取服务实例对象
        InstanceInfo info = eurekaClient.getNextServerFromEureka("student-service", false);
        //接口url
        String url = info.getHomePageUrl() + "student";
        Student student = new Student(10, "gr", "man", "33");
        // 访问接口,发出PUT
        try {
            restTemplate.put(url, student);
        } catch (Exception ex) {
            System.out.println("error....");
        }
        return "update student ok";
    }

    @RequestMapping("/studentDel")
    public String delStudent() {
        // 获取服务实例对象
        InstanceInfo info = eurekaClient.getNextServerFromEureka("student-service", false);
        //接口url
        String url = info.getHomePageUrl() + "student/{0}";

        // 访问接口发出delete请求
        try {
            restTemplate.delete(url, 10);
        } catch (Exception ex) {
            System.out.println("error....");
        }
        return "delete student ok";
    }
}
3.3.3.7 运行结果
3.4 Eureka心跳
EurekaClient启动是将自己的信息注册到EurekaServer上,EurekaServer就会存储上EurekaClient的注册信息;当EurekaClient调用服务时,本地没有缓冲信息时就回去EurekaServer中获取注册信息;EurekaClient会通过心跳的方式和EurekaServer进行连接;
eureka:
  instance:
    lease-renewal-interval-in-seconds: 30 #心跳的间隔
    lease-expiration-duration-in-seconds: 90 #多久没发送认为不可达
client:
  registry-fetch-interval-seconds: 30 #每隔30秒更新一下本地注册信息
Eureka的自我保护机制:
- 15分钟内如果一个服务的心跳发送低于85%,EurekaServer就会开启保护机制;
- 不会从EurekaServer中移除长时间没有收到心跳的服务;
- 网络稳定时,EurekaServer才会开始将自己的信息被其他节点同步过去;
server:
  enable-self-preservation: true #开启自我保护机制
4. Robbin_服务间的负载均衡
但是实际环境中,我们往往会开启很多个user-service的集群。此时我们获取的服务列表中就会有多个,这种情况下我们就需要编写负载均衡算法,在多个实例列表中进行选择;就有了负载均衡组件:Ribbon;
Robbin帮助我们实现服务间的负载均衡,属于客户端的负载均衡,一般配合Eureka进行使用;
- 客户端负载均衡:将Search模块全部拉取到本地缓冲,在customer中自己做一个负载均衡策略,选中某一服务;
- 服务端负载均衡:在注册中心中根据指定对的负载均衡策略,选中一个指定的服务信息返回;
4.1 创建Eurekaserver
创建SpringBoot项目(springcloud_eurekaserver_01),只导入Eureka Server;
- 在启动文件中加入@EnableEurekaServer注解用于开启Eureka服务注册功能
4.1.1 配置application.yml
server:
  port: 10003
eureka:
  instance:
    hostname: localhost
  client:
    service-url:
      defaultZone: http://localhost:10003/eureka/
    register-with-eureka: false
    fetch-registry: false
4.2 创建producer
创建SpringBoot项目(springcloud_producer_01),选择以下依赖;
- 在启动文件中加入@EnableEurekaClient用于启动Eureka客户端注册功能
4.2.1 配置application.yml
#配置服务端口
server:
  port: 10004
  #port: 1005
spring:
  application:
    name: producer-service1 #配置服务名
eureka:
  client:
    service-url:
      defaultZone: http://localhost:10003/eureka/ #配置Eureka注册地址
4.2.2 修改为双实例运行
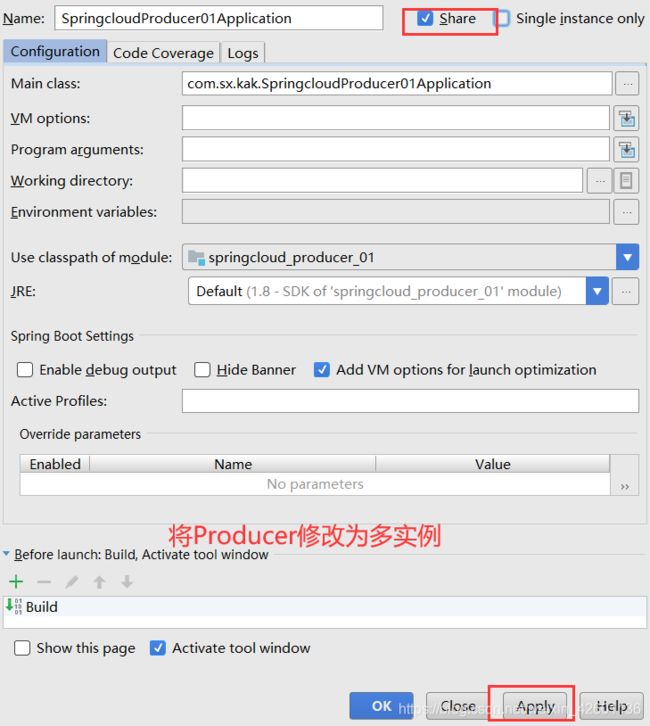
- 利用Robbin选择两个服务
4.2.3 编写ProducerController
@RestController
public class ProducerController {
    @Value("${server.port}") //将配置文件中的Server.port参数注入到port属性中
    private String port;
    @RequestMapping(value = "/proMsg",method = RequestMethod.GET)
    public String getMess(String msg){
        System.out.println("收到的参数:"+msg+"---port:"+port);
        return "recieve ok"+msg;
    }
4.3 创建ribbon
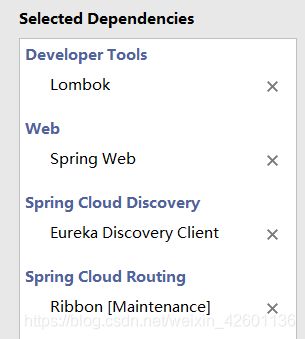
实现服务间的负载均衡,创建SpringBoot项目(springcloud_comsumer_ribbon),选择以下依赖;
- 在启动文件中加入@EnableEurekaClient用于启动Eureka客户端注册功能
<dependency>
    <groupId>org.springframework.cloudgroupId>
    <artifactId>spring-cloud-starter-netflix-ribbonartifactId>
dependency>
4.3.1 配置RibbonConfig
用于注册RestTemplate,实现客户端负载均衡;
@Configuration
public class RibbonConfig {
    @Bean
    @LoadBalanced //实现客户端负载均衡
    public RestTemplate restTemplate(){
        return new RestTemplate();
    }
}
4.3.2 配置server层
public interface RibbonService {
    public String getMsgFromRemote(String msg);
}
/**
 * 远程调用
 * Created by Kak on 2020/9/23.
 */
@Service
@Slf4j
public class RibbonServiceImpl implements RibbonService {
    @Autowired
    private RestTemplate restTemplate;

    @Override
    public String getMsgFromRemote(String msg) {
        try {
            String url = "http://producer-service1/proMsg?msg={0}";
            String object = restTemplate.getForObject(url,String.class,msg);
            return object;
        } catch (Exception ex) {
            log.info(ex.getMessage());
        }
        return null;
    }
}
4.3.3 配置application.yml
加入了负载均衡策略
server:
  port: 10006
spring:
  application:
    name: consumer-ribbon
eureka:
  client:
    service-url:
      defaultZone: http://localhost:10003/eureka/
 #指定具体服务的负载均衡策略
producer-service1:      # 编写服务名称
  ribbon:
    NFLoadBalancerRuleClassName: com.netflix.loadbalancer.WeightedResponseTimeRule  # 具体负载均衡使用的类
4.3.4 编写ConsumerController
调用本类
@RestController
public class ConsumerController {
    @Autowired(required = false)
    private RibbonService ribbonService;
    @RequestMapping("/msg")
    public String msg(String msg){
        String s = ribbonService.getMsgFromRemote(msg);
        return "get msg ok:"+ s;
    }
}
4.3.5 运行结果
4.4 Robbin配置负载均衡策略
负载均衡策略:
- RandomRule:随机策略;
- RoundRobbinRule:轮询策略;
- WeightedResponseTimeRule:默认采用轮询策略,后续会根据服务的响应时间自动分配权重;
- BestAvailableRule:根据被调用方并发数量最小的去分配;
4.4.1 采用注解的形式
在Ribbon的config中编写
@Bean
public IRule robbinRule(){
	return new RandomRule();
}
4.4.2 通过配置文件去指定负载均衡的策略
在Ribbon的yml中编写
#指定具体服务的负载均衡策略
producer-service1:      # 编写服务名称
  ribbon:
    NFLoadBalancerRuleClassName: com.netflix.loadbalancer.WeightedResponseTimeRule  # 具体负载均衡使用的类
5. Feign_服务间的调用
5.1 Feign简介
Feign可以帮助我们实现面向接口编程,它使得写Http客户端变得更简单;使用Feign只需要创建一个接口并注解。它具有可插拔的注解特性,可使用Feign注解和JAX-RS注解。Feign默认集成了Ribbon和Eureka结合实现了负载均衡的效果;
- Feign 采用的是基于接口的注解
- Feign 整合了ribbon
5.2 注册中心、提供者的编写
在Robbin的基础上增加的,代码见4.1和4.2
5.3 创建Feign
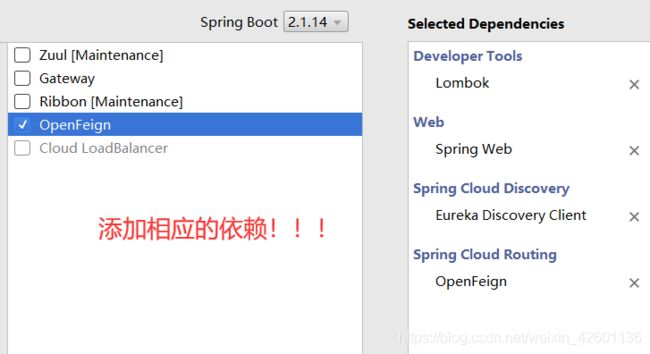
实现面向接口的编程,创建SpringBoot项目(springcloud_comsumer_feign),选择以下依赖;
<dependency>
 <groupId>org.springframework.cloudgroupId>
 <artifactId>spring-cloud-starter-openfeignartifactId>
dependency>
5.3.1 修改SpringcloudComsumerFeignApplication启动文件
在启动文件中加入@EnableEurekaClient用于启动Eureka客户端注册功能,@EnableFeignClients用于开启feign客户端
5.3.2 配置application.yml
server:
  port: 10007
spring:
  application:
    name: consumer-feign
eureka:
  client:
    service-url:
      defaultZone: http://localhost:10003/eureka/
5.3.3 编写FeignRemoteService接口
@FeignClient("producer-service1") //设置调用的服务名称
public interface FeignRemoteService {
    @RequestMapping(value = "/proMsg",method = RequestMethod.GET)
    public String remoteMsg(@RequestParam(value = "msg") String msg);
}
5.3.3 编写FeignController
@RestController
public class FeignController {
    @Autowired(required = false)
    private FeignRemoteService feignRemoteService;
    @RequestMapping("/msg/{msg}")
    public String getMsg(@PathVariable(value = "msg") String msg){
        String s = feignRemoteService.remoteMsg(msg);
        return "getMsg ok from feign client:"+s;
    }
}
5.3.4 运行结果
5.4 Feign的传递参数方式
- 传递的参数复杂时,默认采用POST的请求方式
- 传递单个参数时,使用@PathVariable,如传递参数较多时可以采用@RequestParam,不省略value属性;
- 传递对象信息时,统一采用json的方式,添加@RequestBody
- Client接口必须采用@RequestMapping
6. Ribbon和Feign实现增删查改
四个项目:
- 注册中心:springcloud_eurekaserver
- 生产者提供数据源:springcloud_producer
- Ribbon的客户端(增删查改):springcloud_ribbonclient
- Feign的客户端(增删查改):springcloud_feignclient
- 管理实体类Maven项目:springcloud_entity
- 数据库同上
6.1 注册中心springcloud_eurekaserver
创建SpringBoot项目(springcloud_eurekaserver),只导入Eureka Server;
- 在启动文件中加入@EnableEurekaServer注解用于开启Eureka服务注册功能
6.1.1 配置application.yml
server:
  port: 8761
eureka:
  instance:
    hostname: 127.0.0.1
  client:
    service-url:
      defaultZone: http://localhost:8761/eureka/
    register-with-eureka: false
    fetch-registry: false
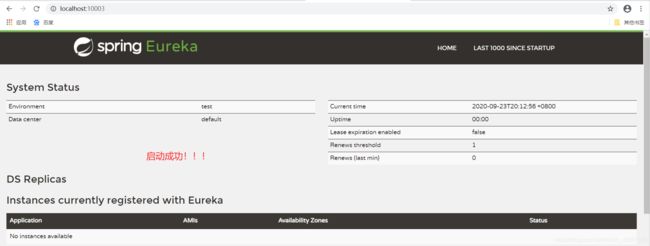
6.1.2 运行结果
浏览器输入localhost:8761
6.2 生产者springcloud_producer
创建SpringBoot项目(springcloud_studentserver),选择以下依赖;
6.2.1 配置application.yml
对格式的要求很严格
server:
   port: 9091
spring:
  application:
    name: producer-service
  datasource:
    driver-class-name: com.mysql.cj.jdbc.Driver
    url: jdbc:mysql://localhost:3306/db0711?serverTimezone=UTC
    username: root
    password: root
eureka:
  client:
    service-url:
       defaultZone: http://localhost:8761/eureka
mybatis:
  mapper-locations: classpath:mapping/*.xml
  type-aliases-package: com.sx.kak.po
6.2.2 修改启动文件SpringcloudProducerApplication
在启动文件中加入@EnableEurekaClient用于启动Eureka客户端注册功能
/**
 * 对数据库的访问封装为一个服务
 */
@SpringBootApplication
@EnableEurekaClient
@MapperScan(basePackages = {"com.sx.kak.mapper"})
public class SpringcloudProducerApplication {

    public static void main(String[] args) {
        SpringApplication.run(SpringcloudProducerApplication.class, args);
    }
}
6.2.3 添加对应的mapper、po、mapping
操作数据库的基本技能,这里是利用mybatis-generator-core-1.3.2生成:参考Mybatis中自动生成代码(利用mybatis-generator-core-1.3.2)一文;
- 注意序列化
6.2.4 编写StudentService接口
/**
 * Created by Kak on 2020/9/22.
 */
public interface StudentService {
    public List<Student> findAllStudentService();

    public Student addStudentService(Student student);

    public void updateStudent(Student student);

    public void deleteStudent(int id);

    public Student findOneById(int id);
}
6.2.5 编写StudentServiceImpl实现类
/**
 * Created by Kak on 2020/9/22.
 */
@Service
@Slf4j
public class StudentServiceImpl implements StudentService {
    @Autowired(required = false)
    private StudentMapper studentMapper;

    @Override
    public List<Student> findAllStudentService() {
        try {
            StudentExample example = new StudentExample();
            List<Student> students = studentMapper.selectByExample(example);
            return students;
        } catch (Exception ex) {
            log.info(ex.getMessage());
        }
        return null;
    }

    @Override
    public Student addStudentService(Student student) {
        try {
            studentMapper.insertSelective(student);
            return student;
        } catch (Exception ex) {
            log.info(ex.getMessage());
        }
        return null;
    }

    @Override
    public void updateStudent(Student student) {
        try {
            studentMapper.updateByPrimaryKeySelective(student);
        } catch (Exception ex) {
            log.info(ex.getMessage());
        }
    }

    @Override
    public void deleteStudent(int id) {
        try {
            studentMapper.deleteByPrimaryKey(id);
        } catch (Exception ex) {
            log.info(ex.getMessage());
        }
    }

    @Override
    public Student findOneById(int id) {
        try{
            Student student = studentMapper.selectByPrimaryKey(id);
            return student;
        }catch (Exception ex){
            log.info(ex.getMessage());
        }
        return null;
    }
}
6.2.6 编写StudentController
/**
 * Created by Kak on 2020/9/23.
 */
@RestController
public class StudentController {

    @Autowired(required = false)
    private StudentService studentService;

    @RequestMapping(value = "/students",method = RequestMethod.GET)
    public ActionResult findAllStudent(){
        List<Student> allStudentService = studentService.findAllStudentService();
        ActionResult actionResult = new ActionResult(200,"",allStudentService);
        return actionResult;
    }

    @RequestMapping(value="/student/{id}",method = RequestMethod.GET)
    public ActionResult findStuById(@PathVariable(value="id") int id){
        Student oneById = studentService.findOneById(id);
        ActionResult result = new ActionResult(200, "", oneById);
        return result;
    }

    @RequestMapping(value = "/student",method = RequestMethod.POST)
    public ActionResult addStu(@RequestBody Student student){
        Student student1 = studentService.addStudentService(student);
        System.out.println(student1);
        ActionResult result = new ActionResult(200, "", student1);
        return result;
    }

    @RequestMapping(value = "/student",method = RequestMethod.PUT)
    public ActionResult updateStudent(@RequestBody Student student){
        ActionResult result = null;
        try {
            studentService.updateStudent(student);
            result = new ActionResult(200, "update ok", null);
            return result;
        }catch(Exception ex){
            result = new ActionResult(404, "error", null);
        }
        return result;
    }


    @RequestMapping(value = "/student/{id}",method = RequestMethod.DELETE)
    public ActionResult deleteStudent(@PathVariable("id") int id ){
        studentService.deleteStudent(id);
        ActionResult result = new ActionResult(200, "delete ok", null);
        return result;
    }
}
6.2.7 测试
![]()
6.3 Ribbon的客户端springcloud_ribbonclient
实现服务间的负载均衡,创建SpringBoot项目(springcloud_ribbonclient),选择以下依赖;
- 在启动文件中加入@EnableEurekaClient用于启动Eureka客户端注册功能
6.3.1 配置application.yml
server:
  port: 9092
eureka:
  client:
    service-url:
      defaultZone: http://localhost:8761/eureka/
spring:
  application:
    name: ribbon-client
6.3.2 RibbonConfig
用于注册RestTemplate,实现客户端负载均衡;
@Configuration
public class RibbonConfig {
    @Bean
    @LoadBalanced //实现客户端负载均衡
    public RestTemplate restTemplate(){
        return new RestTemplate();
    }
    @Bean
    public IRule ribbonRule(){
        //轮询策略
        return  new RoundRobinRule();
    }
}
6.3.3 配置server层
/**
 * Created by Kak on 2020/9/23.
 */
public interface StudentRibbonService {
    public List<Student> findAllStudentService();

    public boolean addStudentService(Student student);

    public boolean updateStudent(Student student);

    public boolean deleteStudent(int id);

    public Map findOneById(int id);
}
/**
 * Created by Kak on 2020/9/24.
 */
@Service
@Slf4j
public class StudentRibbonServiceImpl implements StudentRibbonService {
    @Autowired(required = false)
    private RestTemplate restTemplate;

    @Override
    public List<Student> findAllStudentService() {
        String url = "http://producer-service/students";
        ActionResult actionResult = restTemplate.getForObject(url, ActionResult.class);
        List<Student> data = null;
        if (actionResult != null) {
            data = (List<Student>) actionResult.getData();
        }
        return data;
    }

    @Override
    public boolean addStudentService(Student student) {
        String url = "http://producer-service/student";
        ActionResult actionResult = restTemplate.postForObject(url, student, ActionResult.class);
        if (actionResult.getStatusCode() == 200) {
            return true;
        }
        return false;
    }

    @Override
    public boolean updateStudent(Student student) {
        String url = "http://producer-service/student";
        try {
            restTemplate.put(url, student);
            return true;
        } catch (Exception ex) {
            log.info(ex.getMessage());
        }
        return false;
    }

    @Override
    public boolean deleteStudent(int id) {
        String url = "http://producer-service/student/{0}";
        try {
            restTemplate.delete(url, id);
            return true;
        }catch (Exception ex){
            log.info(ex.getMessage());
        }
        return false;
    }

    @Override
    public Map findOneById(int id) {
        String url = "http://producer-service/student/"+id;
        ActionResult actionResult = restTemplate.getForObject(url, ActionResult.class);
        Map data = null;
        if(actionResult!=null&&actionResult.getData()!=null){
            data =(Map) actionResult.getData();
        }
        return data;
    }
}
6.3.4 配置StudentRibbonController层
/**
 * Created by Kak on 2020/9/24.
 */
@RestController
public class StudentRibbonController {
    @Autowired(required = false)
    private StudentRibbonService studentRibbonService;
    @RequestMapping("/students")
    public String findAllStudent(){
        List<Student> allStudentService = studentRibbonService.findAllStudentService();
        System.out.println(allStudentService);
        return "get student ok!";
    }

    @RequestMapping("/findOneStudent")
    public String findOneStu(int id){
        Map byId = studentRibbonService.findOneById(id);
        System.out.println(byId);
        return "get one student ok!";
    }
    @RequestMapping("/addStudent")
    public String addStu(Student student){
        boolean b = studentRibbonService.addStudentService(student);
        System.out.println(" addStudent:"+b);
        return "add student ok!"+b;
    }
    @RequestMapping("/updateStudent")
    public String updateStu(Student student){
        boolean b = studentRibbonService.updateStudent(student);
        return "update student ok!";
    }
    @RequestMapping("/deleteStudent")
    public String deleteStu(int id){
        boolean b = studentRibbonService.deleteStudent(id);
        return "delete student ok!";
    }
}
6.3.5 测试
6.4 Feign的客户端springcloud_feignclient
创建SpringBoot项目(springcloud_feignclient),选择以下依赖;
6.4.1 修改SpringcloudComsumerFeignApplication启动文件
在启动文件中加入@EnableEurekaClient用于启动Eureka客户端注册功能,@EnableFeignClients用于开启feign客户端
6.4.2 配置application.yml
server:
  port: 9093
eureka:
  client:
    service-url:
      defaultZone: http://localhost:8761/eureka/
spring:
  application:
    name: feign-client
6.4.3 编写StudentFeignService接口
/**
 * Created by Kak on 2020/9/23.
 */
@FeignClient(value = "producer-service")
public interface StudentFeignService {
    @RequestMapping(value = "/students",method = RequestMethod.GET)
    public ActionResult findStudentService();

    @RequestMapping(value = "/student/{id}",method = RequestMethod.GET)
    public ActionResult findStuById(@PathVariable(value="id") int id);

    @RequestMapping(value = "/student",method = RequestMethod.POST)
    public ActionResult addStu(@RequestBody Student student);

    @RequestMapping(value = "/student",method = RequestMethod.PUT)
    public ActionResult updateStudent(@RequestBody Student student);

    @RequestMapping(value = "/student/{id}",method = RequestMethod.DELETE)
    public ActionResult deleteStudent(@PathVariable(value = "id") int id );
}
6.4.4 编写StudentFeigncontroller
/**
 * Created by Kak on 2020/9/23.
 */
@RestController
public class StudentFeigncontroller {
    @Autowired(required = false)
    private StudentFeignService studentFeignService;
    @RequestMapping("/students")
    public String findStu(){
        ActionResult studentService = studentFeignService.findStudentService();
        System.out.println(studentService);
        return "getStudents OK!!!";
    }

    @RequestMapping("/findOneStudent")
    public String findByIdStu(int id){
        ActionResult stuById = studentFeignService.findStuById(id);
        System.out.println(stuById);
        return "get one student ok!";
    }

    @RequestMapping("/addStudent")
    public String addStu(Student student){
        ActionResult actionResult = studentFeignService.addStu(student);
        System.out.println(actionResult);
        return "add student OK!!!";
    }

    @RequestMapping("/updateStudent")
    public String updateStu(Student student){
        ActionResult actionResult = studentFeignService.updateStudent(student);
        System.out.println(actionResult);
        return "update student OK!!!";
    }

    @RequestMapping("/deleteStudent")
    public String deleteStu(int id){
        ActionResult actionResult = studentFeignService.deleteStudent(id);
        System.out.println(actionResult);
        return "delete student OK!!!";
    }
}
6.4.5 测试
![]()
6.5 管理实体类springcloud_entity
将通用的po以及ActionResult封装在Maven中,分别导入以下依赖:
<dependency>
 <groupId>com.sx.kakgroupId>
 <artifactId>springcloud_entityartifactId>
 <version>1.0-SNAPSHOTversion>
dependency>
6.5.1 编写ActionResult
用于接受传递状态
package com.sx.kak.utils;

import lombok.AllArgsConstructor;
import lombok.Data;
import lombok.NoArgsConstructor;
import org.springframework.beans.factory.annotation.Autowired;

import java.io.Serializable;

/**
 * 封装统一的响应对象
 * Created by Kak on 2020/9/22.
 */
@Data
@NoArgsConstructor
@AllArgsConstructor
public class ActionResult implements Serializable{
    private Integer statusCode;
    private String msg;
    private Object data;
}
6.5.2 编写po
package com.sx.kak.po;

import lombok.AllArgsConstructor;
import lombok.Data;
import lombok.NoArgsConstructor;

import java.io.Serializable;
@Data
@NoArgsConstructor
@AllArgsConstructor
public class Student implements Serializable{
    private Integer id;

    private String name;

    private String sex;

    private String age;
}
package com.sx.kak.po;

import java.util.ArrayList;
import java.util.List;

public class StudentExample {
    protected String orderByClause;

    protected boolean distinct;

    protected List<Criteria> oredCriteria;

    public StudentExample() {
        oredCriteria = new ArrayList<Criteria>();
    }

    public void setOrderByClause(String orderByClause) {
        this.orderByClause = orderByClause;
    }

    public String getOrderByClause() {
        return orderByClause;
    }

    public void setDistinct(boolean distinct) {
        this.distinct = distinct;
    }

    public boolean isDistinct() {
        return distinct;
    }

    public List<Criteria> getOredCriteria() {
        return oredCriteria;
    }

    public void or(Criteria criteria) {
        oredCriteria.add(criteria);
    }

    public Criteria or() {
        Criteria criteria = createCriteriaInternal();
        oredCriteria.add(criteria);
        return criteria;
    }

    public Criteria createCriteria() {
        Criteria criteria = createCriteriaInternal();
        if (oredCriteria.size() == 0) {
            oredCriteria.add(criteria);
        }
        return criteria;
    }

    protected Criteria createCriteriaInternal() {
        Criteria criteria = new Criteria();
        return criteria;
    }

    public void clear() {
        oredCriteria.clear();
        orderByClause = null;
        distinct = false;
    }

    protected abstract static class GeneratedCriteria {
        protected List<Criterion> criteria;

        protected GeneratedCriteria() {
            super();
            criteria = new ArrayList<Criterion>();
        }

        public boolean isValid() {
            return criteria.size() > 0;
        }

        public List<Criterion> getAllCriteria() {
            return criteria;
        }

        public List<Criterion> getCriteria() {
            return criteria;
        }

        protected void addCriterion(String condition) {
            if (condition == null) {
                throw new RuntimeException("Value for condition cannot be null");
            }
            criteria.add(new Criterion(condition));
        }

        protected void addCriterion(String condition, Object value, String property) {
            if (value == null) {
                throw new RuntimeException("Value for " + property + " cannot be null");
            }
            criteria.add(new Criterion(condition, value));
        }

        protected void addCriterion(String condition, Object value1, Object value2, String property) {
            if (value1 == null || value2 == null) {
                throw new RuntimeException("Between values for " + property + " cannot be null");
            }
            criteria.add(new Criterion(condition, value1, value2));
        }

        public Criteria andIdIsNull() {
            addCriterion("id is null");
            return (Criteria) this;
        }

        public Criteria andIdIsNotNull() {
            addCriterion("id is not null");
            return (Criteria) this;
        }

        public Criteria andIdEqualTo(Integer value) {
            addCriterion("id =", value, "id");
            return (Criteria) this;
        }

        public Criteria andIdNotEqualTo(Integer value) {
            addCriterion("id <>", value, "id");
            return (Criteria) this;
        }

        public Criteria andIdGreaterThan(Integer value) {
            addCriterion("id >", value, "id");
            return (Criteria) this;
        }

        public Criteria andIdGreaterThanOrEqualTo(Integer value) {
            addCriterion("id >=", value, "id");
            return (Criteria) this;
        }

        public Criteria andIdLessThan(Integer value) {
            addCriterion("id <", value, "id");
            return (Criteria) this;
        }

        public Criteria andIdLessThanOrEqualTo(Integer value) {
            addCriterion("id <=", value, "id");
            return (Criteria) this;
        }

        public Criteria andIdIn(List<Integer> values) {
            addCriterion("id in", values, "id");
            return (Criteria) this;
        }

        public Criteria andIdNotIn(List<Integer> values) {
            addCriterion("id not in", values, "id");
            return (Criteria) this;
        }

        public Criteria andIdBetween(Integer value1, Integer value2) {
            addCriterion("id between", value1, value2, "id");
            return (Criteria) this;
        }

        public Criteria andIdNotBetween(Integer value1, Integer value2) {
            addCriterion("id not between", value1, value2, "id");
            return (Criteria) this;
        }

        public Criteria andNameIsNull() {
            addCriterion("NAME is null");
            return (Criteria) this;
        }

        public Criteria andNameIsNotNull() {
            addCriterion("NAME is not null");
            return (Criteria) this;
        }

        public Criteria andNameEqualTo(String value) {
            addCriterion("NAME =", value, "name");
            return (Criteria) this;
        }

        public Criteria andNameNotEqualTo(String value) {
            addCriterion("NAME <>", value, "name");
            return (Criteria) this;
        }

        public Criteria andNameGreaterThan(String value) {
            addCriterion("NAME >", value, "name");
            return (Criteria) this;
        }

        public Criteria andNameGreaterThanOrEqualTo(String value) {
            addCriterion("NAME >=", value, "name");
            return (Criteria) this;
        }

        public Criteria andNameLessThan(String value) {
            addCriterion("NAME <", value, "name");
            return (Criteria) this;
        }

        public Criteria andNameLessThanOrEqualTo(String value) {
            addCriterion("NAME <=", value, "name");
            return (Criteria) this;
        }

        public Criteria andNameLike(String value) {
            addCriterion("NAME like", value, "name");
            return (Criteria) this;
        }

        public Criteria andNameNotLike(String value) {
            addCriterion("NAME not like", value, "name");
            return (Criteria) this;
        }

        public Criteria andNameIn(List<String> values) {
            addCriterion("NAME in", values, "name");
            return (Criteria) this;
        }

        public Criteria andNameNotIn(List<String> values) {
            addCriterion("NAME not in", values, "name");
            return (Criteria) this;
        }

        public Criteria andNameBetween(String value1, String value2) {
            addCriterion("NAME between", value1, value2, "name");
            return (Criteria) this;
        }

        public Criteria andNameNotBetween(String value1, String value2) {
            addCriterion("NAME not between", value1, value2, "name");
            return (Criteria) this;
        }

        public Criteria andSexIsNull() {
            addCriterion("sex is null");
            return (Criteria) this;
        }

        public Criteria andSexIsNotNull() {
            addCriterion("sex is not null");
            return (Criteria) this;
        }

        public Criteria andSexEqualTo(String value) {
            addCriterion("sex =", value, "sex");
            return (Criteria) this;
        }

        public Criteria andSexNotEqualTo(String value) {
            addCriterion("sex <>", value, "sex");
            return (Criteria) this;
        }

        public Criteria andSexGreaterThan(String value) {
            addCriterion("sex >", value, "sex");
            return (Criteria) this;
        }

        public Criteria andSexGreaterThanOrEqualTo(String value) {
            addCriterion("sex >=", value, "sex");
            return (Criteria) this;
        }

        public Criteria andSexLessThan(String value) {
            addCriterion("sex <", value, "sex");
            return (Criteria) this;
        }

        public Criteria andSexLessThanOrEqualTo(String value) {
            addCriterion("sex <=", value, "sex");
            return (Criteria) this;
        }

        public Criteria andSexLike(String value) {
            addCriterion("sex like", value, "sex");
            return (Criteria) this;
        }

        public Criteria andSexNotLike(String value) {
            addCriterion("sex not like", value, "sex");
            return (Criteria) this;
        }

        public Criteria andSexIn(List<String> values) {
            addCriterion("sex in", values, "sex");
            return (Criteria) this;
        }

        public Criteria andSexNotIn(List<String> values) {
            addCriterion("sex not in", values, "sex");
            return (Criteria) this;
        }

        public Criteria andSexBetween(String value1, String value2) {
            addCriterion("sex between", value1, value2, "sex");
            return (Criteria) this;
        }

        public Criteria andSexNotBetween(String value1, String value2) {
            addCriterion("sex not between", value1, value2, "sex");
            return (Criteria) this;
        }

        public Criteria andAgeIsNull() {
            addCriterion("age is null");
            return (Criteria) this;
        }

        public Criteria andAgeIsNotNull() {
            addCriterion("age is not null");
            return (Criteria) this;
        }

        public Criteria andAgeEqualTo(String value) {
            addCriterion("age =", value, "age");
            return (Criteria) this;
        }

        public Criteria andAgeNotEqualTo(String value) {
            addCriterion("age <>", value, "age");
            return (Criteria) this;
        }

        public Criteria andAgeGreaterThan(String value) {
            addCriterion("age >", value, "age");
            return (Criteria) this;
        }

        public Criteria andAgeGreaterThanOrEqualTo(String value) {
            addCriterion("age >=", value, "age");
            return (Criteria) this;
        }

        public Criteria andAgeLessThan(String value) {
            addCriterion("age <", value, "age");
            return (Criteria) this;
        }

        public Criteria andAgeLessThanOrEqualTo(String value) {
            addCriterion("age <=", value, "age");
            return (Criteria) this;
        }

        public Criteria andAgeLike(String value) {
            addCriterion("age like", value, "age");
            return (Criteria) this;
        }

        public Criteria andAgeNotLike(String value) {
            addCriterion("age not like", value, "age");
            return (Criteria) this;
        }

        public Criteria andAgeIn(List<String> values) {
            addCriterion("age in", values, "age");
            return (Criteria) this;
        }

        public Criteria andAgeNotIn(List<String> values) {
            addCriterion("age not in", values, "age");
            return (Criteria) this;
        }

        public Criteria andAgeBetween(String value1, String value2) {
            addCriterion("age between", value1, value2, "age");
            return (Criteria) this;
        }

        public Criteria andAgeNotBetween(String value1, String value2) {
            addCriterion("age not between", value1, value2, "age");
            return (Criteria) this;
        }
    }

    public static class Criteria extends GeneratedCriteria {

        protected Criteria() {
            super();
        }
    }

    public static class Criterion {
        private String condition;

        private Object value;

        private Object secondValue;

        private boolean noValue;

        private boolean singleValue;

        private boolean betweenValue;

        private boolean listValue;

        private String typeHandler;

        public String getCondition() {
            return condition;
        }

        public Object getValue() {
            return value;
        }

        public Object getSecondValue() {
            return secondValue;
        }

        public boolean isNoValue() {
            return noValue;
        }

        public boolean isSingleValue() {
            return singleValue;
        }

        public boolean isBetweenValue() {
            return betweenValue;
        }

        public boolean isListValue() {
            return listValue;
        }

        public String getTypeHandler() {
            return typeHandler;
        }

        protected Criterion(String condition) {
            super();
            this.condition = condition;
            this.typeHandler = null;
            this.noValue = true;
        }

        protected Criterion(String condition, Object value, String typeHandler) {
            super();
            this.condition = condition;
            this.value = value;
            this.typeHandler = typeHandler;
            if (value instanceof List<?>) {
                this.listValue = true;
            } else {
                this.singleValue = true;
            }
        }

        protected Criterion(String condition, Object value) {
            this(condition, value, null);
        }

        protected Criterion(String condition, Object value, Object secondValue, String typeHandler) {
            super();
            this.condition = condition;
            this.value = value;
            this.secondValue = secondValue;
            this.typeHandler = typeHandler;
            this.betweenValue = true;
        }

        protected Criterion(String condition, Object value, Object secondValue) {
            this(condition, value, secondValue, null);
        }
    }
}
7. Hystrix_服务的隔离及断路器
7.1 Hystrix简介
Hystrix主要是为了解决服务雪崩问题,Hystrix是一个用于分布式系统的延迟和容错的开源库。在分布式系统里,许多依赖不可避免的调用失败,比如超时、异常等,Hystrix能够保证在一个依赖出问题的情况下,不会导致整个服务失败,避免级联故障,以提高分布式系统的弹性;
雪崩效应:是一种因服务提供者的不可用导致服务调用者的不可用,并将不可用逐渐放大的过程;如我们去访问一个服务的时候,发现这个服务崩了,然后我们一直在访问,后面的也一直排队等访问,但是我们有没有成功,导致后面所有的请求在排队,就越来越多的请求等待,这时候系统的资源也会被逐渐的给耗尽,导致所有的服务都可能崩;
7.2 环境的搭建
创建四个spring Boot项目:
- 注册中心:springcloud_eurekaserver
- 服务提供者:springcloud_producer
- Ribbon客户端:springcloud_ribbon_hystrix
- Feign客户端:springcloud_feign
7.2.1 创建Eurekaserver
创建SpringBoot项目(springcloud_eurekaserver),只导入EurekaServer;
- 在启动文件中加入@EnableEurekaServer注解用于开启Eureka服务注册功能
7.2.1.1 配置application.yml
server:
  port: 8761
eureka:
  instance:
    hostname: 127.0.0.1
  client:
    service-url:
      defaultZone: http://localhost:8761/eureka/
    register-with-eureka: false
    fetch-registry: false
7.2.2 创建springcloud_producer
创建SpringBoot项目(springcloud_producer),选择以下依赖;
- 在启动文件中加入@EnableEurekaClient用于启动Eureka客户端注册功能
7.2.2.1 配置application.yml
	server:
  port: 9091
spring:
  application:
    name: producer-server
eureka:
  client:
    service-url:
      defaultZone: http://localhost:8761/eureka/
7.2.2.2 配置StudentController
用于提供服务信息
@RestController
public class StudentController {
    @RequestMapping(value = "/msg",method = RequestMethod.GET)
    public String sendMsg(){
        return "this is producer message";
    }
}
7.2.3 创建springcloud_consumer_ribbon_hystrix
创建SpringBoot项目(springcloud_consumer_ribbon_hystrix),选择以下依赖;
- 在启动文件中加入@EnableDiscoveryClient用于启动Eureka客户端注册功能
7.2.3.1 配置application.yml
server:
  port: 9092
spring:
  application:
    name: consumer-server-hystrix
eureka:
  client:
    service-url:
      defaultZone: http://localhost:8761/eureka/
7.2.3.2 配置Ribbon
编写RibbonConfig
@Configuration
public class RibbonConfig {
    @Bean
    @LoadBalanced
    public RestTemplate restTemplate(){
        return new RestTemplate();
    }
}
7.2.3.3 配置Server层
/**
 * Created by Kak on 2020/9/24.
 */
public interface RemoteRibbonService {
    public String fetchMsg();
}
/**
 * Created by Kak on 2020/9/24.
 */
@Service
public class RemoteRibbonServiceImpl implements RemoteRibbonService {
    @Autowired(required = false)
    private RestTemplate restTemplate;

    /**
     * 通过ribbon远程访问
     * @return
     */
    @Override
    public String fetchMsg() {
        String url = "http://producer-server/msg";
        String forObject = restTemplate.getForObject(url, String.class);
        return forObject;
    }
}
7.2.3.3 配置StuController层
/**
 * Created by Kak on 2020/9/24.
 */
@RestController
public class StuController {
    @Autowired(required = false)
    private RemoteRibbonService remoteRibbonService;
    @RequestMapping("/msg")
    public String getMsg(){
        String s = remoteRibbonService.fetchMsg();
        System.out.println(s);
        return s;
    }
}
7.2.3.4 测试
[外链图片转存失败,源站可能有防盗链机制,建议将图片保存下来直接上传(img-iPeptJSw-1603452930717)(19_SpringCloud.assets/image-20200924173920766.png)]
7.2.4 创建springcloud_feign
实现面向接口的编程,创建SpringBoot项目(springcloud_feign),选择以下依赖;
<dependency>
<groupId>org.springframework.cloudgroupId>
<artifactId>spring-cloud-starter-openfeignartifactId>
dependency>
7.2.4.1 修改SpringcloudConsumerFeignApplication启动文件
在启动文件中加入@EnableEurekaClient用于启动Eureka客户端注册功能,@EnableFeignClients用于开启feign客户端
7.2.4.2 配置application.yml
server:
  port: 9093
spring:
  application:
    name: feign-server-hystrix
eureka:
  client:
    service-url:
      defaultZone: http://localhost:8761/eureka/
7.2.4.3 编写RemoteFeignServer接口
@FeignClient("producer-service") //设置调用的服务名称
public interface RemoteFeignServer {
    @RequestMapping(value = "/msg",method = RequestMethod.GET)
    public String fetchMsg();
}
7.2.4.3 编写StuController
/**
 * Created by Kak on 2020/9/24.
 */
@RestController
public class StuController {
    @Autowired(required = false)
    private RemoteFeignServer remoteFeignServer;
    @RequestMapping("/msg")
    public String getMsg(){
        String s = remoteFeignServer.fetchMsg();
        return s;
    }
}
7.2.4.4 测试
7.3 降级机制实现_ribbon
当某个服务熔断之后,服务器将不再被调用,此刻客户端可以自己准备一个本地的fallback回调,返回一个托底数据,虽然服务水平下降,但比直接挂掉要强;
7.3.1 添加熔断的依赖
<dependency>
    <groupId>org.springframework.cloudgroupId>
    <artifactId>spring-cloud-starter-netflix-hystrixartifactId>
    <version>2.1.4.RELEASEversion>
dependency>
7.3.2 修改启动类
在启动类之前加入注解,开启熔断服务(任选其一):
- @EnableHystrix
- @EnableCircuitBreaker
7.3.3 编写降级方法
服务降级时执行的方法注意:
- 方法名和fallbackmethod值一致
- 参数列表与原来原过程调用的方法参数列表一致
- 返回值与原方法一致
/**
 * Created by Kak on 2020/9/24.
 */
@Service
public class RemoteRibbonServiceImpl implements RemoteRibbonService {
    @Autowired(required = false)
    private RestTemplate restTemplate;
    /**
     * 通过ribbon远程访问
     * @return
     */
    //当远程调用出现异常,退一步执行fetchMsgError方法
    @HystrixCommand(fallbackMethod = "fetchMsgError")
    @Override
    public String fetchMsg() {
        String url = "http://producer-server/msg";
        String forObject = restTemplate.getForObject(url, String.class);
        return forObject;
    }
    public String fetchMsgError() {
        System.out.println("执行降级服务!!!");
        return "拖底数据";
    }
}
7.3.4 测试
关掉producer,制造异常
7.4 降级机制实现_fiegn
如果我们用Fiegn调用另外一个服务时,出现问题,为了避免因一个服务而使所有的服务失效就会使用Fallback自带的依赖包;
7.4.1 配置application.yml
在yml中开启feign的熔断设置
feign:
  hystrix:
    enabled: true #开启feign的熔断设置
7.4.2 修改接口属性
/**
 * Created by Kak on 2020/9/24.
 */
//调用的服务名        降级后执行的类
@FeignClient(value = "producer-server",fallback = RemoteFeignServerHystrix.class)
public interface RemoteFeignServer {
    @RequestMapping(value = "/msg",method = RequestMethod.GET)
    public String fetchMsg();
}
7.4.3 创建feign降级执行的类
/**
 * 创建feign降级执行的类
 * Created by Kak on 2020/9/24.
 */
@Component
public class RemoteFeignServerHystrix implements RemoteFeignServer{
    @Override
    public String fetchMsg() {
        System.out.println("执行降级");
        return "this is feign hystrix fallback msg ";
    }
}
7.4.4 测试
关掉producer,制造异常
7.5 线程隔离
如果我们很多业务都依赖于同一个线程池,当其中一个业务因为各种不可控的原因消耗了所有的线程,导致线程池全部占满,这样其他的业务也就不能正常运转了;如使用Tomcat的线程池去接收用户的请求,使用当前线程去执行其他服务的功能,如果某一个服务出现了故障,导致tomcat的线程大量的堆积;线程资源得不到回收释放;线程池慢慢被占满,最坏的情况就是整个应用都不能提供服务,因此我们需要将线程池进行隔离;
7.5.1 代码实现
    @HystrixCommand(fallbackMethod = "fetchMsgError",commandProperties = {
            @HystrixProperty(name = "execution.isolation.strategy",value = "THREAD")
    })
7.5.2 Hystrix线程池的配置
| 参数 | 描述 | 默认值 |
|---|---|---|
| execution.isolation.strategy | 隔离策略 | 默认:THREAD |
| execution.isolation.thread.timeoutInMilliseconds | 超时时间 | 默认值:1000 |
| execution.timeout.enabled | 执行是否应该有超时 | 默认值:true |
| execution.isolation.thread.interruptOnTimeout | 在发生超时时是否应中断 | 默认值:true |
| execution.isolation.thread.interruptOnCancel | 当发生取消时,执行是否应该中断 | 默认值:false |
7.6 断路器
断容器可以说是一个算法,我们在调用服务时,如果服务的当服务的失败率达到阈值,就会从close状态转为open状态,是无法访问这个服务的;如果访问就会走fallback方法,一段时间后open会转化为half open状态,允许一个请求发送到指定服务,成功转变为close,失败再次转化为open状态,一直到回到closed状态;
- 通俗点说就是,当一个服务挂掉断容器就会标记一个状态,下次请求时直接查看标记,节省了时间;当服务可达时断容器就会转换为closed状态;
在springcloud_ribbon_hystrix中操作
7.6.1 导入依赖
<dependency>
    <groupId>org.springframework.cloudgroupId>
    <artifactId>spring-cloud-starter-netflix-hystrix-dashboardartifactId>
    <version>2.1.1.RELEASEversion>
dependency>
7.6.2 修改启动文件
在启动文件中加入:
- @EnableHystrixDashboard用于开启熔断仪表功能
- 添加扫描Servlet的注解:@ServletComponentScan(“com.sx.kak.servlet”)
7.6.3 配置Servlet路径
配置一个Servlet路径,指定Hystrix
/**
 * 开发熔断监控的Servlet
 * Created by Kak on 2020/9/24.
 */
@WebServlet("/hystrix.stream")
public class HystrixServlet extends HystrixMetricsStreamServlet{
}
7.6.4 测试
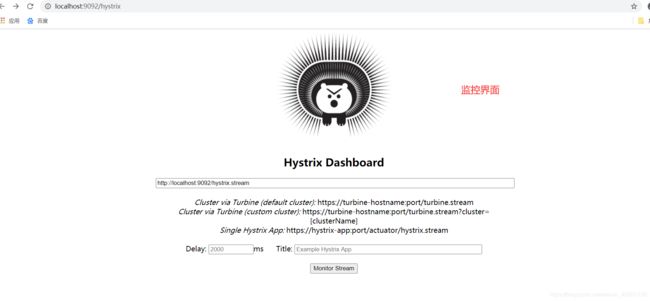
映射路径:http://localhost:9092/hystrix.stream
7.6.5 断路器属性
根据需求增加
@HystrixCommand(fallbackMethod = "fetchMsgError",commandProperties = {
    @HystrixProperty(name = "circuitBreaker.enabled",value = "true"),
    @HystrixProperty(name = "circuitBreaker.requestVolumeThreshold",value = "10")
})
7.7 请求缓存
- 请求缓存的周期是一次请求
- 请求缓存是缓存当前线程的一个方法,将方法的参数作为key,返回结果作为value
- 在一次请求中,目标方法被调用过一次后,就会被缓存
- 是局部缓存,而redis是全局缓存
在springcloud_ribbon_hystrix和springcloud_producer中操作
7.7.1 springcloud_producer中的controller
增加以下代码
@RequestMapping(value = "/msg2/{id}",method = RequestMethod.GET)
public String sendMsg2(@PathVariable(value = "id") Integer id){
    String str = "this is producer message2"+ UUID.randomUUID().toString();
    System.out.println("producer message2:"+str);
    return str;
}
7.7.2 修改springcloud_ribbon_hystrix中server层
/**
/**
 * Created by Kak on 2020/9/24.
 */
public interface RemoteRibbonService {
    public String fetchMsg();

    public String fetchObject(Integer id);

    public void  clearCacheResult(Integer id);
}
实现类中添加以下代码:
@CacheResult:帮助我们缓存当前方法的返回结果(必须与@HystrixCommand配合使用)
@CacheRemove:帮助我们基于某一个缓存信息(基于commandKey)
@CacheKey:指定那个参数作为缓存标识
/**
 * @param id 方法参数id作为缓存的key
 * @return 作为value
 */
@CacheResult
@HystrixCommand(commandKey = "fetchObject")
@Override
public String fetchObject(@CacheKey Integer id) {
    String url = "http://producer-server/msg2/"+id;
    String forObject = restTemplate.getForObject(url, String.class);
    return forObject;
}

/**
 * 清除缓冲 @CacheRemove依赖@HystrixCommand生效
 *
 * @param id
 */
@CacheRemove(commandKey = "fetchObject")
@HystrixCommand
public void clearCacheResult(@CacheKey Integer id) {
    System.out.println("缓冲清除!!!");
}
7.7.3 修改springcloud_ribbon_hystrix中StuController
@RequestMapping("/msg2")
public String getMsg2() {
    String s = remoteRibbonService.fetchObject(10);
    System.out.println(s);

    String s2 = remoteRibbonService.fetchObject(10);
    System.out.println(s2);

    remoteRibbonService.clearCacheResult(10);
    String s3 = remoteRibbonService.fetchObject(10);
    System.out.println(s3);

    return s;
}
7.7.4 测试结果
- 根据以上可以知道:Ribbon发送请求后存入了本地缓存中,下次调用时直接取出数据,所以两个一样;当调用remoteRibbonService.clearCacheResult(10)时,清除本地缓存;之后再次向提供者请求,于是就有了上上图的东西;
8. Zuul_服务的网关
Zuul是Netflix开源的服务网关,它可以和前面介绍的Eureka/Ribbon/Hystrix/Feign等组件很好的兼任使用,并称五大神兽;Zuul的核心是过滤器,通过过滤器实现功能;客户端会有大量的服务,每一块都需要进行添加认证和授权的操作,统一将安全性校验放在Zuul中;
8.1 创建springcloud_zuul
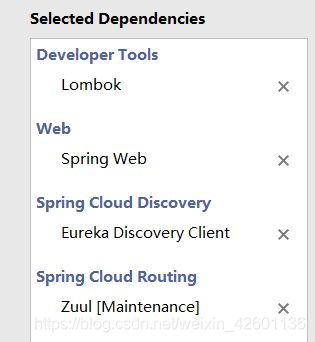
创建SpringBoot项目(springcloud_zuul),选择以下依赖;
<dependency>
<groupId>org.springframework.cloudgroupId>
 <artifactId>spring-cloud-starter-netflix-zuulartifactId>
dependency>
8.1.1 修改配置文件
在启动文件中加入以下注解:
- @EnableDiscoveryClient:用于启动Eureka客户端注册功能
- @EnableZuulProxy:用于开启zuul路由代理服务
8.1.2 配置application.yml
server:
  port: 9098
spring:
  application:
    name: consumer-server-zuul
eureka:
  client:
    service-url:
      defaultZone: http://localhost:8761/eureka/
8.1.3 直接访问测试
8.2 Zuul中常用的配置
8.2.1 自定义路由
#自定义路由
zuul:
  routes:
  #自定义路由名称
    a:
    #映射路径
      path: /a/**
      #服务名称
      serviceId: feign-server-hystrix
    b:
      path: /b/**
      serviceId: consumer-server-hystrix
8.2.2 Zuul的监控信息
8.2.2.1 导入依赖
<dependency>
    <groupId>org.springframework.bootgroupId>
    <artifactId>spring-boot-starter-actuatorartifactId>
dependency>
8.2.2.2 编写配置文件
management:
  endpoints:
    web:
      exposure:
        include: "*"
8.2.2.2 测试结果
actuator/routes
8.2.3 忽略服务配置
忽略consumer-server-hystrix
 #忽略服务配置,自定义除外
ignored-services: consumer-server-hystrix
8.2.4 灰度发布
8.2.4.1 修改Zuul的启动类
@SpringBootApplication
@EnableEurekaClient
@EnableZuulProxy //开启zuul路由代理服务
public class SpringcloudZuulApplication {
public static void main(String[] args) {
SpringApplication.run(SpringcloudZuulApplication.class, args);
}
@Bean
public PatternServiceRouteMapper serviceRouteMapper(){
return new PatternServiceRouteMapper(
"(?^.+)-(?v.+$)" ,
"${version}/${name}"
);
}
}
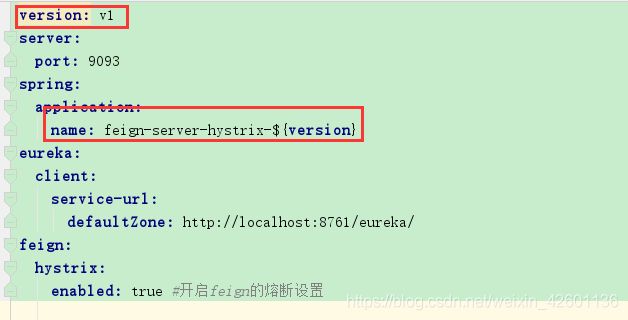
8.2.4.2 在feign的yml中添加
8.2.4.3 测试
8.3 Zuul过滤器的执行流程
PreFilter:在调用服务之先调用的过滤器
PostFilter:在调用服务之后调用的过滤器
ErrorFilter:发生异常调用的过滤器
RoutingFilter:路由过滤器(正在执行)
- 客户端请求发送到Zuul上,如果含有PreFilter的过滤器就会先通过PreFilter过滤器,正常放行;
- 请求到路由过滤器
- 在路由过滤器中调用相应的微服务
- 之后就会返回到路由过滤器(指定服务相应了结果)
- 然后执行PostFilter过滤器
- 最终将响应信息交给客户端
- 如果没有直接执行默认的路由过滤器,执行微服务
- 发生错误执行ErrorFilter过滤器
8.4 Zuul过滤器简单案例
- 创建FirstFilter,继承ZuulFilter抽象类
- 指定过滤类型
- 指定过滤器的执行顺序
- 配置是否启用
- 指定过滤器中的业务代码
8.4.1 FirstZuulFilter
/**
 * Created by Kak on 2020/9/25.
 */
@Component
public class FirstZuulFilter extends ZuulFilter {
    //定义过滤器的类型(前置)
    @Override
    public String filterType() {
        return FilterConstants.PRE_TYPE;
//        return "pre";
    }

    //定义过滤器的执行顺序。数字越小,优先执行默认5
    @Override
    public int filterOrder() {
        return FilterConstants.PRE_DECORATION_FILTER_ORDER-2;
    }
//设定过滤器是否生效 true生效
    @Override
    public boolean shouldFilter() {
        return true;
    }
//过滤器的逻辑
    @Override
    public Object run() throws ZuulException {
        System.out.println("this is my first zuulfilter.....");
        return null;
    }
}
8.4.2 SecondZuulFilter
/**
 * Created by Kak on 2020/9/25.
 */
@Component
public class SecondZuulFilter extends ZuulFilter {
    @Override
    public String filterType() {
        return FilterConstants.POST_TYPE;
    }

    @Override
    public int filterOrder() {
        return FilterConstants.PRE_DECORATION_FILTER_ORDER - 3;
    }

    @Override
    public boolean shouldFilter() {
        return true;
    }

    @Override
    public Object run() throws ZuulException {
        System.out.println("this is my second zuulfilter.....");
        return null;
    }
}
8.4.3 结果
- 由上可知首先触发前置类型,之后才触发后置类型
8.5 PreFilter实现token的检验
创建AuthenFilter,使用前置的方式
- 当token为1234时访问成功
/**
 * Created by Kak on 2020/9/25.
 */
@Component
public class AuthenFilter extends ZuulFilter {
    //定义过滤器的类型
    @Override
    public String filterType() {
        return FilterConstants.PRE_TYPE;
    }

    //定义过滤器的执行顺序。数字越小,优先执行默认5
    @Override
    public int filterOrder() {
        return FilterConstants.PRE_DECORATION_FILTER_ORDER - 2;
    }

    //设定过滤器是否生效 true生效
    @Override
    public boolean shouldFilter() {
        return true;
    }

    //过滤器的逻辑
    @Override
    public Object run() throws ZuulException {
        //获取当前上下文
        RequestContext currentContext = RequestContext.getCurrentContext();
        //得到HttpServletRequest
        HttpServletRequest request = currentContext.getRequest();
        //从参数中获取token
        String token = request.getParameter("token");
        //从请求头部获取认证令牌信息
        request.getHeader("Authentication");
        //令牌无效或不合法
        if (token == null || !"1234".equalsIgnoreCase(token)) {
            currentContext.setSendZuulResponse(false);//阻止请求继续发送到微服务

            currentContext.setResponseStatusCode(HttpStatus.UNAUTHORIZED.value());
            currentContext.setResponseBody("no permission......");
        }
        return null;
    }
}
9. Sidecar_多语言支持
在我们开发中,需要接入一些非java的程序(第三方接口),因此需要启动一个代理的微服务,代理微服务与非java程序交接,使用Sidecar边车模式;
9.1 创建第三方服务
创建一个SpringBoot的web项目(springcloud_multipart)模拟第三方;
- 端口号为10008
/**
 *业务代码
 * Created by Kak on 2020/9/25.
 */
@RestController
public class MultiController {
    @GetMapping("/multi")
    public String getMsg(){
        return "this is multipart service";
    }
}
9.2 创建sidecar客户端
创建SpringBoot项目(springcloud_sidecar),只导入Eureka Discovery Client;
9.2.1 导入依赖
<dependency>
    <groupId>org.springframework.cloudgroupId>
    <artifactId>spring-cloud-netflix-sidecarartifactId>
dependency>
9.2.2 配置application.yml
server:
  port: 9099
eureka:
  client:
    service-url:
      defaultZone: http://localhost:8761/eureka/
spring:
  application:
    name: sidecar-server
#配置第三方服务代理
sidecar:
  port: 10008
9.2.3 在启动类中加入注解
- @EnableEurekaClient:用于启动Eureka客户端注册功能
- @EnableSidecar:用于开启第三方服务代理功能
9.2.4 在Zuul中加入sidecar的自定义路由
sidecar:
  path: /sidecar/**
  serviceId: sidecar-server
9.3 测试
10. Config_服务的动态配置
由于配置文件发散到不同的项目中,不方便维护,所以需要对其就行集中管理,因此运用到了Config;
10.1 环境的搭建
新建一个Maven工程管理SpringCloud(四个)
- springcloud_eurekaserver
- springcloud_producer
- springcloud_consumer
- springcloud_zuul
创建方式参照前面步骤即可
10.2 第一版_在本服务中
10.2.1 springcloud_producer的yml配置
server:
  port: 9091
spring:
  application:
    name: producer-service-jpa
  datasource:
    driver-class-name: com.mysql.cj.jdbc.Driver
    url: jdbc:mysql://localhost:3306/db0711?serverTimezone=UTC
    username: root
    password: root
  jpa:
    hibernate:
      ddl-auto: update
    show-sql: true
eureka:
  client:
    service-url:
      defaultZone: http://localhost:8761/eureka/
10.2.2 springcloud_consumer的yml配置
server:
  port: 9092
spring:
  application:
    name: consumer-server
eureka:
  client:
    service-url:
      defaultZone: http://localhost:8761/eureka
10.2.3 springcloud_zuul的yml配置
server:
  port: 10008
spring:
  application:
    name: consumer-server-zuul
eureka:
  client:
    service-url:
      defaultZone: http://localhost:8761/eureka
10.3 第二版_分离对应的端口
10.3.1 springcloud_producer
- 将application.yml(初始化服务加载的配置)改为bootstrap.yml(引导文件,运行之初)
- 创建application.yml,将数据源端口放入,实现分离;
- 可以建立多个application.yml,配置不同的端口号(有的是测试、有的是主干、有的是开发使用的)
application-dev.yml
spring:
  datasource:
    driver-class-name: com.mysql.cj.jdbc.Driver
    url: jdbc:mysql://localhost:3306/db0711?serverTimezone=UTC
    username: root
    password: root
  jpa:
    show-sql: true
    hibernate:
      ddl-auto: update
server:
  port: 10001
application-test.yml
spring:
  datasource:
    driver-class-name: com.mysql.cj.jdbc.Driver
    url: jdbc:mysql://localhost:3306/db0711?serverTimezone=UTC
    username: root
    password: root
  jpa:
    show-sql: true
    hibernate:
      ddl-auto: update
server:
  port: 10002
application-pro.yml
spring:
  datasource:
    driver-class-name: com.mysql.cj.jdbc.Driver
    url: jdbc:mysql://localhost:3306/db0711?serverTimezone=UTC
    username: root
    password: root
  jpa:
    show-sql: true
    hibernate:
      ddl-auto: update
server:
  port: 10003
bootstrap.yml
server:
  port: 9091
spring:
  application:
    name: producer-service-jpa
  profiles:
    active: dev
eureka:
  client:
    service-url:
      defaultZone: http://localhost:8761/eureka/
![]()
- 结果运行的端口是10001
10.3.2 springcloud_consumer
consumer的设置跟producer一致
10.4 第三版_新建config项目实现本地管理配置
因为每个服务都会有很多配置,不利于管理,因此在建立一个eureka的客户端,并且声明为Config Server,相同的配置与服务名作为区分;
创建SpringBoot项目(springcloud_config),选择以下依赖;
10.4.1 配置application.yml
首先要声明为eureka的客户端,然后设置为Config的服务
- 做以下配置
server:
  port: 8888
spring:
  application:
    name: config-service
  cloud:
    config:
      server:
        native: #配置本地资源位置
          search-locations: classpath:share
  profiles:
    active: native #配置服务资源来自本地
eureka:
  client:
    service-url:
      defaultZone: http://localhost:8761/eureka
10.4.2 在resources文件夹下创建share文件
10.4.3 修改启动文件
- @EnableEurekaClient:用于启动Eureka客户端注册功能
- @EnableConfigServer:用于开启配置中心的服务
10.4.4 在对应的服务上添加config_client依赖
在springcloud_producers和pringcloud_consumer中添加
<dependency>
    <groupId>org.springframework.cloudgroupId>
    <artifactId>spring-cloud-config-clientartifactId>
dependency>
10.4.5 修改producer的yml
server:
  port: 9091
spring:
  application:
    name: producer-service-jpa
  cloud:  #个性化配置的来源
    config:
      discovery:
        service-id: config-service
      profile: dev
eureka:
  client:
    service-url:
      defaultZone: http://localhost:8761/eureka/
![]()
10.4.6 运行流程
- 服务启动时首先加载bootstrap注册自身,作为eureka的服务
- 然后去服务中心抓取(http://localhost:8888)
- 执行
10.5 第四版_实现远程服务配置(手动刷新)
10.5.1 配置consumer-server-dev
在share包下
- 同理配置consumer-server-test
server:
  port: 9093

my:
  name: kak
10.5.2 配置consumer的bootstrap.yml
server:
  port: 9092
eureka:
  client:
    service-url:
      defaultZone: http://localhost:8761/eureka/
spring:
  application:
    name: consumer-server
  profiles:
    active: dev
  cloud:
    config:
      discovery:
        service-id: config-service
      profile: dev
10.5.3 在consumer下实现简单的测试
新建controller包,在该包下建立测试文件(ConfigTestController)
/**
 * Created by Kak on 2020/9/27.
 */
@RestController
public class ConfigTestController {
    @Value("${my.name}")
    private String myname;
    @RequestMapping("info")
    public String showInfo(){
        System.out.println(myname);
        return myname+"出来啊";
    }
}
- 不重启服务器修改内容无法实现动态更新
10.5.4 上传到github上
创建SpringBoot项目(springcloud_remoteconfigserver),选择以下依赖;
启动文件中加入
@EnableConfigServer
@EnableEurekaClient
10.5.5 配置application.yml
server:
  port: 8888
spring:
  application:
    name: config-service
  cloud:
    config:
      server:
        git:
          uri: https://github.com/XXXXXXXXXX.git  #配置中心,放置配置文件的git资源库
          search-paths: config-pro #在资源库中的搜索路径
eureka:
  client:
    service-url:
      defaultZone: http://localhost:8761/eureka
10.5.6 将分离出的文件内容放到GitHub上
上个版本的share文件下的东西
10.5.7 测试
同本地的一样
修改后还是不会动态改变
解决了异地的问题,但是统一的问题还没有解决
10.5.8 动态配置
解决统一性问题
- 修改GitHub上的配置文件
- 通过Git发送请求到Config服务
- 发送消息到MQ
- 指定的服务去获取MQ中得到的消息并且实现自动更新
10.5.8.1导入依赖
<dependency>
    <groupId>org.springframework.cloudgroupId>
    <artifactId>spring-cloud-starter-bus-amqpartifactId>
dependency>

<dependency>
    <groupId>org.springframework.bootgroupId>
    <artifactId>spring-boot-starter-actuatorartifactId>
dependency>
10.5.8.2 在ConfigTestController中加入注解
@RefreshScope用于自动检测配置中心的消息
10.5.8.3 修改consumer中的bootstrap.yml
server:
  port: 9092
eureka:
  client:
    service-url:
      defaultZone: http://localhost:8761/eureka/
spring:
  application:
    name: consumer-server
  cloud:
    config:
      discovery:
        service-id: config-service
      profile: dev
  rabbitmq:
    virtual-host: /
    port: 5672
    username: guest
    password: guest
    host: localhost
# 添加感知
management:
  endpoints:
    web:
      exposure:
        include: "*"
10.5.8.4 修改springcloud_remoteconfigserver中的application.yml
server:
  port: 8888
spring:
  application:
    name: config-service
  cloud:
    config:
      server:
        git:
          uri: https://github.com/kak-willing/springcloud_config.git  #配置中心,放置配置文件的git资源库
          search-paths: config-pro   #在资源库中的搜索路径
  rabbitmq:
    virtual-host: /
    port: 5672
    username: guest
    password: guest
    host: localhost
eureka:
  client:
    service-url:
      defaultZone: http://localhost:8761/eureka
# 添加感知
management:
  endpoints:
    web:
      exposure:
        include: "*"
10.5.9 测试
在GitHub上修改后,自动拉取配置信息
手动发送http://localhost:9093/actuator/bus-refresh(POST请求),不需要重新启动服务就可以刷新
10.6 第五版_实现远程服务配置(自动刷新)
主要是通过内网穿透来实现
10.6.1 内网穿透
NATAPP内网穿透使用教程见:https://blog.csdn.net/weixin_42601136/article/details/108836388
10.6.2 运行得到
复制http://9rfwpq.natappfree.cc到GitHub中
10.6.3 GitHub中配置
10.6.4 处理webhook反序列化异常
处理逆序列化
- 在远端的remoteconfigserver中加入UrlFilter过滤器(根目录下)
package com.sx.kak;
import org.springframework.stereotype.Component;

import javax.servlet.*;
import javax.servlet.http.HttpServletRequest;
import javax.servlet.http.HttpServletRequestWrapper;
import javax.servlet.http.HttpServletResponse;
import java.io.BufferedReader;
import java.io.ByteArrayInputStream;
import java.io.IOException;
/**
 * Created by Kak on 2020/9/27.
 */
@Component

public class UrlFilter  implements Filter {
    @Override
    public void init(FilterConfig filterConfig) throws ServletException {
    }
    @Override
    public void doFilter(ServletRequest request, ServletResponse response, FilterChain chain) throws IOException, ServletException {
        HttpServletRequest httpServletRequest = (HttpServletRequest)request;
        HttpServletResponse httpServletResponse = (HttpServletResponse)response;
        String url = new String(httpServletRequest.getRequestURI());
        //只过滤/actuator/bus-refresh请求
        if (!url.endsWith("/bus-refresh")) {
            chain.doFilter(request, response);
            return;
        }
        //获取原始的body
        String body = readAsChars(httpServletRequest);
        System.out.println("original body:   "+ body);
        //使用HttpServletRequest包装原始请求达到修改post请求中body内容的目的
        CustometRequestWrapper requestWrapper = new CustometRequestWrapper(httpServletRequest);
        chain.doFilter(requestWrapper, response);
    }

    @Override
    public void destroy() {
    }
    private class CustometRequestWrapper extends HttpServletRequestWrapper {
        public CustometRequestWrapper(HttpServletRequest request) {
            super(request);
        }
        @Override
        public ServletInputStream getInputStream() throws IOException {
            byte[] bytes = new byte[0];
            ByteArrayInputStream byteArrayInputStream = new ByteArrayInputStream(bytes);
            return new ServletInputStream() {
                @Override
                public boolean isFinished() {
                    return byteArrayInputStream.read() == -1 ? true:false;
                }
                @Override
                public boolean isReady() {
                    return false;
                }
                @Override
                public void setReadListener(ReadListener readListener) {
                }
                @Override
                public int read() throws IOException {
                    return byteArrayInputStream.read();
                }
            };
        }
    }
    public static String readAsChars(HttpServletRequest request)
    {
        BufferedReader br = null;
        StringBuilder sb = new StringBuilder("");
        try
        {
            br = request.getReader();
            String str;
            while ((str = br.readLine()) != null)
            {
                sb.append(str);
            }
            br.close();
        }
        catch (IOException e)
        {
            e.printStackTrace();
        }
        finally
        {
            if (null != br)
            {
                try
                {
                    br.close();
                }
                catch (IOException e)
                {
                    e.printStackTrace();
                }
            }
        }
        return sb.toString();
    }
}


