8.7.tensorRT高级(3)封装系列-调试方法、思想讨论
目录
-
- 前言
- 1. 模型调试技巧
- 总结
前言
杜老师推出的 tensorRT从零起步高性能部署 课程,之前有看过一遍,但是没有做笔记,很多东西也忘了。这次重新撸一遍,顺便记记笔记。
本次课程学习 tensorRT 高级-调试方法、思想讨论
课程大纲可看下面的思维导图
1. 模型调试技巧
这节我们学习模型的调试技巧,debug 方法
调试法则:
1. 善用 python 工作流,联合 python/cpp 一起进行问题调试(python 工作流比较完善,把 C++ 作为处理工具,Python 作为分析可视化工具)
2. 去掉前后处理情况下,确保 onnx 与 pytorch 结果一致,排除所有因素。这一点 engine 通常是能够保证的。例如都输入全为 5 的张量,必须使得输出之间差距小于 1e-4,确保中间没有例外情况发生
3. 预处理一般很难保证完全一样,考虑把 pytorch 的预处理结果储存文件,c++ 加载后推理,得到的结果应该差异小于 1e-4(尤其是写插件的时候)
4. 考虑把 python 模型推理后的结果储存为文件,先用 numpy 写一遍后处理。然后用 c++ 复现
5. 如果出现 bug,应该把 tensor 从 c++ 中储存文件后,放到 python 上调试查看。避免在 c++ 中 debug
不要急着写 C++,多用 python 调试好
在之前的多线程 yolov5 的代码中,我们在 tensor 封装中拥有两个函数,一个是 save_to_file 可以将我们的 tensor 保存成二进制文件,另一个是 load_from_file 可以从二进制文件中读入 tensor,它们的定义如下:
bool Tensor::save_to_file(const std::string& file) const{

    if(empty()) return false;

    FILE* f = fopen(file.c_str(), "wb");
    if(f == nullptr) return false;

    int ndims = this->ndims();
    unsigned int head[3] = {0xFCCFE2E2, ndims, static_cast<unsigned int>(dtype_)};
    fwrite(head, 1, sizeof(head), f);
    fwrite(shape_.data(), 1, sizeof(shape_[0]) * shape_.size(), f);
    fwrite(cpu(), 1, bytes_, f);
    fclose(f);
    return true;
}

bool Tensor::load_from_file(const std::string& file){

    FILE* f = fopen(file.c_str(), "rb");
    if(f == nullptr){
        INFOE("Open %s failed.", file.c_str());
        return false;
    }

    unsigned int head[3] = {0};
    fread(head, 1, sizeof(head), f);

    if(head[0] != 0xFCCFE2E2){
        fclose(f);
        INFOE("Invalid tensor file %s, magic number mismatch", file.c_str());
        return false;
    }

    int ndims = head[1];
    auto dtype = (TRT::DataType)head[2];
    vector<int> dims(ndims);
    fread(dims.data(), 1, ndims * sizeof(dims[0]), f);

    this->dtype_ = dtype;
    this->resize(dims);

    fread(this->cpu(), 1, bytes_, f);
    fclose(f);
    return true;
}
save_to_file 函数用于将 Tensor 对象保存到指定的文件中,首先写入一个包含魔术数字、维度数量和数据类型的头部,接着写入 Tensor 的形状,最后写入 Tensor 的数据
load_from_file 函数则用于从指定的文件中加载 Tensor 对象,首先读取并验证文件的头部以获取 Tensor 的维度数量和数据类型,接着读取 Tensor 的形状和数据,并将这些信息设置到当前的 Tensor 对象中。
以上是 C++ 中 tensor 的保持和加载,在 python 中我们同样可以实现,具体实现如下:
import numpy as np

def load_tensor(file):

    with open(file, "rb") as f:
        binary_data = f.read()

    magic_number, ndims, dtype = np.frombuffer(binary_data, np.uint32, count=3, offset=0)
    assert magic_number == 0xFCCFE2E2, f"{file} not a tensor file."

    dims = np.frombuffer(binary_data, np.uint32, count=ndims, offset=3 * 4)

    if dtype == 0:
        np_dtype = np.float32
    elif dtype == 1:
        np_dtype = np.float16
    else:
        assert False, f"Unsupport dtype = {dtype}, can not convert to numpy dtype"

    return np.frombuffer(binary_data, np_dtype, offset=(ndims + 3) * 4).reshape(*dims)


def save_tensor(tensor, file):

    with open(file, "wb") as f:
        typeid = 0
        if tensor.dtype == np.float32:
            typeid = 0
        elif tensor.dtype == np.float16:
            typeid = 1
        elif tensor.dtype == np.int32:
            typeid = 2
        elif tensor.dtype == np.uint8:
            typeid = 3

        head = np.array([0xFCCFE2E2, tensor.ndim, typeid], dtype=np.uint32).tobytes()
        f.write(head)
        f.write(np.array(tensor.shape, dtype=np.uint32).tobytes())
        f.write(tensor.tobytes())
Python 版本的实现其实和 C++ 版本没有什么区别
load_tensor 函数用于从指定的文件中读取二进制数据,首先解析头部以获取魔术数字、维度数量和数据类型,然后根据读取到的信息解析 tensor 的形状和数据,最后返回形状和数据类型都已经设置好的 numpy 数组。
save_tensor 函数则用于将 numpy 数组保存到指定的文件中,首先将魔术数字、数组的维度数量和数据类型编码为一个二进制头部,接着写入数组的形状,最后写入数组的数据。
那现在我们就来走一个流程,在 python 中保持一个 tensor,在 C++ 中进行加载,Python 代码如下:
def save_tensor(tensor, file):

    with open(file, "wb") as f:
        typeid = 0
        if tensor.dtype == np.float32:
            typeid = 0
        elif tensor.dtype == np.float16:
            typeid = 1
        elif tensor.dtype == np.int32:
            typeid = 2
        elif tensor.dtype == np.uint8:
            typeid = 3

        head = np.array([0xFCCFE2E2, tensor.ndim, typeid], dtype=np.uint32).tobytes()
        f.write(head)
        f.write(np.array(tensor.shape, dtype=np.uint32).tobytes())
        f.write(tensor.tobytes())

data = np.arange(100, dtype=np.float32).reshape(10, 10, 1)
save_tensor(data, "data.tensor")
C++ 代码如下:
#include "trt-tensor.hpp"

int main(){

    TRT::Tensor tensor;
    tensor.load_from_file("../data.tensor");

    float* ptr = tensor.cpu<float>();
    INFO("tensor.shape = %s, dtype = %d", tensor.shape_string(), tensor.type());

    for(int i = 0; i < tensor.count(); ++i){
        INFO("%d -> = %f", i, prt[i]);
    }

    return 0;
}
执行效果如下:
可以看到结果和我们预期的一样,没有损失,我们可以把它的类型换成 uint8 再来看下,运行效果如下:
可以看到也没有问题,那这边是 python 保存 c++ 读取没有问题,接下来我们来看下 c++ 保存,python 读取
yolov5.cpp 中
214 行/216 行

input->save_to_file("input.tensor")
output->save_to_file("output.tensor")
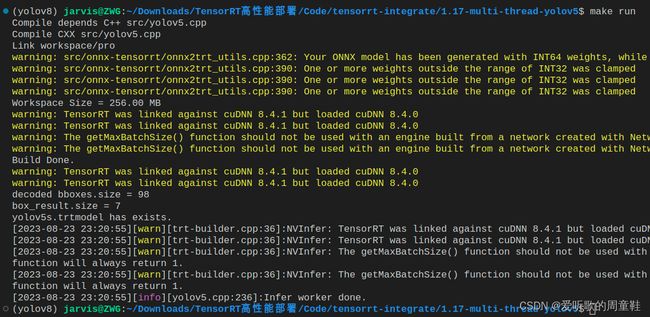
运行如下:
接下来我们去 python 中去加载保存的 input 和 output,代码如下:
import numpy as np

def load_tensor(file):

    with open(file, "rb") as f:
        binary_data = f.read()

    magic_number, ndims, dtype = np.frombuffer(binary_data, np.uint32, count=3, offset=0)
    assert magic_number == 0xFCCFE2E2, f"{file} not a tensor file."

    dims = np.frombuffer(binary_data, np.uint32, count=ndims, offset=3 * 4)

    if dtype == 0:
        np_dtype = np.float32
    elif dtype == 1:
        np_dtype = np.float16
    else:
        assert False, f"Unsupport dtype = {dtype}, can not convert to numpy dtype"

    return np.frombuffer(binary_data, np_dtype, offset=(ndims + 3) * 4).reshape(*dims)

input = load_tensor("workspace/input.tensor")
output = load_tensor("workspace/output.tensor")

print(input.shape, output.shape)

# 恢复成源图像
image = input * 255
image = image.transpose(0, 2, 3, 1)[0].astype(np.uint8)[..., ::-1]

import cv2
cv2.imwrite("image.jpg", image)
print("save done.")
运行效果如下:
可以看到我们恢复出来的效果完全一样,说明中间是没有问题的
这边我们讲解了怎么 save tensor,怎么 load tensor,怎么和 C++ 去做交互,自己也可以去进行封装。
最后我们来看下实现一个模型的流程:
1. 先把代码跑通 predict,单张图作为输入。屏蔽一切与该目标不符的东西,可以修改删除任意多余的东西
2. 自行写一个 python 程序,简化 predict 的流程,掌握 predict 所需要的最小依赖和最少代码
3. 如果第二步比较困难,则可以考虑直接在 pred = model(x) 这个步骤上研究,例如直接在此处写 torch.onnx.export(model, (pred,) …),或者直接把 pred 的结果储存下来研究等等
4. 把前处理、后处理分析出来并实现一个最简化版本
5. 利用简化版本进行 debug、理解分析。然后考虑预处理后处理的合理安排,例如是否可以把部分后处理放到 onnx 中
6. 导出 onnx,在 C++ 上先复现预处理部分,使得其结果和 python 接近(大多数时候并不能得到一样的结果)
7. 把 python 上的 pred 结果储存后,使用 C++ 读取并复现所需要的后处理部分。确保结果正确
8. 把前后处理与 onnx 对接起来,形成完整的推理
总结
本次课程学习了调试方法,首先我们封装了 tensor 保存和加载,这点可以保证 python 与 c++ 之间的交互。然后我们对实现一个模型的流程进行了讨论,拿到一个新的项目后我们先要做的是跑通单张图片的 predict,然后可以自行实现一个简易的 predict 程序,也可以考虑直接导出 onnx 或者把 pred 预测结果保存下来,接着我们通过 debug 分析把预处理、后处理抽出来,导出 onnx。现在 C++ 上复现预处理,看结果和 python 是否接近,另外把 python 存储的 pred 利用 c++ 读取复现后处理,最后把整个对接起来,完成推理。
这是杜老师推荐的工作流,可以简化过程,并且方便开发调试


