手写 git hooks 脚本(pre-commit、commit-msg)
简介
Git 能在特定的重要动作发生时触发自定义脚本,其中比较常用的有:pre-commit、commit-msg、pre-push 等钩子(hooks)。我们可以在 pre-commit 触发时进行代码格式验证,在 commit-msg 触发时对 commit 消息和提交用户进行验证,在 pre-push 触发时进行单元测试、e2e 测试等操作。
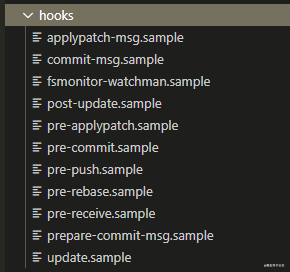
Git 在执行 git init 进行初始化时,会在 .git/hooks 目录生成一系列的 hooks 脚本:
从上图可以看到每个脚本的后缀都是以 .sample 结尾的,在这个时候,脚本是不会自动执行的。我们需要把后缀去掉之后才会生效,即将 pre-commit.sample 变成 pre-commit 才会起作用。
本文主要是想介绍一下如何编写 git hooks 脚本,并且会编写两个 pre-commit、commit-msg 脚本作为示例,帮助大家更好的理解 git hooks 脚本。当然,在工作中还是建议使用现成的、开源的解决方案 husky。
正文
用于编写 git hooks 的脚本语言是没有限制的,你可以用 nodejs、shell、python、ruby等脚本语言,非常的灵活方便。
下面我将用 shell 语言来演示一下如何编写 pre-commit 和 commit-msg 脚本。另外要注意的是,在执行这些脚本时,如果以非零的值退出程序,将会中断 git 的提交/推送流程。所以在 hooks 脚本中验证消息/代码不通过时,就可以用非零值进行退出,中断 git 流程。
exit 1
pre-commit
在 pre-commit 钩子中要做的事情特别简单,只对要提交的代码格式进行检查,因此脚本代码比较少:
#!/bin/sh
npm run lint

# 获取上面脚本的退出码
exitCode="$?"
exit $exitCode
由于我在项目中已经配置好了相关的 eslint 配置以及 npm 脚本,因此在 pre-commit 中执行相关的 lint 命令就可以了,并且判断一下是否正常退出。
// 在 package.json 文件中已配置好 lint 命令
"scripts": {
    "lint": "eslint --ext .js src/"
 },
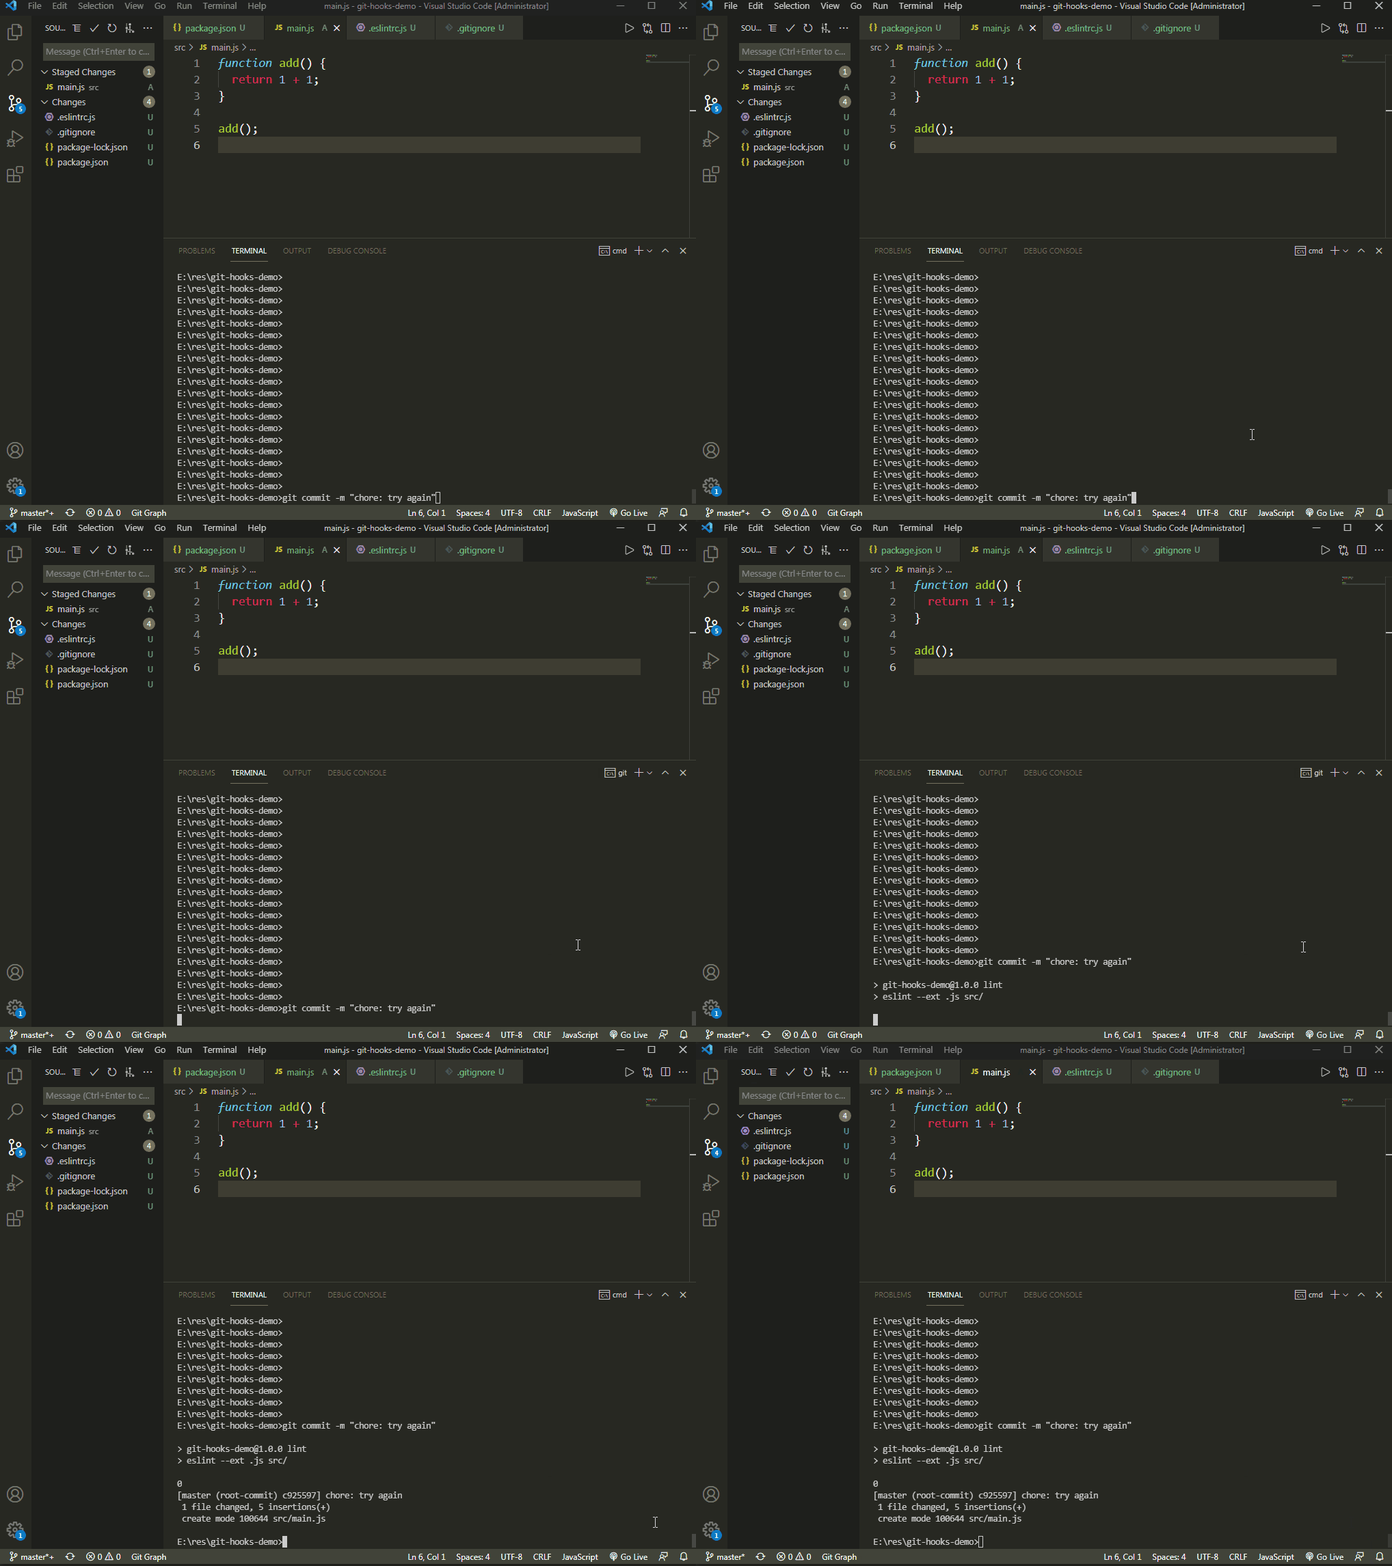
下面看一个动图,当代码格式不正确的时候,进行 commit 就报错了:
在修改代码格式后再进行提交,这时就不报错了:
从动图中可以看出,这次 commit 已正常提交了。
commit-msg
在 commit-msg hooks 中,我们需要对 commit 消息和用户进行校验。
#!/bin/sh

# 用 `` 可以将命令的输出结果赋值给变量
# 获取当前提交的 commit msg
commit_msg=`cat $1`

# 获取用户 email
email=`git config user.email`
msg_re="^(feat|fix|docs|style|refactor|perf|test|workflow|build|ci|chore|release|workflow)(\(.+\))?: .{1,100}"

if [[ ! $commit_msg =~ $msg_re ]]
then
	echo "\n不合法的 commit 消息提交格式,请使用正确的格式:\
	\nfeat: add comments\
	\nfix: handle events on blur (close #28)\
	\n详情请查看 git commit 提交规范:https://github.com/woai3c/Front-end-articles/blob/master/git%20commit%20style.md"

	# 异常退出
	exit 1
fi
在 commit-msg 钩子触发时,对应的脚本会接收到一个参数,这个参数就是 commit 消息,通过 cat $1 获取,并赋值给 commit_msg 变量。
验证 commit 消息的正则比较简单,看代码即可。如果对 commit 提交规范有兴趣,可以看看我另一篇文章。
对用户权限做判断则比较简单,只需要检查用户的邮箱或用户名就可以了(假设现在只有 abc 公司的员工才有权限提交代码)。
email_re="@abc\.com"
if [[ ! $email =~ $email_re ]]
then
	echo "此用户没有权限,具有权限的用户为: [email protected]"

	# 异常退出
	exit 1
fi
下面用两个动图来分别演示一下校验 commit 消息和判断用户权限的过程:
设置 git hooks 默认位置
脚本可以正常执行只是第一步,还有一个问题是必须要解决的,那就是如何和同一项目的其他开发人员共享 git hooks 配置。因为 .git/hooks 目录不会随着提交一起推送到远程仓库。对于这个问题有两种解决方案:第一种是模仿 husky 做一个 npm 插件,在安装的时候自动在 .git/hooks 目录添加 hooks 脚本;第二种是将 hooks 脚本单独写在项目中的某个目录,然后在该项目安装依赖时,自动将该目录设置为 git 的 hooks 目录。
接下来详细说说第二种方法的实现过程:
- 在
npm install执行完成后,自动执行git config core.hooksPath hooks命令。 git config core.hooksPath hooks命令将 git hooks 目录设置为项目根目录下的 hooks 目录。
"scripts": {
    "lint": "eslint --ext .js src/",
    "postinstall": "git config core.hooksPath hooks"
},
踩坑
demo 源码在 windows 上是可以正常运行的,后来换成 mac 之后就不行了,提交时报错:
hint: The 'hooks/pre-commit' hook was ignored because it's not set as executable.
原因是 hooks 脚本默认为不可执行,所以需要将它设为可执行:
chmod 700 hooks/*
为了避免每次克隆项目都得修改,最好将这个命令在 npm 脚本上加上:
"scripts": {
    "lint": "eslint --ext .js src/",
    "postinstall": "git config core.hooksPath hooks && chmod 700 hooks/*"
},
当然,如果是 windows 就不用加后半段代码了。
nodejs hooks 脚本
为了帮助前端同学更好的理解 git hooks 脚本,我用 nodejs 又重写了一版。
pre-commit
#!/usr/bin/env node
const childProcess = require('child_process');

try {
  childProcess.execSync('npm run lint');
} catch (error) {
  console.log(error.stdout.toString());
  process.exit(1);
}
commit-msg
#!/usr/bin/env node
const childProcess = require('child_process');
const fs = require('fs');

const email = childProcess.execSync('git config user.email').toString().trim();
const msg = fs.readFileSync(process.argv[2], 'utf-8').trim(); // 索引 2 对应的 commit 消息文件
const commitRE = /^(feat|fix|docs|style|refactor|perf|test|workflow|build|ci|chore|release|workflow)(\(.+\))?: .{1,100}/;

if (!commitRE.test(msg)) {
  console.log();
  console.error('不合法的 commit 消息格式,请使用正确的提交格式:');
  console.error('feat: add \'comments\' option');
  console.error('fix: handle events on blur (close #28)');
  console.error('详情请查看 git commit 提交规范:https://github.com/woai3c/Front-end-articles/blob/master/git%20commit%20style.md。');
  process.exit(1);
}

if (!/@qq\.com$/.test(email)) {
  console.error('此用户没有权限,具有权限的用户为: [email protected]');
  process.exit(1);
}
总结
其实本文适用的范围不仅仅局限于前端,而是适用于所有使用了 git 作为版本控制的项目。例如安卓、ios、Java 等等。只是本文选择了前端项目作为示例。
最近附上项目源码:https://github.com/woai3c/git-hooks-demo
参考资料
- 自定义 Git - 使用强制策略的一个例子
- Shell 教程

