ExpressLRS开源代码之工程结构
ExpressLRS开源代码之工程结构
- 1. 源由
- 2. 工程
- 3. 开发环境安装
- 4. pio命令
- 5. ExpressLRS配置
- 6. 硬件认证过程
- 7. 参考资料
1. 源由
ExpressLRS开源代码基于Arduino框架设计,在所支持的硬件环境下,提供900/2400发射机和接收机硬件方案。
该设计提供了一个IO配置文件来更好的解耦软硬件设计,使得整个硬件设计工作和软件设计工作更加独立。
虽然系统复杂,工程结构的理解有一定难度,从方法论的角度看,这种解耦的设计本质上是为了更好的简化设计复杂度。
通过对ExpressLRS开源代码的研读,将会就ExpressLRS开源代码工程做一个简单的介绍,以便更好的进行配置和产品硬件IO的定义。
2. 工程
目前,ExpressLRS开源项目提供两种方式管理工程:1) ExpressLRS Configurator;2) PlatformIO。
从实际使用的角度看:
- 获取代码成功率不高
- 编译代码耗时
- ExpressLRS Configurator界面并不友好
- PlatformIO流行,且对开发者相对友好
因此,这里我们主要围绕PlatformIO + vscode来对工程结构进行介绍(包括使用到的截图)。
PlatformIO在嵌入式市场的独特理念为开发人员提供了一个跨平台工作的现代集成开发环境(云和桌面IDE),
支持许多不同的软件开发工具包(SDK)或框架,包括复杂的调试(调试)、单元测试(单元测试)、自动代码分析(静态代码分析),以及远程管理(远程开发)。
它的架构旨在最大限度地提高开发人员的灵活性和选择,开发人员可以使用图形编辑器或命令行编辑器(PlatformIO Core(CLI)),也可以同时使用两者。
PlatformIO是专业嵌入式系统工程师在多个特定平台上开发解决方案的必备工具。
此外,通过拥有去中心化架构,PlatformIO为新的和现有的开发人员提供了一条快速集成的道路,用于开发商业化产品,并缩短了整体上市时间。
PlatformIO可运行在任何一个现代操作系统上(macOS、MS Windows、Linux、FreeBSD)。
3. 开发环境安装
关于vscode + PlatformIO开发环境的安装,这里将不会展开,请参考:Install PlatformIO for VSCode / Get started
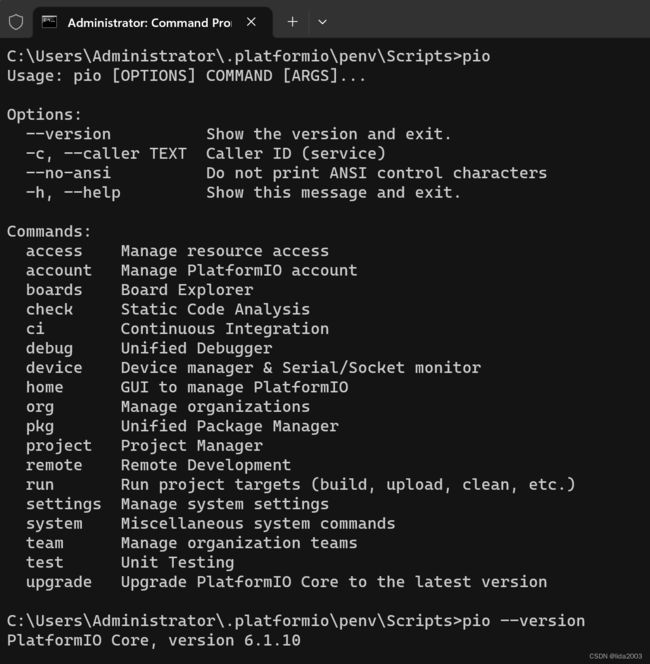
注:如果在Windows环境下,希望在命令行随处可以使用pio命令,请参考以下步骤进行配置。
- In Search, search for and then select: System (Control Panel)
- Click the Advanced system settings link.
- Click Environment Variables. …
- In the Edit System Variable (or New System Variable) window, specify the value of the PATH environment variable. …
- Reopen Command prompt window, and run your java code.
4. pio命令
PlatoformIO(pio)可以认为是一个命令行工具,该命令行工具整合了软件开发工具包(SDK)或框架,详见:PlatformIO Getting Started
 开发者在这个开发工具的帮助下,通过其支持的开发板(硬件),将可以快速实现业务逻辑,帮助项目快速业务软件原型。
5. ExpressLRS配置
当然,虽然pio可以帮助快速业务软件原型,但是ExpressLRS开源接收机、发射机基于各种目标硬件,可以形成各种硬件产品配置。
显然,这块内容相对来说是比较复杂的,但是基于pio开发的代码天生具备软硬件通过配置解耦的特性,接下来,就对这个配置工程结构进行分析:
platformio.ini
 ├──> hardware/targets.json
 │   ├──> hardware/RX/.json
 │   └──> hardware/RX/.json
 ├──> targets/common.ini
 │   ├──> python/build_flags.py
 │   ├──> python/build_env_setup.py
 │   └──> python/build_html.py  //esp series MCU
 ├──> targets/unified.ini
 ├──> targets/betafpv_900.ini //instance of betafpv 900
 └──> targets/.ini
- 总入口:platformio.ini
- 通用环境变量:targets/common.ini
- 额外特定脚本:
build_flags.py、build_env_setup.py、build_html.py- 硬件目标:
.ini - 目标管脚配置:
hardware/RX/、.json hardware/RX/.json - 所支持厂家产品清单:
hardware/targets.json
6. 硬件认证过程
通常来说,硬件厂商,都希望被开源组织认证,以下便是ELRS官方的认证流程:
Step 1: prototype discussion
Step 2: schematic design (following ExpressLRS_Manufacturer_Design_Guidelines_v1.7.pdf) // checklist
Step 3: schematic review
Step 4: layout design (following ExpressLRS_Manufacturer_Design_Guidelines_v1.7.pdf) // checklist
Step 5: layout review
Step 6: send a few sample out for testing (as ELRS dev requested)
Step 7: If test passed, ELRS dev team will add target for long term support // checklist and ExpressLRS开源之RC链路性能测试
Step 8: the manufacturer sends the production unit (=the same unit which your customers will get) samples to the requested ELRS devs (~10 units). The samples will be reserved in the devs’ hands for future technical support
注:目前最新的硬件设计指南是:ExpressLRS_Manufacturer_Design_Guidelines_v1.7.pdf
7. 参考资料
【1】[ExpressLRS开源之接收机固件编译烧录步骤](https://blog.csdn.net/lida2003/article/details/132518813)
【2】ExpressLRS开源之RC链路性能测试
【3】ExpressLRS开源之基本调试数据含义
【4】ExpressLRS开源代码之框架结构
【5】PlatformIO Getting Started
【6】High-performance Open Source Radio Control Link
