measure
在分析onMeasure()前,需要介绍三个基本的layout方法和mState.mLayoutStep状态:
- State.STEP_START : 默认状态,表示RV此时还没有经过
dispatchLayoutStep1() - State.STEP_LAYOUT :
dispatchLayoutStep1()后会将状态转变为此状态,表示处于layout阶段,会调用dispatchLayoutStep2(); - State.STEP_ANIMATIONS:
dispatchLayoutStep2()会将状态转变为次状态,处于执行动画阶段,会调用dispatchLayoutStep3(),dispatchLayoutStep3()执行完毕会将状态重新转为初始默认状态STEP_START
dispatchLayoutStep1():
    /**
     * The first step of a layout where we;
     * - process adapter updates
     * - decide which animation should run
     * - save information about current views
     * - If necessary, run predictive layout and save its information
     */
    private void dispatchLayoutStep1() {
        processAdapterUpdatesAndSetAnimationFlags();
        if (mState.mRunSimpleAnimations) {
            // Step 0: Find out where all non-removed items are, pre-layout
                final ItemHolderInfo animationInfo = mItemAnimator
                        .recordPreLayoutInformation(mState, holder,
                                ItemAnimator.buildAdapterChangeFlagsForAnimations(holder),
                                holder.getUnmodifiedPayloads());
                mViewInfoStore.addToPreLayout(holder, animationInfo);
            }
        if (mState.mRunPredictiveAnimations) {
            // Step 1: run prelayout: This will use the old positions of items.
            // Save old positions so that LayoutManager can run its mapping logic.
            saveOldPositions();
            // temporarily disable flag because we are asking for previous layout
            mLayout.onLayoutChildren(mRecycler, mState);
            for (int i = 0; i < mChildHelper.getChildCount(); ++i) {
                final View child = mChildHelper.getChildAt(i);
                final ViewHolder viewHolder = getChildViewHolderInt(child);
                    final ItemHolderInfo animationInfo = mItemAnimator.recordPreLayoutInformation(
                            mState, viewHolder, flags, viewHolder.getUnmodifiedPayloads());
                    if (wasHidden) {
                        recordAnimationInfoIfBouncedHiddenView(viewHolder, animationInfo);
                    } else {
                        mViewInfoStore.addToAppearedInPreLayoutHolders(viewHolder, animationInfo);
                    }
                }
            }
        }
        mState.mLayoutStep = State.STEP_LAYOUT;
    }
- 调用
processAdapterUpdatesAndSetAnimationFlags()处理adapter更新和设置动画标记 - 保存
animationInfo,run pre-layout:保存animationInfo到ViewInfoStore类中; - 改变state为
Step_Layout
dispatchLayoutStep2():
    private void dispatchLayoutStep2() {

        // Step 2: Run layout
        mState.mInPreLayout = false;
        mLayout.onLayoutChildren(mRecycler, mState);

        mState.mLayoutStep = State.STEP_ANIMATIONS;

    }
- 调用LayoutManager的
onLayoutChildren()真正进行child的测量和布局 - 将state转为
Step_Animations
看看LinearLayoutManager的onLayoutChildren()实现
    public void onLayoutChildren(RecyclerView.Recycler recycler, RecyclerView.State state) {
        // layout algorithm:
        // 1) by checking children and other variables, find an anchor coordinate and an anchor
        //  item position.
        // 2) fill towards start, stacking from bottom
        // 3) fill towards end, stacking from top
        // 4) scroll to fulfill requirements like stack from bottom.
        // create layout state

            updateAnchorInfoForLayout(recycler, state, mAnchorInfo);   //  计算锚点

        detachAndScrapAttachedViews(recycler);  //  一级缓存scrap缓存

            fill(recycler, mLayoutState, state, false);   //
    }
-
调用
updateAnchorInfoForLayout()计算锚点
锚点 detachAndScrapAttachedViews()一级缓存,Scrap缓存fill()计算可填充空间,在fill()中调用layoutChunk()真正的去填充child
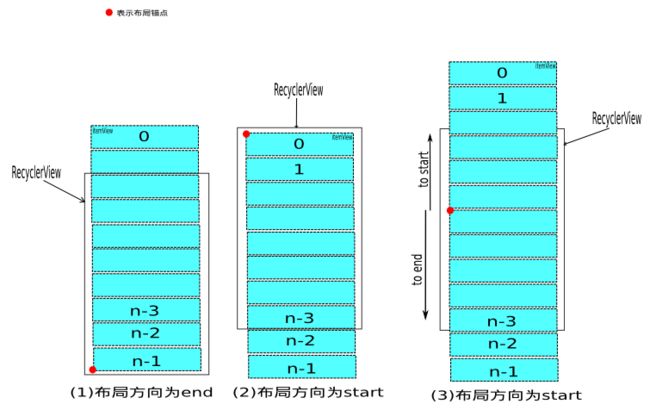
锚点布局的三种
    void layoutChunk(RecyclerView.Recycler recycler, RecyclerView.State state,
            LayoutState layoutState, LayoutChunkResult result) {

        //  如果是第一次,addView()
        View view = layoutState.next(recycler);
        LayoutParams params = (LayoutParams) view.getLayoutParams();
        if (layoutState.mScrapList == null) {
            if (mShouldReverseLayout == (layoutState.mLayoutDirection
                    == LayoutState.LAYOUT_START)) {
                addView(view);
            } else {
                addView(view, 0);
            }
        } else {
            if (mShouldReverseLayout == (layoutState.mLayoutDirection
                    == LayoutState.LAYOUT_START)) {
                addDisappearingView(view);
            } else {
                addDisappearingView(view, 0);
            }
        }

        //   measure child
        measureChildWithMargins(view, 0, 0);

        //   计算child的layout参数
        int left, top, right, bottom;
        if (mOrientation == VERTICAL) {
            if (isLayoutRTL()) {
                right = getWidth() - getPaddingRight();
                left = right - mOrientationHelper.getDecoratedMeasurementInOther(view);
            } else {
                left = getPaddingLeft();
                right = left + mOrientationHelper.getDecoratedMeasurementInOther(view);
            }
            if (layoutState.mLayoutDirection == LayoutState.LAYOUT_START) {
                bottom = layoutState.mOffset;
                top = layoutState.mOffset - result.mConsumed;
            } else {
                top = layoutState.mOffset;
                bottom = layoutState.mOffset + result.mConsumed;
            }
        } else {
            top = getPaddingTop();
            bottom = top + mOrientationHelper.getDecoratedMeasurementInOther(view);

            if (layoutState.mLayoutDirection == LayoutState.LAYOUT_START) {
                right = layoutState.mOffset;
                left = layoutState.mOffset - result.mConsumed;
            } else {
                left = layoutState.mOffset;
                right = layoutState.mOffset + result.mConsumed;
            }
        }

        //  layout child
        layoutDecoratedWithMargins(view, left, top, right, bottom);

    }
- 调用
layoutState.next()获取View,如果是第一次布局(Scrap缓存为null),addView() - 调用
measureChildWithMargins()measure child - 根据LayoutManager的Orientation计算child 坐标
- 调用
layoutDecoratedWithMargins()layout child
dispatchLayoutStep3():
    /**
     * The final step of the layout where we save the information about views for animations,
     * trigger animations and do any necessary cleanup.
     */
    private void dispatchLayoutStep3() {

        mState.mLayoutStep = State.STEP_START;

            // Step 4: Process view info lists and trigger animations
            mViewInfoStore.process(mViewInfoProcessCallback);
    }
- 将state设置为
STEP_START,下次再判断state时肯定会重新经历Step1(),Step2(),Step3() -
trigger animations,开启动画
measure
    @Override
    protected void onMeasure(int widthSpec, int heightSpec) {
        if (mLayout == null) {    //  第一种情况,没有LayoutManager
            defaultOnMeasure(widthSpec, heightSpec);
            return;
        }
        if (mLayout.mAutoMeasure) {           //  第二种情况,有layoutmanager,并且开启自动测量

            mLayout.onMeasure(mRecycler, mState, widthSpec, heightSpec);

            if (mState.mLayoutStep == State.STEP_START) {
                dispatchLayoutStep1();
            }

            dispatchLayoutStep2();

            // now we can get the width and height from the children.
            mLayout.setMeasuredDimensionFromChildren(widthSpec, heightSpec);

        } else {   //  第三种情况,有layoutmanager,没有开启自动测量
                  mLayout.onMeasure(mRecycler, mState, widthSpec, heightSpec);
        }
    }
1. 如果没有layoutManger:
    void defaultOnMeasure(int widthSpec, int heightSpec) {
        // calling LayoutManager here is not pretty but that API is already public and it is better
        // than creating another method since this is internal.
        final int width = LayoutManager.chooseSize(widthSpec,
                getPaddingLeft() + getPaddingRight(),
                ViewCompat.getMinimumWidth(this));
        final int height = LayoutManager.chooseSize(heightSpec,
                getPaddingTop() + getPaddingBottom(),
                ViewCompat.getMinimumHeight(this));

        setMeasuredDimension(width, height);
    }

        public static int chooseSize(int spec, int desired, int min) {
            final int mode = View.MeasureSpec.getMode(spec);
            final int size = View.MeasureSpec.getSize(spec);
            switch (mode) {
                case View.MeasureSpec.EXACTLY:
                    return size;
                case View.MeasureSpec.AT_MOST:
                    return Math.min(size, Math.max(desired, min));
                case View.MeasureSpec.UNSPECIFIED:
                default:
                    return Math.max(desired, min);
            }
        }
当前RV如果没有LayoutManager,就调用defaultOnMeasure()根据MeasureSpec默认测量
2. 如果有layoutManger,并且开启了自动测量默认场景
上面已经介绍了
step1()和step2()的作用,在第二种情况下,onMeasure()首先对child进行measure和layout,然后再结合childsetMeasuredDimension()
3. 关闭自动测量模式:
和第一种情况一样,也是调用了defaultOnMeasure(),不过这是通过LayoutManger来完成调用的;
至此RV的measure过程分析完毕
layout
    @Override
    protected void onLayout(boolean changed, int l, int t, int r, int b) {
        TraceCompat.beginSection(TRACE_ON_LAYOUT_TAG);
        dispatchLayout();
        TraceCompat.endSection();
        mFirstLayoutComplete = true;
    }

    void dispatchLayout() {
        if (mAdapter == null) {
            Log.e(TAG, "No adapter attached; skipping layout");
            // leave the state in START
            return;
        }
        if (mLayout == null) {
            Log.e(TAG, "No layout manager attached; skipping layout");
            // leave the state in START
            return;
        }
        mState.mIsMeasuring = false;
        if (mState.mLayoutStep == State.STEP_START) {
            dispatchLayoutStep1();
            mLayout.setExactMeasureSpecsFrom(this);
            dispatchLayoutStep2();
        } else if (mAdapterHelper.hasUpdates() || mLayout.getWidth() != getWidth()
                || mLayout.getHeight() != getHeight()) {
            // First 2 steps are done in onMeasure but looks like we have to run again due to
            // changed size.
            mLayout.setExactMeasureSpecsFrom(this);
            dispatchLayoutStep2();
        } else {
            // always make sure we sync them (to ensure mode is exact)
            mLayout.setExactMeasureSpecsFrom(this);
        }
        dispatchLayoutStep3();
    }
在layout中的工作就变得非常简单了,首先判断了adapter和layoutManager不为null,然后再调用step3,因为step3会将state设置为start,所以下次再layout的时候就会执行step1,step2,step3了
如果开启了自动测量,就会在measure中测量,将state设置为animation,layout过程就只会执行step3;
如果没有开启自动测量,就会在layout过程执行step1,step2,step3;
draw
    @Override
    public void draw(Canvas c) {
        super.draw(c);

        for (int i = 0; i < count; i++) {
            mItemDecorations.get(i).onDrawOver(c, this, mState);
        }
    }

    @Override
    public void onDraw(Canvas c) {
        super.onDraw(c);

        final int count = mItemDecorations.size();
        for (int i = 0; i < count; i++) {
            mItemDecorations.get(i).onDraw(c, this, mState);
        }
    }
在RV的draw过程中,调用了ItemDecoration的onDrawOver和onDraw为item添加装饰