Python表白代码合集:用完这几种表白代码,找不到对象你来找我,这也太秀了吧❤️
❤️明天就七夕了,谁说程序员不懂浪漫?今天给大家分享几种有意思的表白代码,带你用Python“码”上七夕❤️
话不多说,我们直接上代码~
第一种、表白弹窗
先看效果
文字背景啥的,大家可以自定义一下~
代码展示
20行代码实现弹窗
import tkinter as tk
import random
import threading
import time
def dow():
    window = tk.Tk()
    width=window.winfo_screenwidth()
    height=window.winfo_screenheight()
    a=random.randrange(0,width)
    b=random.randrange(0,height)
    window.title('520快乐')
    window.geometry("200x50"+"+"+str(a)+"+"+str(b))
    tk.Label(window,
        text='亲爱的嫁给我吧!',    # 标签的文字
        bg='Red',     # 背景颜色
        font=('楷体', 15),     # 字体和字体大小
        width=15, height=2  # 标签长宽
        ).pack()    # 固定窗口位置
    window.mainloop()

threads = []
for i in range(100):#需要的弹框数量
    t = threading.Thread(target=dow)
    threads.append(t)
    time.sleep(0.1)
    threads[i].start()
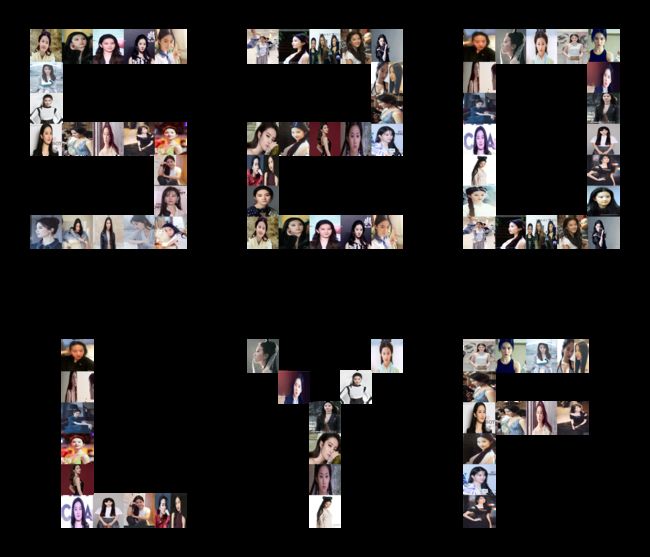
第二种、照片墙+名字
小编:以我老婆为例
网友:放屁,这是大家的~
代码展示
import os
import argparse
from PIL import Image


'''一些超参'''
CELLSIZE = 64


'''图片读取'''
def readImage(img_path, target_size=(64, 64)):
	img = Image.open(img_path)
	img = img.resize(target_size)
	return img


'''图片生成器'''
def yieldImage(target_dir, idx, target_size):
	img_paths = sorted([os.path.join(target_dir, imgname) for imgname in os.listdir(target_dir)])
	idx = (idx + 1) % len(img_paths)
	return readImage(img_paths[idx], target_size), idx


'''解析模板'''
def parseTemplate(template_path):
	template = []
	with open(template_path, 'r') as f:
		for line in f.readlines():
			if line.startswith('#'):
				continue
			template.append(line.strip('\n').split(','))
	return template


'''主函数'''
def main(pictures_dir, template_path):
	template = parseTemplate(template_path)
	w = len(template[0])
	h = len(template)
	image_new = Image.new('RGBA', (CELLSIZE*w, CELLSIZE*h))
	img_idx = -1
	for y in range(h):
		for x in range(w):
			if template[y][x] == '1':
				img, img_idx = yieldImage(pictures_dir, img_idx, (CELLSIZE, CELLSIZE))
				image_new.paste(img, (x*CELLSIZE, y*CELLSIZE))
	image_new.show()
	image_new.save('picturewall.png')


'''run'''
if __name__ == '__main__':
	parser = argparse.ArgumentParser(description="Picture Wall Generator.")
	parser.add_argument('-t', dest='template_path', help='Template path.', default='templates/1.tmp')
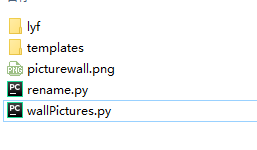
	parser.add_argument('-p', dest='pictures_dir', help='Pictures dir.', default='lyf')
	args = parser.parse_args()
	template_path = args.template_path
	pictures_dir = args.pictures_dir
	main(pictures_dir, template_path)
第三种、 学习
很多小伙伴在学习的过程中因为没有好的学习资料或者学习的路上没有人指导,导致学习进度一慢再慢,遇到问题半天得不到解决,就很打击自己学学习信心。
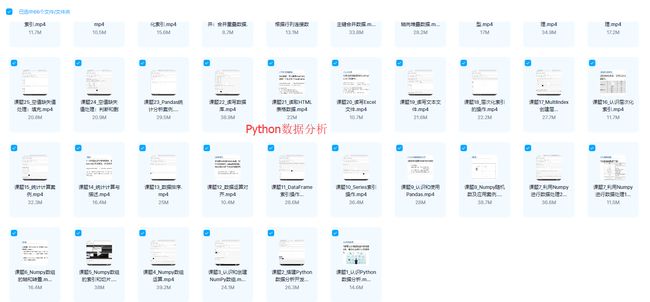
在这里小编准备了这些资料,都打包好了,直接文末名片自取。
- Python+pycharm安装包、安装使用教程,pycharm永久使用码。
- Python基础100集
- Python爬虫实战
- Python数据分析
- Python开发实战
- Python电子书(数百本)
- Python超详细学习路线图
就不全部截图了,尽在文末名片
第四种、抖音表白神器
效果展示
代码展示
'''
仿抖音表白神器

'''
import sys
import cfg
import random
import pygame
from tkinter import Tk, messagebox


'''
Function:
	按钮类
Initial Args:
	--x, y: 按钮左上角坐标
	--width, height: 按钮宽高
	--text: 按钮显示的文字
	--fontpath: 字体路径
	--fontsize: 字体大小
	--fontcolor: 字体颜色
	--bgcolors: 按钮背景颜色
	--is_want_to_be_selected: 按钮是否想被玩家选中
	--screensize: 软件屏幕大小
'''
class Button(pygame.sprite.Sprite):
	def __init__(self, x, y, width, height, text, fontpath, fontsize, fontcolor, bgcolors, edgecolor, edgesize=1, is_want_to_be_selected=True, screensize=None, **kwargs):
		pygame.sprite.Sprite.__init__(self)
		self.rect = pygame.Rect(x, y, width, height)
		self.text = text
		self.font = pygame.font.Font(fontpath, fontsize)
		self.fontcolor = fontcolor
		self.bgcolors = bgcolors
		self.edgecolor = edgecolor
		self.edgesize = edgesize
		self.is_want_tobe_selected = is_want_to_be_selected
		self.screensize = screensize
	'''自动根据各种情况将按钮绑定到屏幕'''
	def draw(self, screen, mouse_pos):
		# 鼠标在按钮范围内
		if self.rect.collidepoint(mouse_pos):
			# --不想被选中
			if not self.is_want_tobe_selected:
				while self.rect.collidepoint(mouse_pos):
					self.rect.left, self.rect.top = random.randint(0, self.screensize[0]-self.rect.width), random.randint(0, self.screensize[1]-self.rect.height)
			pygame.draw.rect(screen, self.bgcolors[0], self.rect, 0)
			pygame.draw.rect(screen, self.edgecolor, self.rect, self.edgesize)
		# 鼠标不在按钮范围内
		else:
			pygame.draw.rect(screen, self.bgcolors[1], self.rect, 0)
			pygame.draw.rect(screen, self.edgecolor, self.rect, self.edgesize)
		text_render = self.font.render(self.text, True, self.fontcolor)
		fontsize = self.font.size(self.text)
		screen.blit(text_render, (self.rect.x+(self.rect.width-fontsize[0])/2, self.rect.y+(self.rect.height-fontsize[1])/2))


'''在指定位置显示文字'''
def showText(screen, text, position, fontpath, fontsize, fontcolor, is_bold=False):
	font = pygame.font.Font(fontpath, fontsize)
	font.set_bold(is_bold)
	text_render = font.render(text, True, fontcolor)
	screen.blit(text_render, position)


'''主函数'''
def main():
	# 初始化
	pygame.init()
	screen = pygame.display.set_mode(cfg.SCREENSIZE, 0, 32)
	pygame.display.set_icon(pygame.image.load(cfg.ICON_IMAGE_PATH))
	pygame.display.set_caption('来自一位喜欢你的小哥哥')
	# 背景音乐
	pygame.mixer.music.load(cfg.BGM_PATH)
	pygame.mixer.music.play(-1, 30.0)
	# biu爱心那个背景图片
	bg_image = pygame.image.load(cfg.BG_IMAGE_PATH)
	bg_image = pygame.transform.smoothscale(bg_image, (150, 150))
	# 实例化两个按钮
	button_yes = Button(x=20, y=cfg.SCREENSIZE[1]-70, width=120, height=35,
						text='好呀', fontpath=cfg.FONT_PATH, fontsize=15, fontcolor=cfg.BLACK, edgecolor=cfg.SKYBLUE,
						edgesize=2, bgcolors=[cfg.DARKGRAY, cfg.GAINSBORO], is_want_to_be_selected=True, screensize=cfg.SCREENSIZE)
	button_no = Button(x=cfg.SCREENSIZE[0]-140, y=cfg.SCREENSIZE[1]-70, width=120, height=35,
					   text='算了吧', fontpath=cfg.FONT_PATH, fontsize=15, fontcolor=cfg.BLACK, edgecolor=cfg.DARKGRAY,
					   edgesize=1, bgcolors=[cfg.DARKGRAY, cfg.GAINSBORO], is_want_to_be_selected=False, screensize=cfg.SCREENSIZE)
	# 是否点击了好呀按钮
	is_agree = False
	# 主循环
	clock = pygame.time.Clock()
	while True:
		# --背景图片
		screen.fill(cfg.WHITE)
		screen.blit(bg_image, (cfg.SCREENSIZE[0]-bg_image.get_height(), 0))
		# --鼠标事件捕获
		for event in pygame.event.get():
			if event.type == pygame.QUIT:
				# ----没有点击好呀按钮之前不许退出程序
				if is_agree:
					pygame.quit()
					sys.exit()
			elif event.type == pygame.MOUSEBUTTONDOWN and event.button:
				if button_yes.rect.collidepoint(pygame.mouse.get_pos()):
					button_yes.is_selected = True
					root = Tk()
					root.withdraw()
					messagebox.showinfo('', '❤❤❤么么哒❤❤❤')
					root.destroy()
					is_agree = True
		# --显示文字
		showText(screen=screen, text='小姐姐, 我观察你很久了', position=(40, 50),
				 fontpath=cfg.FONT_PATH, fontsize=25, fontcolor=cfg.BLACK, is_bold=False)
		showText(screen=screen, text='做我女朋友好不好?', position=(40, 100),
				 fontpath=cfg.FONT_PATH, fontsize=25, fontcolor=cfg.BLACK, is_bold=True)
		# --显示按钮
		button_yes.draw(screen, pygame.mouse.get_pos())
		button_no.draw(screen, pygame.mouse.get_pos())
		# --刷新
		pygame.display.update()
		clock.tick(60)


'''run'''
if __name__ == '__main__':
	main()
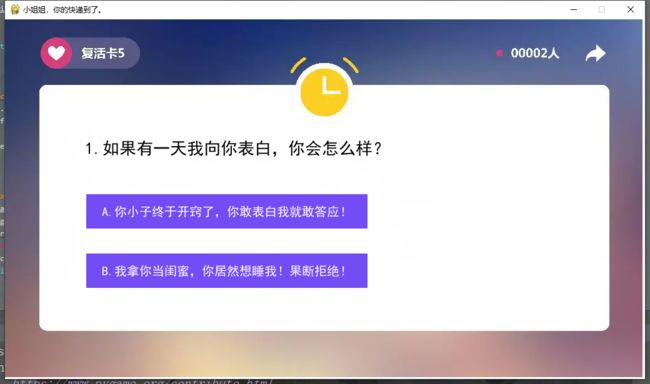
第五种、无套路表白
来看看效果,具体要自己试试,这里只做截图。
代码实现
import pygame
import random
import sys

# 根据背景图大小,设置游戏屏幕大小
WIDTH, HEIGHT = 1024, 576
# 不全屏   Python学习交流裙815624229
screen = pygame.display.set_mode((WIDTH, HEIGHT), 0, 32)
# 全屏
# screen = pygame.display.set_mode((WIDTH, HEIGHT), pygame.FULLSCREEN, 32)
pygame.display.set_caption('小姐姐,你的快递到了。')


# 添加文本信息
def title(text, screen, scale, color=(0, 0, 0)):
    font = pygame.font.SysFont('SimHei', 27)
    textRender = font.render(text, True, color)
    # 初始化文本的坐标
    screen.blit(textRender, (WIDTH / scale[0], HEIGHT / scale[1]))


# 按钮
def button(text, x, y, w, h, color, screen):
        pygame.draw.rect(screen, color, (x, y, w, h))
        font = pygame.font.SysFont('SimHei', 20)
        textRender = font.render(text, True, (255, 255, 255))
        textRect = textRender.get_rect()
        textRect.center = ((x+w/2), (y+h/2))
        screen.blit(textRender, textRect)


# 生成随机的位置坐标
def get_random_pos():
        x, y = random.randint(10, 600), random.randint(20, 500)
        return x, y


# 点击答应按钮后显示的页面
def show_like_interface(screen):
    screen.fill((255, 255, 255))
    background1 = pygame.image.load('2.png').convert()
    screen.blit(background1, (0, 0))
    pygame.display.update()
    while True:
        for event in pygame.event.get():
            if event.type == pygame.QUIT:
                sys.exit()


def main():
    pygame.init()
    clock = pygame.time.Clock()
    # 添加背景音乐
    pygame.mixer.music.load('手写的从前-周杰伦.mp3')#把这个音乐名字改成你自己准备的音乐名字
    pygame.mixer.music.play(-1, 20)
    pygame.mixer.music.set_volume(0.5)
    # 设置不同意按钮属性
    unlike_pos_x = 130
    unlike_pos_y = 375
    unlike_pos_width = 450
    unlike_pos_height = 55
    unlike_color = (115, 76, 243)
    # 设置同意按钮属性
    like_pos_x = 130
    like_pos_y = 280
    like_pos_width = 450
    like_pos_height = 55
    like_color = (115, 76, 243)

    running = True
    while running:
        # 填充窗口
        screen.fill((255, 255, 255))
        # 添加背景图
        background = pygame.image.load('1.png').convert()
        screen.blit(background, (0, 0))

        # 获取鼠标坐标
        pos = pygame.mouse.get_pos()
        # 判断鼠标位置,不同意时,按钮不断变化
        if pos[0] < unlike_pos_x + unlike_pos_width + 5 and pos[0] > unlike_pos_x - 5 and pos[1] < unlike_pos_y + unlike_pos_height + 5 and pos[1] > unlike_pos_y - 5:
            while True:
                unlike_pos_x, unlike_pos_y = get_random_pos()
                if pos[0] < unlike_pos_x + unlike_pos_width + 5 and pos[0] > unlike_pos_x - 5 and pos[1] < unlike_pos_y + unlike_pos_height + 5 and pos[1] > unlike_pos_y - 5:
                    continue
                break

        # 设置标题及按钮文本信息
        title('1.如果有一天我向你表白,你会怎么样?', screen, scale=[8, 3])
        button('A.你小子终于开窍了,你敢表白我就敢答应!', like_pos_x, like_pos_y, like_pos_width, like_pos_height, like_color, screen)
        button('B.我拿你当闺蜜,你居然想睡我!果断拒绝!', unlike_pos_x, unlike_pos_y, unlike_pos_width, unlike_pos_height, unlike_color, screen)
        # 设置关闭选项属性
        for event in pygame.event.get():
            if event.type == pygame.QUIT:
                sys.exit()
        # 当鼠标点击同意按钮后,跳转结束页面
        if pos[0] < like_pos_x + like_pos_width + 5 and pos[0] > like_pos_x - 5 and pos[1] < like_pos_y + like_pos_height + 5 and pos[1] > like_pos_y - 5:
            if event.type == pygame.MOUSEBUTTONDOWN:
                show_like_interface(screen)

        pygame.display.flip()
        pygame.display.update()
        clock.tick(60)


main()
好了,今天的分享就到这里结束了,大家赶紧去试试吧!
记得点赞收藏哦~


