Spring学习笔记——2
Spring学习笔记——2
- 1、Bean的基本注解开发
-
- 1.1、注解版本和@Component简介
- 1.2、@Component使用
- 1.3、@Component的三个衍生注解
- 二、Bean依赖注入注解开发
-
- 2.1、依赖注入相关注解
- 2.2、@Autowired扩展
- 三、非自定义Bean注解开发
- 四、Bean配置类的注解开发
- 五、Spring注解的解析原理
- 六、Spring注解方式整合第三方框架
-
- 6.1、注解方式整合Mybatis代码实现
- 6.2、@Import整合第三方框架原理
1、Bean的基本注解开发
1.1、注解版本和@Component简介
Spring除了xml配置文件进行配置之外,还可以使用注解方式进行配置,注解方式慢慢成为xml配置的替代方案。我们有了xml开发的经验,学习注解开发就方便了许多,注解开发更加快捷方便。
Spring提供的注解有三个版本:
- 2.0时代,Spring开始出现注解
- 2.5时代,Spring的Bean配置可以使用注解完成
- 3.0时代,Spring其他配置也可以使用注解完成,我们进入全注解时代
基本Bean注解,主要是使用注解的方式替代原有xml的
<bean id="" name="" class="" scope="" lazy-init="" init-method="" destroy-method=""abstract="" autowire="" factory-bean="" factory-method="">bean>
使用@Component注解替代
| xml配置 | 注解 | 描述 |
|---|---|---|
| @Component | 被该注解表示的类,会在指定扫描范围内被Spring加载并实例化 |
例:
//
<beans xmlns="http://www.springframework.org/schema/beans"
       xmlns:xsi="http://www.w3.org/2001/XMLSchema-instance"
       xmlns:context="http://www.springframework.org/schema/context"
       xsi:schemaLocation="http://www.springframework.org/schema/beans
       http://www.springframework.org/schema/beans/spring-beans.xsd
       http://www.springframework.org/schema/context
       http://www.springframework.org/schema/context/spring-context.xsd">


    <context:component-scan base-package="com.Smulll"/>
beans>
public class test1 {
    @Test
    public void exp1(){
        ClassPathXmlApplicationContext classPathXmlApplicationContext = new ClassPathXmlApplicationContext("beans.xml");
        Object bean = classPathXmlApplicationContext.getBean("userDao");
        System.out.println(bean);
    }
}
1.2、@Component使用
- 如果@Component不设置name属性,那会回自动将首字母小写的类名转化成name
使用@Component注解替代
| xml配置 | 注解 | 描述 |
|---|---|---|
|
@Scope | 在类上或使用了@Bean标注的方法上,标注Bean的作用范围,取值为singleton或prototype |
|
@Lazy | 在类上或使用了@Bean标注的方法上,标注Bean是否延迟加载,取值为true和false |
|
@PostConstruct | 在方法上使用,标注Bean的实例化后执行的方法 |
|
@PreDestroy | 在方法上使用,标注Bean的销毁前执行方法 |
//1.3、@Component的三个衍生注解
由于JavaEE开发是分层的,为了每层Bean标识的注解语义化更加明确
@Component又衍生出如下三个注解:
| @Component衍生注解 | 描述 |
|---|---|
| @Repository | 在Dao层类上使用 |
| @Service | 在Service层类上使用 |
| @Controller | 在Web层类上使用 |
@Service("userService")
public class UserServiceImpl implements UserService{}
@Repository("userDao")
public class UserDaoImpl implements UserDao{}
@Controller("userService")
public class UserController{}
二、Bean依赖注入注解开发
2.1、依赖注入相关注解
Bean依赖注入的注解,主要是使用注解的方式替代xml的
<bean id=" "class="">
	<property name="" value=""/>
	<property name="" ref=""/>
bean>
Spring主要提供如下注解,用于在Bean内部进行属性注入的:
| 属性注入注解 | 描述 |
|---|---|
| @Value | 使用在字段或方法上,用于注入普通数据 |
| @Autowired | 使用在字段或方法上,用于根据类型(byType)注入引用数据 |
| @Qualifier | 使用在字段或方法上,结合@Autowired,根据名称注入 |
| @Resource | 使用在字段或方法上,根据类型或名称进行注入 |
- @Value一般会引用Spring容器里面的一些值,根据key进行获取
- @Autowired根据类型进行注入,如果同一类型的Bean有多个,尝试根据名字进行二次匹配,如果匹配不成功则会报错
- 配合使用@Qualifier注解,可以在同一类型的多个Bean中根据名称注入相应的Bean
- @Resource不指定名称参数时,根据类型注入,指定名称则根据名称注入
@Repository("userDao")
public class UserDaoImpl implements UserDao{}
@Repository("userDao2")
public class UserDaoImpl implements UserDao{}
@Service("userService")
public class UserServiceImpl implements UserService{

    @Value("zhangsan")
    private String username;

    //@Autowired //如果同一类型的Bean有多个,尝试根据名字进行二次匹配,如果匹配不成功则会报错
    //@Qualifier("userDao2") //配合使用@Autowired注解,可以在同一类型的多个Bean中根据名称注入相应的Bean
    @Resource //不指定名称参数时,根据类型注入,指定名称则根据名称注入
    private UserDao userDao;
    @Override
    public void show() {
        System.out.println(username);
        System.out.println(userDao);
    }
}
2.2、@Autowired扩展
- @Autowired使用该注解时,所查看的是参数的类型,跟方法的名称无关
@Service("userService")
public class UserServiceImpl implements UserService{
    @Autowired
    public void xxx(UserDao userDao) {
        System.out.println("xxx:"+userDao);
    }
}
- 该注解同样可以获取一个集合,可以将同一类型的多个Bean打印出来
@Service("userService")
public class UserServiceImpl implements UserService{
    @Autowired
    public void yyy(List<UserDao> userDaoList) {
        System.out.println("yyy:"+userDaoList);
    }
}
三、非自定义Bean注解开发
非自定义Bean不能像自定义Bean一样使用@Component进行管理,非自定义Bean要通过工厂的方式进行实例化,使用@Bean标注方法即可,@Bean的属性为beanName,如不指定为当前工厂方法名称
//将方法返回值Bean实例以@Bean注解指定的名称存储到spring容器中
@Bean ("datasource")
public DataSource dataSource (){
	DruidDataSource dataSource = new DruidDataSource();
	dataSource.setDriverClassName("com.mysql.jdbc.Driver");
	dataSource.setUrl("jdbc:mysql://localhost:3306/mybatis");
	dataSource.setUsername("root");
	dataSource.setPassword("123456");
	return dataSource;
}
- @Bean标注后面不加name值,则将类名赋值为name属性值
在参数中注入
@Component
public class otherBean {
    @Bean("dataSource")
    public DataSource dataSource(
   		@Value("${jdbc.driver}") String driver
   		@Qualifier("userDao") UserDao UserDao//不需要写@Autowired
	){
        DruidDataSource dataSource = new DruidDataSource();
        dataSource.setDriverClassName("com.mysql.jdbc.Driver");
        dataSource.setUrl("jdbc:mysql://localhost:3306/mybatis");
        dataSource.setUsername("root");
        dataSource.setPassword("123456");
        return dataSource;
    }
}
四、Bean配置类的注解开发
@Component等注解替代了
    <context:component-scan base-package="com.Smulll"/>

    <context:property-placeholder location="classpath:jdbc.properties"/>

    <import resource="classpath:beans.xml">
定义一个配置类替代原有的xml配置文件,
需要在配置类上加 @Configuration
作用:
- 标识该类是一个配置类
- 使其具备@Component作用
| xml配置 | 注解 | 描述 |
|---|---|---|
|
@ComponentScan | 组件扫描配置 |
|
@PropertySource | 获取到properties文件里的信息 |
|
@Import | 导入其他的xml配置文件 |
base-package的配置方式:
- 指定一个或多个包名:扫描指定包及其子包下使用注解的类
- 不配置包名:扫描当前@componentScan注解配置类所在包及其子包下的类
@Configuration
//配置其他注解
扩展:@Primary注解用于标注相同类型的Bean优先被使用权,@Primary 是Spring3.0引入的,与@Component和@Bean一起使用,标注该Bean的优先级更高,则在通过类型获取Bean或通过@Autowired根据类型进行注入时,会选用优先级更高的
@Repository("userDao")
public class UserDaoImpl implements UserDao{}
@Repository("userDao2")
@Primary
public class UserDaoImpl2 implements UserDao{}
@Bean("dataSource")
public DataSource dataSource(){}

@Bean("dataSource2")
@Primary
public DataSource dataSource2(){}
扩展:@Profile注解的作用同于xml配置时学习profile属性,是进行环境切换使用的
<beans profile="test">
注解@Profile标注在类或方法上,标注当前产生的Bean从属于哪个环境,只有激活了当前环境,被标注的Bean才能被注册到Spring容器里,不指定环境的Bean,任何环境下都能注册到Spring容器里
@Repository("userDao")
@Profile("test")
public class UserDaoImpl implements UserDao{}
@Repository("userDao2")
public class UserDaoImpl2 implements UserDao{}
可以使用以下两种方式指定被激活的环境:
- 使用命令行动态参数,虚拟机参数位置加载
-Dspring.profiles.active=test - 使用代码的方式设置环境白能量
System.setProperty("profiles.active","test");
@Test
public void exp2(){
    System.setProperty("spring.profiles.active","test");
    AnnotationConfigApplicationContext annotationConfigApplicationContext = new AnnotationConfigApplicationContext(SpringConfig.class);
    Object userDao = annotationConfigApplicationContext.getBean("userDao");
    System.out.println(userDao);
}
五、Spring注解的解析原理

结论:只要将Bean对应的BeanDefinition注册到beanDefinitionMap中,就可以经历整个SpringBean的生命周期,最终实例化进入单例池中
使用@Component等注解配置完毕后,要配置组件扫描才能使注解生效
- xml配置组件扫描:
<context:component-scan base-package="com.Smulll"/>
- 配置类配置组件扫描:
@Configuration
@ComponentScan("com.Smulll")
public class AppConfig {
}
六、Spring注解方式整合第三方框架
6.1、注解方式整合Mybatis代码实现
第三方框架整合,依然使用MyBatis作为整合对象,之前我们已经使用xml方式整合了MyBatis,现在使用注解方式无非就是将xml标签替换为注解,将xml配置文件替换为配置类而已,原有xml方式整合配置如下:
<bean id="dataSource" class="com.alibaba.druid.pool.DruidDataSource">
    <property name="driverClassName" value="com.mysql.cj.jdbc.Driver">property>
    <property name="url" value="jdbc:mysql://localhost:3306/mybatis2">property>
    <property name="username" value="root">property>
    <property name="password" value="123456">property>
bean>

<bean class="org.mybatis.spring.SqlSessionFactoryBean">
    <property name="dataSource" ref="dataSource">property>
bean>

<bean  class="org.mybatis.spring.mapper.MapperScannerConfigurer">
    <property name="basePackage" value="com.Smulll.mapper">property>
bean>
使用注解方式:
注解方式,Spring整合MyBatis的原理,关键在于**@MapperScan**,@MapperScan不是Spring提供的注解,是MyBatis为了整合Spring,在整合包org.mybatis.spring.annotation中提供的注解,源码如下:
package com.Smulll.config;
import com.Smulll.Bean.otherBean;
import com.alibaba.druid.pool.DruidDataSource;
import org.mybatis.spring.SqlSessionFactoryBean;
import org.mybatis.spring.annotation.MapperScan;
import org.springframework.beans.factory.annotation.Value;
import org.springframework.context.annotation.*;
import javax.sql.DataSource;
@Configuration
//重点关注一下@lmport({MapperScannerRegistrar.class),当@MapperScan被扫描加载时,会解析@Import注解,从而加载指定的类,此处就是加载了MapperScannerRegistrar
6.2、@Import整合第三方框架原理
Spring与MyBatis注解方式整合有个重要的技术点就是@Import,第三方框架与Spring整合xml方式很多是凭借自定义标签完成的,而第三方框架与Spring整合注解方式很多是靠@Import注解完成的。
@lmport可以导入如下三种类:
- 普通的配置类
- 实现
lmportSelector接口的类
public class MyImportSelector implements ImportSelector {
    @Override
    public String[] selectImports(AnnotationMetadata importingClassMetadata) {
        //参数importingClassMetadata叫做注解媒体数组,该对象内部封装是当前使用了@import注解的类上的其他注解
        Map<String, Object> annotationAttributes = importingClassMetadata.getAnnotationAttributes(ComponentScan.class.getName());
        annotationAttributes.forEach((attrName,attrValue)->{
            System.out.println(attrName+"=="+attrValue);
        });
        //返回的数组是需要被注册到Spring容器中的Bean的全限定名
        return new String[]{otherBean2.class.getName(), otherBean.class.getName()};
    }
}
@Configuration
// @Test
public void exp3(){
AnnotationConfigApplicationContext annotationConfigApplicationContext = new AnnotationConfigApplicationContext(SpringConfig.class);
Object otherBean2 = annotationConfigApplicationContext.getBean(com.Smulll.Bean.otherBean2.class);
System.out.println(otherBean2);
}
运行结果

- 实现
lmportBeanDefinitionRegistrar接口的类
public class MyImportBeanDefinitionRegistrar implements ImportBeanDefinitionRegistrar {
    @Override
    public void registerBeanDefinitions(AnnotationMetadata importingClassMetadata, BeanDefinitionRegistry registry, BeanNameGenerator importBeanNameGenerator) {
        //注册BeanDefinition
        RootBeanDefinition rootBeanDefinition = new RootBeanDefinition();
        rootBeanDefinition.setBeanClassName(otherBean2.class.getName());
        registry.registerBeanDefinition("otherBean2",rootBeanDefinition);
    }
}
@Configuration
//@Test
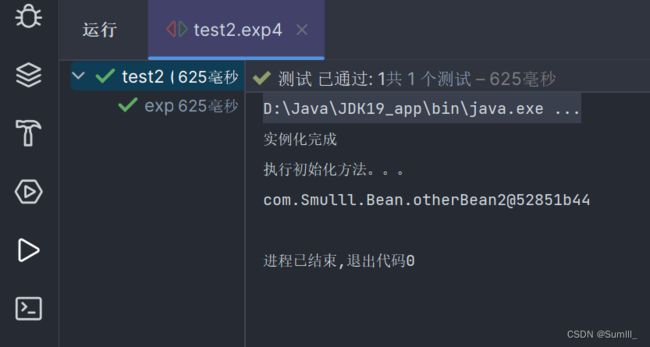
public void exp4(){
AnnotationConfigApplicationContext annotationConfigApplicationContext = new AnnotationConfigApplicationContext(SpringConfig.class);
Object otherBean2 = annotationConfigApplicationContext.getBean("otherBean2");
System.out.println(otherBean2);
}
运行结果