Vagrant 安装 centos7(修)
Vagrant 安装 centos7
-
仓库
在官方仓库中找到 centos/7, 打开地址 https://app.vagrantup.com/centos/boxes/7 或根据名字直接安装 -
安装
个人电脑安装目录
E:\vms\centos下
打开控制终端进入目录E:\vms\centos
在控制台窗口中使用命令 vagrant init centos/7 初始化系统
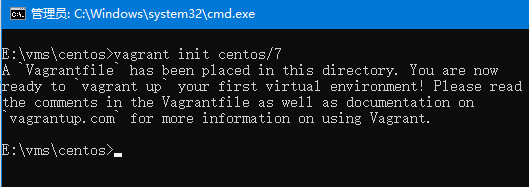
目录中生成Vagrantfile文件
Vagrantfile 说明
默认生成如下:
# -*- mode: ruby -*-
# vi: set ft=ruby :

# All Vagrant configuration is done below. The "2" in Vagrant.configure
# configures the configuration version (we support older styles for
# backwards compatibility). Please don't change it unless you know what
# you're doing.
Vagrant.configure("2") do |config|
  # The most common configuration options are documented and commented below.
  # For a complete reference, please see the online documentation at
  # https://docs.vagrantup.com.

  # Every Vagrant development environment requires a box. You can search for
  # boxes at https://vagrantcloud.com/search.
  config.vm.box = "centos/7"

  # Disable automatic box update checking. If you disable this, then
  # boxes will only be checked for updates when the user runs
  # `vagrant box outdated`. This is not recommended.
  # config.vm.box_check_update = false

  # Create a forwarded port mapping which allows access to a specific port
  # within the machine from a port on the host machine. In the example below,
  # accessing "localhost:8080" will access port 80 on the guest machine.
  # NOTE: This will enable public access to the opened port
  # config.vm.network "forwarded_port", guest: 80, host: 8080

  # Create a forwarded port mapping which allows access to a specific port
  # within the machine from a port on the host machine and only allow access
  # via 127.0.0.1 to disable public access
  # config.vm.network "forwarded_port", guest: 80, host: 8080, host_ip: "127.0.0.1"

  # Create a private network, which allows host-only access to the machine
  # using a specific IP.
  # config.vm.network "private_network", ip: "192.168.33.10"

  # Create a public network, which generally matched to bridged network.
  # Bridged networks make the machine appear as another physical device on
  # your network.
  # config.vm.network "public_network"

  # Share an additional folder to the guest VM. The first argument is
  # the path on the host to the actual folder. The second argument is
  # the path on the guest to mount the folder. And the optional third
  # argument is a set of non-required options.
  # config.vm.synced_folder "../data", "/vagrant_data"

  # Provider-specific configuration so you can fine-tune various
  # backing providers for Vagrant. These expose provider-specific options.
  # Example for VirtualBox:
  #
  # config.vm.provider "virtualbox" do |vb|
  #   # Display the VirtualBox GUI when booting the machine
  #   vb.gui = true
  #
  #   # Customize the amount of memory on the VM:
  #   vb.memory = "1024"
  # end
  #
  # View the documentation for the provider you are using for more
  # information on available options.

  # Enable provisioning with a shell script. Additional provisioners such as
  # Ansible, Chef, Docker, Puppet and Salt are also available. Please see the
  # documentation for more information about their specific syntax and use.
  # config.vm.provision "shell", inline: <<-SHELL
  #   apt-get update
  #   apt-get install -y apache2
  # SHELL
end
配置单文件多个虚拟机(个人不常用):
不常用原因: 1. 可以使用不同的Vagrantfile增加虚拟机
2. 启动运行虚拟机不方便
# -*- mode: ruby -*-
# vi: set ft=ruby :

# All Vagrant configuration is done below. The "2" in Vagrant.configure
# configures the configuration version (we support older styles for
# backwards compatibility). Please don't change it unless you know what
# you're doing.
Vagrant.configure("2") do |config|
  config.vm.define "default" do |default|
  # The most common configuration options are documented and commented below.
  # For a complete reference, please see the online documentation at
  # https://docs.vagrantup.com.

  # Every Vagrant development environment requires a box. You can search for
  # boxes at https://vagrantcloud.com/search.
  config.vm.box = "centos/7"

  # Disable automatic box update checking. If you disable this, then
  # boxes will only be checked for updates when the user runs
  # `vagrant box outdated`. This is not recommended.
  # config.vm.box_check_update = false

  # Create a forwarded port mapping which allows access to a specific port
  # within the machine from a port on the host machine. In the example below,
  # accessing "localhost:8080" will access port 80 on the guest machine.
  # NOTE: This will enable public access to the opened port
  # config.vm.network "forwarded_port", guest: 80, host: 8080

  # Create a forwarded port mapping which allows access to a specific port
  # within the machine from a port on the host machine and only allow access
  # via 127.0.0.1 to disable public access
  # config.vm.network "forwarded_port", guest: 80, host: 8080, host_ip: "127.0.0.1"

  # Create a private network, which allows host-only access to the machine
  # using a specific IP.
  # config.vm.network "private_network", ip: "192.168.33.10"

  # Create a public network, which generally matched to bridged network.
  # Bridged networks make the machine appear as another physical device on
  # your network.
  # config.vm.network "public_network"

  # Share an additional folder to the guest VM. The first argument is
  # the path on the host to the actual folder. The second argument is
  # the path on the guest to mount the folder. And the optional third
  # argument is a set of non-required options.
  # config.vm.synced_folder "../data", "/vagrant_data"

  # Provider-specific configuration so you can fine-tune various
  # backing providers for Vagrant. These expose provider-specific options.
  # Example for VirtualBox:
  #
  # config.vm.provider "virtualbox" do |vb|
  #   # Display the VirtualBox GUI when booting the machine
  #   vb.gui = true
  #
  #   # Customize the amount of memory on the VM:
  #   vb.memory = "1024"
  # end
  #
  # View the documentation for the provider you are using for more
  # information on available options.

  # Enable provisioning with a shell script. Additional provisioners such as
  # Ansible, Chef, Docker, Puppet and Salt are also available. Please see the
  # documentation for more information about their specific syntax and use.
  # config.vm.provision "shell", inline: <<-SHELL
  #   apt-get update
  #   apt-get install -y apache2
  # SHELL
  end
end
**单虚拟机和多个虚拟机配置相同,多虚拟机配置只是增加config.vm.define **
-
启动
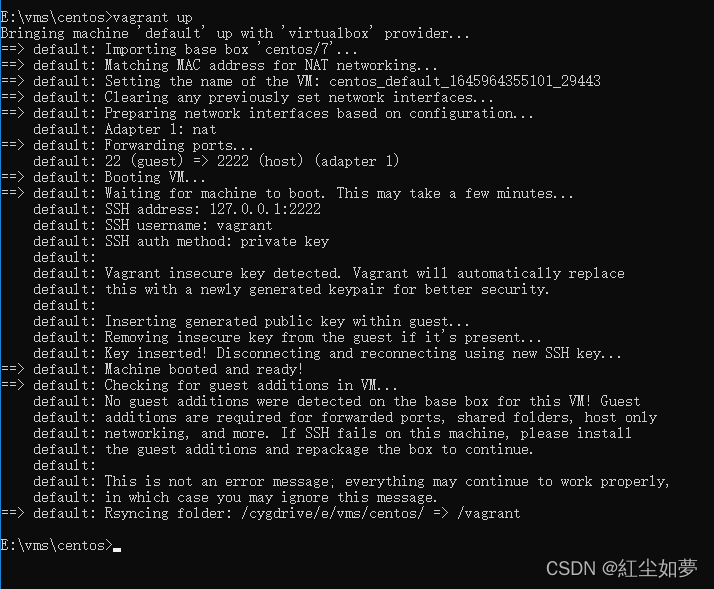
使用vagrant up启动系统时间较长,第一次使用会下载centos7系统
下载慢解决
在仓库地址中下载 virtualbox
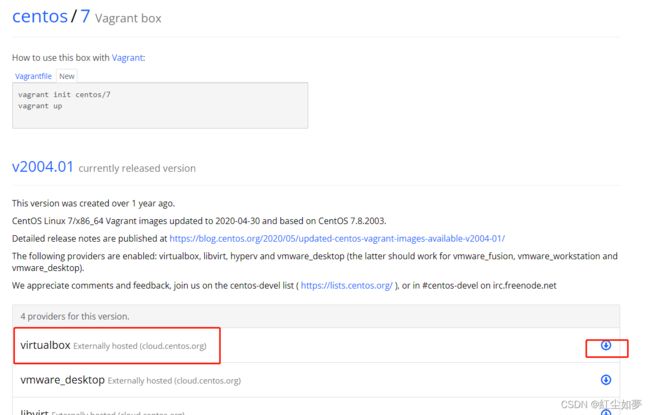
把下载好的文件virtualbox.box复制到E:\vms\centos目录中
执行vagrant box add centos/7 virtualbox.box后重新启动
启动后可以删除virtualbox.box文件出错解决
虚拟化出错
-
禁用Hyper-V
以管理员权限打开 CMD 或 Windows PowerShell ,输入如下命令:
bcdedit /set hypervisorlaunchtype off -
BIOS开启虚拟化
根据不同电脑自行开启 -
可以使用
vagrant reload重新加载(非必要)
-
-
登录 ssh
使用
vagrant ssh登录 ssh,账号为 vagrant

使用
ssh工具连接虚拟机(个人使用MobaXterm)
1. 使用 vagrant ssh 进入centos
2. 修改ssh配置文件vi /etc/ssh/sshd_config
3. 修改PasswordAuthentication no为PasswordAuthentication yes
4. 重启ssh服务systemctl restart sshd.service
5. 连接 127.0.0.1,端口是设置的转发端口 2200,如果提示 No supported authentication methods available (server sent: publickey,gssapi-keyex,gssapi-with-mic), 是因为没有开启ssh配置。
-
更改网络端口转发
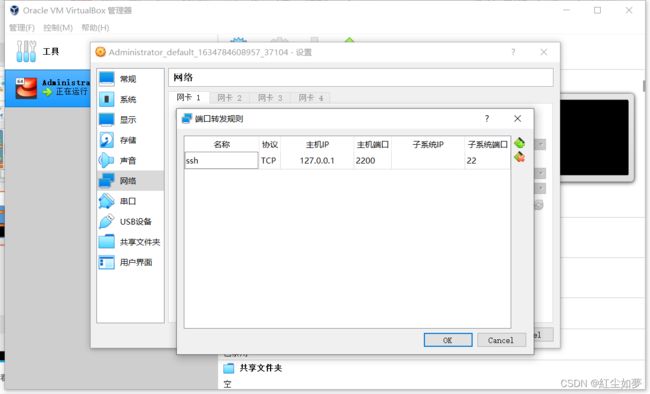
使用端口时需要转发,不方便开发, 虚拟机中默认IP如下:

配置仅主机访问的网络
通过更改
C:\Users\Administrator\Vagrantfile文件中开始配置config.vm.network "private_network", ip: "192.168.56.10"ip更换
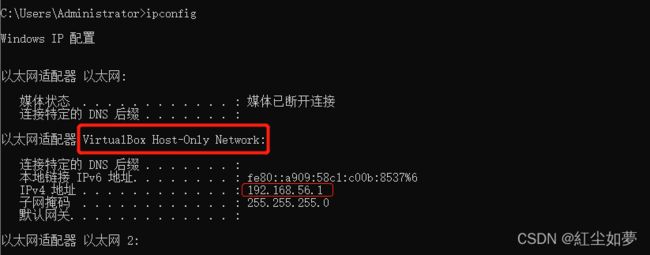
根据上述配置 更改为192.168.56.10后执行vagrant reload命令
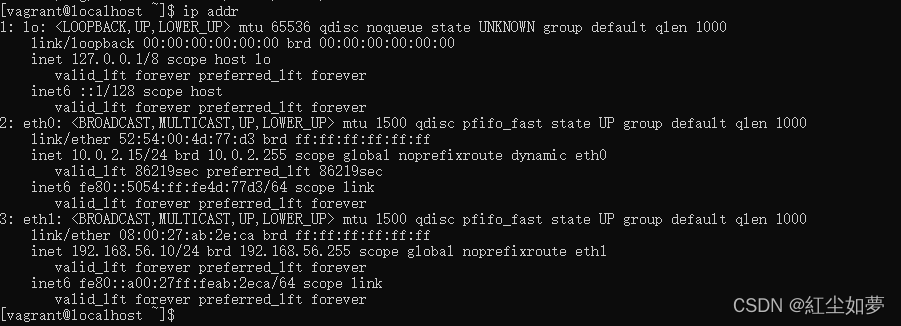
会增加一个网络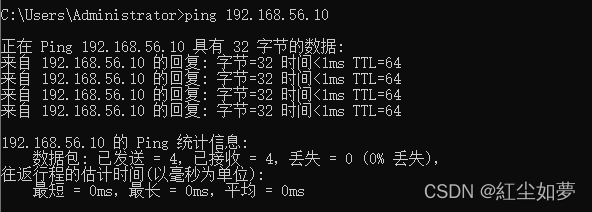
可以直接ping 通虚拟机。增加公网访问
通过更改C:\Users\Administrator\Vagrantfile文件中开始配置config.vm.network "public_network", ip: "192.168.1.10" -
映射虚拟机和宿主机目录
config.vm.synced_folder "E:/vms/centos/data", "/home/vagrant/data", create:true, owner: "root", group: "root"

# "E:/vms/centos/data"  	宿主机目录
# "/home/vagrant/data"  	虚拟机映射目录
# create					宿主机不存在目录创建, 默认为false
# owner						所属用户, 默认为vagrant
# group						所属用户组, 默认为vagrant
# disabled					禁用该项挂载, 默认为false
# mount_options				["dmode=775","fmode=664"]
#							dmode配置目录权限,fmode配置文件权限, 默认权限777
# type						文件共享方式, vagrant默认根据系统环境选择最佳的文件共享方式
安装 vagrant-vbguest 插件
vagrant plugin install vagrant-vbguest --local
–local 只安装在当前虚拟机
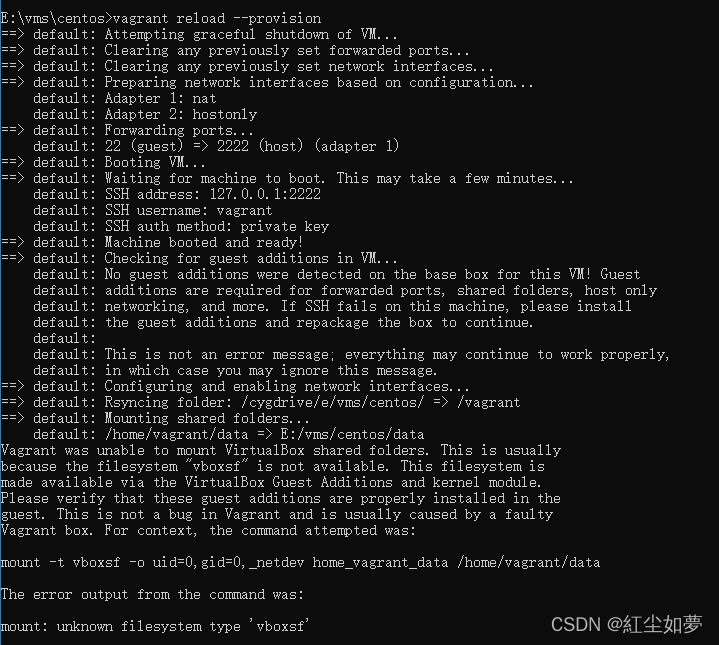
重新加载 vagrant reload --provision,提示

进入虚拟机 yum -y update 更新后重新加载虚拟机

查看文件是否可以同步
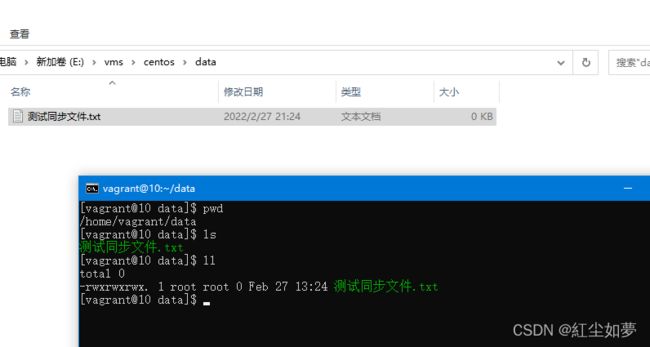
同步成功。
文章有参考,如有侵权请联系作者。

