Dajngo02_第一个Django案例
Dajngo02_第一个Django案例
经过之前学习,我们已经可以创建Django环境
现在开始尝试快速使用Django开发一个案例
案例:利用Django实现一个查看当前时间的web页面。
在django中要提供数据展示给用户,一般情况下我们需要完成3个步骤:
- 在urls.py中设计url与视图的映射关系
- 创建子应用,在views.py中构建视图函数
- 将变量嵌入到模板中返回客户端
2.1 创建子应用
子应用的名称将来会作为目录名而存在,所以不能出现特殊符号,不能出现中文等多字节的字符
python manage.py startapp 子应用名称
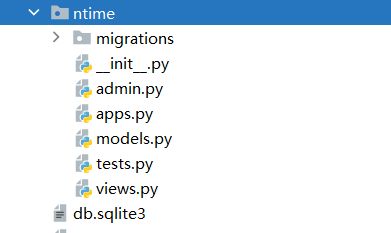
python manage.py startapp ntime
创建子应用之后需要注册app,( 将我们创建的子应用加入配置文件,让主配置文件知道这个子应用 )
2.2 绑定路由
HelloDjango/urls.py代码:
from django.contrib import admin
from django.urls import path
from ntime import views

urlpatterns = [
    path('admin/', admin.site.urls),
    path('times',views.times)
]
2.3 创建视图函数
ntime/view.py,代码:
from django.shortcuts import render, HttpResponse

# Create your views here.

import datetime
def times(request):
    now = datetime.datetime.now().strftime("%Y-%m-%d %X")
    # return HttpResponse(now)
    return render(request, "timer.html", {"now": now})
2.3 创建网页模板
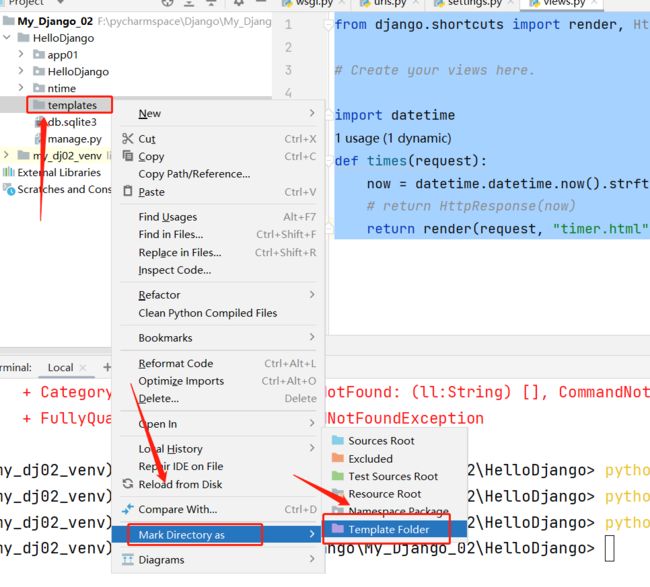
1) 创建 templates 文件夹
2)为 templates 文件夹 赋予模板属性
3)在模板文件夹下 创建 展示的网页文件 timer.html
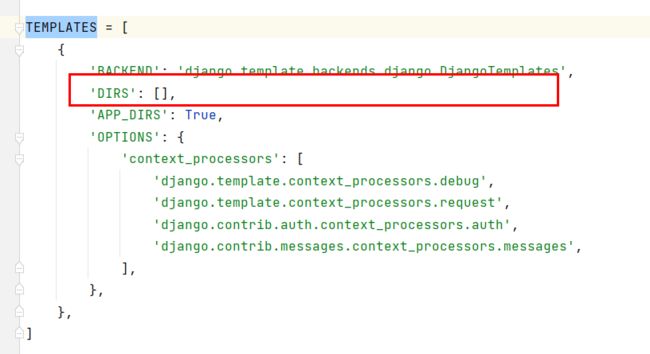
由于版本原因:需要去 配置文件中 指定路径寻找模板
在 setting文件中的TEMPLATES:
改为(将会在根目录下的templates中找【优先】):
TEMPLATES = [
    {
        'BACKEND': 'django.template.backends.django.DjangoTemplates',
        'DIRS': [os.path.join(BASE_DIR, 'templates')],
        'APP_DIRS': True,
        'OPTIONS': {
            'context_processors': [
                'django.template.context_processors.debug',
                'django.template.context_processors.request',
                'django.contrib.auth.context_processors.auth',
                'django.contrib.messages.context_processors.messages',
            ],
        },
    },
]
timer.html 内容:
DOCTYPE html>
<html lang="en">
<head>
    <meta charset="UTF-8">
    <title>Titletitle>

    <style>
        span{
            color: red;
        }
    style>
head>
<body>

<h3>当前时间:<span>{{ now }}span>h3>

body>
html>
2.4 运行
(my_dj02_venv) PS F:\pycharmspace\Django\My_Django_02\HelloDjango> python manage.py runserver
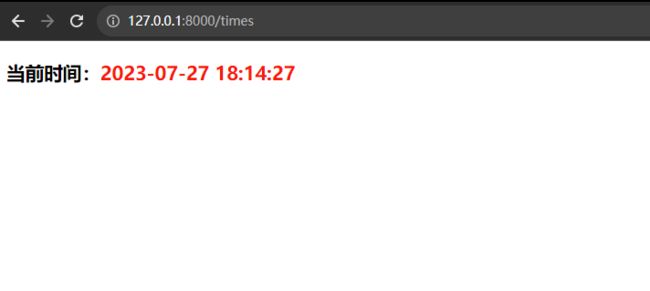
因为上面我们绑定 times 视图函数的url地址是index,所以我们可以通过
http://127.0.0.1:8000/times 地址来访问视图函数
如果每次运行项目都要在终端下输入运行命令的话,比较麻烦,这时候我们可以借助pycharm直接自动运行这段命令
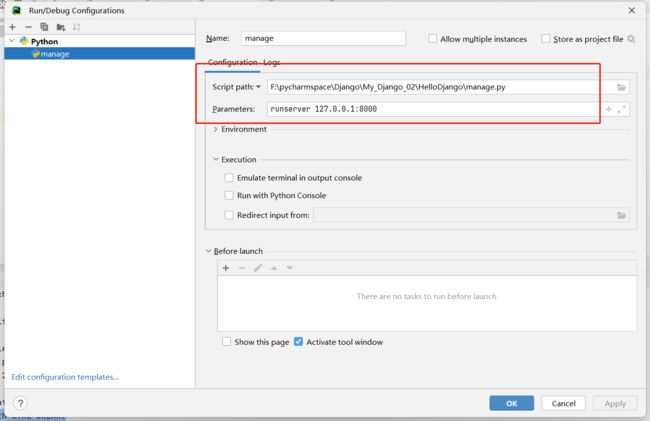
需要在pycharm配置一下
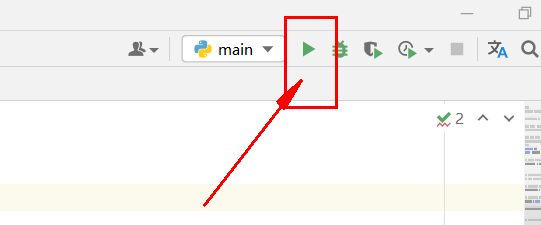
点击这个小三角,选择 Edti…
可以在runserver 参数后配置修改django监听的端口和IP地址
注意:只能是127.0.0.1对应的其他地址.不能是任意IP.否则无法运行或访问!!
runserver 127.0.0.1:8000
之后就可以点击 绿色三角(run …) 运行了
