Centos7安装PostgreSQL12
Postgres安装
-
- 1.事前准备
-
- 1.1 创建用户
- 1.2 安装包下载&解压缩
- 1.3 安装依赖组件&安装数据库服务
- 2. 开始安装
-
- 2.1 configure
- 2.2 安装
- 2.3 环境变量配置
- 2.4 初始化数据库
- 2.5 配置文件
- 2.6 启动,关闭,重启
- 3. 安装debug插件(可选,根据个人需求)
-
- 3.1 下载:
- 3.2 安装:
- 3.3 添加配置
- 4. real类型带来的问题
1.事前准备
友情提示:如果不是特别熟悉,在需要debug的情况下,请不要使用docker来搭建,可能是需要一些特殊的参数,
如果有需求或者有想法的可以自行查阅资料,(好用了的话烦请赐教)
由于国内资料比较少,具体的就不自己研究了,这里仅为友情提示,以免大家像我一样浪费宝贵的时间.
1.1 创建用户
安装时PostgreSql会根据安装时你所使用的用户名来当做初始数据库名及用户名,所以这里一定要建一个postgres用户.
groupadd postgres
useradd -g postgres postgres
echo "postgress" | passwd --stdin postgres
1.2 安装包下载&解压缩
下载地址:可以选择自己需要的版本.
https://www.postgresql.org/ftp/source/
下载后解压缩,到自己喜欢的目录
tar -xzvf postgresql-12.2.tar.gz -C /opt/tools/
将解压后的目录owner及group都指定为postgres用户
chown -R postgres:postgres /opt/tools/postgresql-12.2
1.3 安装依赖组件&安装数据库服务
yum install -y make gcc-c++ readline-devel zlib-devel
2. 开始安装
从现在开始请使用postgres用户进行操作
su - postgres
2.1 configure
首先切入安装包目录
cd /opt/tools/postgresql-12.2/
开始进行配置,这里的选项是为了让PostgreSql支持debug.(虽然跟oracle比起来很难用....)
# --prefix 后面接数据库的安装位置.
./configure --enable-debug --enable-cassert --disable-thread-safety CFLAGS='-O0 -g' \
--prefix=/home/postgres/pghome
2.2 安装
建议make和make instal分开执行,有时候配置错误会可以少做些无用功
make
make install
2.3 环境变量配置
vi ~/.bashrc
在~/.bashrc中添加如下内容:
export LD_LIBRARY_PATH=$HOME/pghome/lib:$LD_LIBRARY_PATH
export PATH=$HOME/pghome/bin:$PATH
记得重读配置文件
. ~/.bashrc
or
source ~/.bashrc
2.4 初始化数据库
首先创建一个目录,用来存放数据.
mkdir ~/pgdata
也可以选择性的创建一个日志文件用来存放日志
mkdir ~/logs/pglog
ok,初始化数据库
initdb -d --locale=C -E UTF8 -D ~/pgdata/
2.5 配置文件
- ~/pgdata/pg_hba.conf

将IPv4的相关ADDRESS开放. - ~/pgdata/postgresql.conf

将listen_addreesses = 'localhost'这一行的注释打开,并且如果想要让其他主机访问时可以换成*表示任意主机.
接下来就是下面的port = 5432这个端口信息的注释也解开.
2.6 启动,关闭,重启
- 启动
pg_ctl -D ~/pgdata -l ~/logs/pglog start
- 关闭
pg_ctl -D ~/pgdata stop
- 重启
pg_ctl -D ~/pgdata restart
- 其他
pg_ctl --help
登录的话使用
# -U 用户名,默认会安装postgres名的库和用户
psql -U postgres
3. 安装debug插件(可选,根据个人需求)
3.1 下载:
下载地址:
https://git.postgresql.org/gitweb/?p=pldebugger.git

这里我用的是git方式下载,所以切换到root用户,或者安装sudo后,给postgres用户sudo权限.
这里需要说明一下,我是直接在/opt/tools/postgresql-12.2/contrib/目录中下载的,这是由于该插件编译时,需要PostgreSql安装包内文件的依赖,这点在pldebugger的README.pldebugger文件中也写的很清楚.
git clone git://git.postgresql.org/git/pldebugger.git
下载之后,将文件夹及其文件的owner和group改为postgres
sudo chown -R postgres:postgres /opt/tools/postgresql-12.2/contrib/pldebugger
3.2 安装:
PostgreSQL pl/pgsql Debugger API
================================

This module is a set of shared libraries which implement an API for debugging
pl/pgsql functions on PostgreSQL 8.4 and above. The pgAdmin project
(http://www.pgadmin.org/) provides a client user interface as part of pgAdmin
III v1.10.0 and above, and pgAdmin 4.

If you wish to debug functions on PostgreSQL 8.4, 9.0 or 9.1, please checkout
the PRE-9_2 branch from GIT.

If you wish to debug functions on PostgreSQL 8.2 or 8.3, please checkout the
PRE_8_4_SERVER branch from CVS.


Installation
------------

- Copy this directory to contrib/ in your PostgreSQL source tree.

- Run 'make; make install'

- Edit your postgresql.conf file, and modify the shared_preload_libraries config
  option to look like:

  shared_preload_libraries = '$libdir/plugin_debugger'

- Restart PostgreSQL for the new setting to take effect.

- Run the following command in the database or databases that you wish to
  debug functions in:

  CREATE EXTENSION pldbgapi;

  (on server versions older than 9.1, you must instead run the pldbgapi--1.1.sql
  script directly using psql).
接下来要做的事情很简单:
make
make install
完成后在~/pghome/lib/目录中会生成一个plugin_debugger.so的文件.

3.3 添加配置
在~/pgdata/postgresql.conf文件中,添加响应的引用.

将此行注释打开,并将后面内容添加到等号右面.
此处的$libdir是postgres的一个变量,指的就是~/pghome/lib目录
shared_preload_libraries = '$libdir/plugin_debugger'
ok,修改完配置信息后记得重启服务才能生效
pg_ctl -D ~/pgdata restart
如果配置文件有错,或者指定的这个文件找不到,那么会直接报错,无法启动.
启动后进入postgres,可以查询到刚才的配置:
show shared_preload_libraries;

注意,到此为止只是server支持了debug,但是如果想要使用debug时,还需要在相应的数据库中添加相应的扩展:
CREATE EXTENSION pldbgapi;
![]()
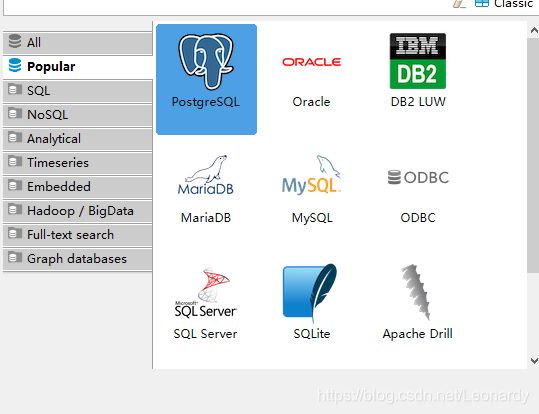
顺便安利大家一款数据库软件,DBeaver,开源的,也很强大,而且同时支持多种数据库:

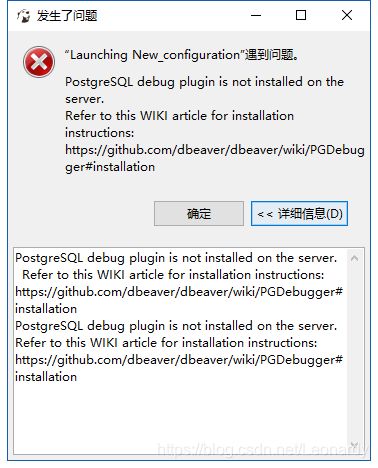
如果想要使用DBeaver中的debug功能,还需要安装一个插件:


这里也需要注意,要记得这个插件一定要放到public的schema中,我个人而言,放到别的shcema中测报错:PostgreSQL debug plugin is not installed on the server.
不过,很严重的一个问题就是,断点时走的行数,内容跟你肉眼看到的source完全不同,你根本弄不清走到哪里,调用了哪个函数,所以你只能借助debug时候,右上角有个Variable面板,根据特殊的变量值来猜测到哪里了.不知道是不是我安装时编译源码的参数有问题,有老司机请赐教.
4. real类型带来的问题
首先不得不吐槽一下,目前真的觉得PostgreSql的调试功能真的比Oracle要弱…刚接触不就,纯属个人感官,不喜勿喷.
不过这次还是帮了我的大忙了,再怎么说也比肉眼看成千上万行的函数来的好一点…
我们的项目中关于贷款相关的业务中,一个金额的计算比之前多了1!!!通过调查,最后我将原因锁定在了postgreSql端的某些functions…
由于我们的项目刚刚尝试从Oracle数据库换到了PostgreSql,移植之后,由于P家没有存储过程的概念,所以之前的存储过程被切分成了N个函数,一顿调查,最后发现,原来是real类型的原因!

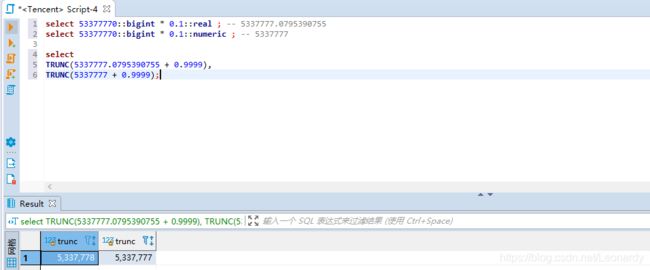
如图中所示,如果利率被指定为real类型,那么进行乘法(除法)运算后,小数点之后会有N多位小数,由于金额的计算经常有小数,所以之前都是让乘积 + 0.9999之类的,让小数部分也计算进位,之后再TRUNC掉小数部分.
但是,本案就因为这样,以前计算结果明明是整数的金额,被多加上了1.


