OpenCV之MobileNet-SDD目标检测
- 个人主页:风间琉璃
- 版权: 本文由【风间琉璃】原创、在CSDN首发、需要转载请联系博主
- 如果文章对你有帮助、欢迎关注、点赞、收藏(一键三连)和订阅专栏哦
目录
前言
一、MobileNet-SSD 简介
二、加载网络模型
三、预处理
四、执行推理
五、解析输出
前言
MobileNet系列是谷歌为适配移动终端提供了一系列模型,包含图像分类:mobileNet v1,mobileNet v2,mobileNet v3,目标检测SSD mobileNet等。
MobileNet-SSD 是以 MobileNet 为基础的目标检测算法,很好的继承了 MobileNet 预测速度快,易于部署的特点,能够很好的在多种设备上完成图像目标检测任务。
一、MobileNet-SSD 简介
想要了解MobileNet系列,需要先了解深度可分离卷积(depthwise separable convolution),在MobileNet网络中,由depthwise(DW)和pointwise(PW)两个部分结合起来,用来提取特征feature map。其核心思想就是减少卷积计算以及参数。
对于SSD来说,其针对YOLO和Faster R-CNN的各自不足与优势,SSD整个网络采取了one stage的思想,以此提高检测速度。SSD就是在VGG的网络基础之上,在中间几层提取了featuremap,用来提取Default Bounding Boxes,做目标检测。
MobileNet-SSD它采用SSD的思想,在MobileNet2基础上进行改善,其网络模型结构参考:Netscope (ethereon.github.io)
二、加载网络模型
这里使用Caffe深度学习框架中已经预训练好的SSD网络,需要相应的模型权重文件(.caffemodel)以及模型配置文件(.prototxt)。
加载模型和配置文件如下所示:
//分类标签名称
const char* classNames[] = { "background",  "aeroplane",      "bicycle",  "bird",    "boat",
                             "bottle",      "bus",            "car",      "cat",     "chair",
                             "cow",         "diningtable",    "dog",      "horse",   "motorbike",
                             "person",      "pottedplant",    "sheep",    "sofa",    "train",     "tvmonitor" };

//模型文件
String model = "F:/data/CQU/VS/MobileNetSSD_ObjectDetection/MobileNetSSD_deploy.caffemodel";
//配置文件
String config = "F:/data/CQU/VS/MobileNetSSD_ObjectDetection/MobileNetSSD_deploy.prototxt";
由于该网络的目标检测对象只有20个类别,这里直接将目标检测标签用一个字符串数组存储。
三、预处理
通过 OpenCV中的VideoCapture类读取视频流。这里我们需要对每一帧图像进行预处理后,在进行目标检测。
const size_t width = 300; //图像宽度
const size_t height = 300; //图像高度
const float meanVal = 127.5;//均值
const float scaleFactor = 0.007843f;
//预处理
Mat inputblob = blobFromImage(frame, scaleFactor, Size(width, height), meanVal, false);
//输入
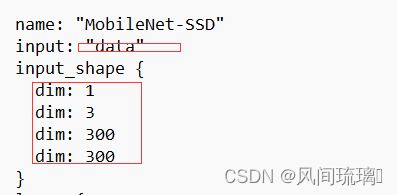
net.setInput(inputblob, "data");预处理主要要使输入图像尺寸满足网络输入的大小,网络输入的大小可以在配置文件prototxt中查看。
四、执行推理
图片预处理完成,就可以利用网络进行预测,这个过程也是把输入图像在网络各层中前向进行传播。
//预测
Mat detection = net.forward("detection_out");
这里的detection_out是网络的输出层的名称,在网络的配置文件中可以查看。

若要使用CUDA进行加速可以推理前加入下面的代码
//使用cuda加速
net.setPreferableBackend(cv::dnn::DNN_BACKEND_CUDA);
net.setPreferableTarget(cv::dnn::DNN_TARGET_CUDA_FP16);
五、解析输出
在 detection中存储着网络的所有输出。在获得正确的分类类别之前,还有一些需要与处理得步骤。
//获取分类的结果
Mat detectionMat(detection.size[2], detection.size[3], CV_32F, detection.ptr());
//置信度设置,越小检测到的物体越多,官方推荐为0.25
float confidence_threshold = 0.35;
for (int i = 0; i < detectionMat.rows; i++)
{
    //获取置信度
    float confidence = detectionMat.at(i, 2);
    //过滤置信度较低的结果
    if (confidence > confidence_threshold)
    {
        //获取分类索引值
        size_t objIndex = (size_t)(detectionMat.at(i, 1));
        //获取目标边框坐标
        float tl_x = detectionMat.at(i, 3) * frame.cols;
        float tl_y = detectionMat.at(i, 4) * frame.rows;
        float br_x = detectionMat.at(i, 5) * frame.cols;
        float br_y = detectionMat.at(i, 6) * frame.rows;

        Rect object_box((int)tl_x, (int)tl_y, (int)(br_x - tl_x), (int)(br_y - tl_y));
        rectangle(frame, object_box, Scalar(0, 0, 255), 2, 8, 0);
        putText(frame, format("%s:%.2f", classNames[objIndex], confidence), Point(tl_x, tl_y), FONT_HERSHEY_SIMPLEX, 1.0, Scalar(255, 0, 0), 2);

    }
}
帧率的计算:
在图像进行目标检测之前加入下面一句代码,获取当前系统的计时周期
//获得当前系统的计时间周期数,求FPS
double t = (double)getTickCount();
然后在图像目标检测完加入下面的代码,计算FPS并显示
 //FPS计算
 t = ((double)getTickCount() - t) / getTickFrequency();//求输入帧后经过的周期数/每秒系统计的周期数=一帧用时多少秒
 double fps = 1.0 / t;//求倒数得到每秒经过多少帧,即帧率
 string text = "FPS:" + to_string(fps);
 cv::putText(frame, text, Point(10, 50), FONT_HERSHEY_SIMPLEX, 1, cv::Scalar(0, 255, 0), 2, 8, 0);
运行结果:
(1)不使用CUDA:
mobile
(2)使用CUDA
MobileNet-SSD CUDA加速
opencv_cuda_mobilenet_ssd
源码:完整程序下载:OpenCVSSD目标检测(C++)资源-CSDN文库
// MobileNetSSD_ObjectDetection.cpp : 此文件包含 "main" 函数。程序执行将在此处开始并结束。
//
#include 结束语
感谢你观看我的文章呐~本次航班到这里就结束啦
希望本篇文章有对你带来帮助 ,有学习到一点知识~
躲起来的星星也在努力发光,你也要努力加油(让我们一起努力叭)。
最后,博主要一下你们的三连呀(点赞、评论、收藏),不要钱的还是可以搞一搞的嘛~
不知道评论啥的,即使扣个666也是对博主的鼓舞吖 感谢