(Pytorch)环境配置与代码学习1—边缘检测:更丰富的卷积特征 Richer Convolutional Features for Edge Detection
(Pytorch)环境配置与代码学习1 — 边缘检测:更丰富的卷积特征 Richer Convolutional Features for Edge Detection
-
- Source code and paper address
- 1. Pytorch 环境配置 Windows 10 + Pytharm + Python3.6
- 2.编译 Pytorch Version RCF
Source code and paper address
Source code is available at https://github.com/meteorshowers/RCF-pytorch
基本原理: https://blog.csdn.net/ruotianxia/article/details/100055506
1. Pytorch 环境配置 Windows 10 + Pytharm + Python3.6
地址:
https://pytorch.org/get-started/locally/
页面上有不同版本的 Pytorch安装方式
因为我的环境是CUDA8.0, Python3.6 ,所以安装命令如下:
# Python 3.6
首先安装或更新一下 numpy
pip install numpy
然后
pip3 install https://download.pytorch.org/whl/cu80/torch-1.0.1-cp36-cp36m-win_amd64.whl
这一句会报一个错误
pip3 install torchvision
//  Could not find a version that satisfies the requirement torch>=1.1.0
因此,改用下面的命令安装 torchvision
pip3 install --no-deps torchvision
因为网太慢,所以我直接下载的 torch-1.0.1-cp36-cp36m-win_amd64.whl
然后直接
pip3 install torch-1.0.1-cp36-cp36m-win_amd64.whl
即可.
下面来验证一下是否安装好
在 Python Console 中输入以下代码
from __future__ import print_function
import torch
x = torch.rand(5, 3)
print(x)
...............
Ressults:
tensor([[0.6721, 0.2654, 0.8204],
        [0.3341, 0.0447, 0.5296],
        [0.1545, 0.2893, 0.6191],
        [0.8655, 0.4210, 0.7503],
        [0.6606, 0.3944, 0.5899]])
紧接着测试以下Pytorch是否可以使用GPU和CUDA
import torch
torch.cuda.is_available()
如果不报错,则说明安装成功
2.编译 Pytorch Version RCF
首先,从github上下载代码:
在 Terminal 中输入
git clone --recursive https://github.com/meteorshowers/RCF-pytorch.git
运行 python train_RCF.py
出现以下错误
from torchvision import _C ImportError: DLL load failed: 找不到指定的模块。
原因是我安装的torch版本是1.0.1,与torchvision的版本不匹配,
所以重新安装了低版本的torchvision
pip install torchvision==0.2.1
然后继续安装其他依赖库
pip install pillow
pip install opencv-python
pip install matplotlib
pip install scipy
pip install scikit-image
数据集下载
wget http://mftp.mmcheng.net/liuyun/rcf/data/bsds_pascal_train_pair.lst
wget http://mftp.mmcheng.net/liuyun/rcf/data/HED-BSDS.tar.gz
wget http://mftp.mmcheng.net/liuyun/rcf/data/PASCAL.tar.gz
wget http://mftp.mmcheng.net/liuyun/rcf/data/NYUD.tar.gz
因为 Pytorch 版本中,只使用 BSDS就可以了,所以只用下载BSDS.
数据集百度网盘:
链接:https://pan.baidu.com/s/1BNopdAUOHf1qTGWnOlUb5g
提取码:8u8u
复制这段内容后打开百度网盘手机App,操作更方便哦
所有数据都准备好了,那么接下来在 Terminal 中运行
python train_RCF.py
出现报错:
FileNotFoundError: [Errno 2] No such file or directory: 'data/HED-BSDS_PASCAL\\bsds_pascal_train_pair.lst'
解决方法:将下载下来的 bsds_pascal_train_pair.lst,放入到相应文件夹中,若无,请自行新建文件夹。
重新运行 train_RCF,
出现报错:
FileNotFoundError: [Errno 2] No such file or directory: 'data/HED-BSDS_PASCAL\\test.lst'
解决方法: 解压的HED-BSDS中有一个 test.lst, copy出来,放入到相应文件夹。
重新运行,train_RCF
出现报错 :
FileNotFoundError: [Errno 2] No such file or directory: 'vgg16convs.mat'
缺失模型文件, 下载网址:
https://drive.google.com/file/d/1lUhPKKj-BSOH7yQL0mOIavvrUbjydPp5/view
百度网盘:
链接:https://pan.baidu.com/s/1i1XAS3qCF0ThN6KvG-Y6HQ
提取码:npqf
复制这段内容后打开百度网盘手机App,操作更方便哦
下载之后,放入根目录,
然后重新运行, train_RCF
出现报错 :
FileNotFoundError: [Errno 2] No such file or directory: 'data/HED-BSDS_PASCAL\\test/100007.jpg'
解决方法: 将HED-BSDS中的test文件夹拷入相应目录
运行 train_RCF
第一次 200张test完之后出现报错
FileNotFoundError: [Errno 2] No such file or directory: 'data/HED-BSDS_PASCAL\\PASCAL/aug_gt/0.0_0/2008_007748.png'
将PASCAL考入到相应文件夹,HED-BSDS也考入到该文件夹
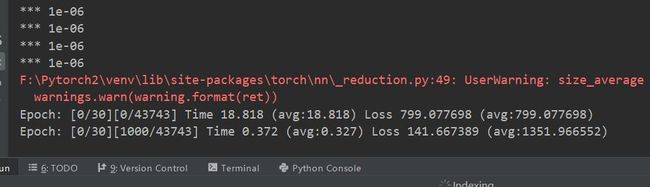
再次运行,成功。
HED 参考网址:https://blog.csdn.net/wangkun1340378/article/details/70154492