1、安装vue-cropper和less
npm install vue-cropper
yarn add vue-cropper
npm install -D less less-loader@7.3.0
2、创建组件文件夹名 cropperImage 文件名index.vue’
<template>
<el-dialog
title="图片裁切"
class="cropper-dialog"
:close-on-click-modal="false"
:visible="dialogVisible"
center
@close="close"
>
<div class="cropper-wrap">
<div
class="cropper-box"
:style="cropperStyle"
>
<vue-cropper
ref="cropper"
:img="option.img"
:output-size="option.size"
:output-type="option.outputType"
:info="option.info"
:full="option.full"
:canScale="option.canScale"
:can-move="option.canMove"
:can-move-box="option.canMoveBox"
:fixed="option.fixed"
:fixed-box="option.fixedBox"
:original="option.original"
:auto-crop="option.autoCrop"
:auto-crop-width="option.autoCropWidth"
:auto-crop-height="option.autoCropHeight"
:center-box="option.centerBox"
:high="option.high"
:info-true="option.infoTrue"
:max-img-size="option.maxImageSize"
:enlarge="option.enlarge"
:mode="option.mode"
:maxImgSize="option.maxImgSize"
@realTime="realTime"
/>
</div>
<div class="preview-box">
<div class="preview-title">
<span>预览</span>
<span @click="upload" class="preveiw-upload">重新上传</span>
</div>
<input
ref="upload"
type="file"
style="position:absolute; clip:rect(0 0 0 0);"
accept="image/png, image/jpeg, image/jpg"
@change="uploadImg"
>
<div
:style="previewStyle"
class="preview-img"
>
<div :style="preview.div">
<img
:style="preview.img"
:src="preview.url"
/>
</div>
</div>
</div>
</div>
<div slot="footer" class="dialog-footer">
<el-button @click="close">取 消</el-button>
<el-button type="primary" @click="finish" :loading="loading">确认</el-button>
</div>
</el-dialog>
</template>
<script>
import { VueCropper } from 'vue-cropper'
export default {
name: 'ImageCropper',
components: {
VueCropper
},
data () {
return {
option: {
img: '',
outputSize: 1,
outputType: 'png',
full: true,
info: true,
canScale: true,
autoCrop: true,
autoCropWidth: 200,
autoCropHeight: 150,
canMove: true,
fixedBox: true,
fixed: false,
canMoveBox: true,
original: false,
centerBox: false,
height: true,
infoTrue: false,
enlarge: 1,
mode: 'container',
maxImgSize: 375
},
loading: false,
preview: {},
previewStyle: {}
}
},
props: {
dialogVisible: {
type: Boolean,
default: false
},
cropperOption: {
type: Object,
default: () => {}
},
cropperStyle: {
type: Object,
default: () => {}
},
fileSize: {
type: Number,
default: 2
},
zoom: {
type: Number,
default: 1
}
},
watch: {
cropperOption: {
handler (value) {
this.option = Object.assign(this.option, value)
},
immediate: true,
deep: true
}
},
methods: {
upload () {
this.$refs.upload.value = null
this.$refs.upload.click()
},
uploadImg (e) {
let file = e.target.files[0]
if (!/\.(jpg|jpeg|png|JPG|PNG)$/.test(e.target.value)) {
this.$message.error(file.name + '不是图片格式文件')
return false
}
if (file.size > 1024 * 1024 * this.fileSize) {
this.$message.error(`请上传小于${this.fileSize}M的图片`)
return false
}
let reader = new FileReader()
reader.readAsArrayBuffer(file)
reader.onload = e => {
let data
if (typeof e.target.result === 'object') {
data = window.URL.createObjectURL(new Blob([e.target.result]))
} else {
data = e.target.result
}
this.$set(this.option, 'img', data)
}
},
realTime (preview) {
this.preview = preview
this.previewStyle = {
width: preview.w + 'px',
height: preview.h + 'px',
overflow: 'hidden',
margin: '0',
zoom: this.zoom
}
},
dataURLtoFile (dataurl, filename) {
let arr = dataurl.split(',')
let mime = arr[0].match(/:(.*?);/)[1]
let bstr = atob(arr[1])
let len = bstr.length
let u8arr = new Uint8Array(len)
while (len--) {
u8arr[len] = bstr.charCodeAt(len)
}
return new File([u8arr], filename, { type: mime })
},
finish () {
this.$refs.cropper.getCropData(data => {
let file = this.dataURLtoFile(data, 'images.png')
this.$emit('uploadCropper', file, data)
})
},
close () {
this.$emit('close')
}
}
}
</script>
<style lang="less" scoped>
.cropper-dialog {
& /deep/ .el-dialog{
width: max-content;
}
& /deep/ .el-dialog__body {
padding: 20px;
}
& /deep/ .el-button {
width: 145px;
}
}
.cropper-wrap{
display: flex;
.cropper-box{
margin-right: 20px;
width: 375px;
height: 176px;
}
.preview-box{
.preview-title {
display: flex;
min-width: 100px;
justify-content: space-between;
align-items: center;
height: 32px;
color: rgba(30,35,48,1);
font-family: PingFangSC-Medium;
.preveiw-upload {
color: #0067ED;
cursor: pointer;
}
}
.preview-img{
border-radius: 2px;
}
}
}
.fun-btn{
margin-top: 16px;
i{
margin-right: 16px;
font-size: 18px;
color: #8c8c8c;
cursor: pointer;
&:hover{
color: #0067ED;
}
}
.reUpload{
margin-right: 16px;
}
}
</style>
3、引用
  import cropperImage from '@/components/cropperImage/index.vue'
  components: {
      cropperImage
    },
4、使用
1、上传按钮
<el-upload class="myupload" drag action="" :auto-upload="true" :on-change="handleCrop"
          :before-upload="beforeAvatarUpload"
          :disabled="disabled" accept=".png,.jpg"
          :data="{type:0}"
           list-type="picture-card"
>
  <div class="myupload-div">
       <img style="width: 29px;height: 29px" src="@/assets/riverOutfall/upload-img.png" alt="">
       <span class="upload-text">点击上传图片</span>
  </div>
</el-upload>
2、裁剪弹框引入
<cropperImage
      :dialogVisible="showCropper"
      :cropper-option="cropperOption"
      :file-size="fileSize"
      :cropper-style="cropperStyle"
      @close="showCropper=false"
      @uploadCropper="uploadImg"></cropperImage>
3、data参数
fileList:[],
fileSrcList:[],
showCropper: false,
cropperOption: {
img: '',
autoCropWidth: 375,
autoCropHeight: 187
},
cropperStyle: {
width: '390px',
height: '290px'
},
fileSize:1,
cropperData:{}
4、methods
handleCrop (file) {
this.$nextTick(() => {
if (this.canCropper) {
this.cropperOption.img = window.URL.createObjectURL(file.raw)
this.showCropper = this.canCropper
}
})
},
beforeAvatarUpload (file) {
const isJPG = file.type === 'image/jpeg' || file.type === 'image/jpg' || file.type === 'image/png'
const isLt2M = file.size / 1024 / 1024 < 2
if (!isJPG) {
this.$message.error('上传头像图片只能是 JPG/PNG 格式!')
}
if (!isLt2M) {
this.$message.error('上传头像图片大小不能超过 2 MB!')
}
this.canCropper = isJPG && isLt2M
return false
},
async uploadImg (file, data) {
let fileFormData = new FormData()
fileFormData.append('file', file);
fileFormData.append('type', 0);
this.cropperData.iconUrl = data
this.showCropper = false
},
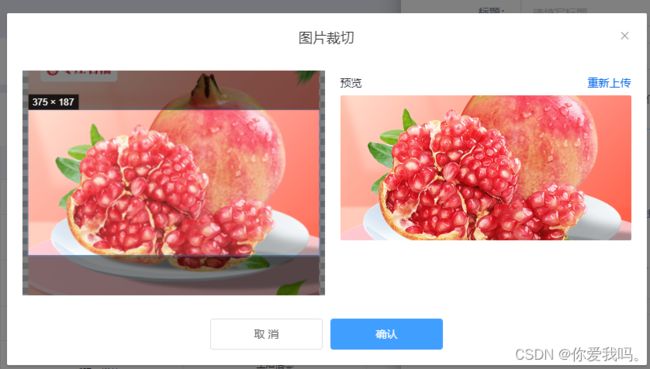
最终效果