ElasticSearch单机部署及可视化工具ES-head和kibana安装
一、ES部署
1、下载安装包
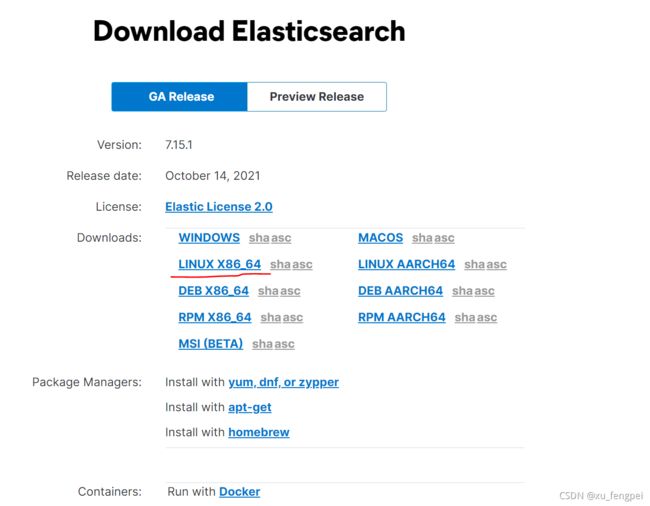
下载地址:https://www.elastic.co/cn/downloads/elasticsearch
下载Linux版本的。
2、解压到 /opt下
3、添加es操作用户(出于安全考虑,es不能使用root用户操作)并给操作用户权限
useradd username

passwd username
#输入密码

chown -R username:username /opt/elasticsearch-版本号
4、修改配置文件
mkdir /opt/elasticsearch/data
vi /opt/elasticsearch/config/elasticsearch.yml
discovery.seed_hosts: ["IP地址"]
cluster.initial_master_nodes: ["node-1"]
cluster.name: es
node.name: node-1
path.data: /opt/elasticsearch/data
path.logs: /opt/elasticsearch/logs
network.host: 0.0.0.0
http.port: 9200

#在文末添加下面两行,允许跨域
http.cors.enabled: true
http.cors.allow-origin: "*"
编辑 limits.conf 配置文件
vi/etc/security/limits.conf
添加如下内容:
* soft nofile 65536
* hard nofile 131072
* soft nproc 2048
* hard nproc 4096
修改配置文件 sysctl.conf
vi /etc/sysctl.conf
添加下面配置:
vm.max_map_count=655360
并执行命令(配置生效):
sysctl -p
5、启动
su username

cd /opt/elasticsearch/bin

./elasticsearch -d
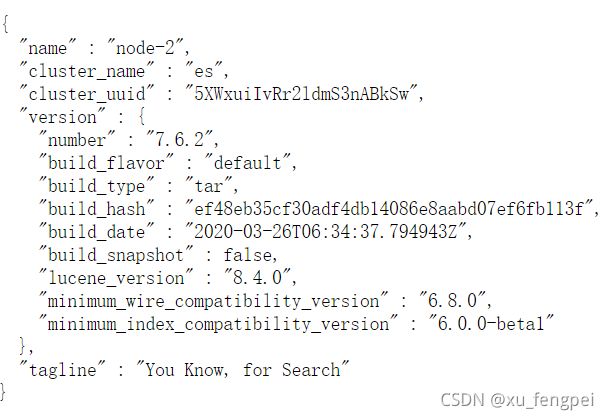
6、浏览器登录
http://IP:9200
可以看到json文件内容
二、ES-head安装
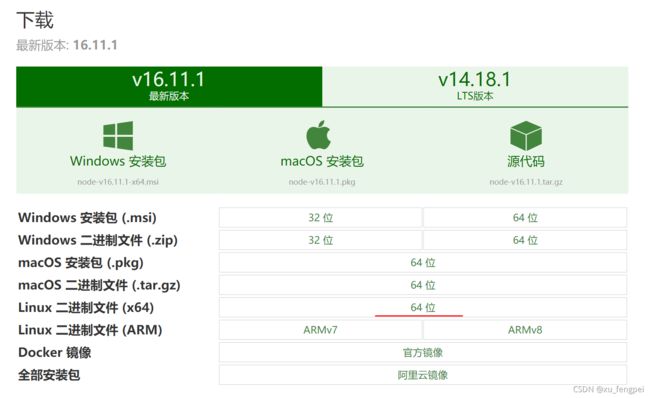
1、安装node.js
http://nodejs.cn/download/
选择linux版本
2、先使用xz -d node-版本.tar.xz 解压xz包,再使用tar解压
3、添加环境变量
vi /etc/profile

source /etc/profile

npm -version
4、安装cnpm
npm install -g cnpm --registry=https://registry.npm.taobao.org

cnpm install [email protected] --ignore-scripts
grunt是一个很方便的构建工具,可以进行打包压缩、测试、执行等等的工作,5.0里的head插件就是通过grunt启动的。因此需要安装一下grunt(在elasticsearch-head目录下):
cnpm install -g grunt-cli

cnpm install grunt --save-dev

grunt -version
5、下载es-head插件
yum -y install git

git clone https://github.com/mobz/elasticsearch-head.git
到elasticsearch-head目录下, 执行cnpm install 命令
6、修改配置文件
修改es-head目录下的/Gruntfile.js,增加hostname属性(connect层)
port :9100,
hostname: '*',
base: '.',
在es-head的安装目录下_site/app.js,将这一行的localhost改成主机名或公网IP
this.base_uri = this.config.base_uri || this.prefs.get(“app-base_uri”) || “http://localhost:9200“;
7、运行
前台运行./node_modules/grunt/bin/grunt server (直接运行)
后台运行nohup ./node_modules/grunt/bin/grunt server > es-head-start.log 2>&1 & (后台运行)
浏览器登录 http://IP:9100
三、安装kibana
下载地址:https://www.elastic.co/cn/downloads/
1、解压安装包到es的plugins目录下
2、修改kibana.yml配置文件
server.port: 5601 端口
server.host: “0.0.0.0” 允许所有主机访问
elasticsearch.hosts: [“http://192.168.18.238:9200”] 指定es的主机地址
3、启动(kibana的bin目录下)
./kibana --allow-root
4、汉化
kibana是支持汉化的,想使用汉化版的可以通过修改配置文件完成
vi config/kibana.yml
文件末尾可以看到

i18n.locale 这里的值为 en 代表英语,将其改为zh-CN
重启kibana即可汉化
./kibana --allow-root