前后端分离管理系统day01---Springboot+MybatisPlus
目录
目录
软件
基础知识
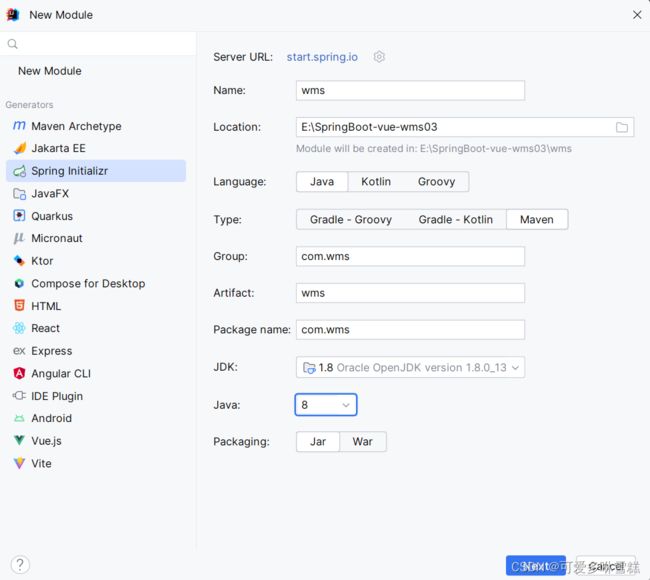
一创建后端项目
注意:
删除多余项
创建测试类
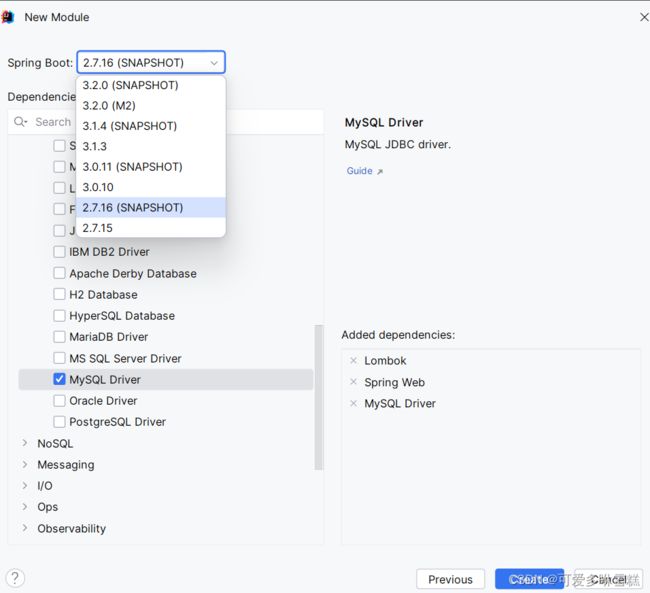
二 加入mybatis-plus依赖支持
1.加入依赖码
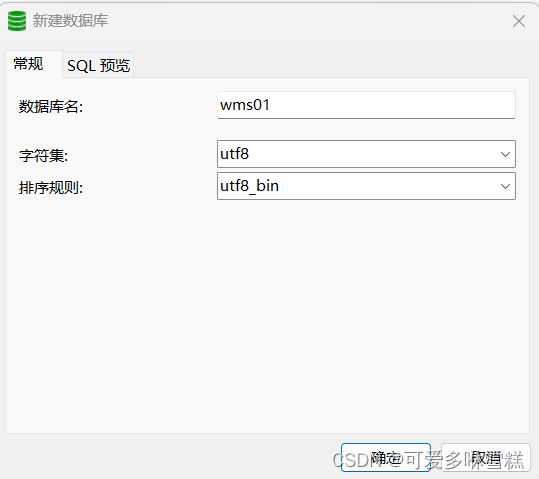
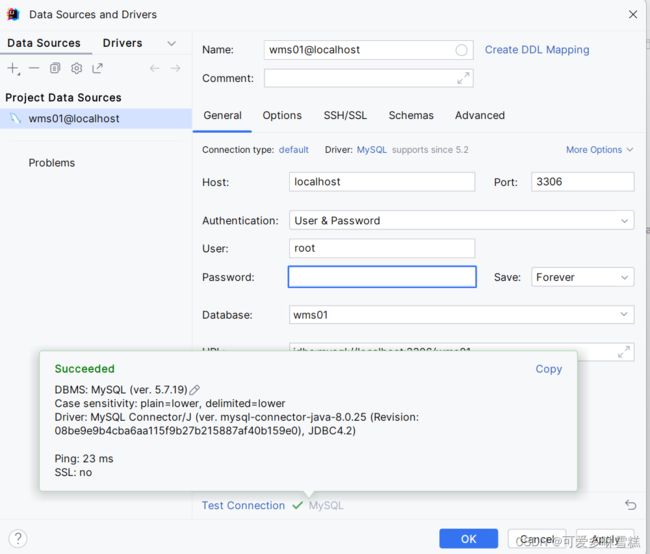
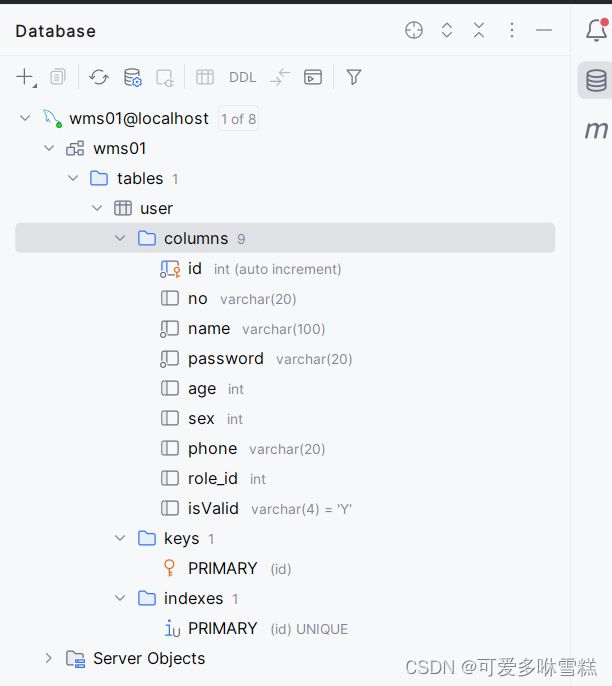
2.创建数据库实例/创建用户表/插入默认数据
创建数据库实例
创建表
插入数据
3.配置yml文件
注意:wms01必须是数据库的名字,后端手动配置端口8090,防止前端访问8080时和后端冲突
4.编写测试代码
①创建entity包和User类
②创建mapper包和UserMapper接口,继承Basemapper
③创建 service包和UserService接口,继承IService
④创建impl包和实现类UserServiceImpl,继承ServiceImpl
编辑
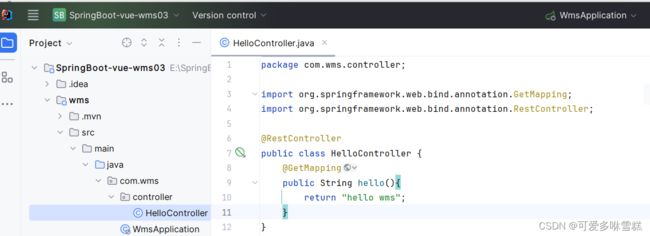
⑤编写测试类HelloController
5.创建自己的方法listAll( )
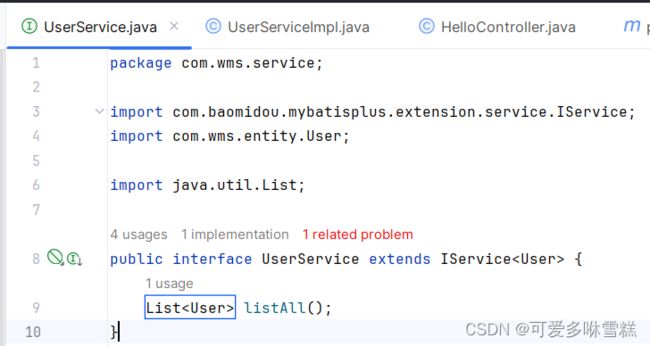
① 在UserService创建自定义listAll( )的方法接口
②在UserServiceImpl.java中实现自定义的方法listAll( )(按Alt+回车)编辑
④注入UserMapper
⑤在UserMapper中创建方法listAll( )的接口
⑥在resources下创建一个目录mapper
⑦在mapper下创建一个xml配置文件(mybatis的核心配置文件)
法一,直接在mybatis的核心配置文件中注入,自己写一个select
法二,在我们的接口中添加注解
软件
Mysql+IDEA
基础知识
注解 | MyBatis-Plus (baomidou.com)
http://t.csdn.cn/yFTWw
一创建后端项目
注意:
Spring Boot 3.0版本不支持JDK8。最低要求是JDK17。对于仍然在使用JDK8的用户,可以选择使用Spring Boot 2.7版本。
Spring Boot 3.0版本由于使用了较老版本的asm类库,无法支持JDK8之后的Java class格式,从而在启动时报错。从Spring Boot 4开始,正式支持JDK8,通过升级配套的asm类库,使其可以支持JDK8的版本。
因此,坚持使用JDK8的用户,建议选用Spring Boot 2.7版本。对于从Spring Boot 3升级到Spring Boot 4/5的老应用,可能会引发很多兼容性问题,建议整个spring生态一起升级到新版本。
删除多余项

创建测试类

二 加入mybatis-plus依赖支持
1.加入依赖码
参考网站:快速开始 | MyBatis-Plus (baomidou.com)
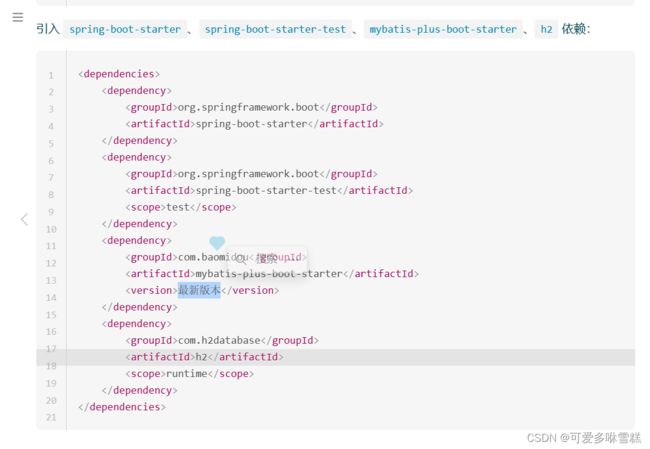
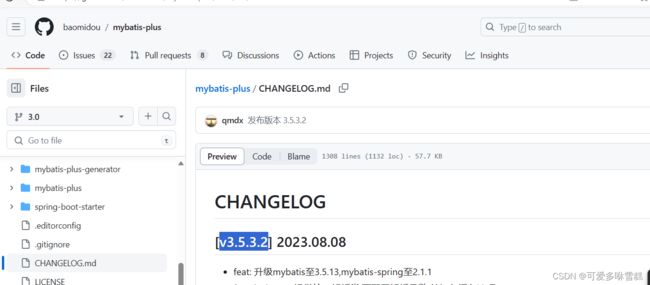
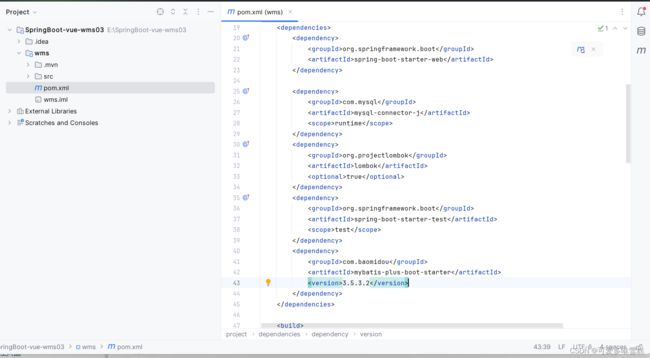
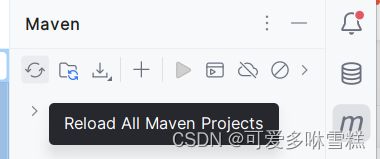
点击更新日志查看最新版本![]()
2.创建数据库实例/创建用户表/插入默认数据
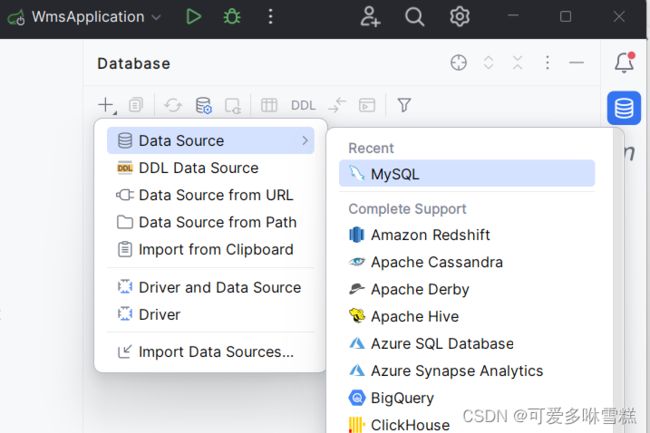
创建数据库实例
创建表
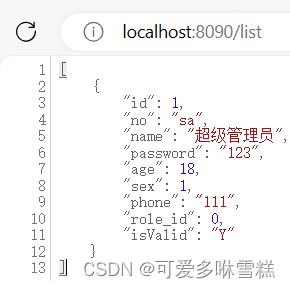
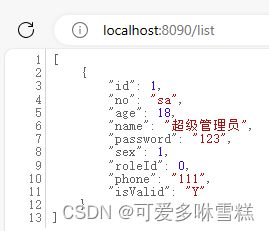
create table user
(
    id        int                       auto_increment comment  '主键' primary key ,
    no        varchar(20)               null comment '账号',
    name      varchar(100)              not null comment '名字',
    password  varchar(20)               not null comment '密码',
    age       int                       null comment '年龄',
    sex       int                       null comment '性别',
    phone     varchar(20)               null comment '电话',
    role_id   int                       null comment '角色 0超级管理员,1管理员,2普通账户',
    isValid   varchar(4) default 'Y'    null comment '是否有效,Y有效,其他无效'
)
charset = utf8;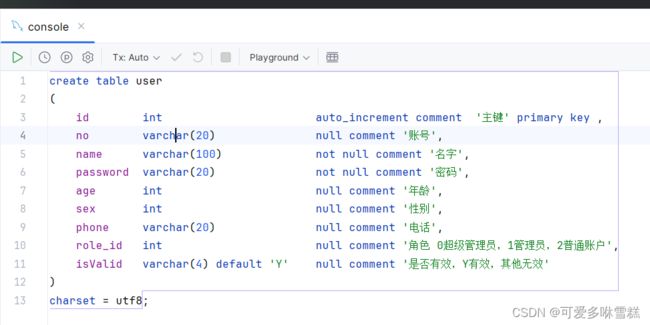
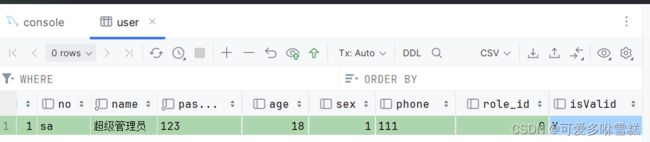
插入数据
3.配置yml文件
把application.properties改为application.yml
server:
  port: 8090

spring:
  datasource:
    url: jdbc:mysql://localhost:3306/wms01?useUnicode&characterEncoding=utf-8&useSSL=false&serverTimeZone=GMT%2B8
    driver-class-name: com.mysql.jdbc.Driver
    username: root
password: crush 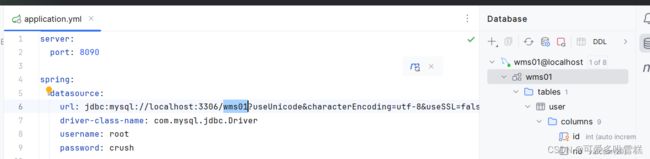
注意:wms01必须是数据库的名字,后端手动配置端口8090,防止前端访问8080时和后端冲突
4.编写测试代码
①创建entity包和User类
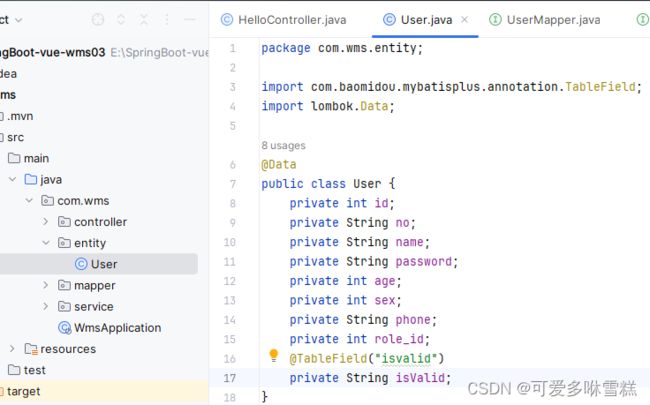
package com.wms.entity;

import com.baomidou.mybatisplus.annotation.TableField;
import lombok.Data;

@Data
public class User {
    private int id;
    private String no;
    private String name;
    private String password;
    private int age;
    private int sex;
    private String phone;
    private int role_id;
    @TableField("isvalid")
    private String isValid;
}
@TableField("isvalid") 可能会报错,只要重新加载Maven就可以了
②创建mapper包和UserMapper接口,继承Basemapper
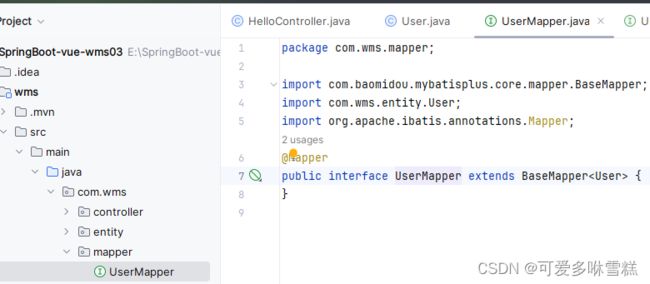
package com.wms.mapper;

import com.baomidou.mybatisplus.core.mapper.BaseMapper;
import com.wms.entity.User;
import org.apache.ibatis.annotations.Mapper;

@Mapper
public interface UserMapper extends BaseMapper {
}
③创建 service包和UserService接口,继承IService
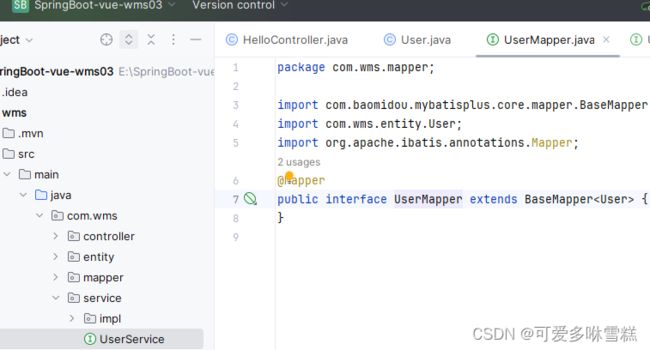
package com.wms.service;

import com.baomidou.mybatisplus.extension.service.IService;
import com.wms.entity.User;

public interface UserService extends IService {
}
④创建impl包和实现类UserServiceImpl,继承ServiceImpl

package com.wms.service.impl;

import com.baomidou.mybatisplus.extension.service.impl.ServiceImpl;
import com.wms.entity.User;
import com.wms.mapper.UserMapper;
import com.wms.service.UserService;
import org.springframework.stereotype.Service;

@Service
public class UserServiceImpl extends ServiceImpl implements UserService {
}
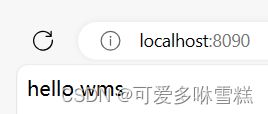
⑤编写测试类HelloController
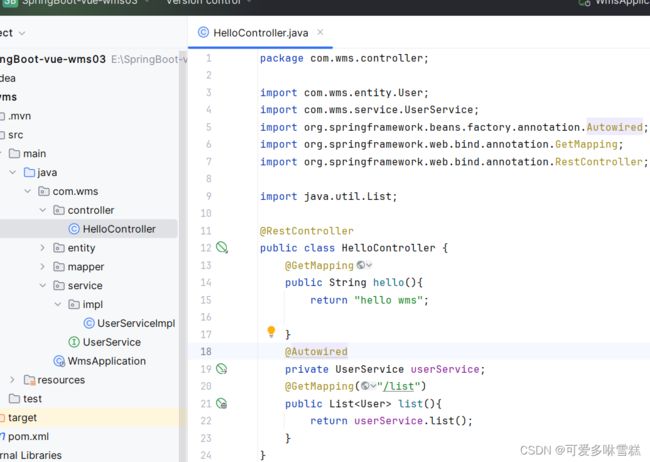
package com.wms.controller;
import com.wms.entity.User;
import com.wms.service.UserService;
import org.springframework.beans.factory.annotation.Autowired;
import org.springframework.web.bind.annotation.GetMapping;
import org.springframework.web.bind.annotation.RestController;
import java.util.List;
@RestController
public class HelloController {
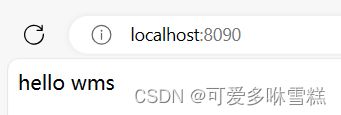
@GetMapping
public String hello(){
return "hello wms";
}
@Autowired
private UserService userService;
@GetMapping
public List list("/list"){
return userService.list();
}
}
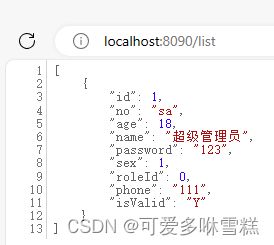
运行成功

5.创建自己的方法listAll( )
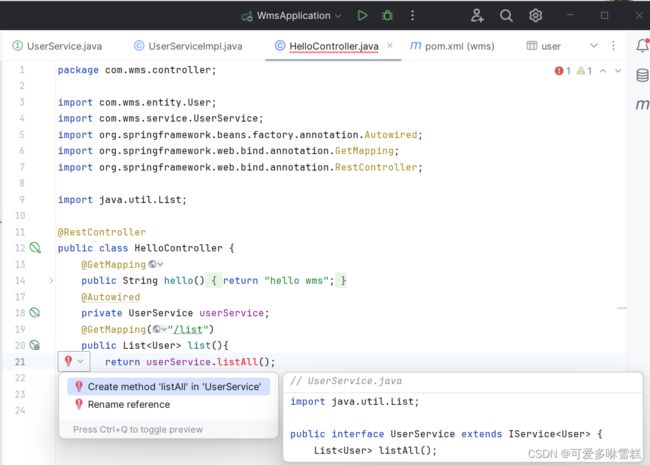
① 在UserService创建自定义listAll( )的方法接口
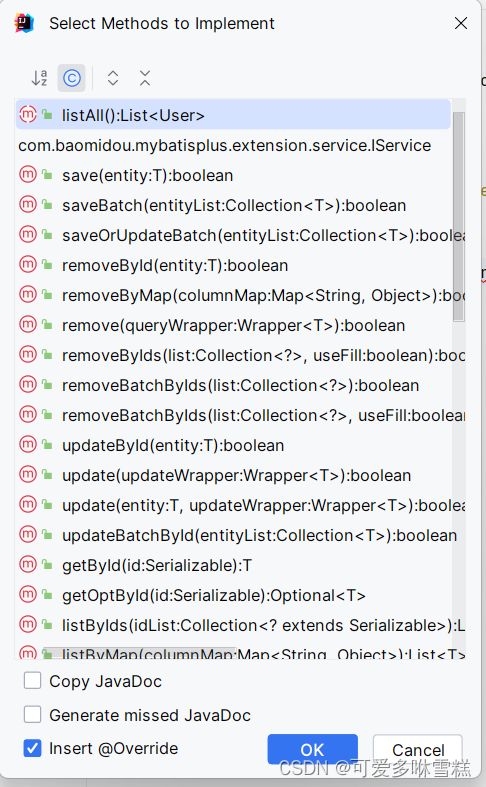
②在UserServiceImpl.java中实现自定义的方法listAll( )(按Alt+回车)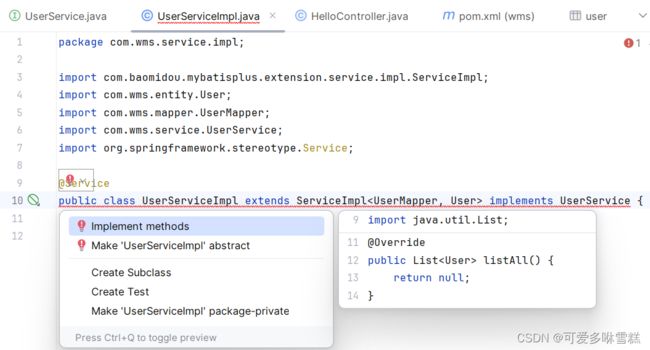
选第一个
④注入UserMapper
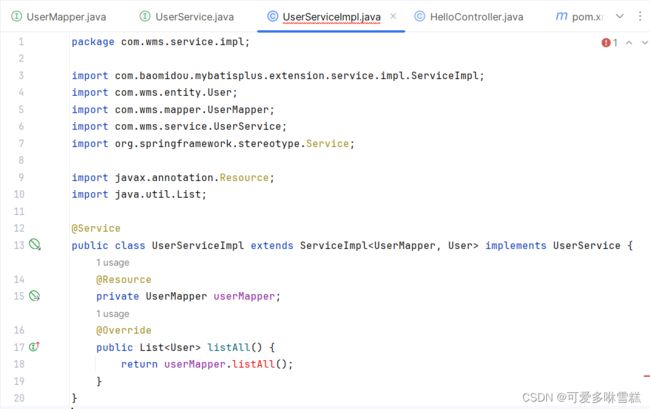
⑤在UserMapper中创建方法listAll( )的接口
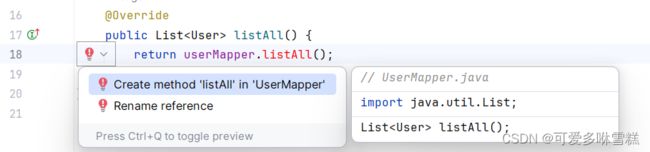
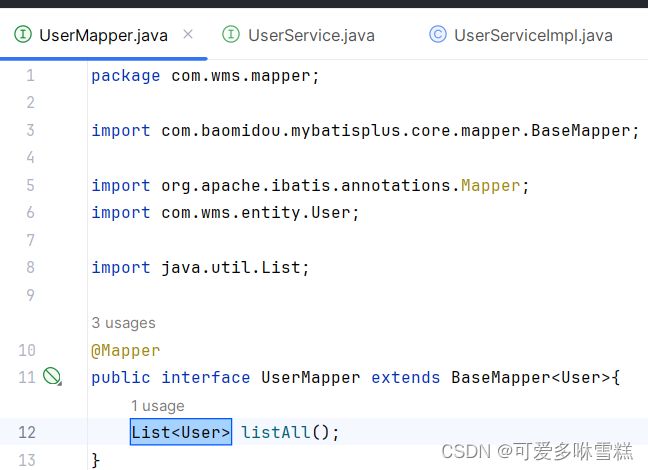
实际上并没有实现,需要自己配置
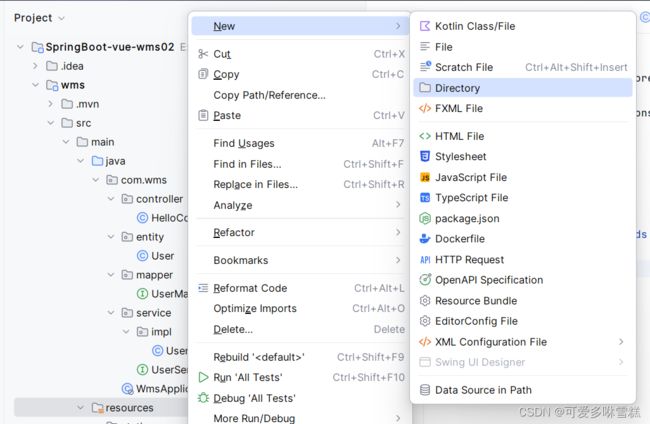
⑥在resources下创建一个目录mapper
⑦在mapper下创建一个xml配置文件(mybatis的核心配置文件)
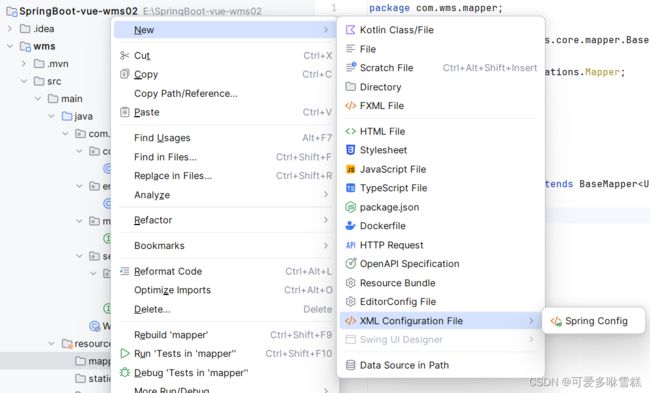
不懂的直接在网上查”mybatis配置头文件模板“
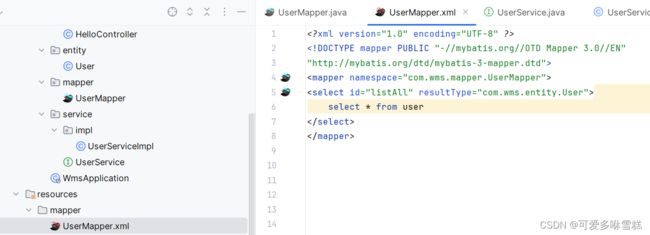
法一,直接在mybatis的核心配置文件中注入,自己写一个select
测试HelloController
法二,在我们的接口中添加注解
@Select("select * from user")
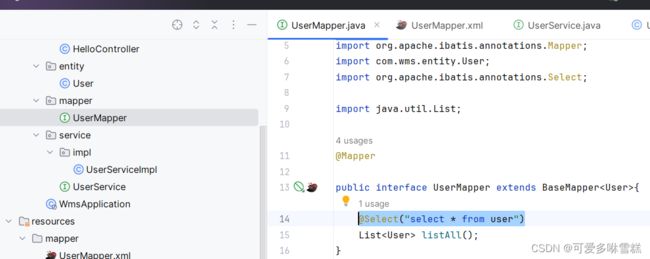
测试HelloController