Python+opencv3.4+kalman(卡尔曼)滤波实现视频中运动物体追踪和轨迹绘制
官方卡尔曼滤波目标追踪实例c++版,本文的opencv版本代码是由改代码改编而来
https://www.myzhar.com/blog/tutorials/tutorial-opencv-ball-tracker-using-kalman-filter/
kalman滤波相关知识,理解等
https://blog.csdn.net/u010712012/article/details/90294295?utm_medium=distribute.pc_relevant.none-task-blog-baidujs-2
hsv色彩对照表:(设置运动目标hsv阈值时要用到)

实现效果:
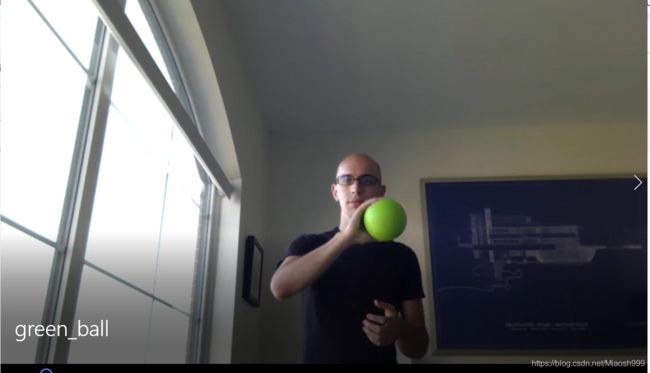

需要视频的话可以去我的下载里面找,有上面这个视频
https://download.csdn.net/download/Miaosh999/12547308
实验环境:
Python3.6+OpenCV3.4+pycharm2019
代码实现:
首先是一个简单的不用kalman滤波的运动目标追踪代码
这里可以根据需要进行摄像头运动目标识别,只要把
camera = cv2.VideoCapture('./video/yellow_ball.mp4')
#  改成camera = cv2.VideoCapture(0)  就是摄像头内识别
完整代码:
from collections import  deque
import numpy as np
import cv2
# imutils
import time
#设定阈值,HSV空间
redLower = np.array([11, 100, 100])
redUpper = np.array([20, 255, 255])
#初始化追踪点的列表
mybuffer = 64
pts = deque(maxlen=mybuffer)
#打开摄像头
camera = cv2.VideoCapture('./video/yellow_ball.mp4')
fourcc = cv2.VideoWriter_fourcc(*'XVID')  # 保存文件为avi格式
fps = camera.get(cv2.CAP_PROP_FPS)
size = (int(camera.get(cv2.CAP_PROP_FRAME_WIDTH)), int(camera.get(cv2.CAP_PROP_FRAME_HEIGHT)))  # 输出视频尺寸,长和宽
out = cv2.VideoWriter('new_yellow_ball.avi', fourcc, fps, size)  # 输出视频
#等待两秒
time.sleep(2)
#遍历每一帧,检测红色瓶盖
while True:
    #读取帧
    (ret, frame) = camera.read()
    if ret == False:
        break
    #判断是否成功打开摄像头
    # if not ret:
    #     print('No Camera')
    #     break
    #frame = imutils.resize(frame, width=600)
    #转到HSV空间
    hsv = cv2.cvtColor(frame, cv2.COLOR_BGR2HSV)
    #根据阈值构建掩膜
    mask = cv2.inRange(hsv, redLower, redUpper)
    #腐蚀操作
    mask = cv2.erode(mask, None, iterations=2)
    #膨胀操作,其实先腐蚀再膨胀的效果是开运算,去除噪点
    mask = cv2.dilate(mask, None, iterations=2)
    #轮廓检测
    cnts = cv2.findContours(mask.copy(), cv2.RETR_EXTERNAL, cv2.CHAIN_APPROX_SIMPLE)[-2]
    #初始化瓶盖圆形轮廓质心
    center = None
    #如果存在轮廓
    if len(cnts) > 0:
        #找到面积最大的轮廓
        c = max(cnts, key = cv2.contourArea)
        #确定面积最大的轮廓的外接圆
        ((x, y), radius) = cv2.minEnclosingCircle(c)
        #计算轮廓的矩
        M = cv2.moments(c)
        #计算质心
        center = (int(M["m10"]/M["m00"]), int(M["m01"]/M["m00"]))
        #只有当半径大于10时,才执行画图
        if radius > 10:
            cv2.circle(frame, (int(x), int(y)), int(radius), (0, 255, 255), 2)
            cv2.circle(frame, center, 5, (0, 0, 255), -1)
            #把质心添加到pts中,并且是添加到列表左侧
            pts.appendleft(center)
    #遍历追踪点,分段画出轨迹
    for i in range(1, len(pts)):
        if pts[i - 1] is None or pts[i] is None:
            continue
        #计算所画小线段的粗细
        thickness = int(np.sqrt(mybuffer / float(i + 1)) * 2.5)
        #画出小线段
        cv2.line(frame, pts[i - 1], pts[i], (0, 0, 255), thickness)
    #res = cv2.bitwise_and(frame, frame, mask=mask)
    cv2.imshow('Frame', frame)
    out.write(frame)
    #键盘检测,检测到esc键退出
    k = cv2.waitKey(5)&0xFF
    if k == 27:
        break
#摄像头释放
camera.release()
#销毁所有窗口
cv2.destroyAllWindows()
这里是基于kalman滤波的运动目标识别与轨迹绘制
import cv2
import numpy as np
# hsv阈值,便于进行轮廓判断及轨迹绘制,需要根据运动目标的颜色自己进行调整
min_hsv_bound = (35, 100, 100)
max_hsv_bound = (77, 255, 255)
#状态向量
stateSize = 6
#观测向量
measSize = 4
coutrSize = 0
kf = cv2.KalmanFilter(stateSize,measSize,coutrSize)
state = np.zeros(stateSize, np.float32)#[x,y,v_x,v_y,w,h],簇心位置,速度,高宽
meas = np.zeros(measSize, np.float32)#[z_x,z_y,z_w,z_h]
procNoise = np.zeros(stateSize, np.float32)

#状态转移矩阵
cv2.setIdentity(kf.transitionMatrix)#生成单位矩阵
# [1 0 dT 0  0 0]
# [0 1 0  dT 0 0]
# [0 0 1  0  0 0]
# [0 0 0  1  0 0]
# [0 0 0  0  1 0]
# [0 0 0  0  0 1]
#观测矩阵
# [1 0 0 0 0 0]
# [0 1 0 0 0 0]
# [0 0 0 0 1 0]
# [0 0 0 0 0 1]
kf.measurementMatrix = np.zeros((measSize,stateSize),np.float32)
kf.measurementMatrix[0,0]=1.0
kf.measurementMatrix[1,1]=1.0
kf.measurementMatrix[2,4]=1.0
kf.measurementMatrix[3,5]=1.0

#预测噪声
# [Ex 0 0 0 0 0]
# [0 Ey 0 0 0 0]
# [0 0 Ev_x 0 0 0]
# [0 0 0 Ev_y 0 0]
# [0 0 0 0 Ew 0]
# [0 0 0 0 0 Eh]
cv2.setIdentity(kf.processNoiseCov)
kf.processNoiseCov[0,0] = 1e-2
kf.processNoiseCov[1,1] = 1e-2
kf.processNoiseCov[2,2] = 5.0
kf.processNoiseCov[3,3] = 5.0
kf.processNoiseCov[4,4] = 1e-2
kf.processNoiseCov[5,5] = 1e-2

#测量噪声
cv2.setIdentity(kf.measurementNoiseCov)
# for i in range(len(kf.measurementNoiseCov)):
#     kf.measurementNoiseCov[i,i] = 1e-1

video_cap = cv2.VideoCapture('./video/green_ball.mp4')
# 视频输出
fps = video_cap.get(cv2.CAP_PROP_FPS) #获得视频帧率,即每秒多少帧
size = (int(video_cap.get(cv2.CAP_PROP_FRAME_WIDTH)),int(video_cap.get(cv2.CAP_PROP_FRAME_HEIGHT)))
videoWriter = cv2.VideoWriter('./video/new_green.mp4' ,cv2.VideoWriter_fourcc('m', 'p', '4', 'v'), fps, size)
ticks = 0
i=0
found = False
notFoundCount = 0
prePointCen = [] #存储小球中心点位置
meaPointCen = []
while(True):
    ret, frame = video_cap.read()
    if ret is False:
        break
    cv2.imshow('frame',frame)
    cv2.waitKey(1)
    precTick = ticks
    ticks = float(cv2.getTickCount())
    res = frame.copy()
    # dT = float(1/fps)
    dT = float((ticks - precTick)/cv2.getTickFrequency())
    if(found):
        #预测得到的小球位置
        kf.transitionMatrix[0,2] = dT
        kf.transitionMatrix[1,3] = dT

        state = kf.predict()
        width = state[4]
        height = state[5]
        x_left = state[0] - width/2 #左上角横坐标
        y_left = state[1] - height/2  #左上角纵坐标
        x_right = state[0] + width/2
        y_right = state[1] + height/2

        center_x = state[0]
        center_y = state[1]
        prePointCen.append((int(center_x),int(center_y)))
        cv2.circle(res, (int(center_x),int(center_y)),2,(255,0,0),-1)
        cv2.rectangle(res,(x_left,y_left),(x_right,y_right),(255,0,0),2)

    #根据颜色二值化得到的小球位置
    frame = cv2.GaussianBlur(frame, (5,5), 3.0, 3.0)
    frame = cv2.cvtColor(frame, cv2.COLOR_BGR2HSV)
    rangeRes = cv2.inRange(frame, min_hsv_bound,max_hsv_bound)
    kernel = np.ones((3, 3), np.uint8)
    # 腐蚀膨胀
    rangeRes = cv2.erode(rangeRes, kernel, iterations=2)
    rangeRes = cv2.dilate(rangeRes, kernel, iterations=2)
    # cv2.imshow("Threshold", rangeRes)
    cv2.waitKey(1)
    contours = cv2.findContours(rangeRes.copy(),cv2.RETR_EXTERNAL,cv2.CHAIN_APPROX_NONE)[-2]
    #检测轮廓,只检测最外围轮廓,保存物体边界上所有连续的轮廓点到contours向量内
    balls = []
    ballsBox = []
    for i in range(len(contours)):
        x, y, w, h = cv2.boundingRect(np.array(contours[i]))

        ratio = float(w/h)
        if(ratio > 1.0):
            ratio = 1.0 / ratio
        if(ratio > 0.75 and w*h>=400):
            balls.append(contours[i])
            ballsBox.append([x, y, w, h])

    print( "Balls found:", len(ballsBox))
    print("\n")

    for i in range(len(balls)):
        # 绘制小球轮廓
        cv2.drawContours(res, balls, i, (20,150,20),1)
        cv2.rectangle(res,(ballsBox[i][0],ballsBox[i][1]),(ballsBox[i][0]+ballsBox[i][2],ballsBox[i][1]+ballsBox[i][3]),(0,255,0),2) #二值化得到小球边界

        center_x = ballsBox[i][0] + ballsBox[i][2] / 2
        center_y = ballsBox[i][1] + ballsBox[i][3] / 2

        meaPointCen.append((int(center_x),int(center_y)))
        cv2.circle(res,(int(center_x),int(center_y)), 2, (20,150,20) ,-1)

        name = "(" + str(center_x) + "," + str(center_y) + ")"
        cv2.putText(res, name, (int(center_x) + 3, int(center_y) - 3), cv2.FONT_HERSHEY_COMPLEX, 0.5, (20,150,20), 2)
    n = len(prePointCen)
    for i in range(1, n):
        print(i)
        if prePointCen[i-1] is None or prePointCen[i] is None:
            continue
         #  注释掉的这块是为了绘制能够随时间先后慢慢消失的追踪轨迹,但是有一些小错误
        # 计算所画小线段的粗细
        # thickness = int(np.sqrt(64 / float(n - i + 1))*2.5)
        # print(thickness)
        # 画出小线段
        # cv2.line(res, prePointCen[i-1], prePointCen[i], (0, 0, 255), thickness)
        cv2.line(res, prePointCen[i-1], prePointCen[i], (0,0,255), 1, 4)
    if(len(balls) == 0):
        notFoundCount += 1
        print("notFoundCount",notFoundCount)
        print("\n")

        if notFoundCount >= 100:
            found = False

    else:
        #测量得到的物体位置
        notFoundCount = 0
        meas[0] = ballsBox[0][0] + ballsBox[0][2] / 2
        meas[1] = ballsBox[0][1] + ballsBox[0][3] / 2
        meas[2] = float(ballsBox[0][2])
        meas[3] = float(ballsBox[0][3])

        #第一次检测
        if not found:
            for i in range(len(kf.errorCovPre)):
                kf.errorCovPre[i,i] = 1
            state[0] = meas[0]
            state[1] = meas[1]
            state[2] = 0
            state[3] = 0
            state[4] = meas[2]
            state[5] = meas[3]

            kf.statePost = state
            found = True

        else:
            kf.correct(meas) #Kalman修正

            print('rr',res.shape)
            print("Measure matrix:", meas)
            cv2.imshow("Tracking", res)

            cv2.waitKey(1)
    videoWriter.write(res)
大概就是这样了,如果追踪效果不好就自己调整一下阈值范围吧
如果要追踪鼠标运动轨迹的可以看一下这位朋友的
(OpenCV+Python)–目标跟踪,卡尔曼滤波+鼠标轨迹跟踪