Devops7实验环境搭建(terraform-kind-k8s-argocd)
Devops7实验环境搭建(terraform-kind-k8s-argocd)
目录
实验环境
操作系统: CentOS8 Linux (我本次用centos7.6)
内存资源:32GB+ (自己nuc机器32G内存)
实验软件版本:
| 工具名称 | Version | 描述信息 |
|---|---|---|
| Terraform | 1.1.7 | 使用kind provider操作kind |
| Kind | 0.14.0 | 创建Kubernetes集群工具 |
| Docker-CE | 1.19+以上 (Docker version 23.0.3, build 3e7cbfd) | 容器运行时 |
| kubectl | version.Info{Major:“1”, Minor:“24”, GitVersion:"v1.24.0 | |
| Kubernetes | 1.24.0 | 容器云环境 |
| ArgoCD | 2.6.7 | 云原生应用持续部署工具 |
| NFS | 存储系统,持久化存储容器数据 |
实验软件
链接:https://pan.baidu.com/s/1RgZJ9_Mu2pPLZ71gm_ew_A?pwd=0820
提取码:0820
2023.7.16-搭建devops7测试环境-code
- 本次涉及docker镜像打包
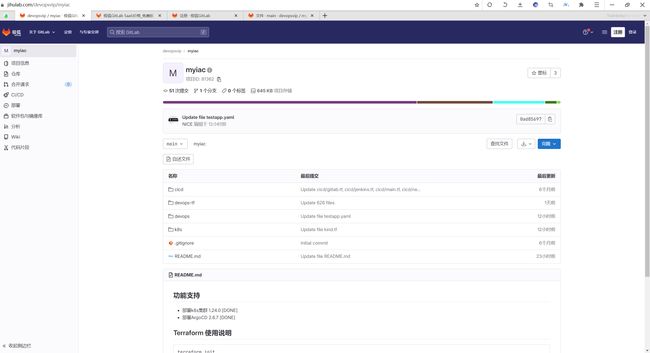
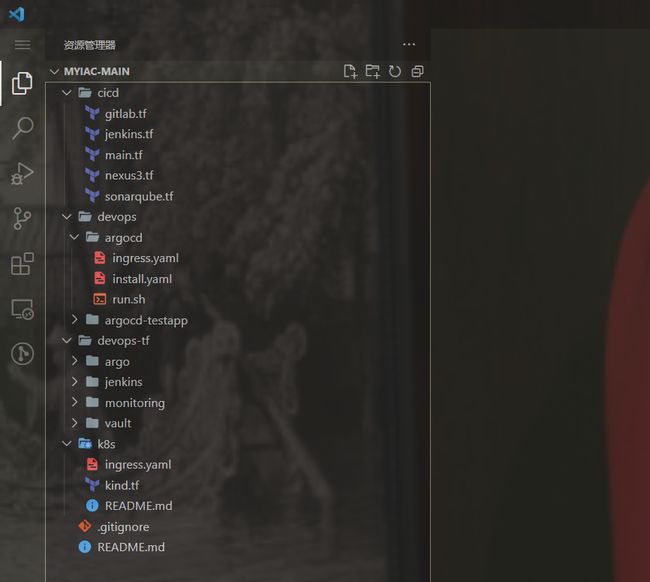
0、创建自己的基础设施代码库
gitlab代码库
- 老师代码库:
https://jihulab.com/devopsvip/myiac
https://jihulab.com/devops_course/argocd-example-apps.git
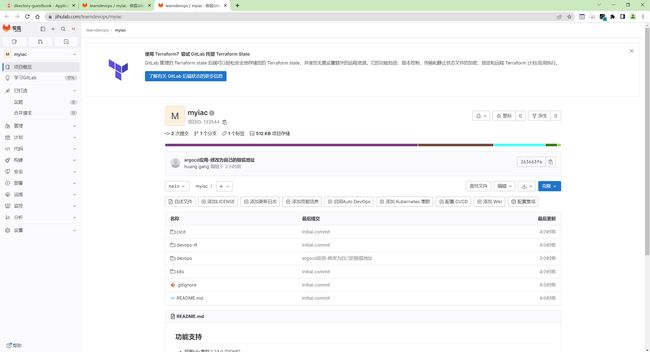
- 自己的极狐仓库地址(这个是后续要用到的代码已经上传到自己的极狐仓库了)
Iac仓库:https://jihulab.com/learndevops/myiac.git
ArgoCD应用demo仓库:https://jihulab.com/learndevops/argocd-example-apps.git
![]()
1、安装docker
- 完整代码:
#以下命令可一键粘贴执行!

systemctl stop firewalld
systemctl disable  firewalld
systemctl stop NetworkManager
systemctl disable  NetworkManager

setenforce 0
sed -i s/SELINUX=enforcing/SELINUX=disabled/ /etc/selinux/config

cd /etc/yum.repos.d/
mkdir backup-`date +%F`
mv * !$

wget -O /etc/yum.repos.d/CentOS-Base.repo http://mirrors.aliyun.com/repo/Centos-7.repo
yum clean all
yum makecache

yum install -y net-tools
yum install -y vim
yum install -y wget
yum install -y lrzsz

yum remove docker \
                  docker-client \
                  docker-client-latest \
                  docker-common \
                  docker-latest \
                  docker-latest-logrotate \
                  docker-logrotate \
                  docker-engine

yum install -y yum-utils device-mapper-persistent-data lvm2
yum-config-manager --add-repo http://mirrors.aliyun.com/docker-ce/linux/centos/docker-ce.repo
yum makecache

yum install -y yum install docker-ce-23.0.3 docker-ce-cli-23.0.3 containerd.io #指定需要安装的版本号
systemctl start docker && systemctl enable docker

docker version
docker info

mkdir -p /etc/docker
tee /etc/docker/daemon.json <<-'EOF'
{
  "registry-mirrors":["https://kvuwuws2.mirror.aliyuncs.com","http://hub-mirror.c.163.com","https://dockerhub.azk8s.cn"]
}
EOF

cat /proc/sys/net/ipv4/ip_forward
echo "net.ipv4.ip_forward = 1" >> /etc/sysctl.conf
sysctl -p
cat /proc/sys/net/ipv4/ip_forward

systemctl daemon-reload
systemctl restart docker
验证效果:
[root@devops7 ~]#docker version
Client: Docker Engine - Community
 Version:           23.0.3
 API version:       1.42
 Go version:        go1.19.7
 Git commit:        3e7cbfd
 Built:             Tue Apr  4 22:04:18 2023
 OS/Arch:           linux/amd64
 Context:           default

Server: Docker Engine - Community
 Engine:
  Version:          23.0.3
  API version:      1.42 (minimum version 1.12)
  Go version:       go1.19.7
  Git commit:       59118bf
  Built:            Tue Apr  4 22:02:01 2023
  OS/Arch:          linux/amd64
  Experimental:     false
 containerd:
  Version:          1.6.21
  GitCommit:        3dce8eb055cbb6872793272b4f20ed16117344f8
 runc:
  Version:          1.1.7
  GitCommit:        v1.1.7-0-g860f061
 docker-init:
  Version:          0.19.0
  GitCommit:        de40ad0
[root@devops7 ~]#
- 参考链接
https://www.yuque.com/xyy-onlyone/exkgza/nafa6w?singleDoc# 《31 实战-centos上安装docker(超详细)-2021912》
2、安装Kind
安装Kubectl
##1、下载
[root@devops7 ~]#curl -LO "https://dl.k8s.io/release/$(curl -L -s https://dl.k8s.io/release/stable.txt)/bin/linux/amd64/kubectl"
  % Total    % Received % Xferd  Average Speed   Time    Time     Time  Current
                                 Dload  Upload   Total   Spent    Left  Speed
100   138  100   138    0     0    119      0  0:00:01  0:00:01 --:--:--   120
100 46.9M  100 46.9M    0     0  9869k      0  0:00:04  0:00:04 --:--:-- 13.4M
[root@devops7 ~]#ll -h
total 47M
-rw-r--r-- 1 root root 47M Jul 16 07:48 kubectl

##2、安装
[root@devops7 ~]#sudo install -o root -g root -m 0755 kubectl /usr/local/bin/kubectl

##3、查看
[root@devops7 ~]#kubectl version  --client
WARNING: This version information is deprecated and will be replaced with the output from kubectl version --short.  Use --output=yaml|json to get the full version.
Client Version: version.Info{Major:"1", Minor:"27", GitVersion:"v1.27.3", GitCommit:"25b4e43193bcda6c7328a6d147b1fb73a33f1598", GitTreeState:"clean", BuildDate:"2023-06-14T09:53:42Z", GoVersion:"go1.20.5", Compiler:"gc", Platform:"linux/amd64"}
Kustomize Version: v5.0.1
[root@devops7 ~]#

##4、kubectl的自动补全
#安装软件包
yum install -y epel-release bash-completion

#执行命令
source /usr/share/bash-completion/bash_completion

source <(kubectl completion bash)
echo "source <(kubectl completion bash)" >> ~/.bashrc
source ~/.bashrc
安装Kind
[root@devops7 ~]# wget https://github.com/kubernetes-sigs/kind/releases/download/v0.14.0/kind-linux-amd64
#这里直接wget可能下载失败,需要使用科学上网哦。我这里提供了安装包。

[root@devops7 ~]#chmod +x kind-linux-amd64
[root@devops7 ~]#sudo mv kind-linux-amd64 /usr/local/bin/kind

# 验证版本
[root@devops7 ~]#kind version
kind v0.14.0 go1.18.2 linux/amd64
- 参考链接
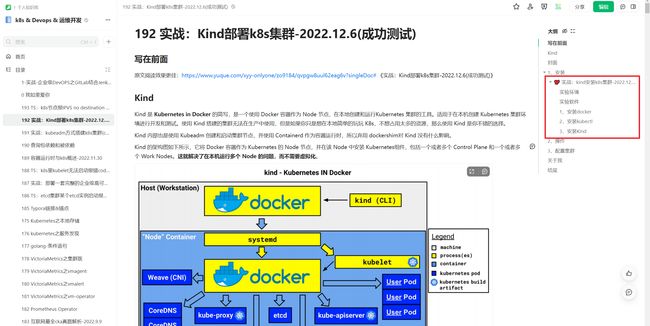
https://www.yuque.com/xyy-onlyone/exkgza/eocq7i3537zrr7xe?singleDoc# 《192 实战:Kind部署k8s集群-2022.12.6(成功测试)》
安装Terraform
(1)上传下载好的二进制包到服务器
[root@devops7 ~]#ll -h terraform_1.1.9_linux_amd64.zip
-rw-r--r-- 1 root root 18M Apr 12 19:59 terraform_1.1.9_linux_amd64.zip
[root@devops7 ~]#unzip terraform_1.1.9_linux_amd64.zip
Archive:  terraform_1.1.9_linux_amd64.zip
  inflating: terraform
[root@devops7 ~]#ll -h terraform
-rwxr-xr-x 1 root root 62M Apr 20  2022 terraform

(2)移动二进制文件到PATH路径
[root@devops7 ~]#mv terraform /usr/local/bin/

(3)验证
[root@devops7 ~]#terraform version
Terraform v1.1.9
on linux_amd64
3、部署Kuberenetes集群
提前拉取好镜像
#备注:
kindest/node:v1.24.0
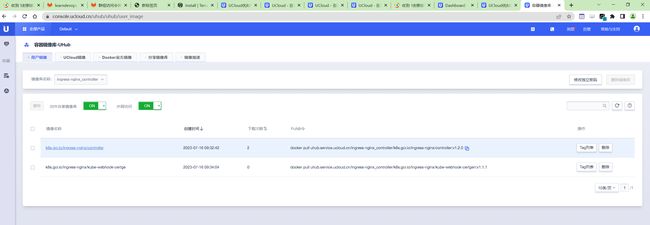
这2个镜像得拉取下来才行:得从阿里云拉取下来,再重新打上tag

k8s.gcr.io/ingress-nginx/controller:v1.2.0
k8s.gcr.io/ingress-nginx/kube-webhook-certgen:v1.1.1
docker pull kindest/node:v1.24.0
通过ucloud拉取,并重新打上tag:
已拉取好镜像:
[root@devops7 ~]#docker images
REPOSITORY                                      TAG       IMAGE ID       CREATED         SIZE
kindest/node                                    v1.24.0   a7d31d743aca   13 months ago   911MB
kindest/node                                    <none>    f5aa68ba122a   14 months ago   911MB
k8s.gcr.io/ingress-nginx/controller             v1.2.0    04fcc7019408   15 months ago   288MB
k8s.gcr.io/ingress-nginx/kube-webhook-certgen   v1.1.1    c41e9fcadf5a   21 months ago   47.7MB
- 如何拉取国外镜像,请看如下链接
https://www.yuque.com/xyy-onlyone/exkgza/on4ku7?singleDoc# 《110 实战:借助ucloud镜像加速功能下载镜像(亲测成功)-2022.1.1》
Terraform安装k8s集群
- 安装过程如下
插件安装失败:
再安装一次就好了……
terradorm插件缓存目录:
- 部署k8s集群
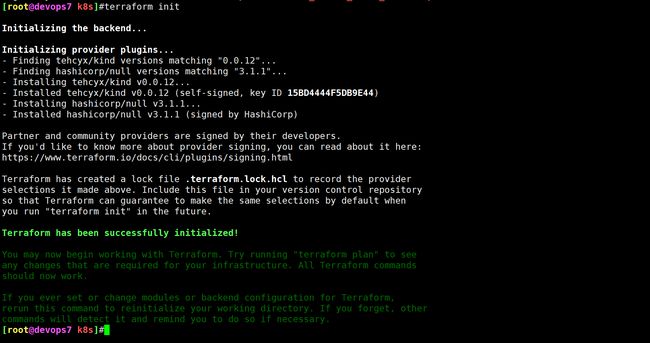
Terraform初始化和发布
# install
cd k8s
terraform init
terraform apply --auto-approve

# uninstall
terraform destroy --auto-approve
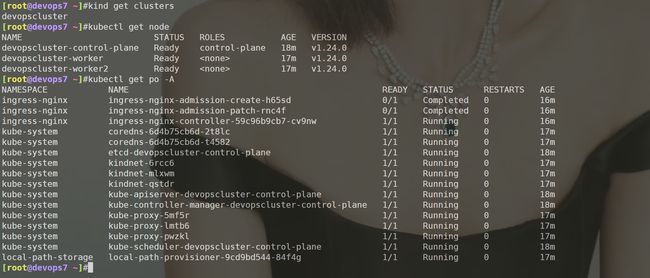
等待Terraform发布成功后,检查集群状态。
[root@devops7 k8s]#kubectl get node
NAME                          STATUS   ROLES           AGE   VERSION
devopscluster-control-plane   Ready    control-plane   16m   v1.24.0
devopscluster-worker          Ready    <none>          16m   v1.24.0
devopscluster-worker2         Ready    <none>          16m   v1.24.0
ingress-nginx
[root@devops7 k8s]#kubectl get pod -n ingress-nginx
NAME                                        READY   STATUS      RESTARTS   AGE
ingress-nginx-admission-create-h65sd        0/1     Completed   0          15m
ingress-nginx-admission-patch-rnc4f         0/1     Completed   0          15m
ingress-nginx-controller-59c96b9cb7-cv9nw   1/1     Running     0          15m
集群部署成功。
4、部署ArgoCD
部署ArgoCD
- 提前拉取镜像
# # GetDockerImage
docker pull ccr.ccs.tencentyun.com/argocds/dex:v2.35.3
docker pull ccr.ccs.tencentyun.com/argocds/redis:7.0.8-alpine
docker pull ccr.ccs.tencentyun.com/argocds/argocd:v2.6.7

# # TagDockerImage
docker tag ccr.ccs.tencentyun.com/argocds/dex:v2.35.3 ghcr.io/dexidp/dex:v2.35.3
docker tag ccr.ccs.tencentyun.com/argocds/argocd:v2.6.7 quay.io/argoproj/argocd:v2.6.7
docker tag ccr.ccs.tencentyun.com/argocds/redis:7.0.8-alpine redis:7.0.8-alpine
- 执行脚本
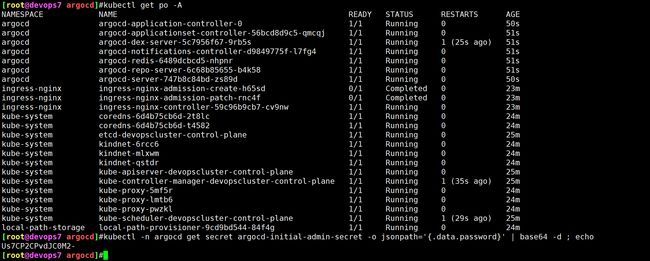
[root@devops7 argocd]#sh run.sh
查看状态:
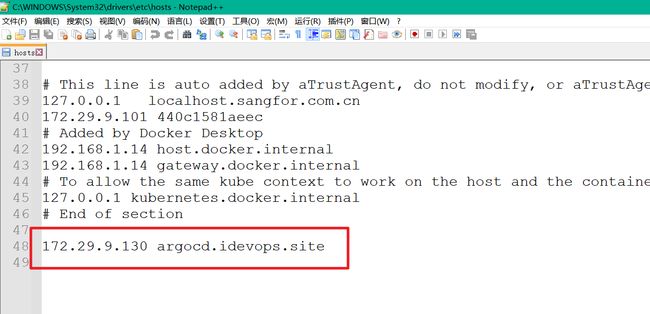
- 配置自己pc hosts,映射域名
172.29.9.130 argocd.idevops.site
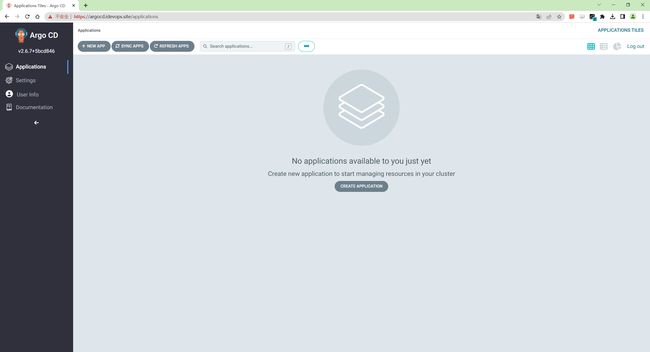
- 登录argocd
https://argocd.idevops.site/
- 修改密码
admin/Admin@123
部署argocd应用
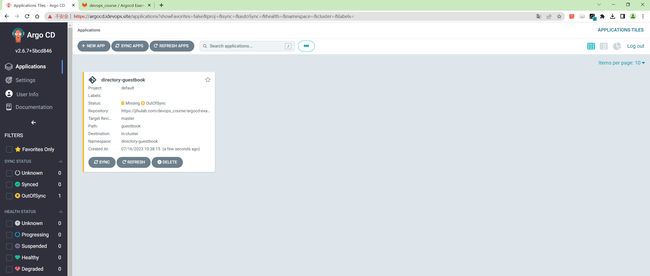
- 执行
[root@devops7 argocd-testapp]#ls
testapp.yaml
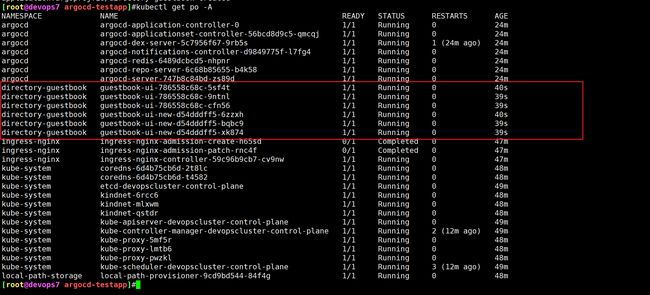
[root@devops7 argocd-testapp]#kubectl apply -f testapp.yaml
application.argoproj.io/directory-guestbook created
[root@devops7 argocd-testapp]#
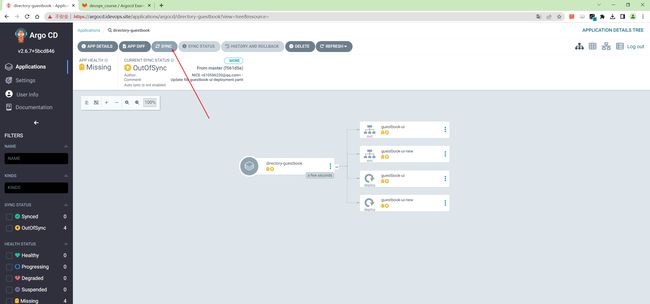
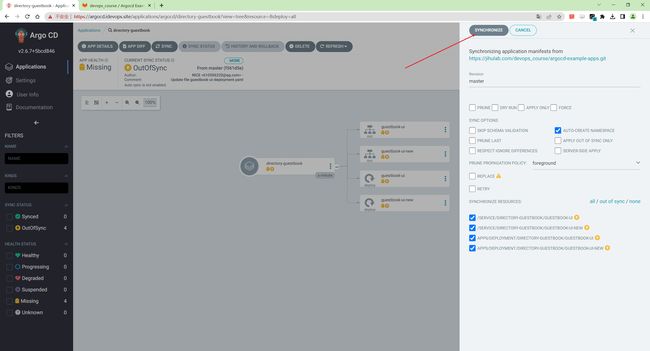
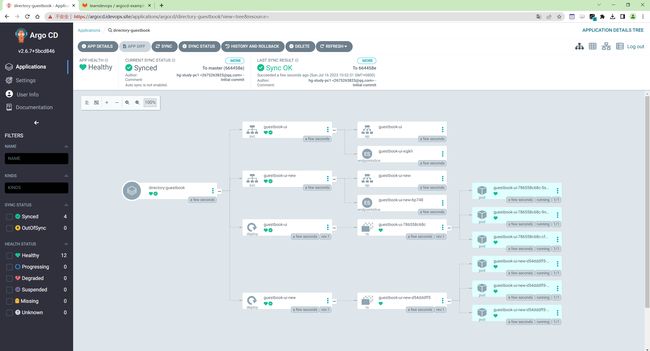
- 点击
SYNC
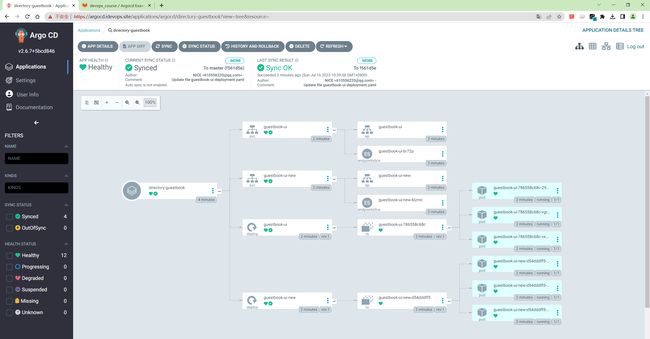
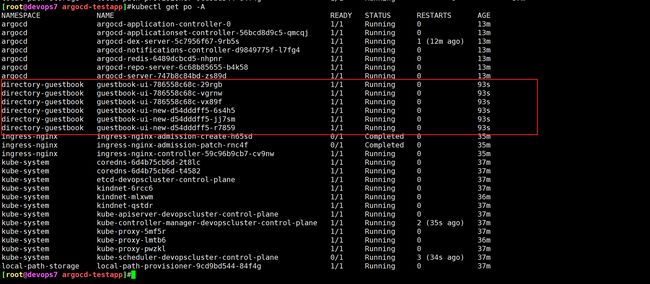
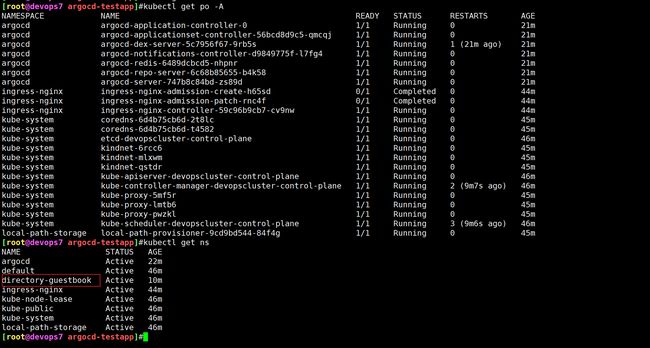
- 观察状态
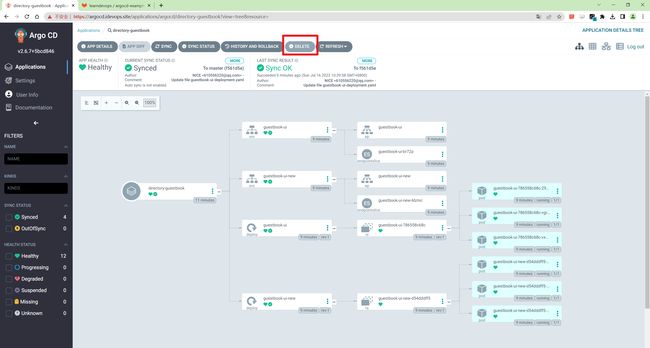
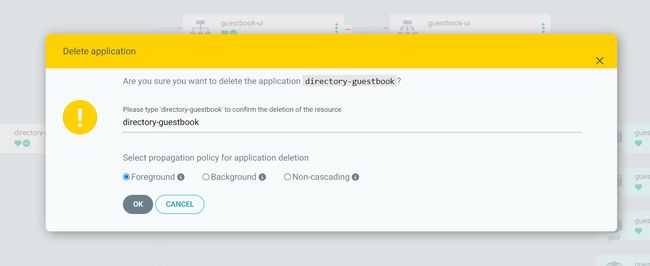
- 删除argocd应用
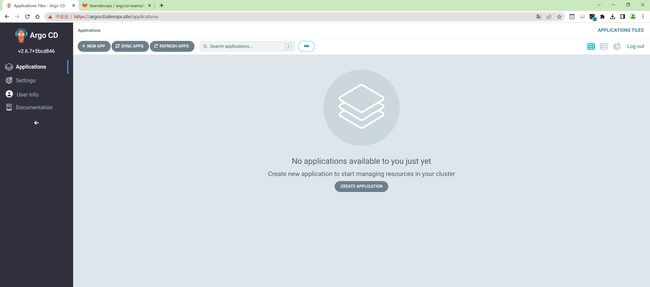
删除成功:
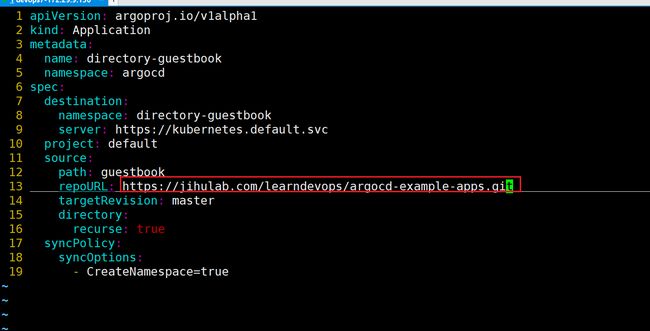
- 我们将argocd应用的代码仓库换成自己的极狐地址,再次部署,观察现象
[root@devops7 argocd-testapp]#kubectl apply -f testapp.yaml
application.argoproj.io/directory-guestbook created
可正常部署应用:
以上,本次的测试环境已搭建成功。
关于我
我的博客主旨:
- 排版美观,语言精炼;
- 文档即手册,步骤明细,拒绝埋坑,提供源码;
- 本人实战文档都是亲测成功的,各位小伙伴在实际操作过程中如有什么疑问,可随时联系本人帮您解决问题,让我们一起进步!
微信二维码
x2675263825 (舍得), qq:2675263825。
微信公众号
《云原生架构师实战》
语雀
https://www.yuque.com/xyy-onlyone
csdn
https://blog.csdn.net/weixin_39246554?spm=1010.2135.3001.5421
知乎
https://www.zhihu.com/people/foryouone
最后
好了,关于本次就到这里了,感谢大家阅读,最后祝大家生活快乐,每天都过的有意义哦,我们下期见!
